The continuing restoration of "Trevor"
This will be the final chapter as things are coming together quickly now.
Today Andrew was true to his word and the errant and annoying horn bracket got welded back on to the rear subframe. I wheeled the bike the few blocks to his workshop and he paused his current job and made the repair while I waited. I had cleaned the paint off and ground back the original weld to make room for a new one. He both welded then ground back to smooth, after which he also treated it to some copper spray which is a bare metal undercoat. He didn't want to take any money, but I made him take $20. When I cannot do something myself I expect to pay someone who can. Not only that, but he used three different power tools plus some spray paint, and I need to be able to approach him again to get the benefit of his expertise - without feeling that I am leaning on a friendship. This guy has serious skills so he makes what he does look easy. I can't do it at all. Thats how it rolls.
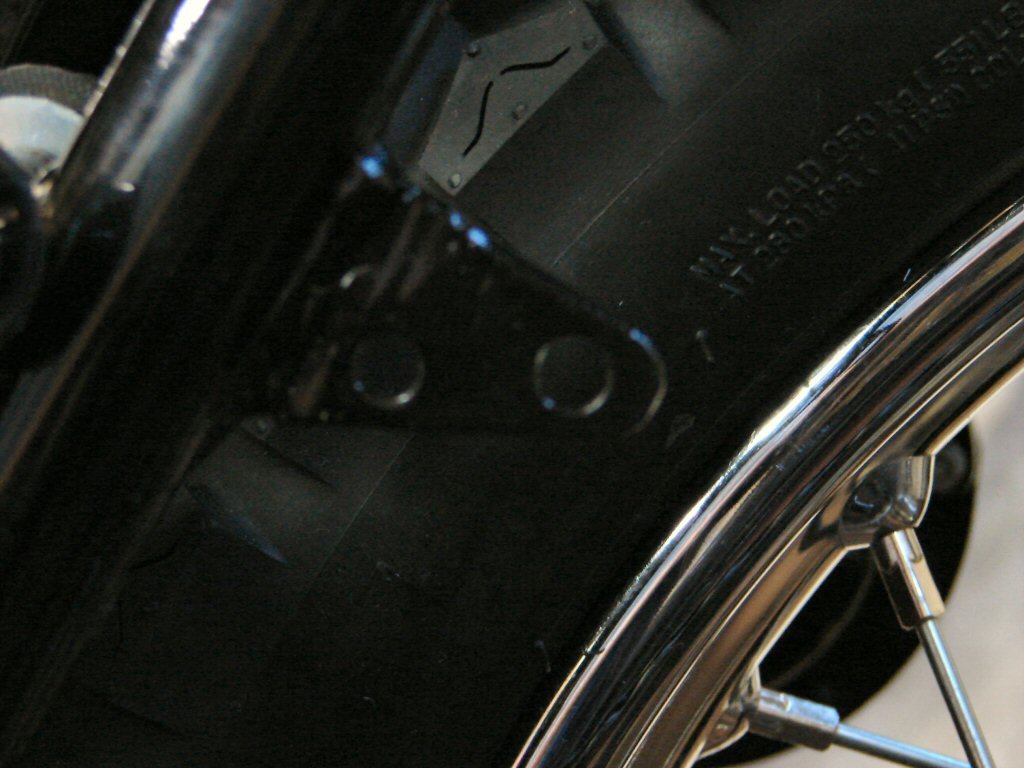
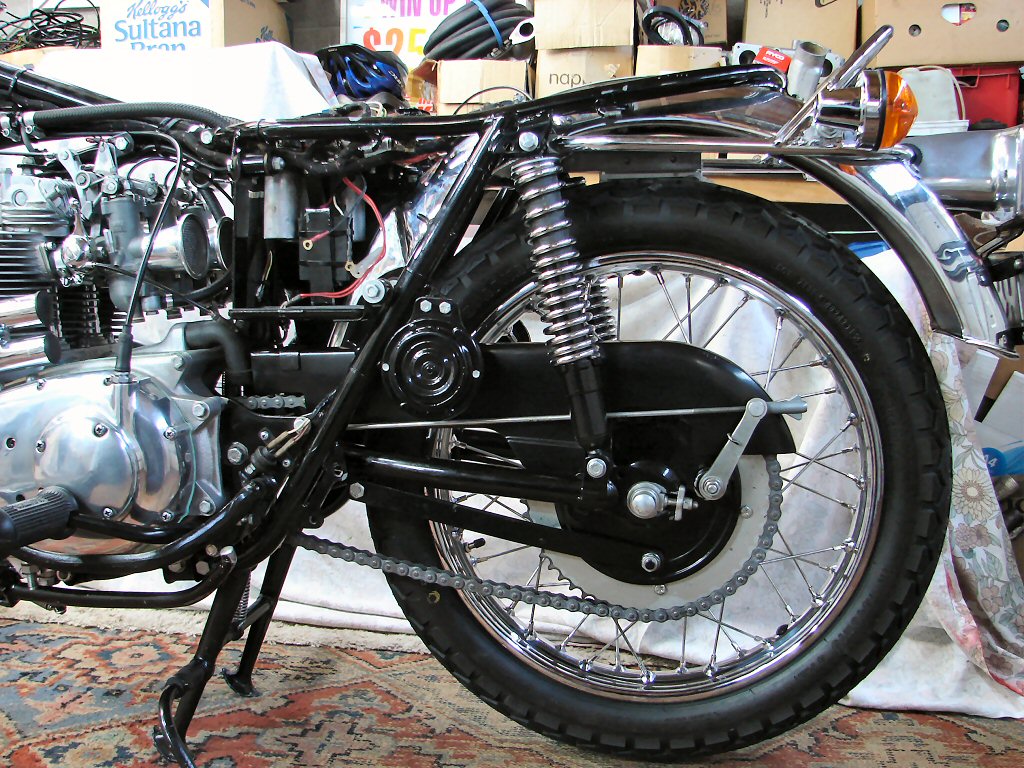
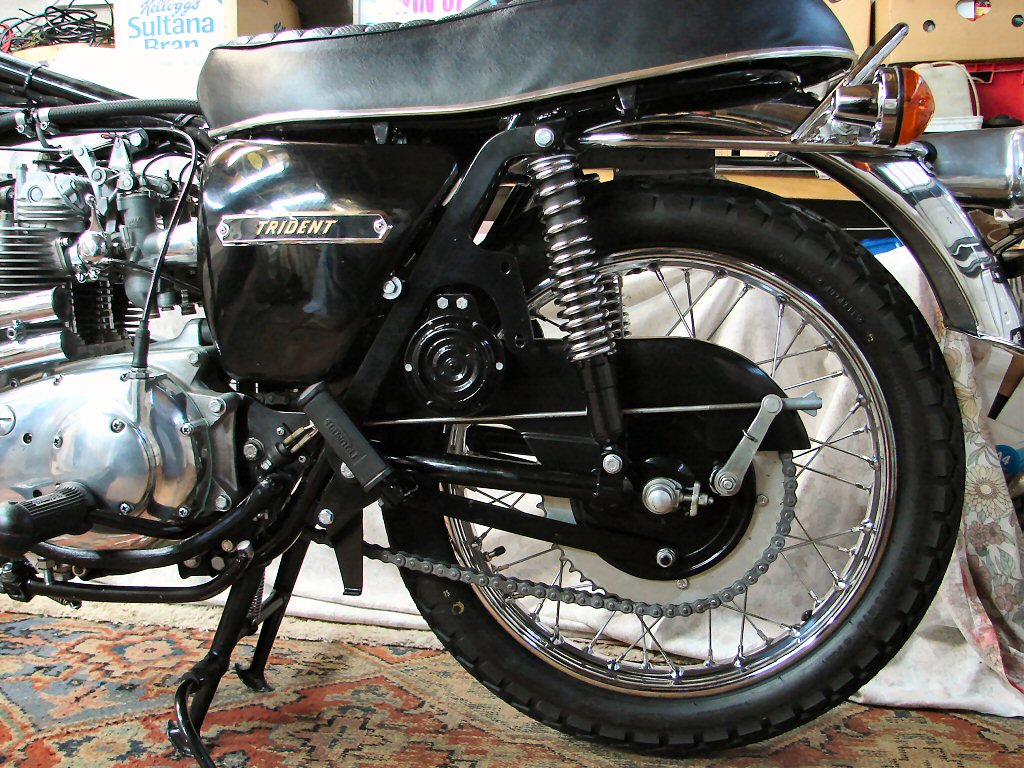
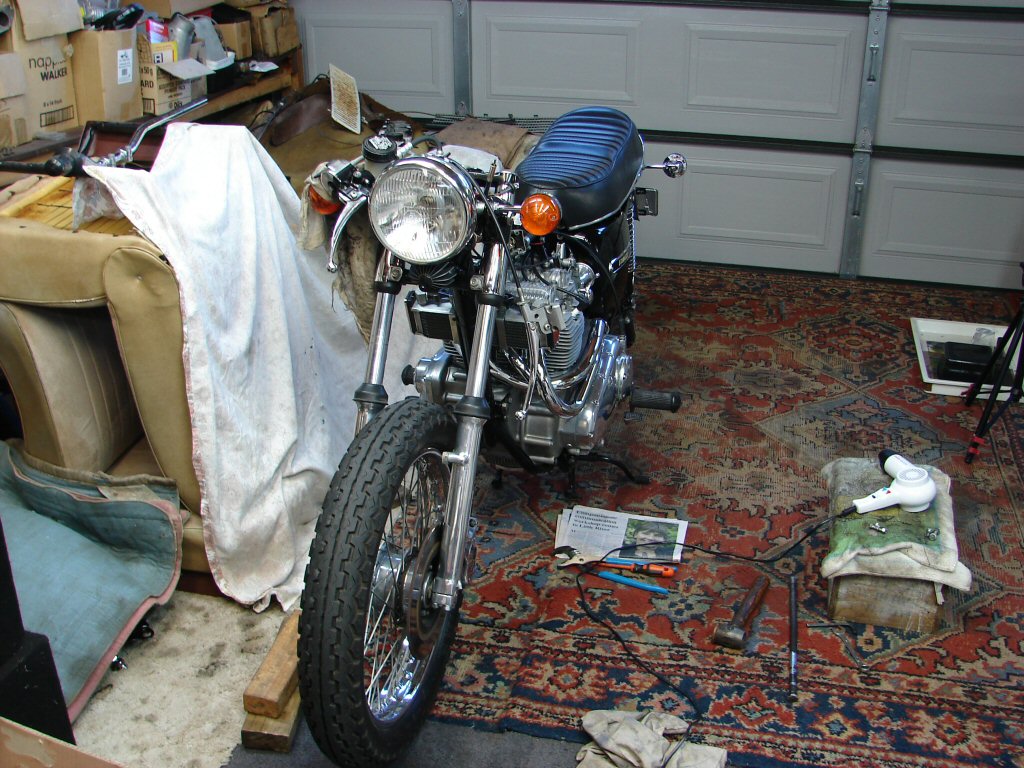
I wheeled the bike home again and left it in the sun for a short time, during which I masked off everything in the nearby vicinity, and was then able to give it a good coat of engine enamel. My camera had trouble picking up black-on-black, and chose to focus on the rear tyre instead. The paint looks good, so the apparent scars in the photo are just something that the camera dreamed up. Honest Guv.
So small, but so ornery..
The next step will be to refit the chainguard and shock absorber before fitting the horn itself, but the paint seems determined to go awry on the chainguard for some reason. Perhaps there is some reaction taking place with whatever was applied previously. Whatever, I cannot proceed until the chainguard is looking good enough to please me - so that is where I am.
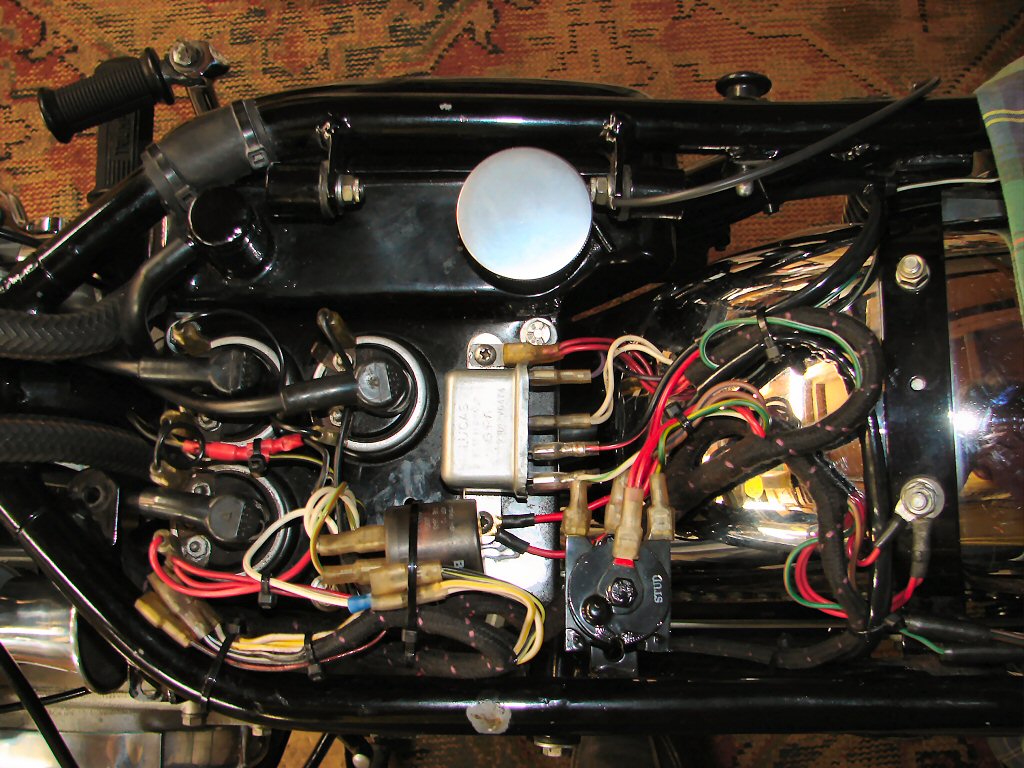
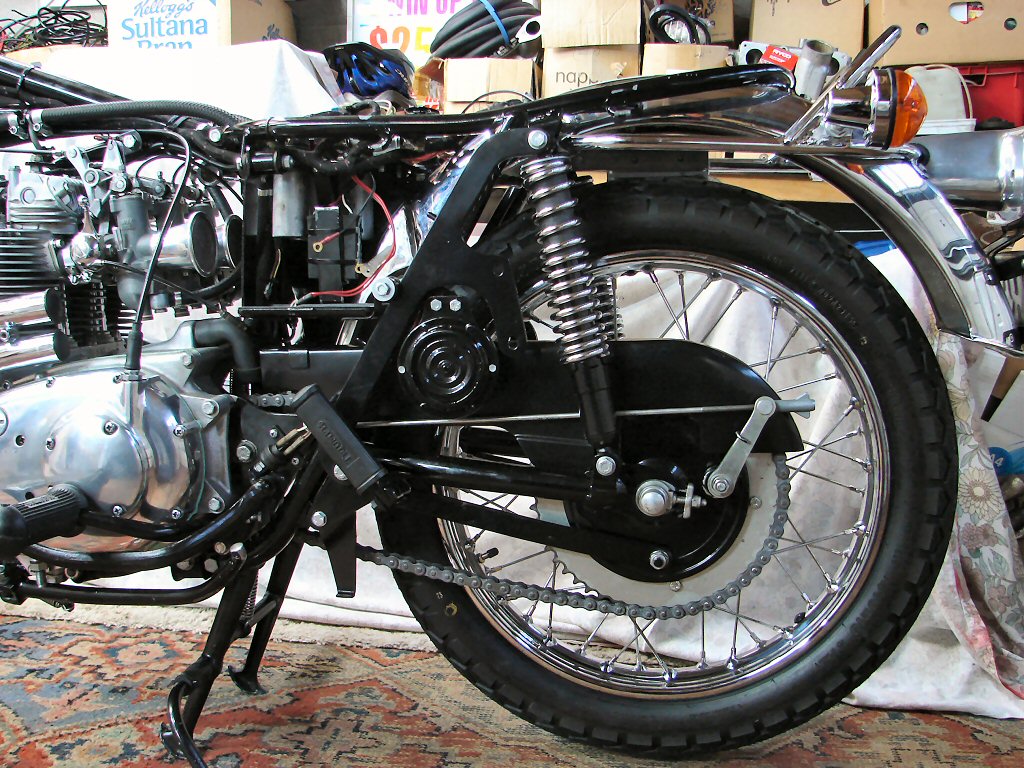
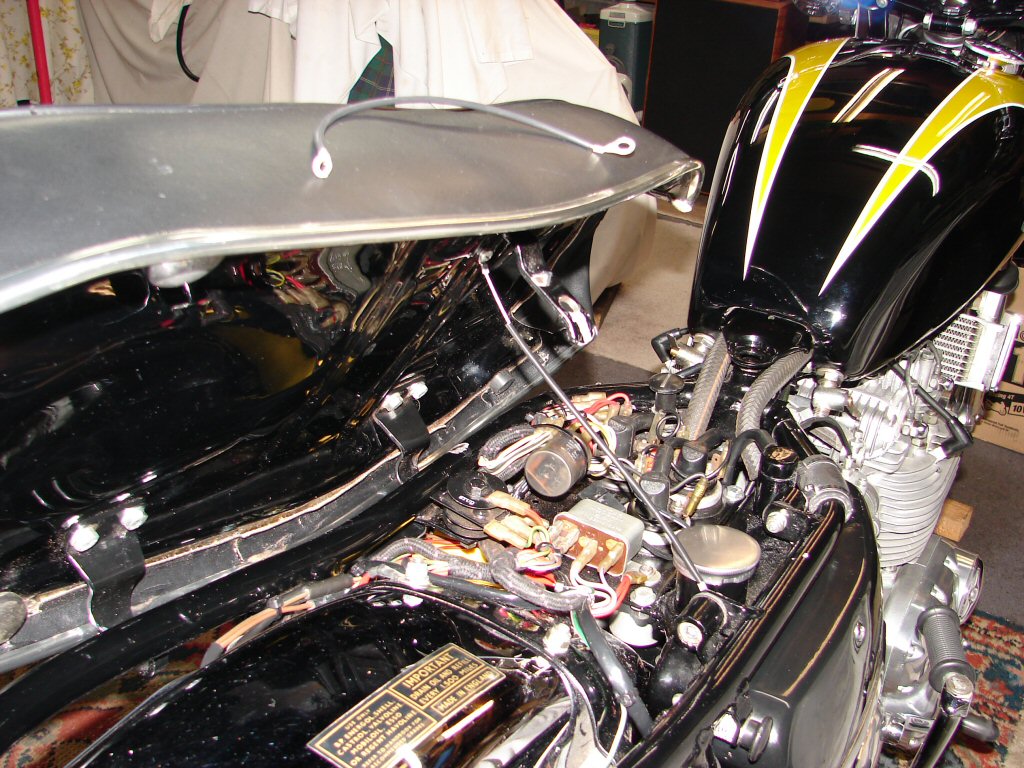
Meantime, I took advantage of the stalled assembly proceedings to make some necessary alterations to the wiring. There were a number of crappy connections I had identified, plus I had decided to run seperate 'earth' wires to each horn rather than rely on a frame earth at the horn itself. Two reasons.
First and entirely electrical is that the paint on all the mounting points can effectively ruin an efficient return path for the horns electrical current, so I would rather have it returning to a reliable source - in this case the mounting points of the horn relay itself.
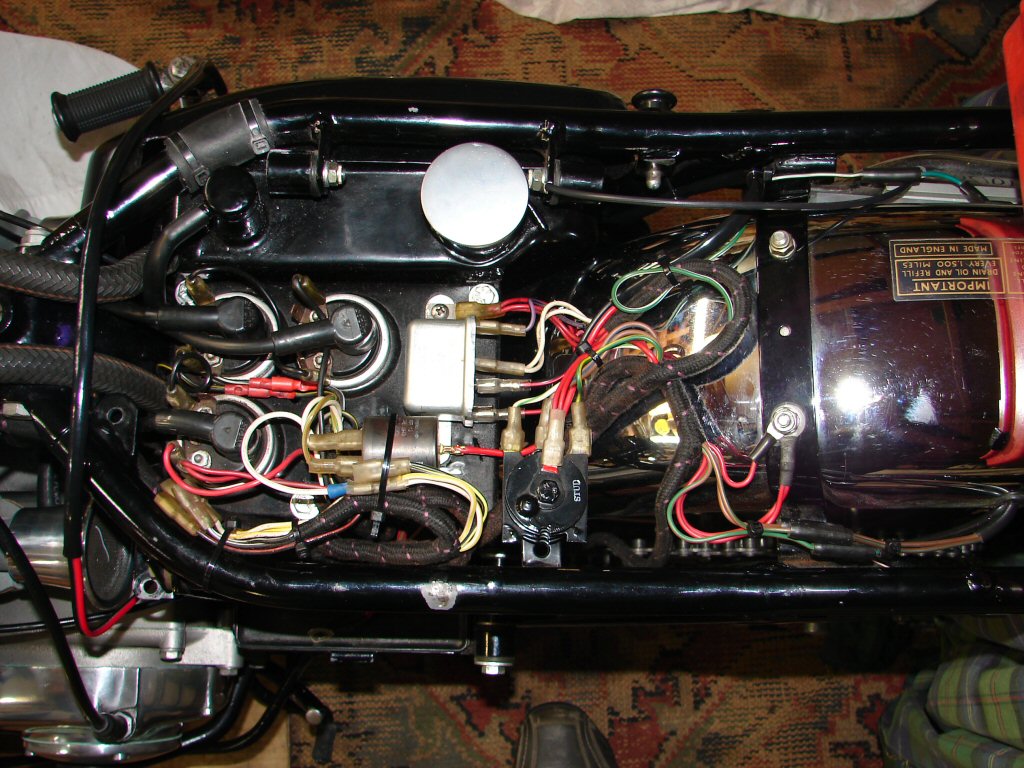
Secondly is purely mechanical. Much in the same way that the head gasket compresses and encourages things to leak, the electrical terminals in current use are made of soft material and are sometimes responsible for loosening the mounting bolts they are fitted beneath simply due to their own compression. The horn mountings on these frames are subject to frequent fatigue fractures, and one cause of this can be loose mountings which allow things to flap about. I like to think that by removing one potential source of this taking place might help to allow the bracket I have just had welded back on to last somewhat longer in service without doing the same thing again - so the ground terminal is now gone and everything tightened to incompressible steel alone. I have rewired the right side horn already, the loom for the left side is draped across the frame on the left of this photo while it waits for other bits to be reinstated before the left side horn can be bolted back on.
Electrons all in a row..
You do not notice until you notice.
My comment that this would be the final part of the blog may return to bite me. Today yielded a number of annoying setbacks. Annoying but necessary in the scheme of things. All further assembly hinges on completion of the chainguard paint, and it is becoming a real pain. The weather is a bit too moist, the paint has changed its contents, each attempt produces another issue which then necessitates at least 24 hours of curing time before changing tack. Probably because I am in this frustrated state, I have manifested another couple of similar issues.
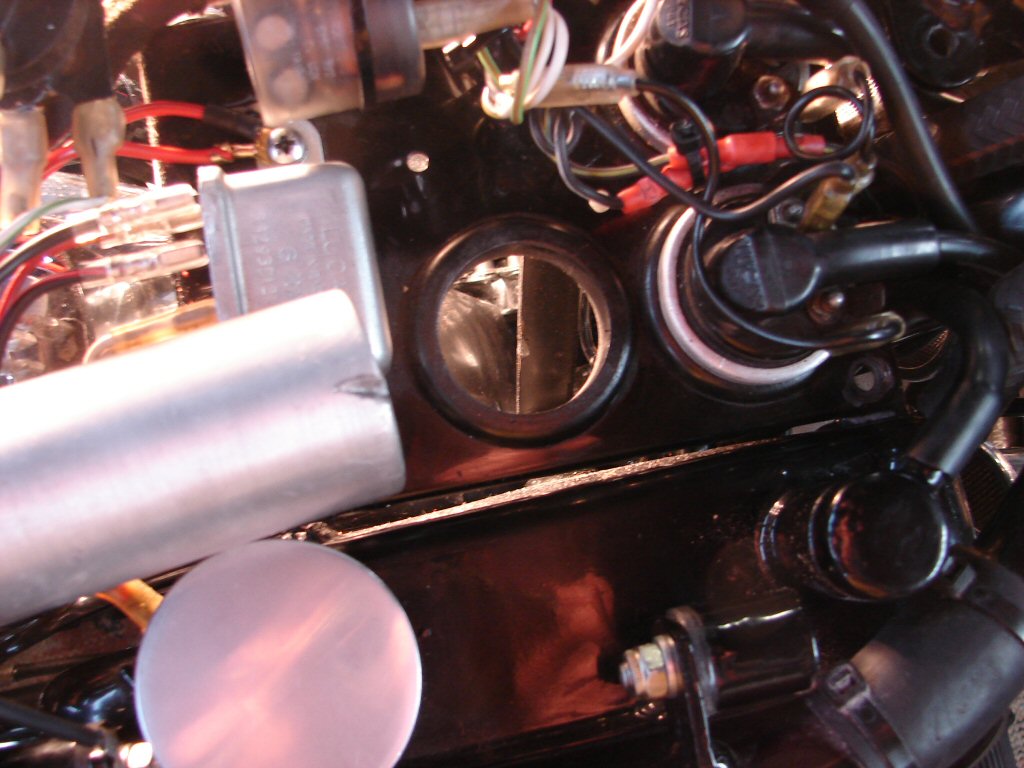
I completed the wiring work, so fitted the battery to ensure that we had sparks and that they were seemingly occurring at the right time. That was a yes, but it seemed that I had a much stronger spark on the right side than the other two. This led to some testing with a multimeter that indicated there was a problem with that particular coil, in particular, it had a short to the case on the HT side. This seemed strange to me, and I then investigated to see if it could possibly be making contact with something metal and thus the frame of the bike. Oh yes.!
There is an angle brace which bolts between the rear of the oil tank and the far (left) side of the coil tray. This had remained attached to the coil tray whilst I had the oil tank out for cleaning, so had been refitted as it was when the oil tank went back in. Said angle brace turns out to not be symmetrical, and had been fitted the wrong way round, presumably during the resto of 1999. This had caused an interaction between the coil and the bracket, resulting in a rather deep gouge in the case of the coil, and which in due course would have caused its demise.
Damaged coil and offending bracket..
Because some further assembly has taken place since this lot was last exposed, there was an amount of disassembly required to extract and reverse the bracket.
When you are seemingly on the point of bringing the whole thing together these kind of annoyances are exceedingly irritating, and they seem to be gaining in numbers.
This bracket swings one way..
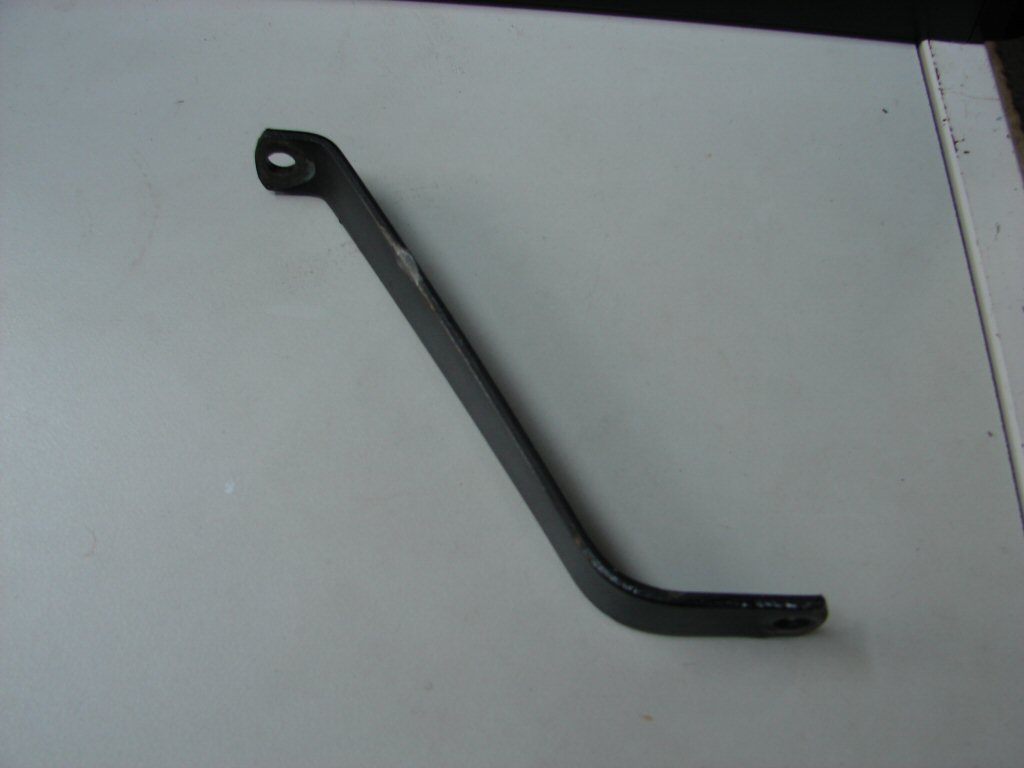
So - after some ambidextrous exercises I managed to restore the bracket in its correct orientation and the coil dropped into its appointed space with nary a moan. One down.
Having also completed the wiring for the absent horn, as I was able to accurately position the wires it would need in a location that would allow a tidy connection, I could now declare the wiring side of things complete. Although during my brief period of testing all things electrical I had found that the front brake light switch was once again U/S. Oh joy. That will need to come apart again. It is a somewhat delicate mechanism and relies on the inherent spring-like behaviour of the contact material, and that is its achilles heel. At least all the physical connections that needed attention have been replaced.
The full 9 yards..
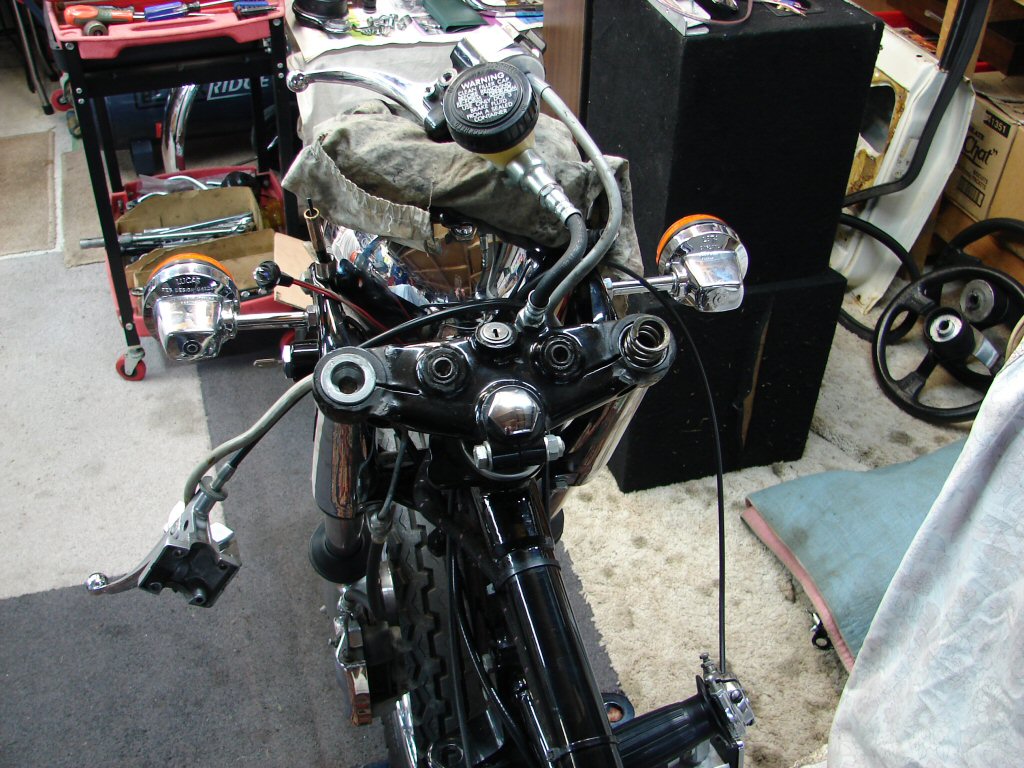
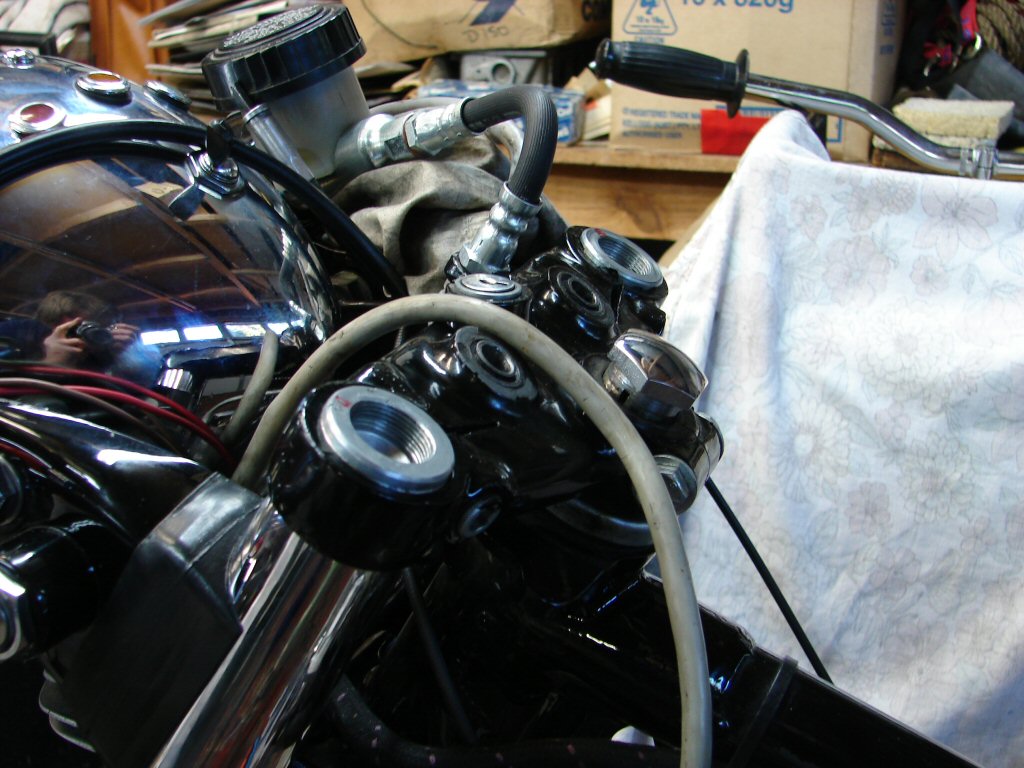
The next thing that demanded attention came to light as I was jockeying all the control cables and wiring around the steering head. This is just a part of life once all the ingredients come together, and it turns out that items that seemed perfectly happy being where they were are now at odds with something else that was perfectly happy being where it was. I guess it is just a matter of priorities.
I cannot help but try to imagine what was in the mind of the previous builder when they did whatever it is they did that I am now finding fault with. In this case I am ashamed to say that I think the major motivation was in how it looked. I am ashamed because I adopt that approach frequently myself, but I am also aware of the reasons why some things are the way they are, and thus aesthetic considerations must allow engineering principles to come first.
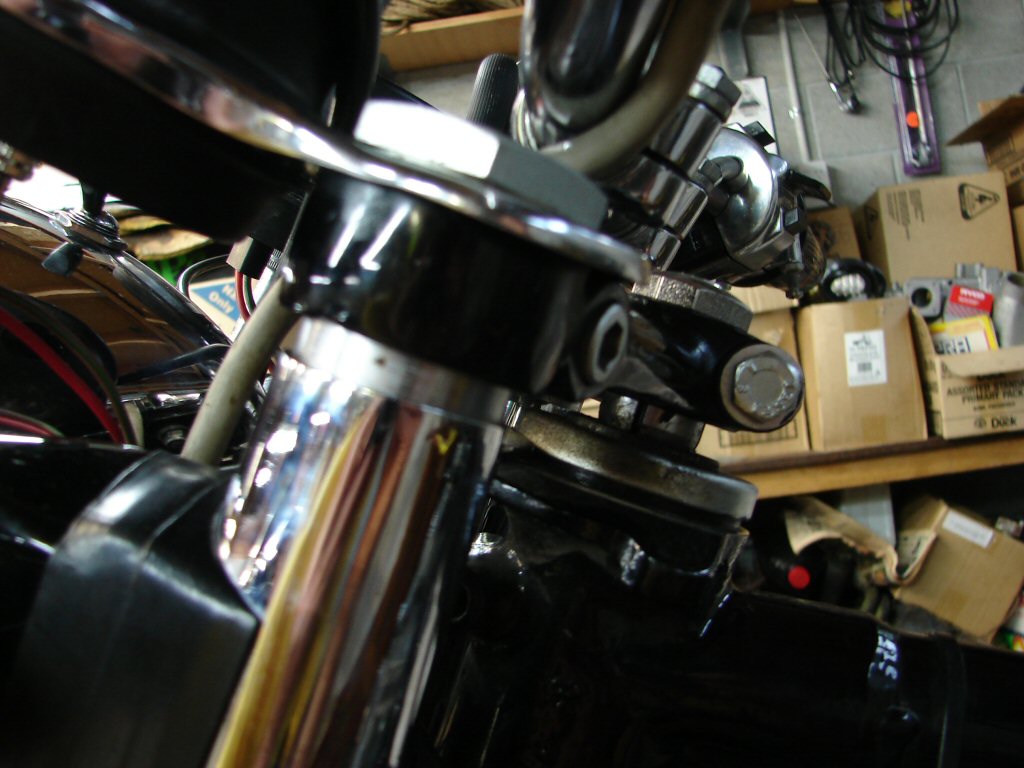
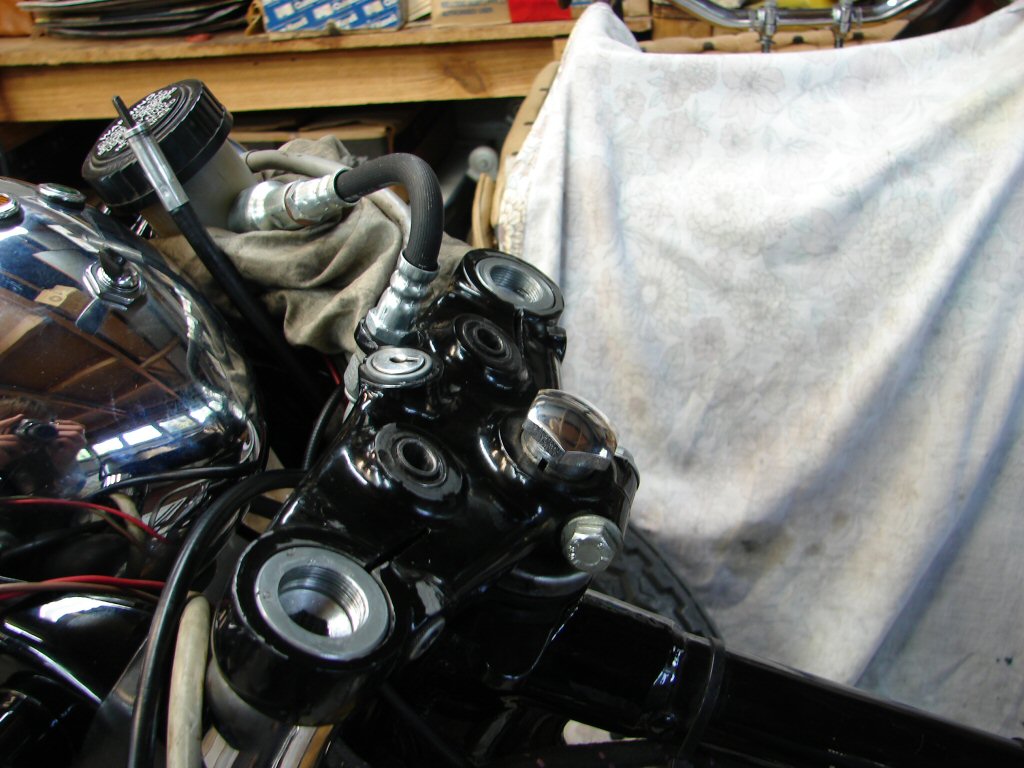
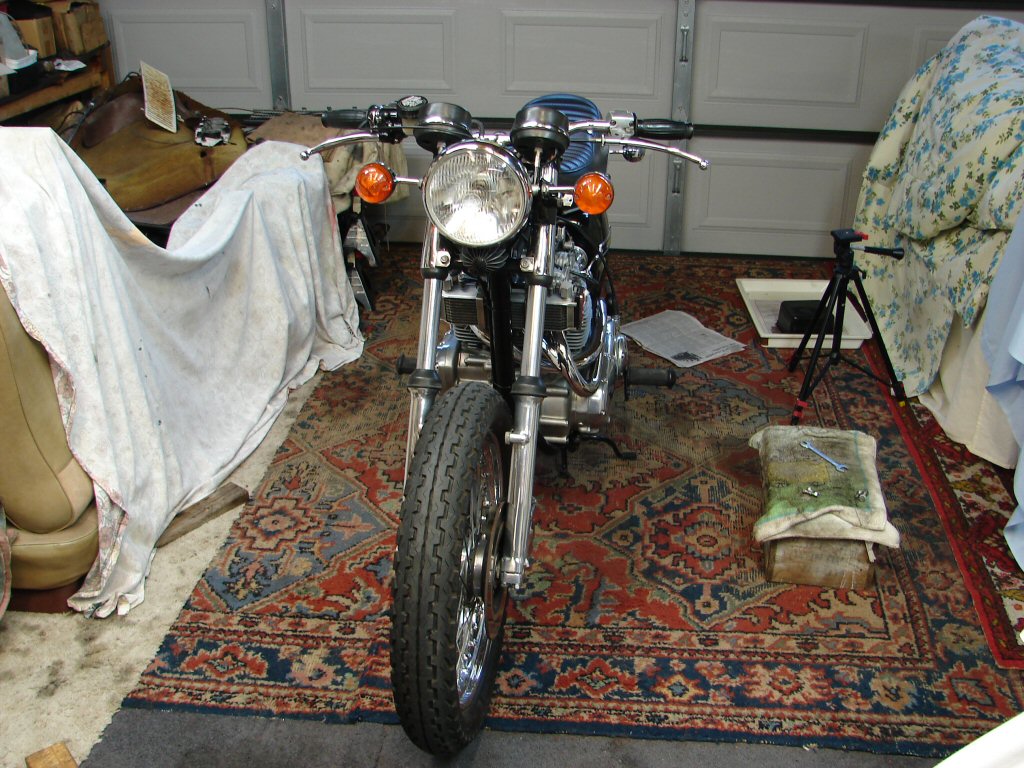
For some reason the last person who assembled the forks placed the top triple clamp in a position that allowed the steering stem nut to sit flush in it. Looks nice but introduces a few inconsistencies. The major one being that they effectively lowered the front end by nearly 3/4". That might make itself known in some handling situations.
I cannot be absolutely sure that it will not either, but having spotted something that simply is not "as it should be" I feel compelled to do something about it. Unfortunately the solution involves moving the fork stanchions down through the lower triple clamp, and that is not necessarily a straight forward manoeuvre. Considering the history I am building up with this particular machine I have a sense of foreboding.
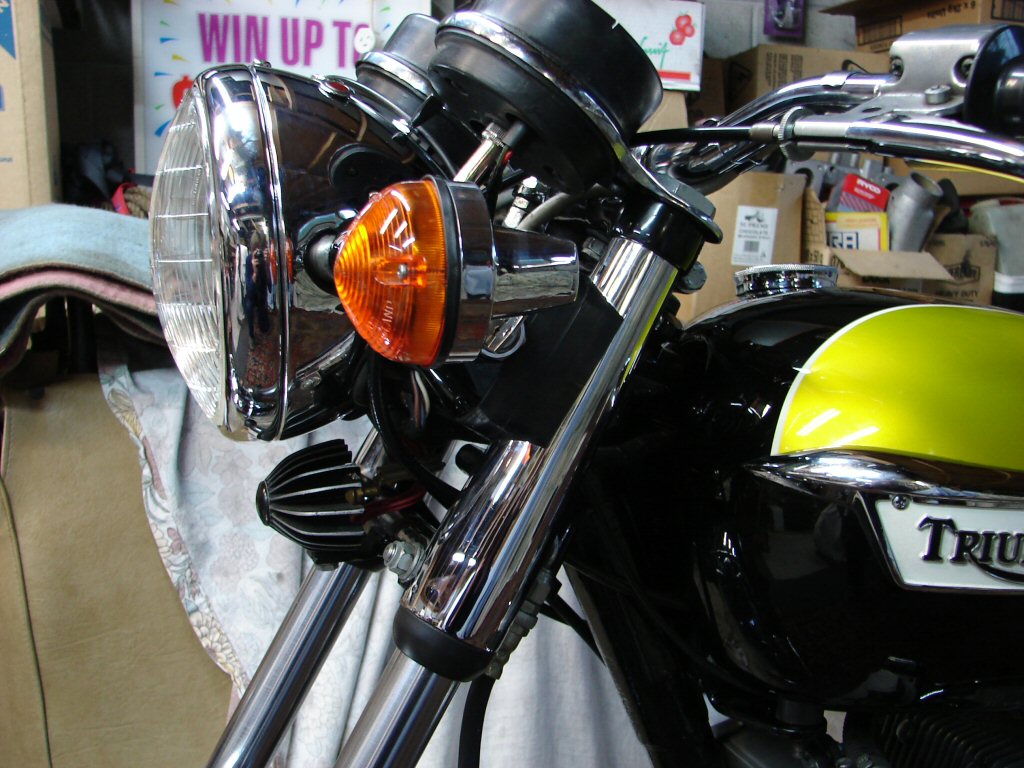
The chrome headlight mounting shroud nearest the camera should be sitting inside a recess in the top clamp provided exactly for that purpose. That would also see the steering stem chrome nut sitting about 3/8" above the top clamp, but that is just how it is. This reposition effectively moves both fork legs downwards in relation to the steering head of the frame, thus raising the height of the bike and introducing a slight alteration to the fork angle - which is a major handling consideration.
A bit up in the air..
So - it has been an annoying Friday, when I thought I would be on the road to a total fit up of just about everything. Guess I will be back on painting duty tomorrow.
Today the rain came again, but in some cosmic anomaly, while sheltering around the back of the house yesterday from a brisk north-easterly breeze straight off the ocean, I think I managed to get a good enough coat of paint on the chain guard to satisfy my allowable standards.
I certainly hope so. I have resisted all temptation to disturb it since, and hope to cut and polish it tomorrow to then see what the final result actually is. Fingers crossed.
Well - I made the most of a fairly bad spray paint by cutting and polishing a number of times. Lacking a proper buffing wheel I could still not get the best from it, but as I have had enough of one chain guard, it will do. It has a better gloss than appears in the photo.
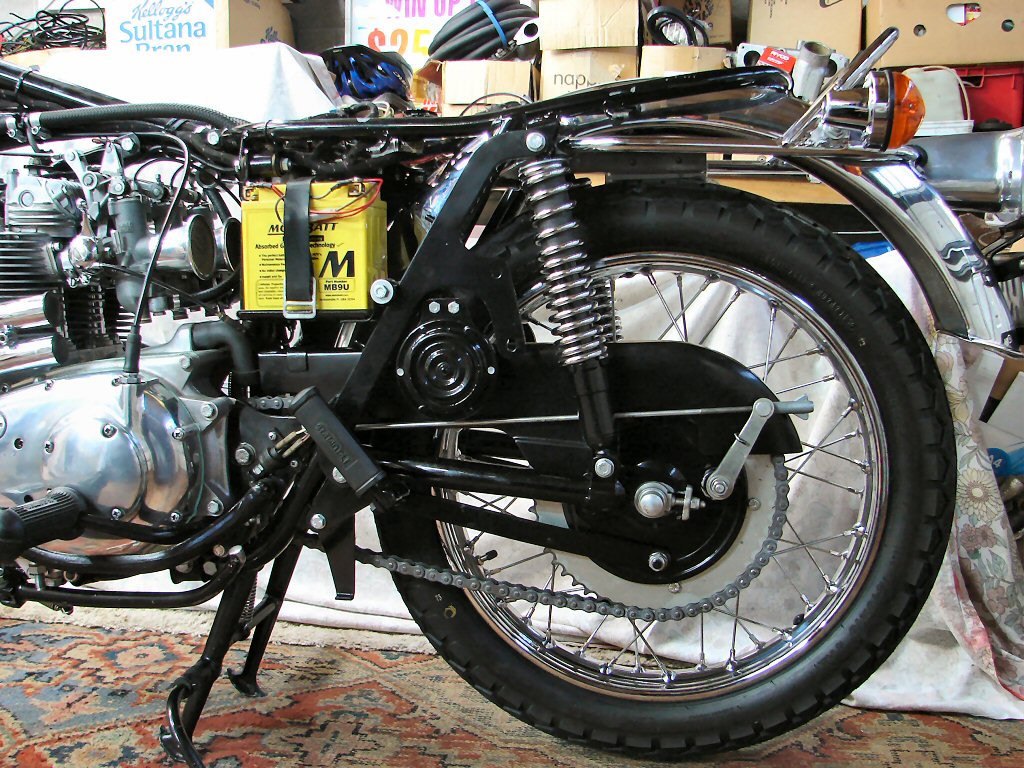
What would follow would simply be the refitting of a number of parts in one small area of the bike, but a most important area in view of the placement of the new exhaust system. Most of these parts will not be accessible in future without first removing the latter part of the exhaust system. That includes the battery, so a charging lead has been fitted to the lineup.
I will now shut up and just stack the photos of the assembly.
Chain guard..
De-Hagoned shock..
Long absent horn..
Footpeg, stand rest and muffler bracket..
Motobatt battery with charging lead..
Seat - needs fitting before side cover..
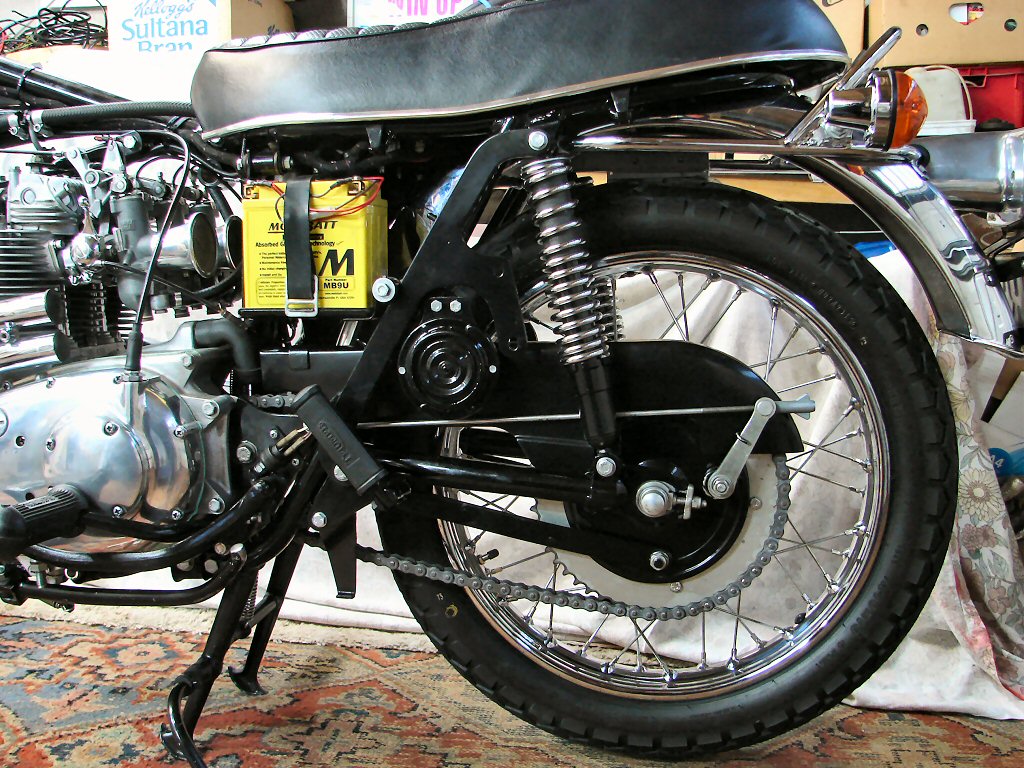
.. and side cover..
All of these parts now need to be in place before the tail pipes and mufflers. Hopefully there will seldom be need to remove it all, but this has to be the order of assembly when building a "TR7C".
If I have been thorough enough, it will be absolutely fine, and this thing will blow a few minds along Sunday Boulevards. Possibly even in the scratchy places in the Port Hills. I reckon it could prove to be a real "Tool".
Could not resist a "progress so far" shot.
Pretty as already..
Next step is to final fit the tail pipes and mufflers. This will also involve refitting the manifold and treating the entire setup as one unit. Hope it behaves.
Only down side today was that the long absent horn appears to have an internal short. Hopefully I can adjust it. I suspect it hit the deck when the bracket broke, so it may have had a bit of a scare.
Continuing progress today. Got the errant horn working, so there are two tones once again. Marvellous. Only casualty was a tiny chip of paint came off the end of the centre stud which retains the vibratory bits. I am hoping that such a tiny paint repair can hardly put up much of a fight. But I have been wrong..
Picture with noise..

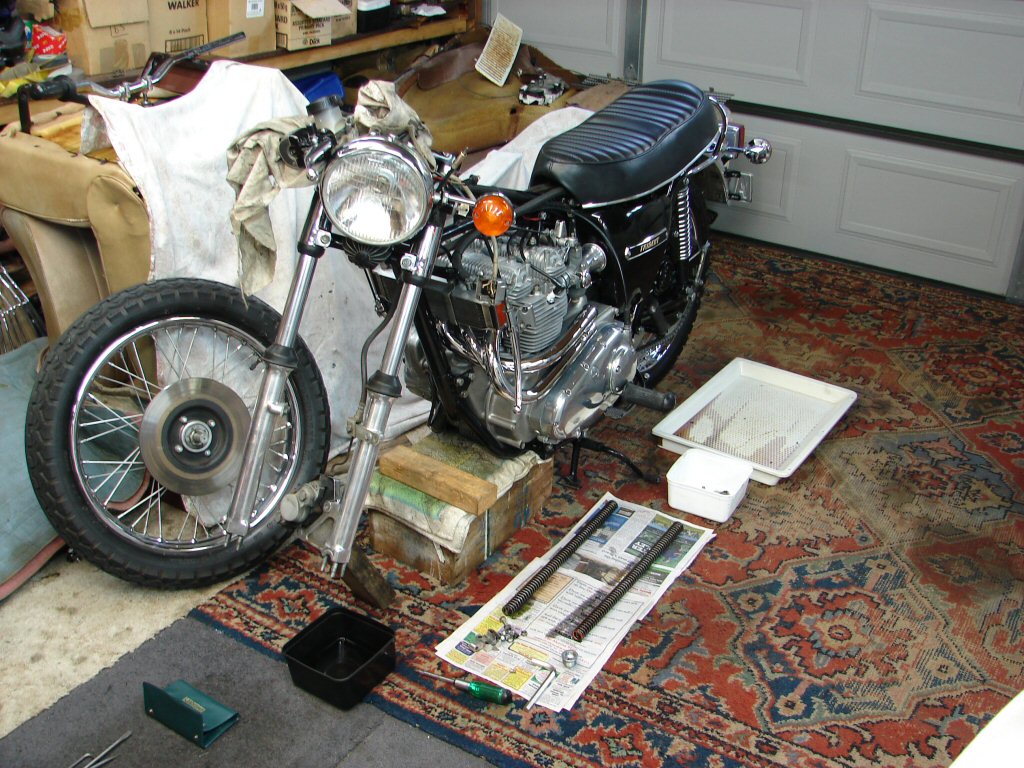
With that step complete I began loosening off the front forks to see if I can cajole the stanchions downward without too much ecological damage. Now looking for a sturdy box to support the frame beneath the engine. No exhaust pipes to worry about down there now.
To begin today's efforts, I decided to continue in the same vein as yesterday, as in, attention to detail. Two things were attracting my attention on this score.
Firstly. Since fitting the left side cover and the seat, it became apparent that the check strap on the seat was too long. I am aware that there are at least two different length examples, and the fitted one allowed the seat to make contact with the top edge of the side cover before the check strap reached its limit. In fact, it couldn't reach its limit, which was a bit of a pity, because that was exactly what it was there for. As it happened, I recently acquired an example of each length from a local source who manufactures them. I used to buy all such things from offshore sources, but when describing this to a friend one day he laughed and told me that in fact he supplied these very parts to the offshore supplier.
You have to keep your eye on the ball.!
A quick comparison showed that the longer item fitted to this bike was in fact the exact same item as was original on my T160 - whereas the shorter item of the two I had purchased was the correct fit for this T150.
Check this..
So that went well.
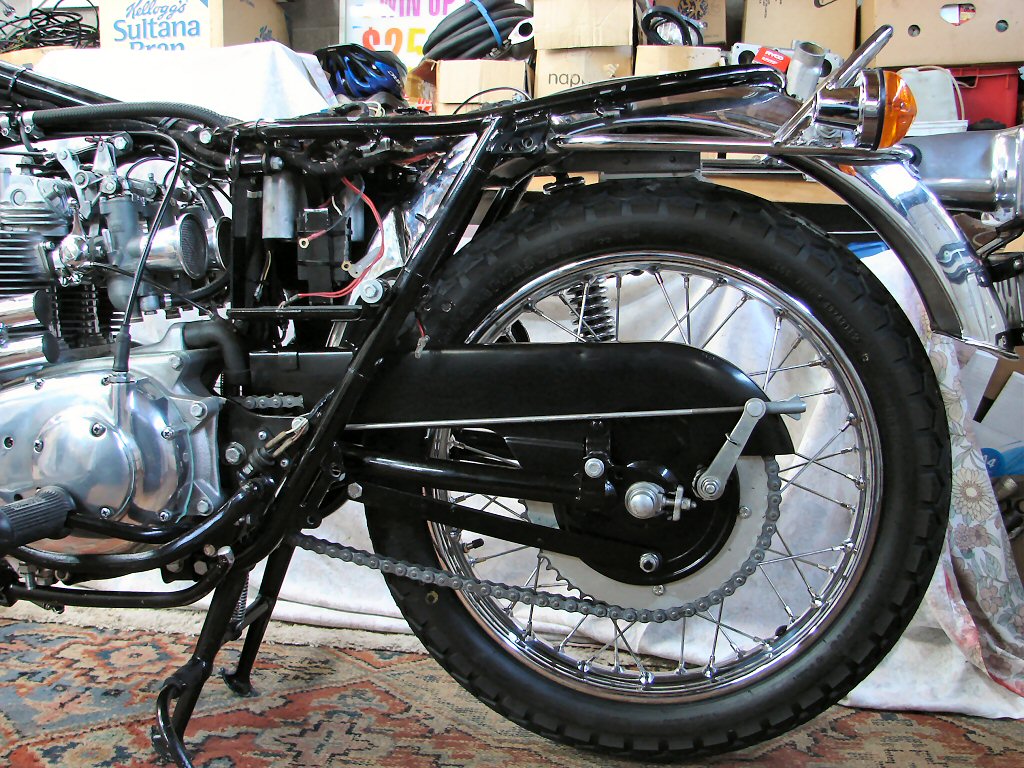
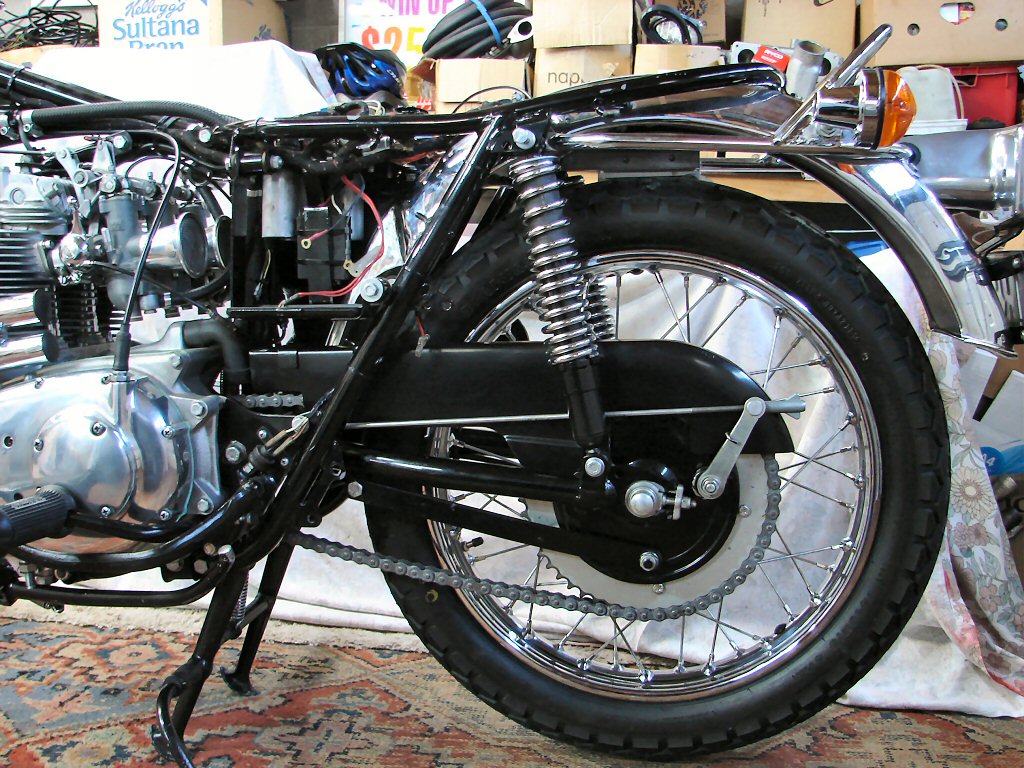
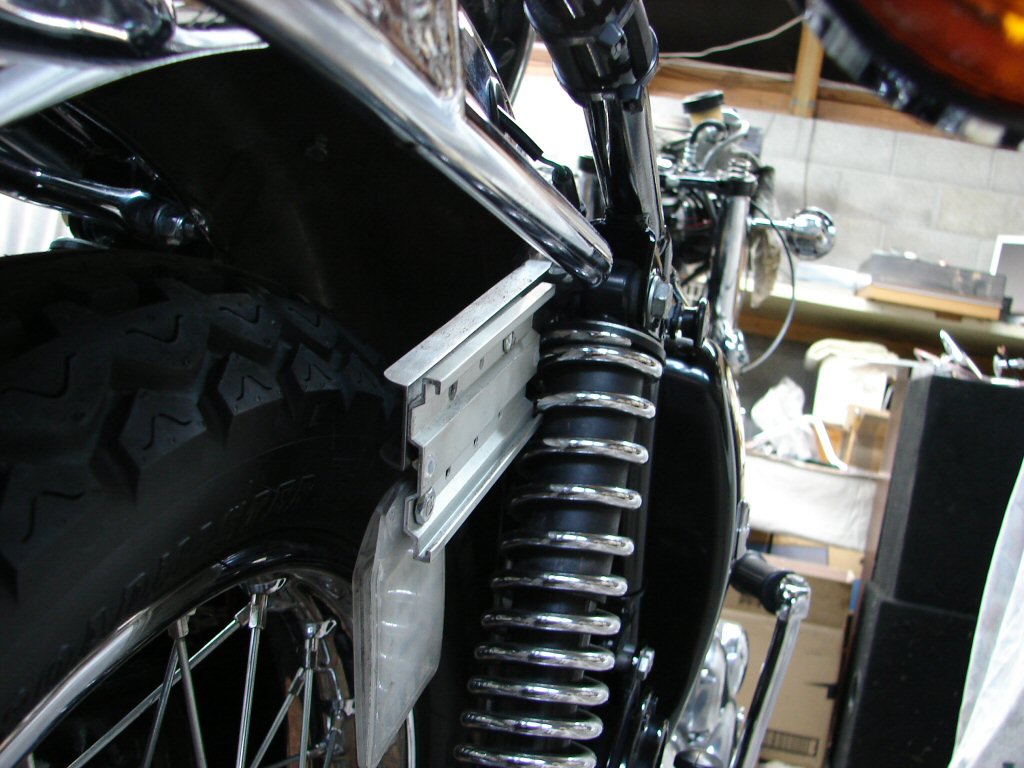
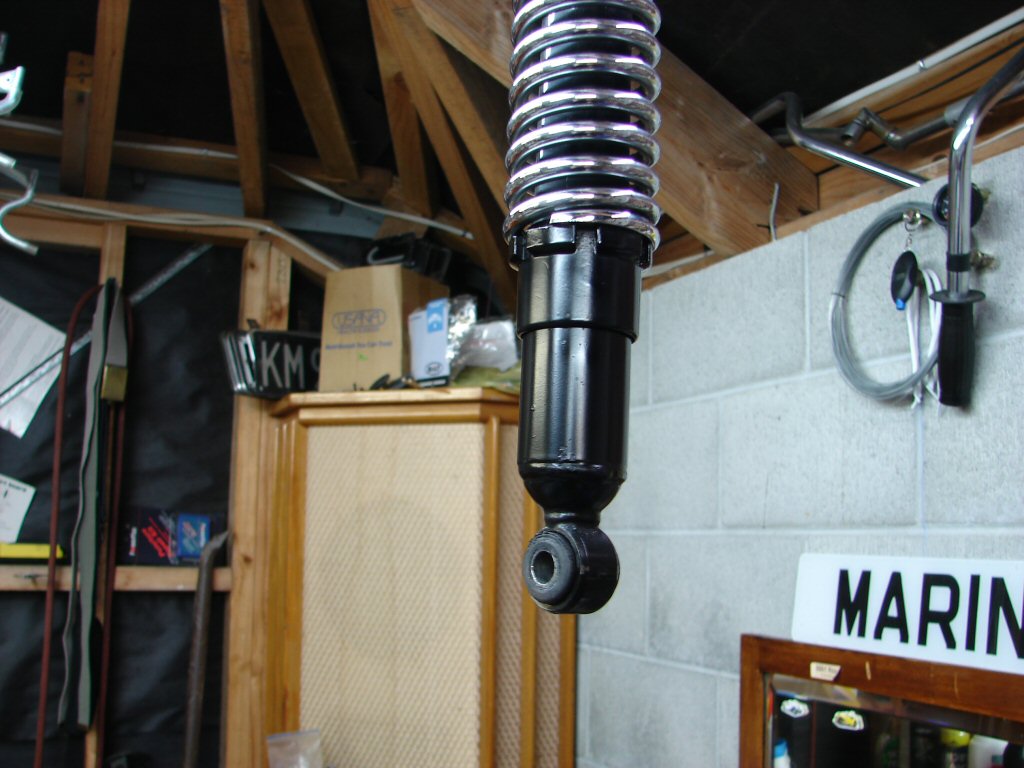
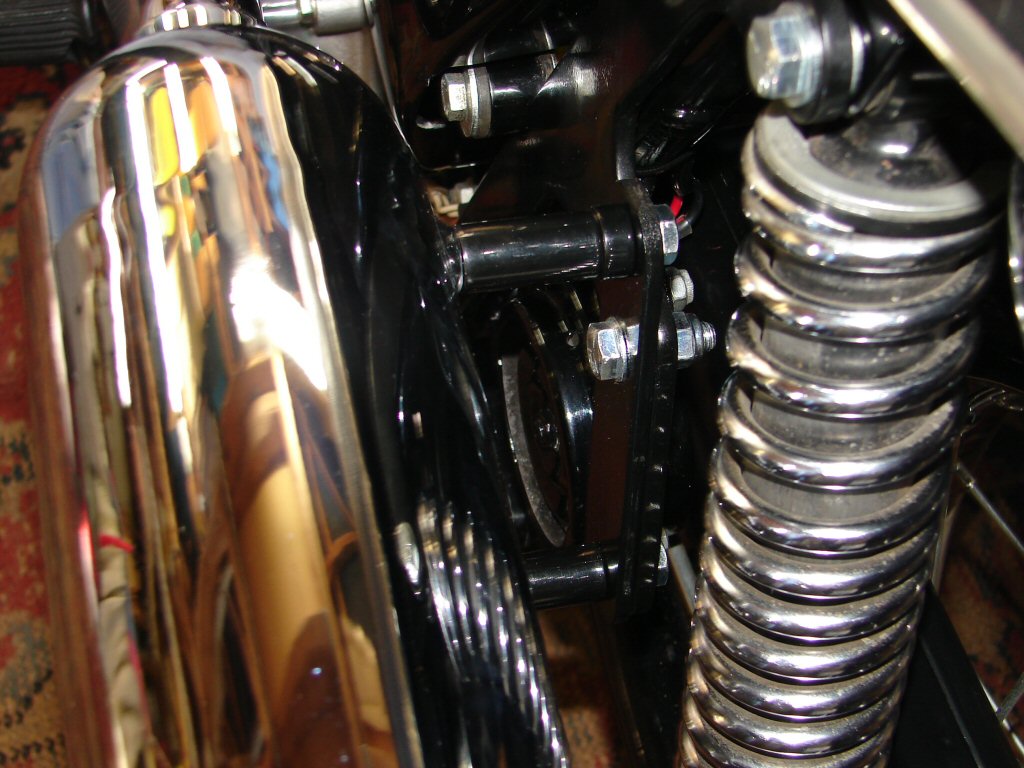
Second thing was the right rear shock absorber, which needed to be "de-Hagoned". This is simply a case of removing the slightly garish sticker, lightly sanding, then painting the alloy spring tension adjuster, so it all looks like an old Girling.
Things got a bit sticky right here. Just remove the shock right? Turned out that the top mount on this shock had also been pressed into service as a handy location to include the very nasty bracket supplied by the NZ Transport Authority, the purpose of which is to retain the rego label. One can be fined for not displaying this label - even if the machine is in fact legally registered. However, I view this thing as an abhorrence, and would rather utilise the double-sided tape option that is now issued. So - it would serve two purposes to remove the shock and the offending bracketry. Alas, it seemed that this thing had been fitted before the rear mudguard, and the nut which retained the shock absorber bolt was now neatly hidden within an alloy channel piece which precluded any access to the nut.
What the..?
Catch 22..
I tried to wedge a screwdriver between the alloy part and a flat of the nut, but these original self-locking nuts have a very firm grip on their own personal bolt, and all that happened was that the nut revolved, and my screwdriver spread the soft alloy. I tried a number of approaches then decided that this was too annoying, and began instead to pull down the front forks.
I had been holding off on this, as it seemed such a shame to have to pull more bits apart when so much had just gone together. Oh well - you don't get anywhere without making a mess.
I studied it all in order to decide how I could achieve what I needed by removing the least parts. It seemed I could remove the speedo and tacho first, then possibly tap the loosened stanchions down through the lower triple clamp, while leaving the top as it was, which would pull the top triple clamp down as well. At least it was a good plan.
The Tacho came off easily, and was stashed away from the front line. The speedo put up a tremendous fight. It seemed that the top nut was locked to the fork cap, and the pair were unscrewing as a unit, which meant two things. One being that the fork spring would soon be released. The other was that neither would be able to come out unless the handlebars were first removed. Quelle horreur.! As in bugger.
I thought some more. I was going to have to pull the front brake assembly apart again anyway as the brake light switch had gone AWOL again. Therefore, I could simply remove all the controls and switchgear fairly simply, and just leave them perched somewhere while I plucked the 'bars off. So I did. After that it was somewhat easier to convince the locked together nut and cap to escape.
Well that's stuffed it..
I also removed the front mudguard which obliged by squeezing backwards through the fork legs, and I bunged a wooden nail box under the sump and frame. The wheel would be easiest removed once both fork springs were released and the sliders could easily be lifted.
The errant speedo mount would need to be clamped in a vice in order to release the top nut. It did so happily enough.
Knotted..
I then removed the axle clamps from the bottom of the sliders, noting that while they had been seriously overtightened, neither had cracked. Yay. I also noticed that the right side clamp showed evidence of a reasonably copious amount of fork oil. Hiss. Crap. This now meant stripping the right fork leg would be necessary.
It can suddenly occur to one that they only came here to rebuild the engine. It did. But here you are, and you have found more things not as they should be. Obviously the previous builders would have whacked a coat of paint on it and left it alone. As I am not so good at painting, I prefer to actually put things right. Sigh.
Actually, I will add here that I take immense pleasure in handing a bike that is the best I can possibly make it back to its owner. Not just in the area I was instructed, but everywhere. I guess this is why I would never be able to make a living out of this lark. I just need to have it right for my own satisfaction.
Draining fork oils..
While the forks were draining I had another go at the shock mount. By removing the label holder from the alloy channel I was able to get a tad more angle on the channel. Then by judicious use of an open ended spanner across the top of the rear tyre, and applying much force, I got the reluctant nut off. I marvel at what was in someone's mind when they put this together in such a fashion. I guess it seemed like a good idea at the time.
I did not feel like waiting for a fine day before applying paint to a few inches of shock absorber, especially as fine days are becoming less frequent as we slide into winter. I chose another approach. As you do.
I put my finest satin black rattle can in the sink with a few inches of hot water. Once it felt suitably warmed to the occasion I heated the masked up shock absorber with her indoors hair drier. She will never know. Right? I then whipped the two smoking items outdoors and sprayed a modest amount of paint on in a rotisserie fashion.
Cunning stunt..
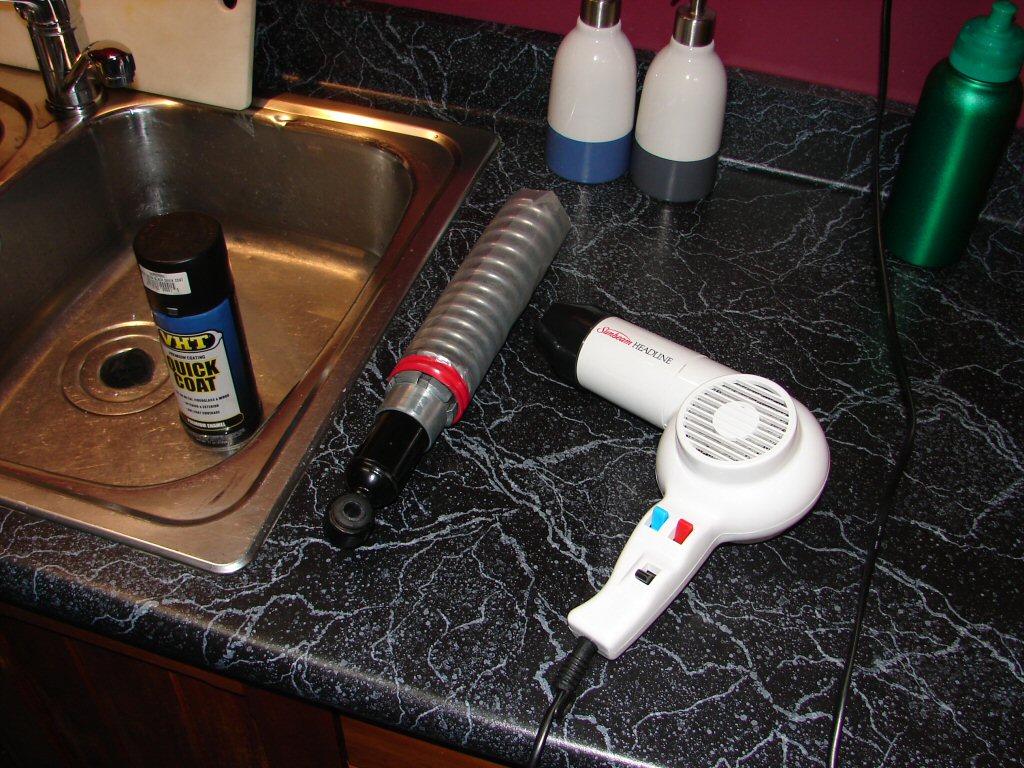
Considering my recent paint failures, this worked very well for around 12C ambient. Admittedly there are a few bits of space junk adhered to the paint, but I shall leave it hanging until tomorrow and give it a quick cut. Perhaps in two days. I must say, satin finish is much less demanding on technique.
Hang about..
Back to matters in hand. I removed the right fork slider and found that whilst the special sealing washer was present at the bottom, it had so much sealant forced through it that it was no longer effective. Perhaps if no sealant had been used it may have simply done its job. Cleaned the slider, fitted a new sealing washer, and with a smear of new fork oil, refitted it to the stanchion.
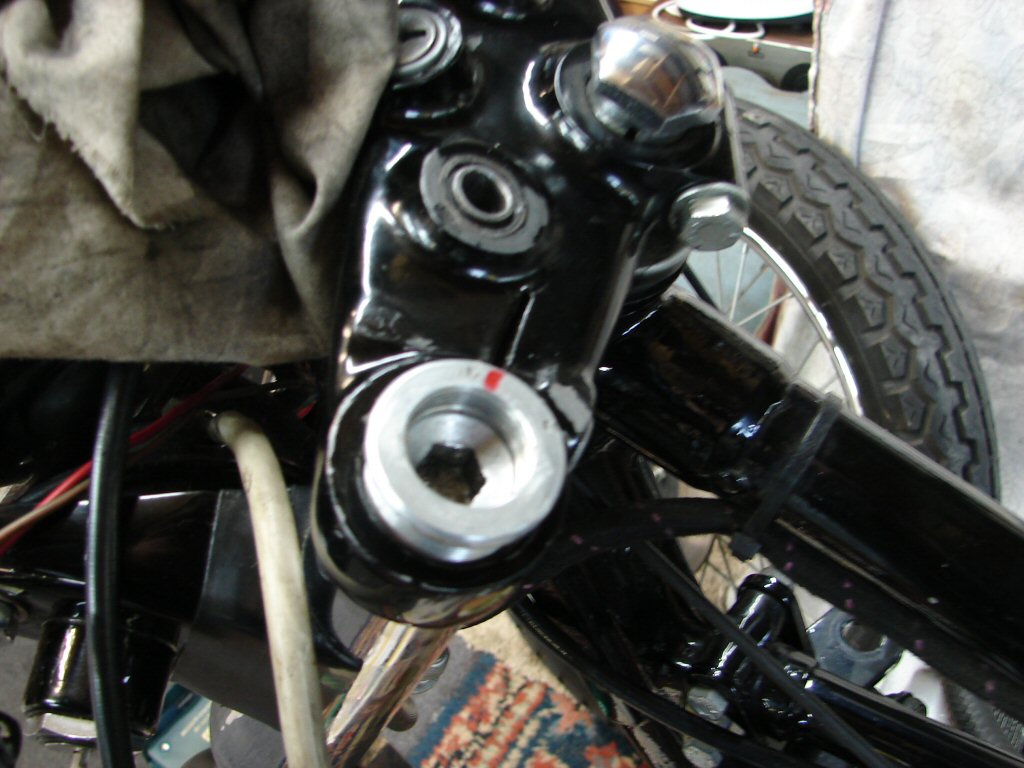
With the lower triple clamps and the steering head stem nut locking bolts loosened, I was now able to tap the stanchions downwards through the lower triple clamp by using a rubber mallet against the fork caps which were wound about halfway down their threads. The top triple clamp went with them, and I stopped when the headlight mounting shrouds assumed their correct location within the recesses in the bottom of the upper triple clamp. I was surprised how easily everything moved into place, simply because of the resistance I had encountered up until now.
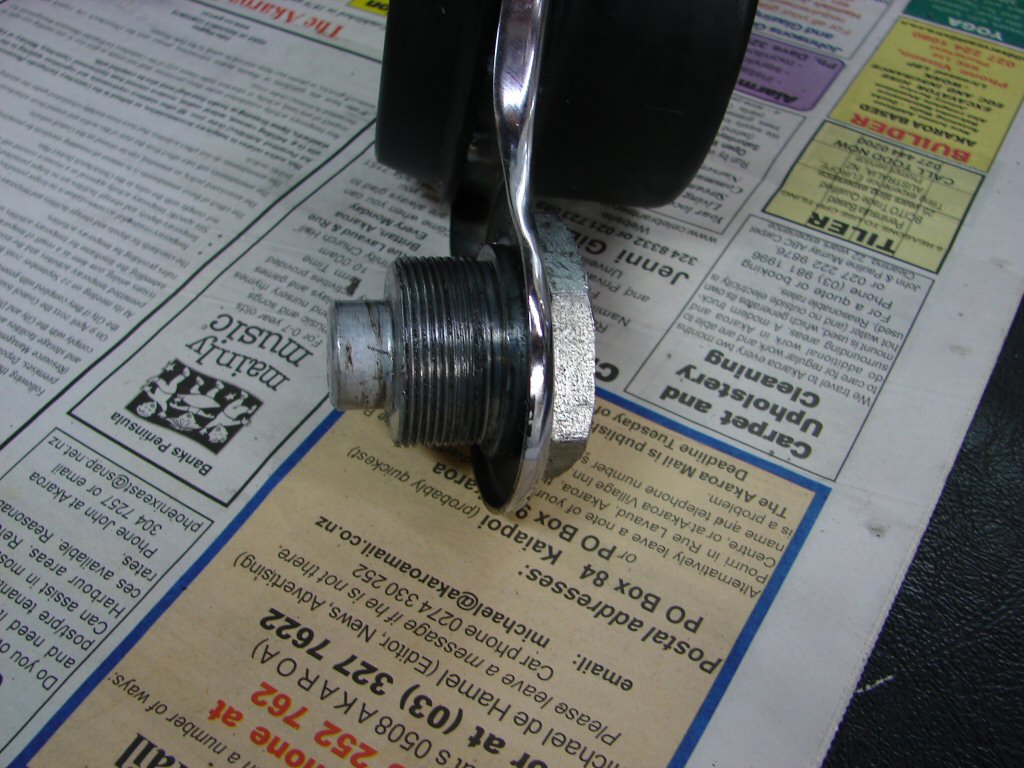
I could now see one reason why a previous builder might have chosen to arrange things the way they were. The steering stem nut was now sitting hugely proud of the upper triple clamp. I measured the depth of this nut beneath the head and found it to be 1.25" in total. I had some vague recollection of there being more than one version of this nut, so I measured the one on my T160 and found it to be 1". Looking in the parts book gave the same part number for both this T150 and the T160, so I suspect that this is the wrong nut.
Tall poppy syndrome..
In the above photo the fork caps are screwed down tight. I had noticed that there was damage to the paint on the upper triple clamp in the areas where the instrument brackets fitted. On the T160 these caps are set flush with the triple clamp, but checking my workshop manuals for bikes with this type of instrument holders it appeared that the stanchions should in fact be level with the triple clamp, so the caps would then sit proud to elevate the instrument brackets.
That reposition will be my first job tomorrow, and I will evaluate at the same time whether or not I need to repair the damaged paint - or if it will be covered.
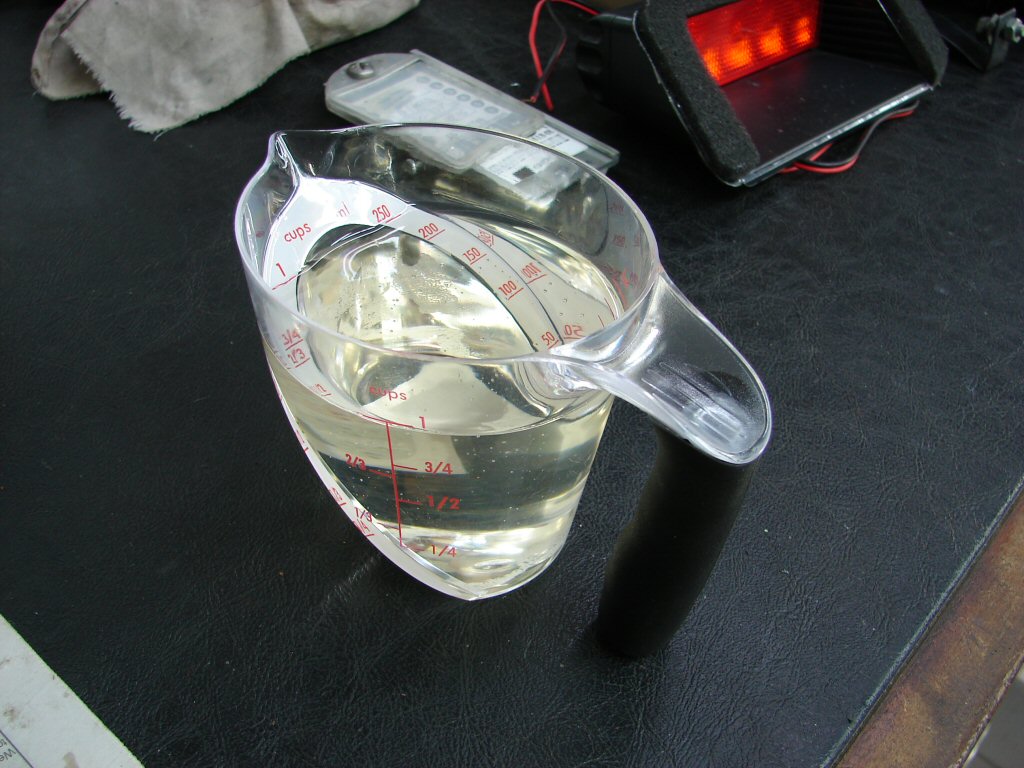
I was now ready to refill the forks with oil. I always use slightly more than the recommended amount as it creates a slight "rising rate" effect as the effective air space compresses. I shall be using 15W fork oil, and I found a rather nifty measuring device recently. This was a stupendous $2 from my local supermarket, but it has a wonderfully user-friendly graduation system which makes finding your preferred level an absolute breeze while filling, thanks to a stepped outer diameter which allows a sloping inner circular ramp. I love the minds that come up with new ideas.
As I am unfamiliar with the capacity of these forks which normally take 230ml, I have only given them 250ml per side.
Brilliant but simple design..
At some point in my experience with these bikes and in particular the front forks, a simple thing occurred to me. This has saved me from what is potentially a huge amount of grief. If it may serve to do the same for you then that is simply a lucky by-product.
When refitting the fork caps with the springs needing to be compressed, and all via a large allen key, there is a sizeable risk that the delicate fine threads of the cap might become cross-threaded, and due to the amount of force being applied just to compress the springs, it may go unnoticed until some serious damage has taken place.
So here is what you do.
Before the springs go in, locate the caps into the top of the stanchions and begin to screw them down. Now - back them off until they only just release from the threads. Allowing about 1/8" before that point, mark the outer edge of the caps where they align with the pinch bolt slot. Now when you do the final assembly, you simply begin in this position, and within a quarter of a turn you know absolutely if you have hit the money. Like so..
Too easy..
I very much dislike calling an end to play on any day when things are in a very disorderly state, but I did tonight as I needed to research the correct position of the top of the stanchions, while at the same time - telling you all about it. However, I shall finish with an item that is more in keeping with how todays efforts began.
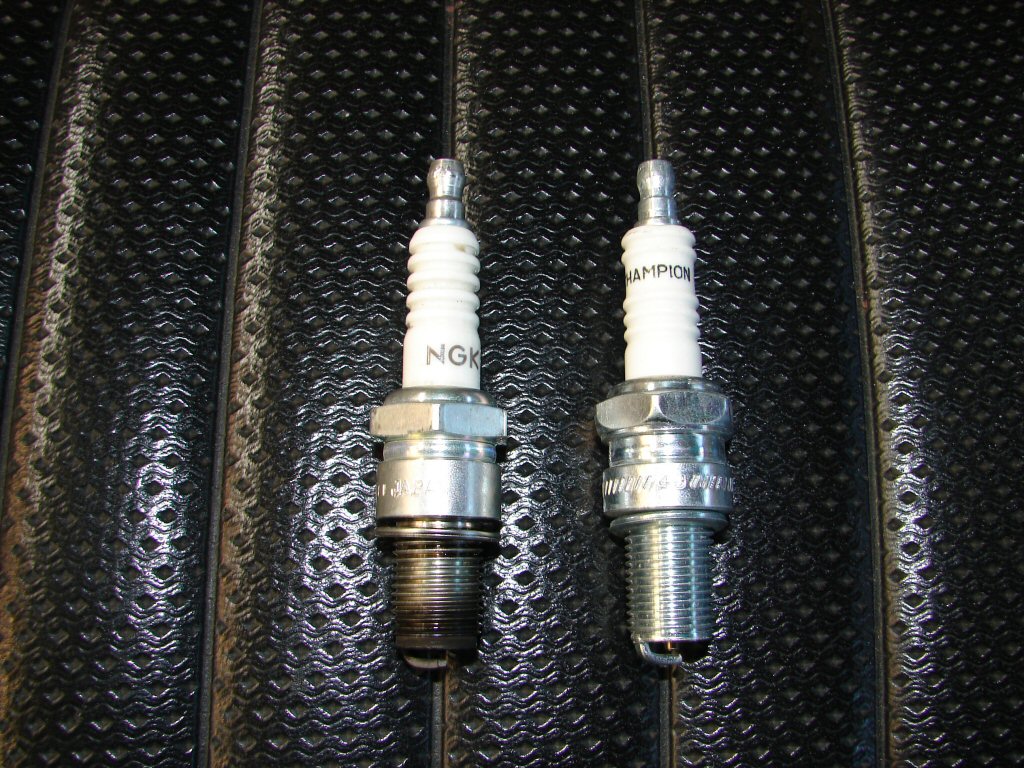
I acquired a set of "proper" spark plugs. Now this is attention to detail.!
Hot licks..
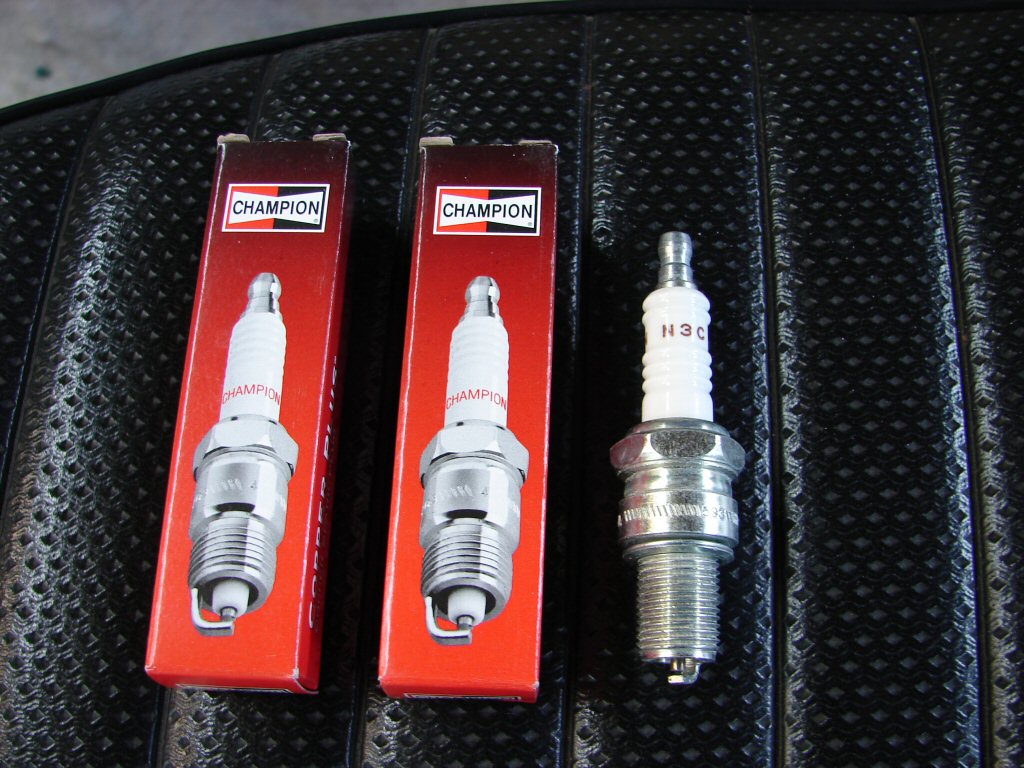
Today I actually fitted the new plugs in place of the original NGK's. While I am no expert on flame propagation, I would have thought that the slightly further extended electrode might be a point in favour of the Champion.
Regardless, they went in so that I can feel ok about the general state of things.
Bright sparks..
But anyway - that was just a thought in passing. The real job today was to complete the assembly of the front forks. They were left overnight with new oil and the caps secured with my usual light smear of silicone sealant on the upper section of their threads to discourage any oil leaving by that path.
Having found that the caps needed to be proud of the top triple clamp I adjusted same today. Placing a block of wood under each fork leg at a time, I tapped the top clamp down while the pinch clamps were loosened on both triple clamps, and behold, the stanchions agreeably moved upwards to the amount I needed. They were immediately clamped at the top while I left the lower ones loose until I could pump the suspension up and down a few times to ensure everything was where it wanted to be.
Spot on..
Continuing in the same vein I taped up the bare wires on the two instrument lamp circuits, then fitted the handlebars so that the controls could be reinstated before anything else got in the way. Bars tightened the left control lever and switch cluster were refitted. No issues there. On the right side I now needed to take another look at the front brake light switch.
This bike strikes me as a little odd up here at the sharp end. The left side features the older style alloy lever mount and switchgear, while the other side with its newly fangled disc brake hydraulics has the more modern style housing albeit with the same older style switchgear. However, it is the later type switchgear that is the problem. A close scrutiny of the brake light switch revealed that its tiny nylon trigger was way offset and thus missing engagement with the lever screw. Solution was to drill out the mounting hole so that the switch could be repositioned. Trials seemed hopeful, so the entire assembly was reinstated and the switch was now working.
The clocks were now fitted and both mountings behaved the best they have ever done on this bike. The gauges were leaned slightly inboard so that their respective cables had clearance from the headlight brackets, which showed evidence of interaction in the past. Just about every piece of equipment in the handlebar area interacts with some other, so the location of most parts is dictated by another. The trick is to try them all in various arrangements while observing what takes place when moving the 'bars from lock to lock. You then choose the path of least resistance.
As happy as it can be..
It is obvious in this photo that the headlight mounting shrouds are now properly located inside the lower extremities of the upper triple clamp. Happily enough, all the other bits are now also in their correct place.
This chapter can now be eliminated from further enquiries.
So.
Matters have today progressed from this..
Sadly degraded..
..to a more "coming back" sort of scenario..
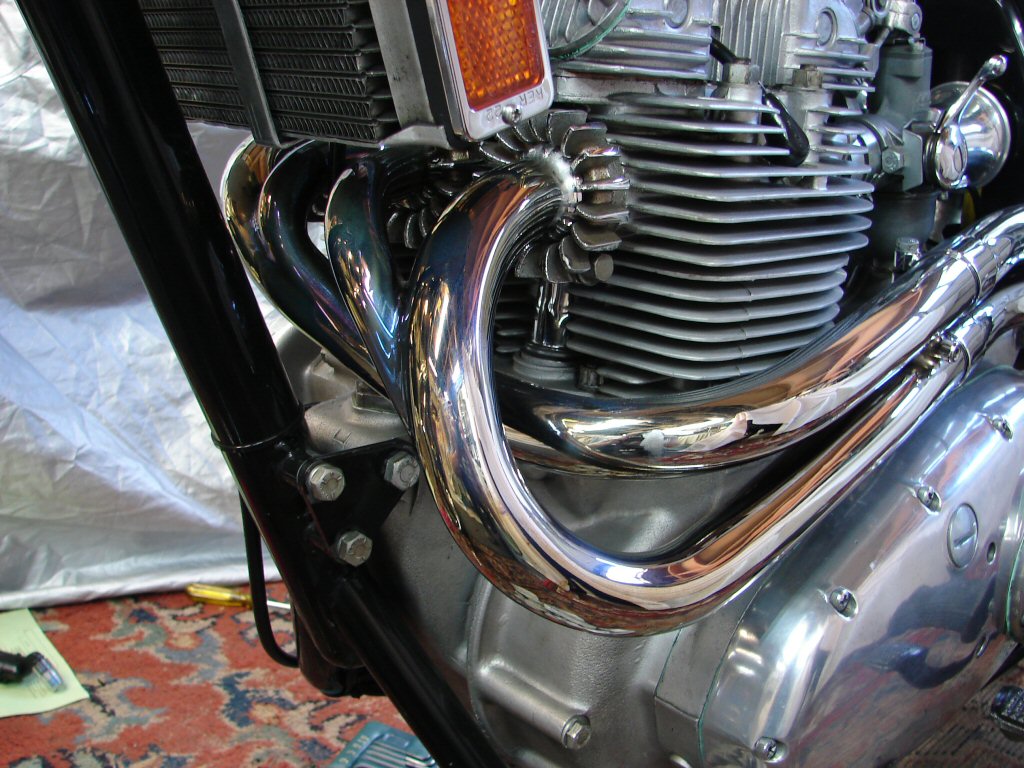
The absence of conventional exhaust headers makes this bike look exceedingly trim.
So sleek it could be a Brylcreem ad..
From here it was simply too tempting not to assemble the entire exhaust system for a final trial fit. There is some monkeying to be done with the muffler mountings so that no excess stress is transmitted to the manifold, which previously was tending to spring the headers off the exhaust stubs.
A bit of fine tuning of those mountings promises to allay that particular tendency, which will also reduce an apparent trend to allow exhaust leaks at the manifold.
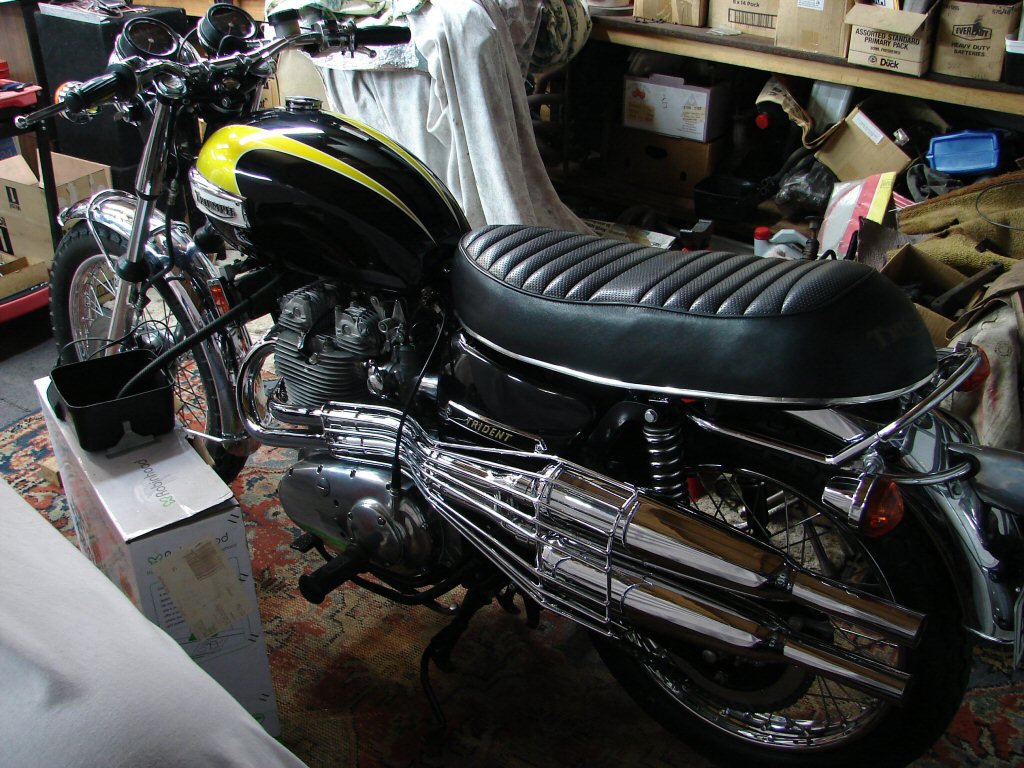
So - it is going to look like this.
Woof.!
This is a most attractive machine.!
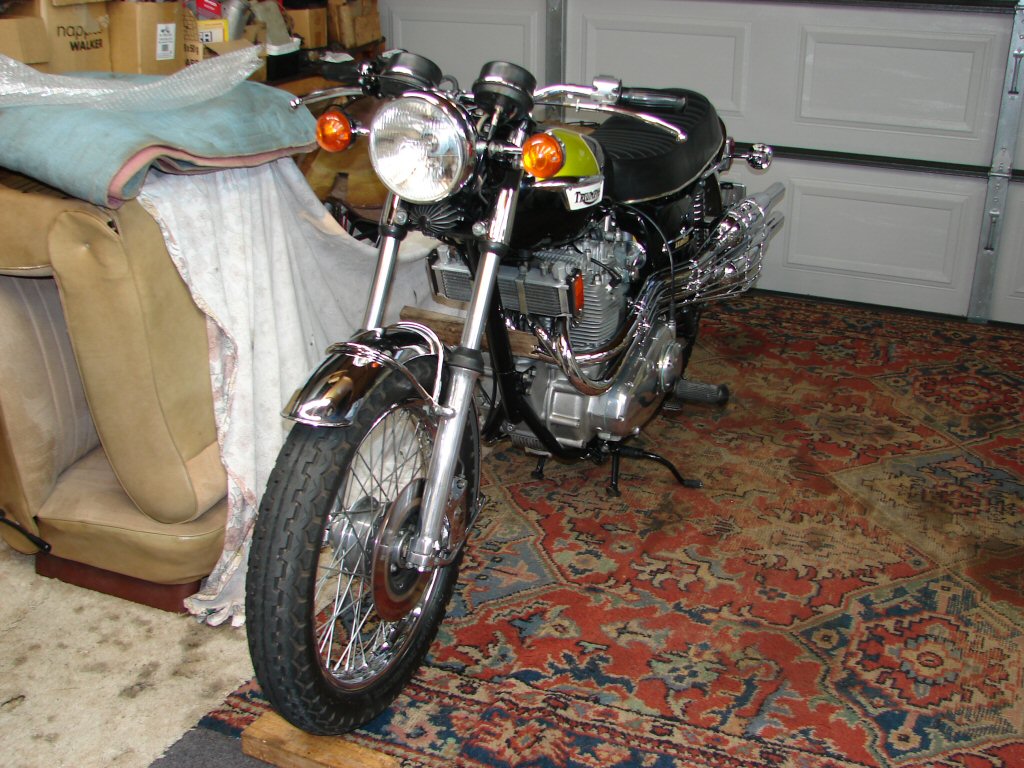
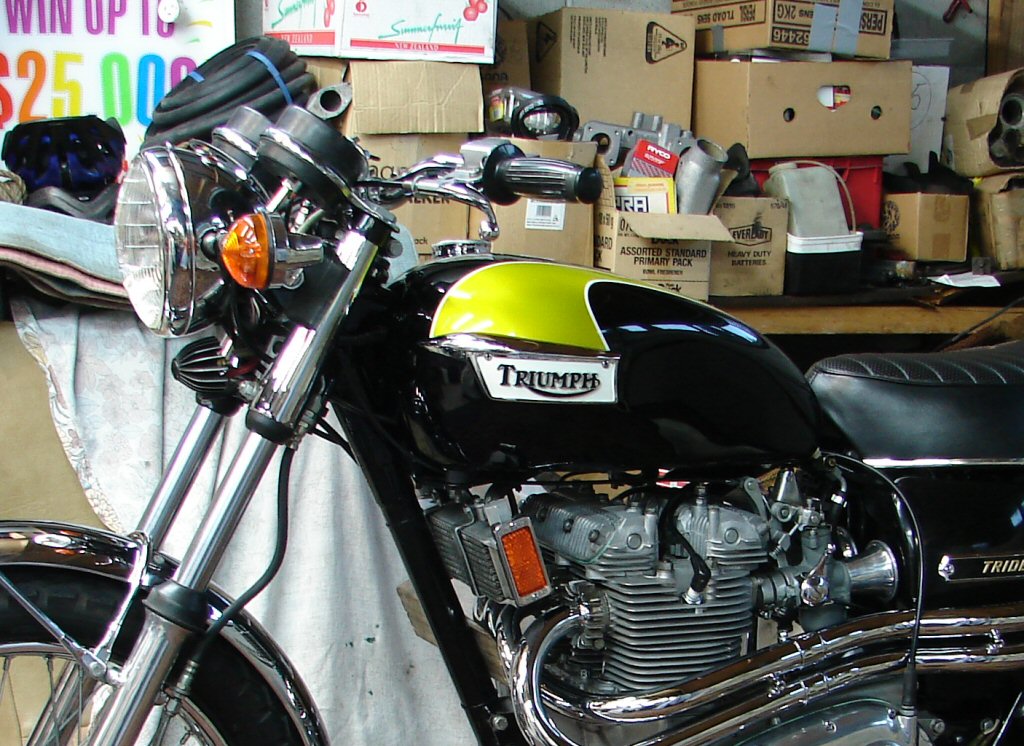
I must register here a particular attraction to this paint colour that I think Triumph called "Spring Gold". As can be seen in some of the photos, it has a definite green aspect which is most appealing. I rate this as my most favourite tank colour of all.
Yay - the weekend. Often it brings even more work than I do during the week, but it feels different. People have more time to chat.
This morning I am expecting a new owner of a T150 with problems to call in, so I am attending to details while I await the arrival. Mostly this consists of finalising the muffler mounting bracketry which is nearing its ultimate form. Previously the mounts were pulling the mufflers inboard to the extent that the manifold was losing grip and allowing the headers to pull away on the right side to the point that gas leakage was inevitable.
I had tried forcing the pipes inwards whilst retaining the headers with a wooden wedge, but was unsure if this had elicited any useful improvement. Yesterdays fit up had shown that I had been partially successful, but there was still a little too much tension on the muffler mounts. I had made an extra bracket to compensate for an error in the design of the mount supplied with the exhaust system, and mounted it behind the existing one. It now occurred to me that if I moved it to the front of the OEM job I might cure that issue.
So I did.
And it did.
The crux of it all..
As there are no other supports at all between the cylinder head exhaust stubs and these mounts, they need to be very rigid, and in a position that does not induce tension on the headers, which might encourage them to move on the exhaust stubs. As it had. I now think I have it all in the best overall position, so I can finalise the manifold joint and this bike is complete.
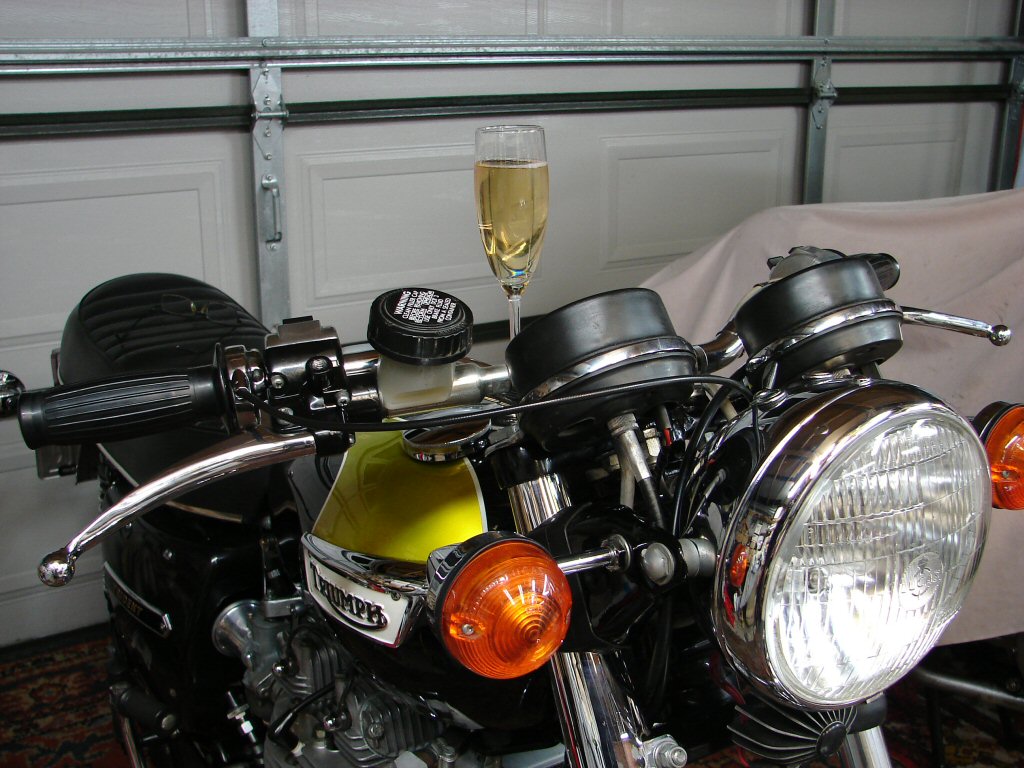
I don't know if it goes - but it is complete...
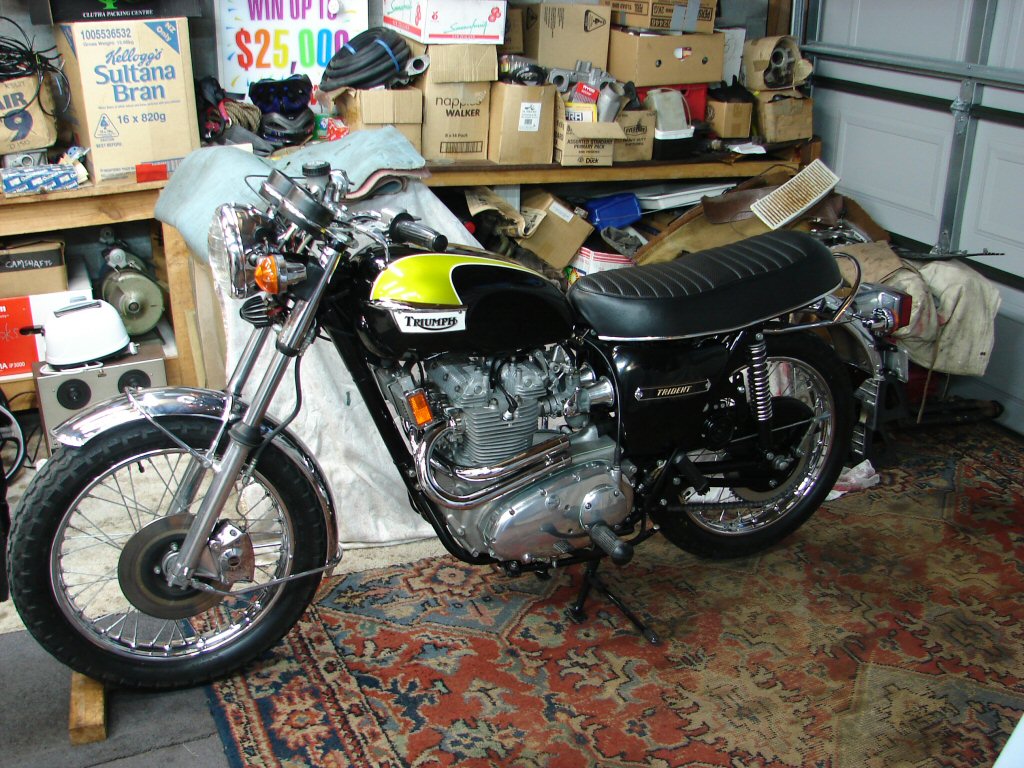
So - as a form of celebration, I wheeled it outdoors so that I could get a bit of camera perspective. If it goes as well as I think it looks, I will be well happy.
Purty..
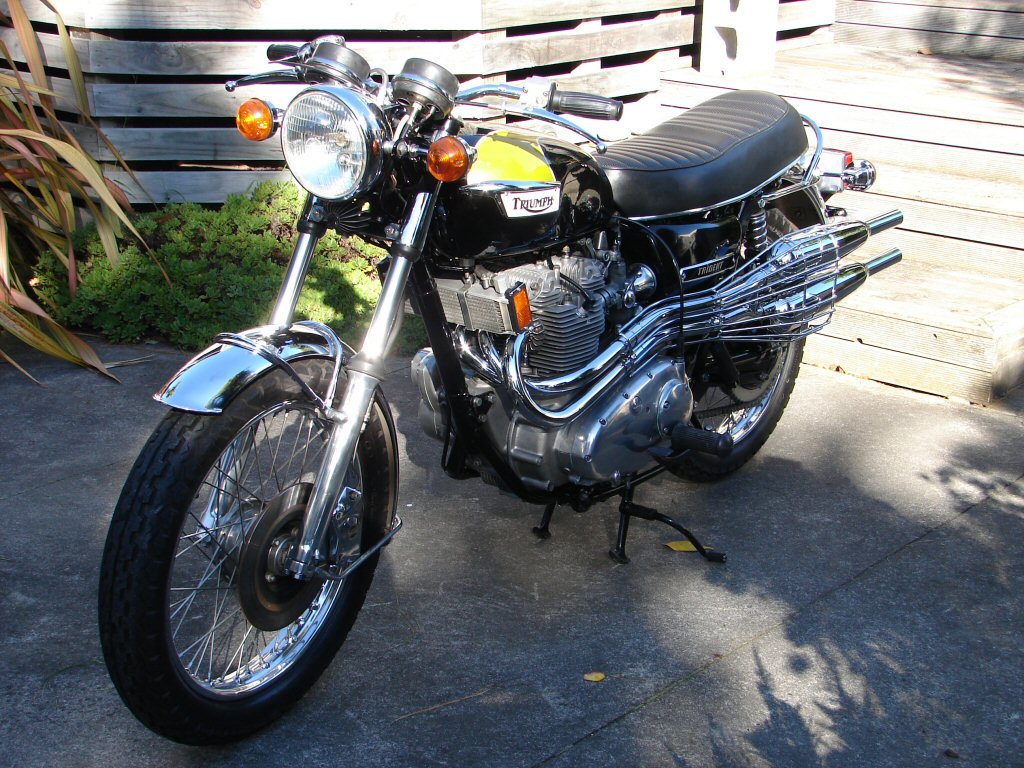
The right side looks to be devoid of anything superficial at all.
In fact, I think it looks more like a 500cc Triumph as regards its general bulk.
Bodes well for scratching..

Picking up the thread.
Today I began disassembling Trevor's exhaust system as the first move in finalising its fitment. All mountings have been arranged and trialled, so everything now has its final place to be.
In order to make the exhaust manifold stable on the cylinder head, this final fit needs to be done with the tailpipes attached to the headers so there will be no leverage applied which might spring the manifold off the exhausts stubs - as had previously happened.
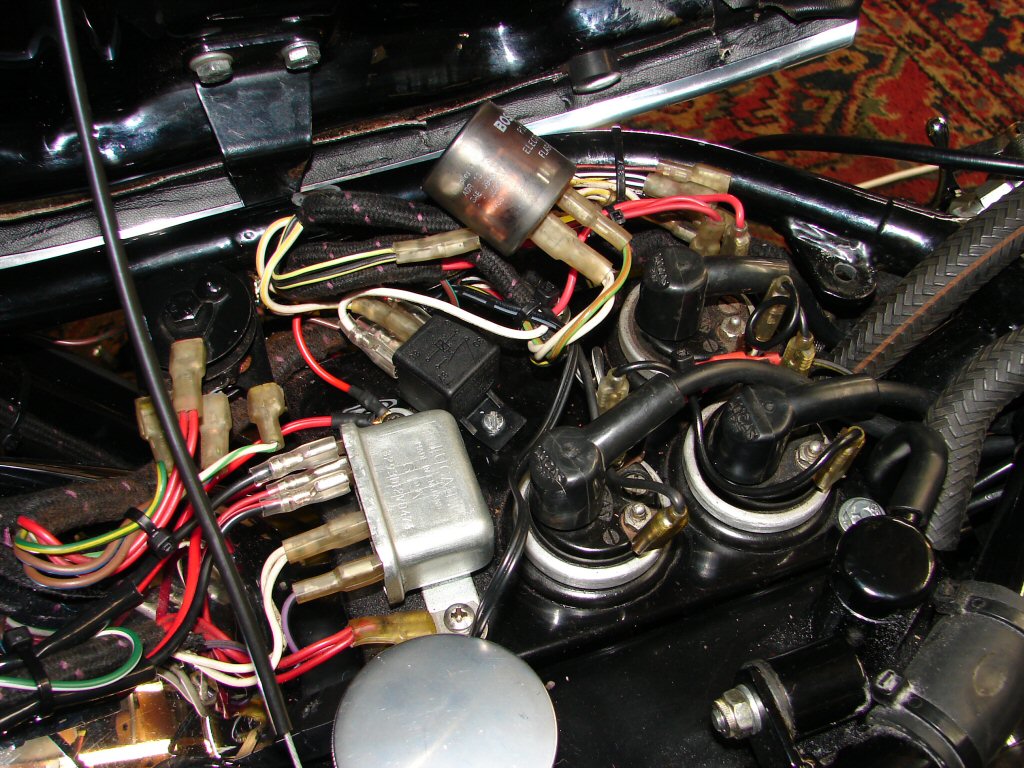
I turned on the ignition to check the battery status, and listened for the click of the ignition relay I always fit to bikes with electronic ignition systems. There was no click. There was no relay.! What was I thinking.? How could I have missed this important step. I then realised that I had fitted such a relay to the Trident that got pushed into the queue and thus halted progress on this one - so I had simply not gotten around to that step.
I shall explain the relay thing further.
While the subject of much criticism, the wiring looms fitted to these bikes during production were adequate for the service they were expected to provide. However - fitting a modern electronic ignition is a modification that introduces a problem. Electronics are voltage conscious, and the cheapest systems available utilise many of the original ignition components, but connect them in a way that reduces their efficiency quite considerably. This can lead to reluctant starting, especially if the battery is other than fully charged. The problem is the losses that occur in the wiring and equally ancient switches, which would not have worried points and coils at all, but can actually fail to provide enough voltage to an electronic unit for it to even operate successfully. The Boyer system fitted to this bike, and probably most in the day, is the most sensitive of all. I measured the voltage available to the "black box" of the Boyer system fitted here and found it to be 11.4 volts. A couple less and play will not resume. I then fitted the relay as per my usual approach, and now measured that the Boyer was receiving 12.5 volts, which was the actual voltage of the battery in its current state of play. This is a simple way to obtain the best of what is, but I also find that the audible 'click' of the relay is a very useful fault finding tool should the bike ever fail to fire up easily.
Ignition relay happily ensconced next to horn relay..
The exhaust system is ready to receive its final bolting up, and the clamps are fitted to the mufflers in preparation for that to take place. Some daylight will greatly assist that process, so it will be done tomorrow.
And tomorrow did come.
Removed fuel tank, removed mufflers, removed spark plugs and made sure they all fired, while kicking the engine over quite a few times to pump a little oil about. Plugs back in and exhaust fitted up with some new silicone sealant at the exhaust stubs, mufflers all clamped up and everything bolted up as it will hopefully remain. Tank back on but no fuel in it yet.
Container ready to bleed off a few litres from cooler..
Weather promises to be reasonable tomorrow so I might be able to create a little more space to operate in.
First step in preparation for starting first time - pour a small amount of fuel into the fuel tank to see if it leaks.
It does. Immediately. Blast.! This thing is going right to the wire.
I just ran my finger along the lower side of the fuel taps where they thread into the tank, and the left one came away wet. I tried tightening the locknut but that seemed to annoy it further. Tank came off, and I stood it on its nose so I could remove the fuel tap. All the correct washers fitted, and everything looks new. No indication that there has been a long-term leak, so I assume it has happened during storage.
Searching for something I could apply to the threads I came across my ancient Hermetite Blue, which promised to be resistant to all fuels. I cleaned everything and applied a good measure of this magic blue stuff, then tightened it all back up. I then sat the tank level again and waited for a time.
No correspondence will be entered into..

It seemed to have done the trick - either that or I had dislodged something that was preventing a good seal. I refitted the tank and the fuel lines and waited a little longer just to be sure you know.
Once again, all appeared fueltight after some minutes, so I prepared to carry out the next step. This involves turning on the fuel taps and seeing what happens at carb level. In case they leak.
Fortunately nothing happened at all, which is reassuring as I have had them apart. Nothing for it then - set up the camera and see if I can coax some life from the beast.
I think that went quite well then. There was some smoke to begin with, but most of what is visible is condensation into an atmosphere of around 10 degrees C. For the same reason, the usual 3 start Boyer approach in cold weather.
Having restored the return oil line to the tank and filling the oil I ran it again briefly, adjusting the pilot air screws to obtain an even idle. Tomorrow I will run it up again and strobe the ignition - then I will be confident enough to get it fairly hot to encourage some gasket settling for the first head retighten.
It has to be appropriate..
It lives.!
Trevor is awake after 18 months of piecing together all that was needed. I look forward to riding a few miles and the inevitable adjustments, head tightenings, valve adjustments and oil changes.
The engine sound is interesting. To the camera and ear it mostly sounds like a standard exhaust, but from my position next to it there is a slightly odd beat at certain revs, which I had suspected the uneven length centre headers might have allowed. We shall see how that goes as things reach a finer state of tune.
Several starts later.
Igntion timed - was somewhat retarded having used the factory setup instructions.
With that done I felt it safe enough to remove the velocity stacks and use a vacuum gauge to get all the carbs synched. The one-off exhaust manifold is assymetric, and that showed up in the carb balancing. Centre carb was doing most of the work, outers were quite different left and right. Makes sense.
Oil pressure readings were the highest I have observed, and make me think my gauge is over-reading a bit. Extremely healthy which is good. I had been slightly concerned that it took 3 kicks to make the oil light go off, but I discovered there was a new pressure switch fitted, so I suspect it has a higher pressure threshold than a standard item.
Head has been retightened but it did not move enough to require adjustment of valve clearances. That is reassuring and more the norm when using solid gaskets.
Time for the first test ride of about 5 miles.
First ride proves to be totally stupendous. In every respect this bike proves to have every control - every behaviour - every sign of being sorted - that one can strive for years to achieve. A fabulous experience to say the least.
I rode to a workshop where the NZ "warrant-of-fitness" may be obtained, and it duly was. As the testing officer rightly observed - "they didn't do this when they were new.." - but this one does all that and more. Perhaps the camshaft timing - perhaps the attention to ignition timing and carb balancing - it matters not. This machine responds to the slightest input from either controls or body movement. I rate it as the most agreeable handling Trident I have ever ridden. That is huge praise from one who has owned and modified a T160 variant from new. This thing "feels" amazing.
I am so totally chuffed that the level of care in the assembly process has resulted in such a wonderful riding experience.
I had a comment that the colour of the tank is more gold than spring gold. This is one of those paint jobs that presents differently depending on light or viewer perspective.
Gold..
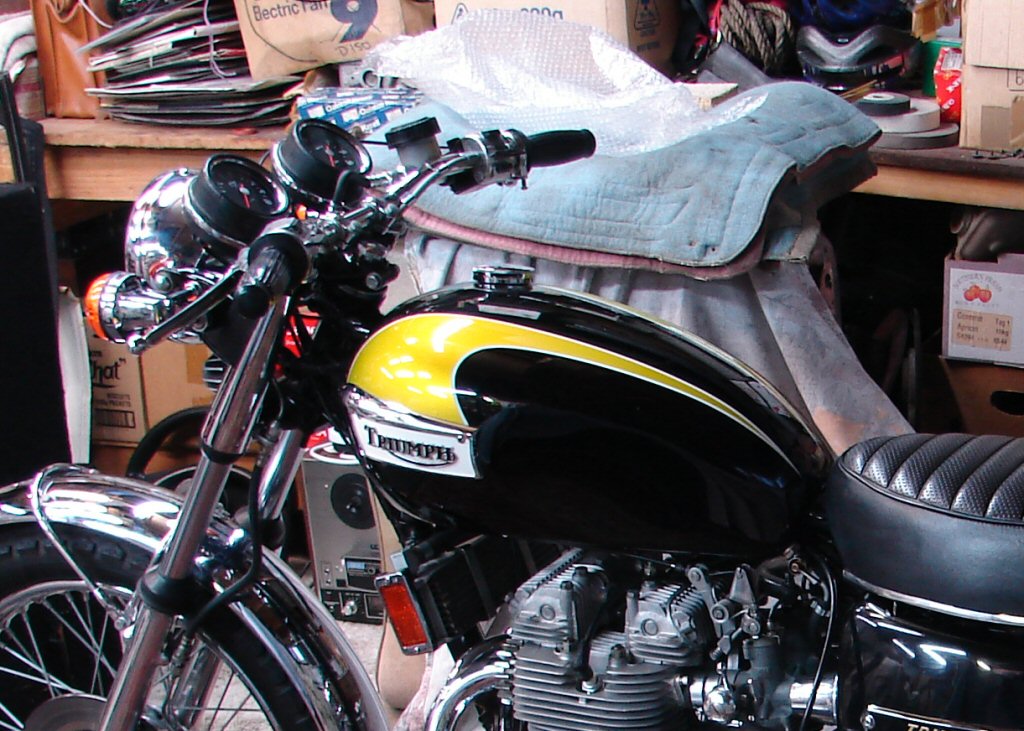
Spring gold..
I fitted an oil pressure gauge before the second engine run. This meant the engine was started dead cold and in sub 10 degree temps.
I was somewhat perplexed by the readings I achieved, so I duly had my oil pressure gauge calibrated. It came back as 100% accurate.
Dang.
This engine is managing to produce 145psi oil pressure from cold start. Happily, it reduces to 120psi after around 30 seconds, so I am thinking it is mostly to do with 20/50 oil and very cool ambient temps. The oil pressure relief valve is just as it was when last in service - when it ran seriously low on oil pressure, so I am hoping that all will settle down soon.
I spoke to my Engine Reconditioner today and he said that a condition could occur where "washing" might exist if pressure was too high. This is where the oil is forced out of the bearings so fast that a film does not remain, and this can create a fast wear situation. I shall trust that such is not so, but I am tempted to at least try another oil pressure relief valve..
Trevor goes to a show.
To be more precise, the 2017 British Bike Show organised by 4 different owners clubs in Christchurch, New Zealand. Besides the organisers Triumphs, BSA's, Nortons and AJS/Matchless, there were Ariel square fours, Greeves trials bikes, Vincents, a Metisse, and all sorts of interesting old stuff.
This was a mix of Triumphs - older and newer - with the most horsepower on tap. Trevor second in..
Pretty and serious..
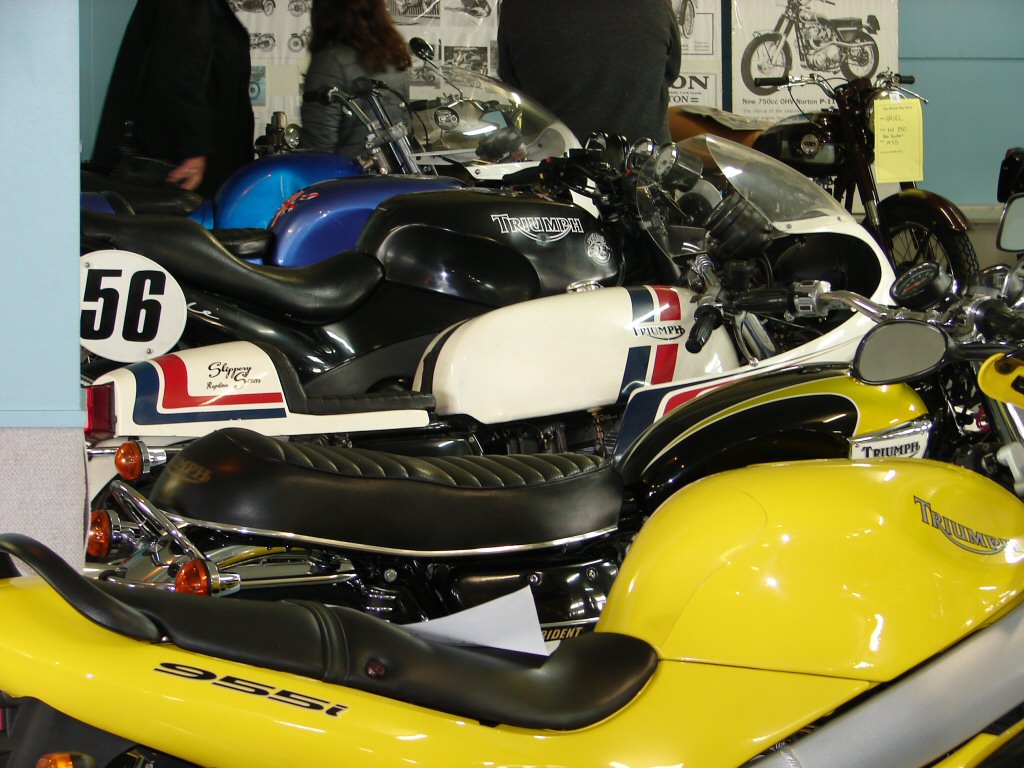
Most gratifyingly, Trevor won 'Best Custom' award, which was an honour considering some of the other customs.
Ridden to and from the show, and nary a spec of oil anywhere. I think that is kind of authentic and alone deserving of an award.
Moving forward - December 2017.
Trevor has been sitting all this time as other projects have demanded time and attention. Total mileage to date 8 miles.
Next planned ride will be 50 miles, after which oil and filter will be changed, final head tighten and valve adjustment done, and general attention to anything which may have shown up during this ride.
Finally managed this Friday 15th December. Planned to ride to Diamond Harbour and back, which is my routine 50 mile route. Before starting the bike I drained out the oil which had made its way down to the bottom of the crankcases during the months of layup. The oil looked to contain a few microscopic shiny bits so I dumped the lot and refilled with new stuff. Best to play safe. Thanks to ambient temps probably 15-20 degrees higher than the last ride, the start was a two kick affair and everything seemed just great.
Headed away in the direction of Lyttelton, gearchanging a sheer delight thanks to very compliant clutch action and excellent throttle response. It was a cinch to find neutral at standstill - always a test of Trident clutches. The ride around the harbour was great fun, and I was keeping the revs between 3 and 4 grand which is the norm when I am not riding hard. Not a single complaint from anywhere, plenty of grunt on tap and no vibes or rattles to make me fret. Top stuff.
Passed through Teddington and buzzed past a car or two then began to climb the hill towards Charteris Bay. Just after negotiating the sharp left-hander before the final climb to the top it all changed. The engine lost power and suddenly felt "flat". Opening the throttle only elicited misfiring and reluctant response, so I backed right off and cruised to the top where the road swings to the right through a cutting. I immediately came across a queue of stationary traffic due to roadworks, so rather than stopping I made a U turn and headed back in case I might be unable to rectify the problem. I checked things at idle as I coasted down the hill, and the engine was at least happy there. I now noticed some sudden blueing of the exhaust header where it swept around on the left side, so killed the engine and coasted all the way to the bottom of the hill.
At the bottom of the hill I made rudimentary checks. Plenty fuel in tank and carbs. Plenty electrics. Tried starting - it lit up immediately but same poor throttle response. My feeling was that it had suffered a serious retarding of the ignition. As it has a Boyer electronic ignition I could not check much here, so I decided discretion would be the better course and phoned a friend who is well versed in the art of motorcycle recovery. He was on the far side of the city but would come right away, but as that looked like being 45 minutes or so I decided to push the bike to the Wheatsheaf Tavern at Teddington. Purely for scientific reasons of course. I had plenty time to reflect during the ensuing 1 mile push. The T150 is considerably lighter than my own T160, for which I was grateful, especially as it was now pretty hot and I had nowhere to park my helmet or jacket as I pushed. Several motorists stopped to offer help, one of whom turned out to be a client of mine and motorcyclist himself. I was pleased that they were bike-minded even though they could do nothing for me today.
Made the Pub and quaffed a pint of dark ale - only one step less desirable than a shed full of tools. Chewed the fat with a couple of bikers on Brit twins who pulled in, then my friend arrived and we loaded the Trident on the trailer and headed for the safety of the workshop. No more surprises and the bike was locked up before dark. Noice.!
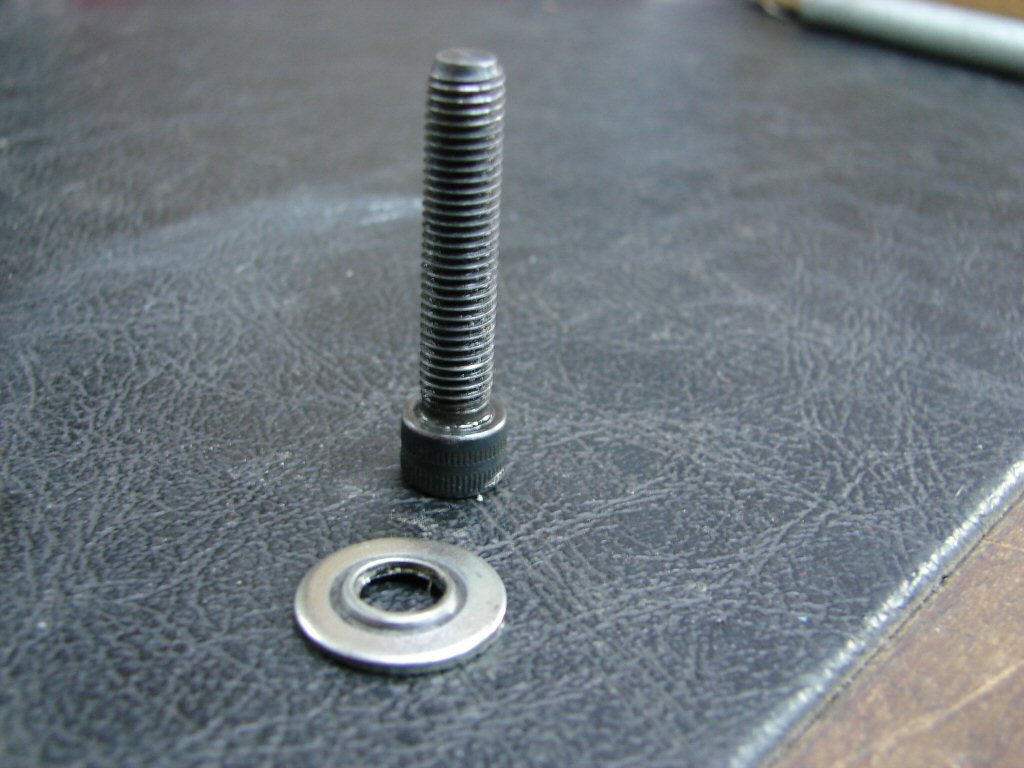
Did not attend to the bike until Wednesday 20th December. Removed the points cover and the Boyer pickup plate. Went to undo the allen screw which retains the rotor and found it loose. Not loose enough to unscrew, but not tight enough. Lined up the timing marks and found that the rotor was indeed grossly retarded from its correct position, and that I could move it with my fingers. Mystery explained, but not the reason why it had become loose. Removing the allen screw and washer provided that answer. I had refitted these parts exactly as they were because there had been no issues in this department prior to the engine failure. What I had missed was that the washer had become deformed and was not doing its job properly..
Damn them soft washers..
I was somewhat annoyed at the blueing of the headers, seeing as how they had been shiny and new until now. I decided to try polishing the worst bits out and was relieved to discover that I got an immediate improvement, so will give some more attention to this in the coming days..
Centre pipes still blue but main bend clean again..
Another problem showed up during my checking of all things. The exhaust heatshield had fractured at one of the mounting bosses. I am not sure now whether it did so because of the vibrations of the exhaust, or because it had already fractured when first fitted and that had allowed it to flex with the vibrations.
Fracture evident where the screwdriver points - appears the weld broke..
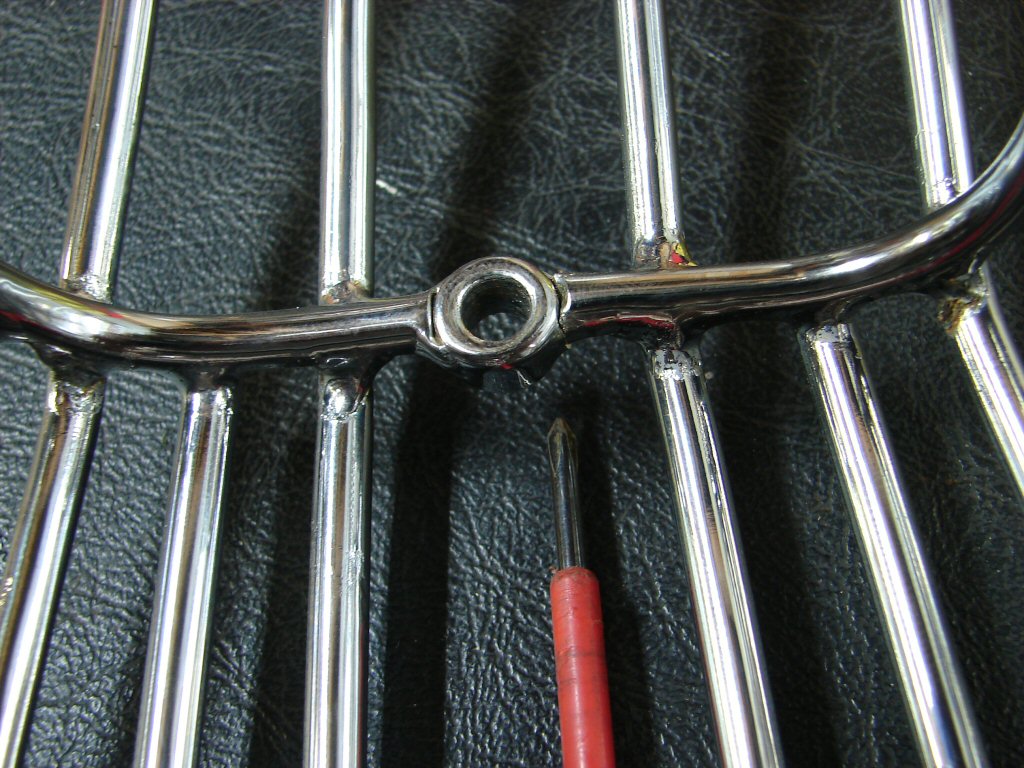
Had it tig welded today and it is now refitted. Checked the oil today and it looks clean and free of contamination, so I shall do a few more miles then dump it all while hot. One other thing took place during the last ride. The gauze covering the right side velocity stack fell out. When I stopped at the bottom of the hill and was looking for the problem I found it perched at the rear of the gearbox housing. I removed all the stacks while working on the bike yesterday and found that the lacing wires I had fitted to retain the foam filters inside the stacks had managed to cause the gauze filters to become convex rather than concave, thus one had fallen out. I decided to remove all my foam filters and see what difference it might make to the tuning. I would prefer to fit some finer mesh gauze on the outside of the stacks but as yet I have not managed to find a source.
Total mileage currently 65 miles, once I have completed some more polishing to reduce the blueing of the headers we are ready to go again. Next ride will culminate in dumping all oils yet again plus filter, after which all should be ready for some serious mileage in the hands of the owner.
I hope to be his wingman for some of that..
Some running in and adjustments in Part VI.