The continuing restoration of "Trevor"
Part III.
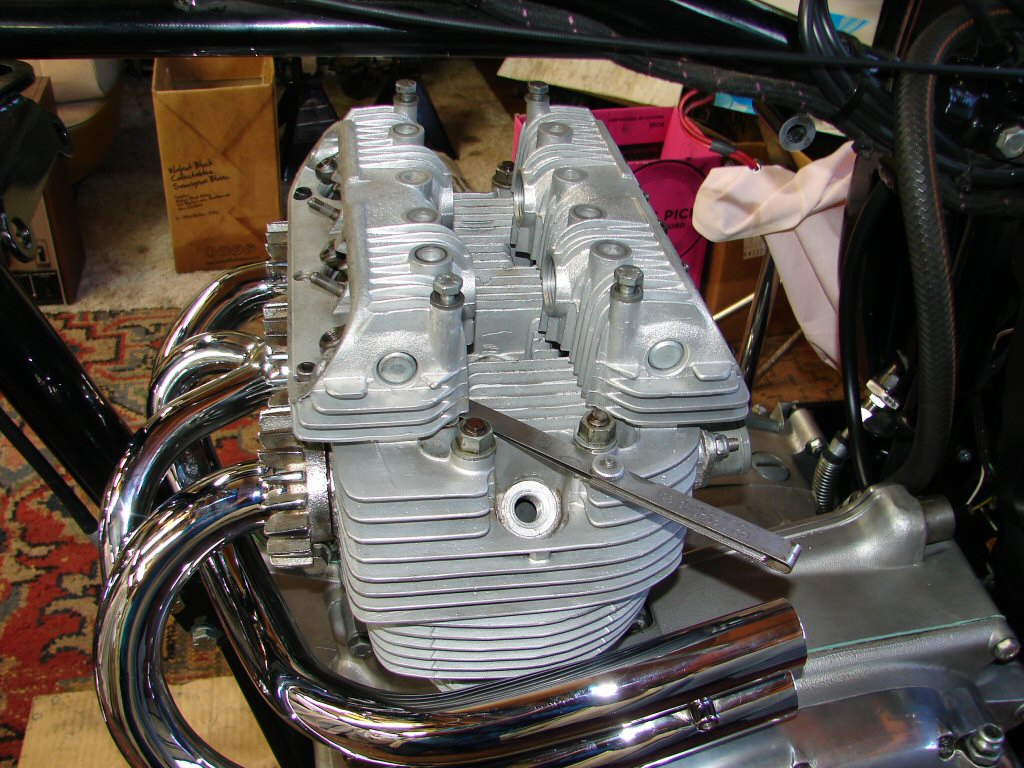
The clearance beneath the exhaust rockerbox before applying any tension was very much the same as the inlet, which meant green light to proceed with completing the fitting of the cylinder head and trust there shall be leak-free pushrod tubes.
We were never this careful back in the day..
All the pushrods were refitted to their original followers, with some sticky assembly lube at the lower end and oil at the top. This encourages them to remain in the followers even when being lifted, and results in less displaced pushrods.
Head bolts tightened moderately with a short ring spanner to keep my enthusiasm in check.
Rockers and pushrods engaged.

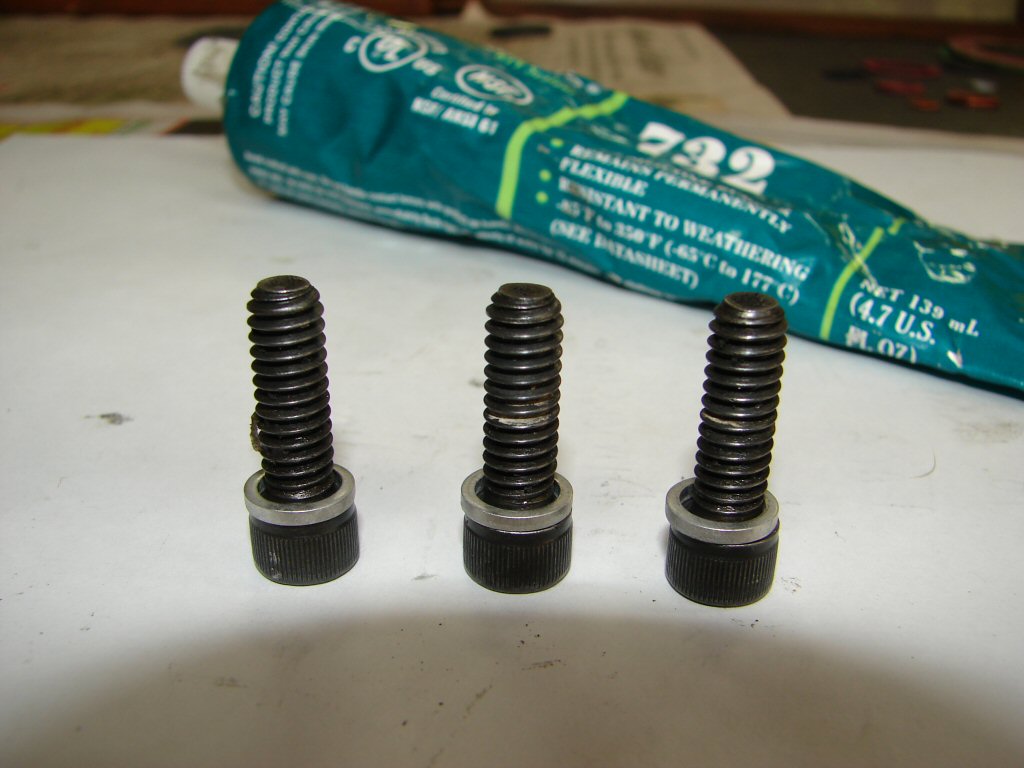
On t'other side the allen screws were treated to some new aluminium washers, and would next receive some silicon sealant on their threads to prevent oil finding its way out by that avenue.
Critical sealers these..
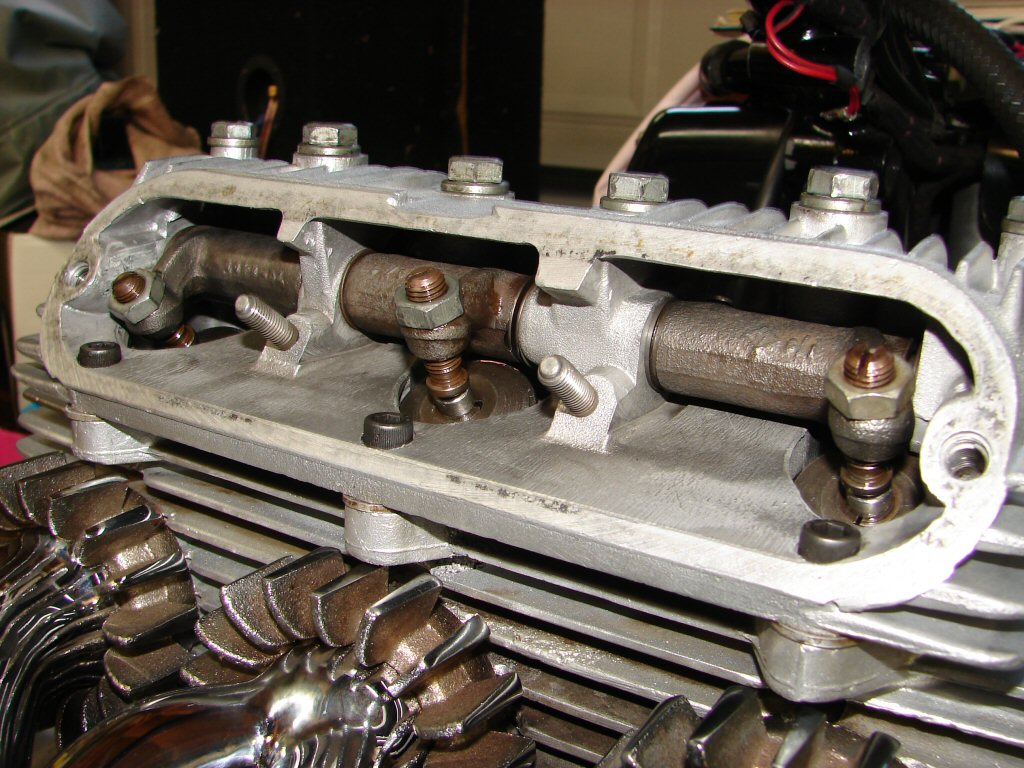
New valve adjusters of the mushroom type were also fitted as the original ball-in-socket type were getting decidedly worn to the point that several of them actually rattled.
Valve clearances all seem normal enough at this stage considering No.1 cylinder remains at TDC on it's firing stroke.
Happy family..
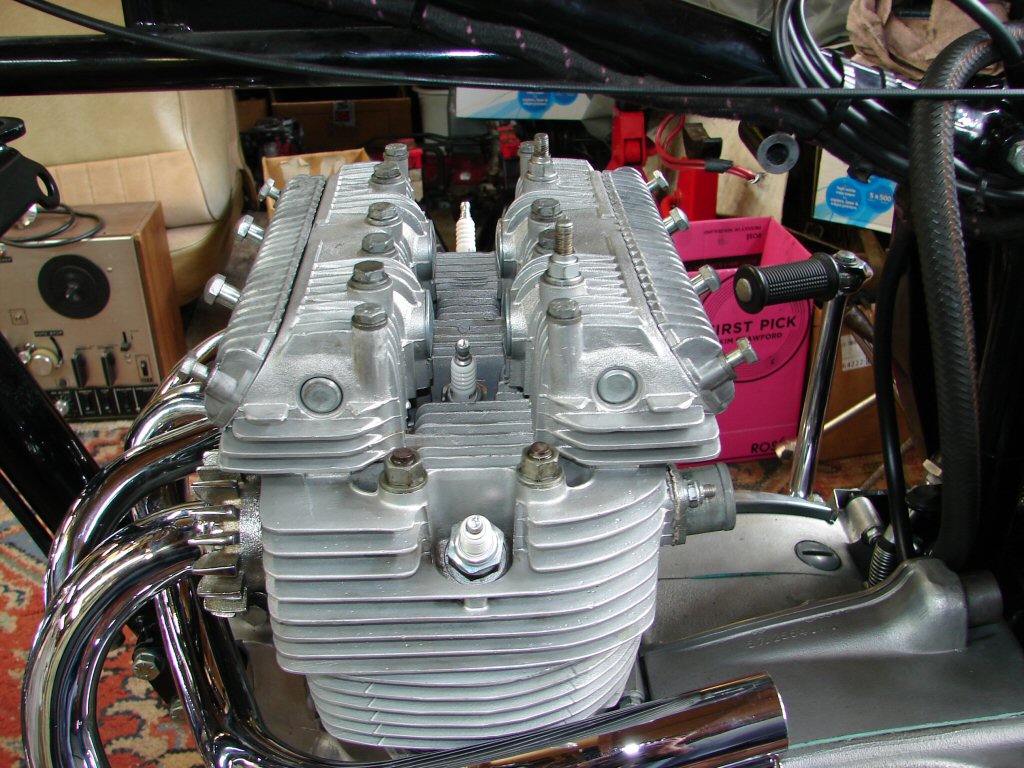
Exhaust rockerbox fitted up without any issues and the head bolts tightened in sequence to 18ft/lb.
Using my T160 as a reference I turned the engine over and checked the positions of the valves on No.3 cylinder through the spark plug hole while using a piece of wire through the No.1 spark plug hole to gauge the position of that piston. To my naked eye I got the impression that the exhaust cam timing on this engine might be fractionally further advanced than the T160, so I will be keen to check that bike using my new method when its barrels come off for a pillar bolt repair. Or two..
Time out for 24 hours.
I loosely fitted the rockerbox covers to ensure there was no interference between valve adjusters and covers with no gaskets fitted, which is a worst case scenario. All good, although there is damage to the inside of the exhaust cover from some previous event. Possibly overtightening, but someone has subsequently had a go at it for no apparent reason.
All valve clearances were set to one quarter turn as the head will be retightened tomorrow so no point in getting fussy at this juncture.
Rockerbox cover has been PO'd.
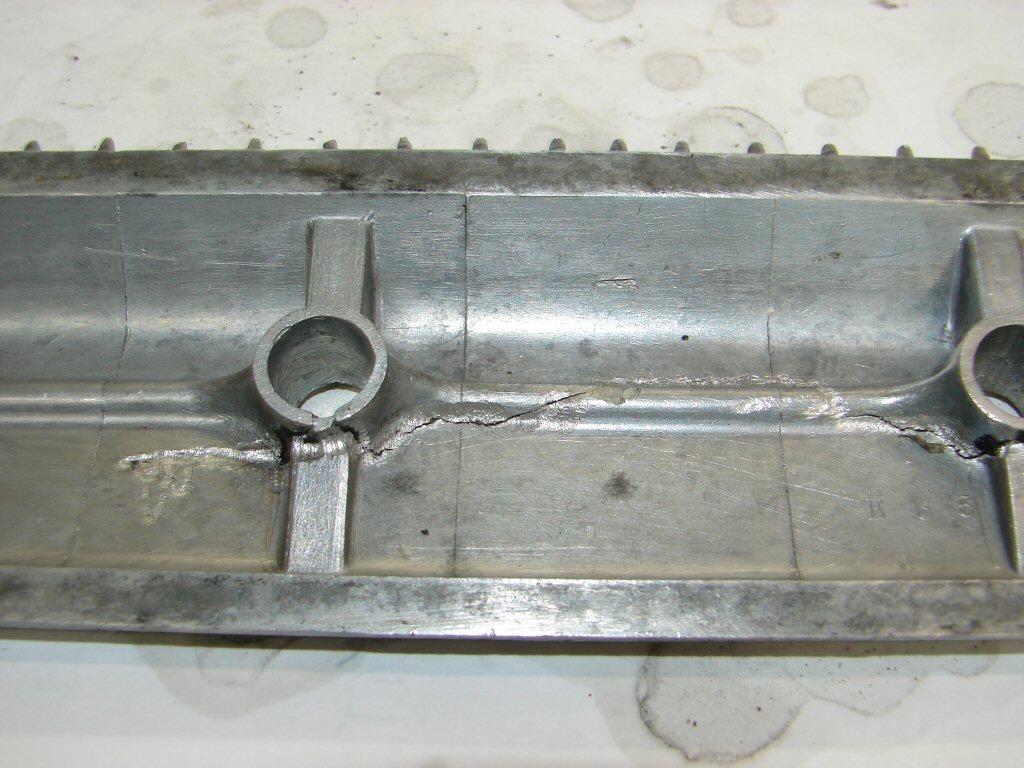
For the uninitiated - PO means "Previous Owner". Which previous owner of course is up for conjecture. Many battle scars are carried forward for decades on all types of vehicles, but I feel that British Motorcycles often display some of the worst. Lets face it, many people in the era concerned bought motorcycles instead of cars because they were cheaper. This would also often lead to highly unskilled owners having a go at fixing it themselves, and without some basic understanding of engineering principles, this can go quite badly.
Apart from my own machines - which I know inside out - I treat all vehicles as an unknown quantity. This means that you do not assume that it was ok before you pulled it apart, and every single part is to be treated with suspicion. When doing routine maintenance one has to accept that there are shoddy bits in service, but your brief does not extend to putting them all to rights. During a rebuild, any crappy part that you fail to attend to may undo everything you have attempted to repair, so a different story completely.
While this rockerbox cover does not pose any threat to the major engine internals, it may prove to be a source of oil leaks, so at the least I will seal it internally. What is more significant is that someone appears to have run a light grinder along the back of the crack, then simply left it at that. The same level of expertise seems to have been applied during the original restoration process in the 90's, but so far perhaps confined to the engine/gearbox unit which I understand was farmed out at the time.
While it would be nice to simply replace every part that did not look top spec, it is neither cost-effective, nor in some cases possible due to supply availability. I will use my judgement on what passes muster and what does not. I am thinking that is part of my role after all.
Today I retightened the head and set the valve clearances to 8 and 10 thou. All the inlets were spot-on so 1/4 turn seems close to 8 thou. The exhausts needed opening up a tad but once again were uniform. Nice. Rockerbox covers and head steady also fitted.
I had previously noted that there was seemingly a path for the tacho cable to sneak through the new headers. When I tried to fit it today I found that the long steel sleeve at the lower end clashed with the headers and I could not even begin the thread onto the drive unit. I had another cable in stock so I made a comparison. This item had a much shorter sleeve such that I was able to fit it. Yay.! In order to keep it as well clear of the pipes as possible, it seems it will need to run up the inside of the oil cooler..
Touch - or not - and go..
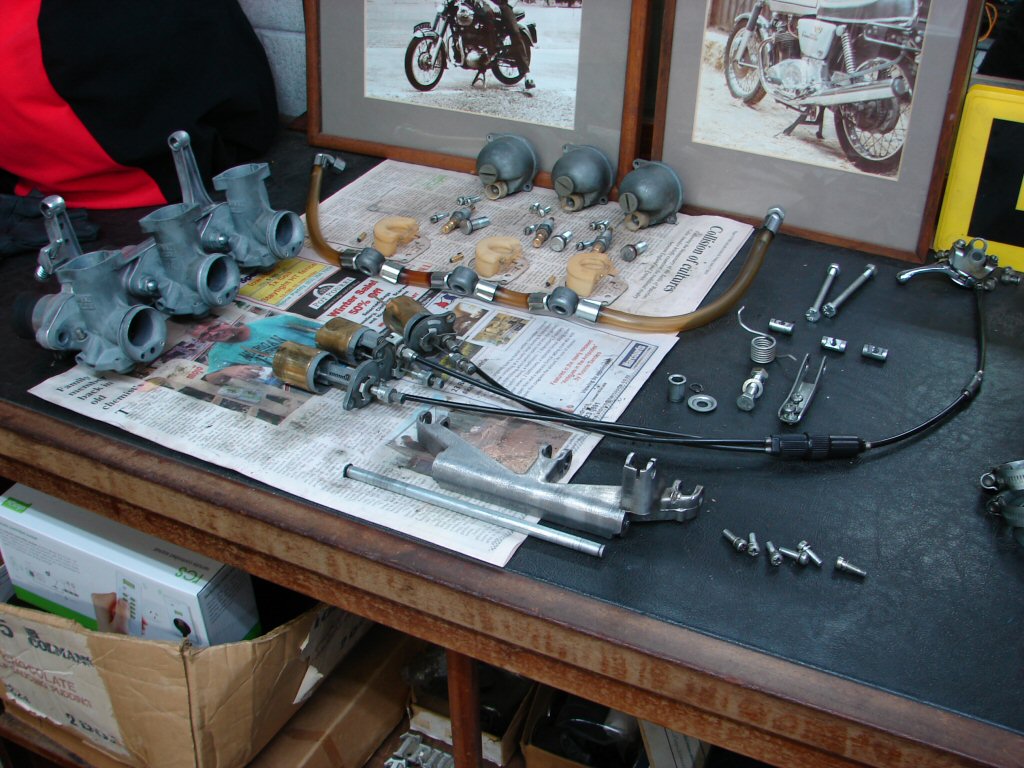
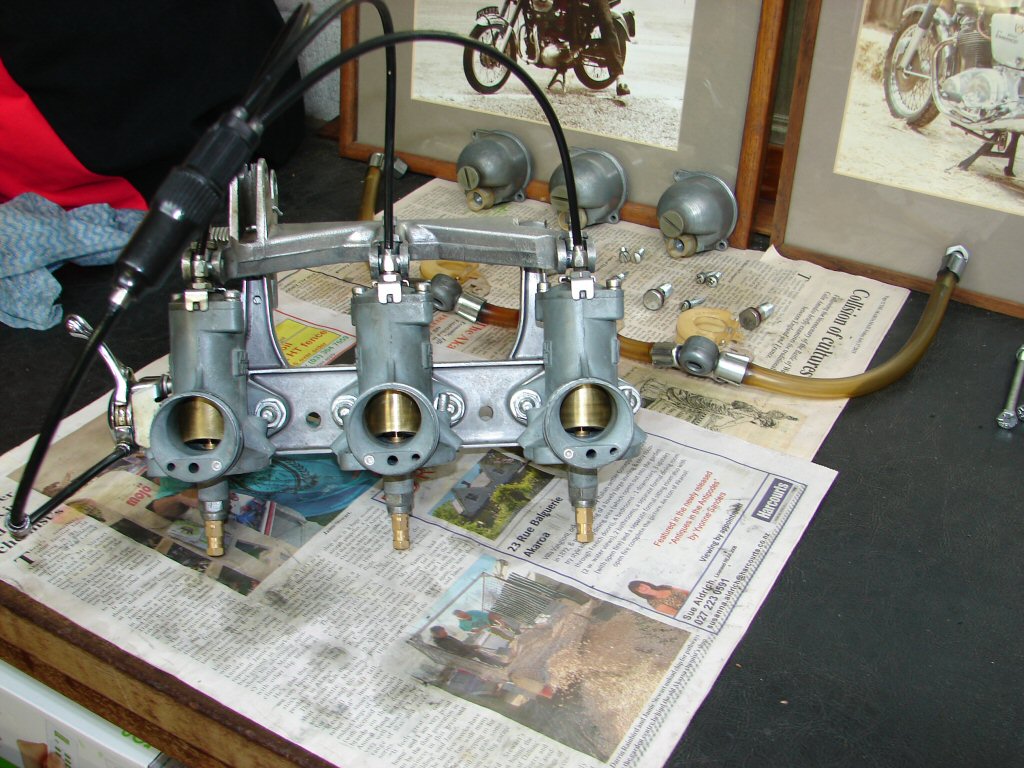
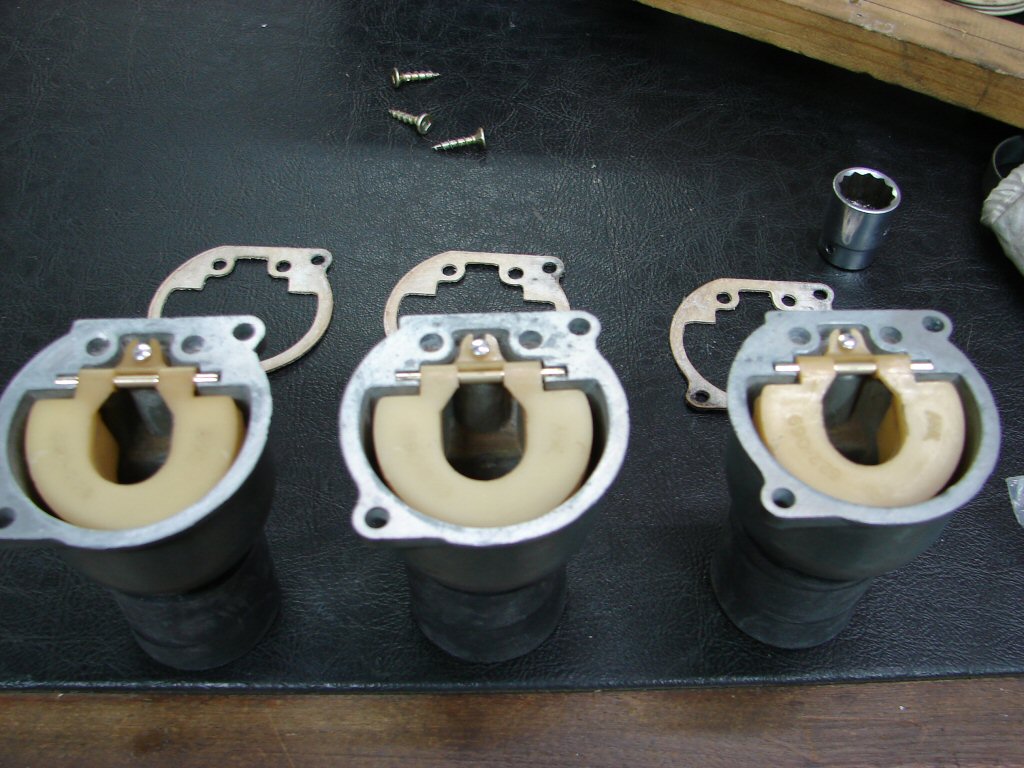
I then dragged the carbs out of the loft and pulled them apart. Nice to see that the slides have been brass sleeved. They will simply need a polish. All the jet sizes and settings are by the book, but the float needles are the brass type. I will swap them for the lighter alloy ones. After which I will check the float heights with an arrangement I have not yet constructed. I'm sure it will be another fun thing.!
Some signs of corrosion evident but most parts have obviously been treated to some serious plating work during the 90's rebuild. The bushes in the linkage setup were totally shagged, so they did not extend their attention that far. One of the choke cable abutments is also stripped. Not sure if the chokes are even needed on this bike, but I would prefer to leave them there as lip service to originality.
They consume a huge amount of bench area when stripped.
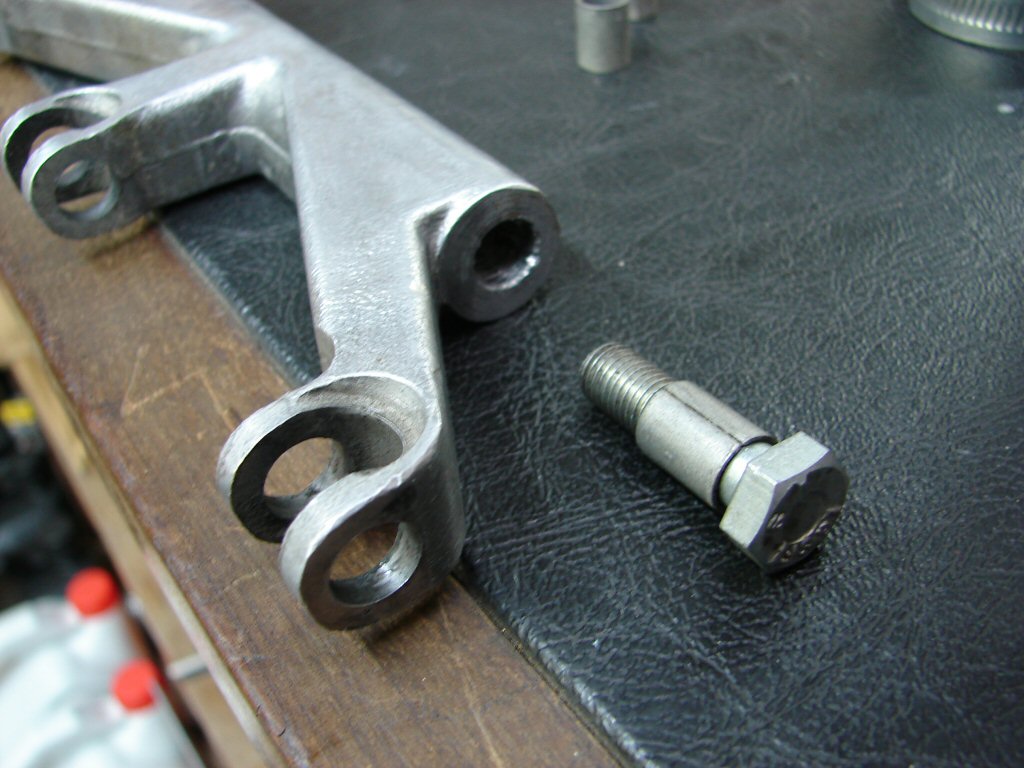
Long ago I discovered a really easy way of removing the throttle linkage bushes. First you run a drill of 21/64" through each bush which removes most of the soft bearing material.
Then you run an 11/32" drill into each bush - I use a battery drill which is easy to control the speed on - and within the first quarter inch the entire bush begins spinning and you can simply draw it out with the drill. No trauma whatsoever.
To fit the new bushes I find a bolt with 1/2" head, which has a shank size of slightly less than 5/16". The shaft is exactly 5/16" so the bolt has a little extra clearance. Pop the bush on the bolt, apply a squirt of WD40, then sitting the opposite end of whichever part you are working on against the top of the vice jaws, a few light taps with the copper mallet and the new bush slides easily into place - once again - with no trauma.
Easy as pie..
When working on the two unsupported uprights on the inlet manifold you must be sure to place the lower edge of the one you are working on against the vice in order to fit the new bush. They are prone to breaking if you should attempt to drive the top bush in while supporting the lower and vice versa. They were not designed to withstand stress from a side load.
Assembling it all up the difference afforded by the new bushes is huge, and bodes well for correct and reliable tuning. The choke cables previously managed a complex crossover to the outer carbs, so the cables were removed and reversed. The slides are matched to their individual bodies, either deliberately or from wear, so they stayed put.
Much happier trio.
Next the float bowls. I have yet to find an Amal float bowl which did not require surfacing. They distort at either mounting hole, and if placed against the carb body without a gasket, will rock from side to side with a noticeable gap visible both sides which the gasket would have great trouble in sealing. This encourages both fuel leaking out, and air leaking in, and neither is desirable. A brief rub on some sandpaper on a flat surface is enough to restore sanity.
As the float needles will be changed there may be some adjustment needed to the needle jets to get the fuel height happy, so final cleaning will wait until then. I have also found that the inlet rubbers are past their best-by date, so a new set needed.
Little by little..

Not much I could achieve today, as I am mostly waiting on parts. However, I can always flush some oil from the system while checking to see if any signs of contamination are still present.
At this time I have assembled the oil lines as far as the rocker feeds, with the oil cooler exit blanked off. Cranking the oil pump gear manages to drain the crankcases while pumping more fresh oil through the bearings. I found only one spec of metal in this bleed off. That is encouraging.
Purging..

Next job is also one involving cleaning. This time the oil cooler. Rumour has it this will prove to be rather difficult, but as I am always keen to keep original parts in service, I figure it's worth a crack.
Method is to fill it with petrol and let it soak for 24 hours. Then drain it and see what comes out. It is the ideal location for metal fragments to come to rest, so I shall have my work cut out trying to remove all traces of what I figure is inside it.
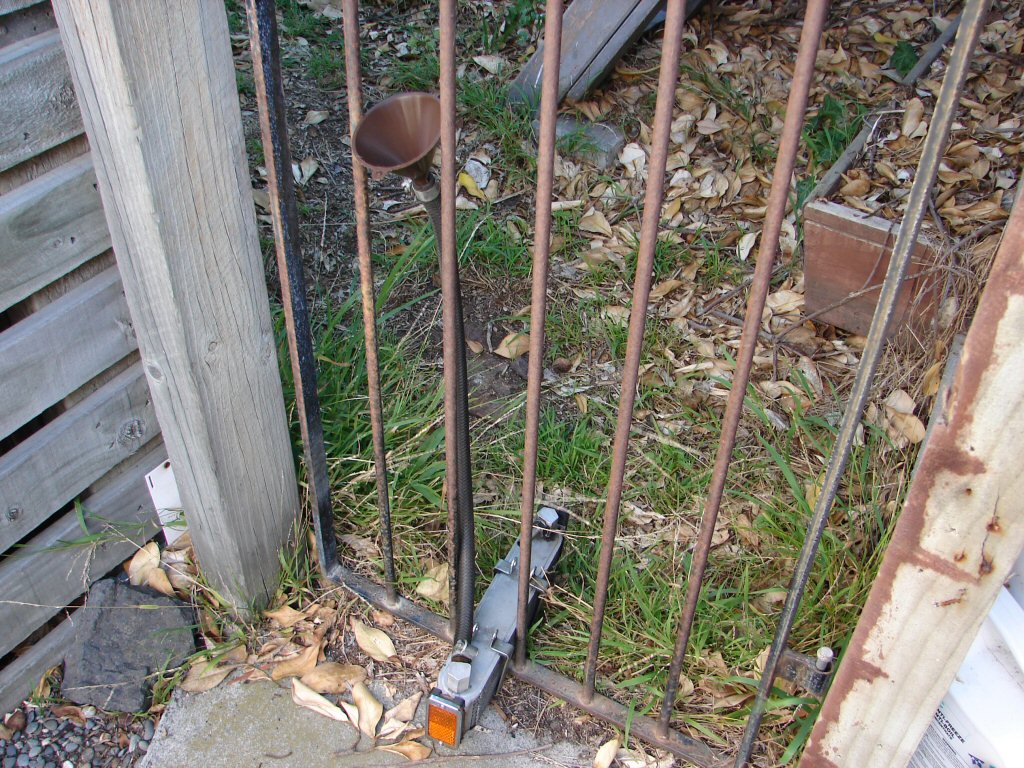
Reason for having gate..
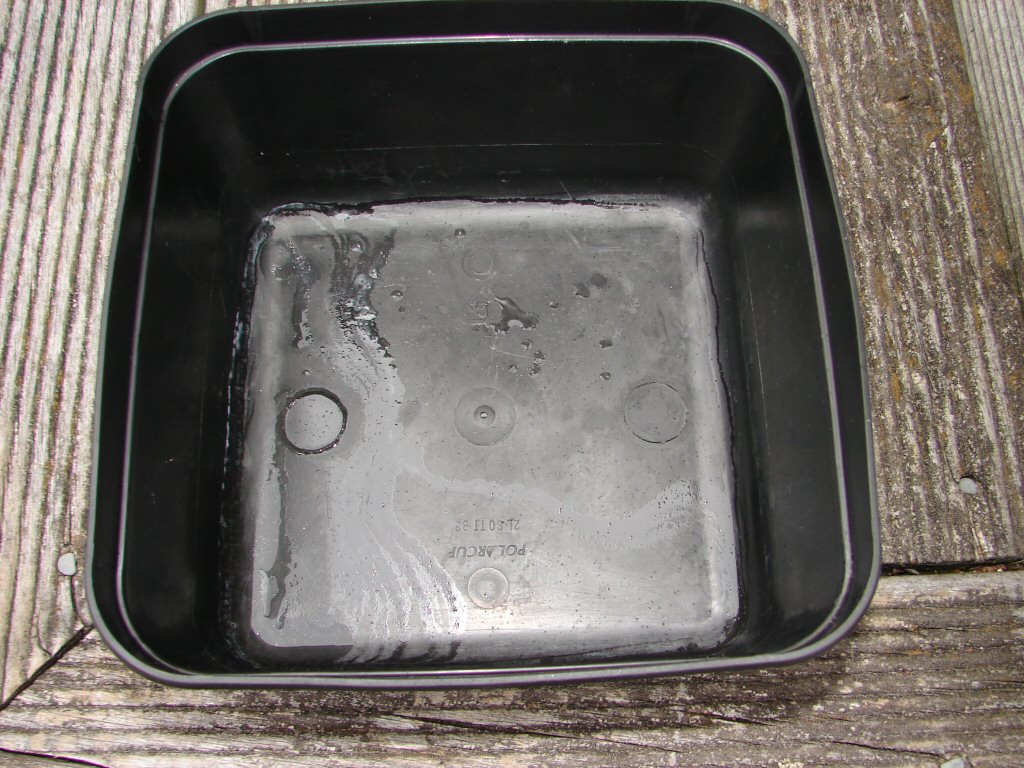
It took around 300ml of petrol to fill it completely - somewhat less than I thought it might hold. I will leave it in the sun tomorrow - 25 degrees C should assist the process..
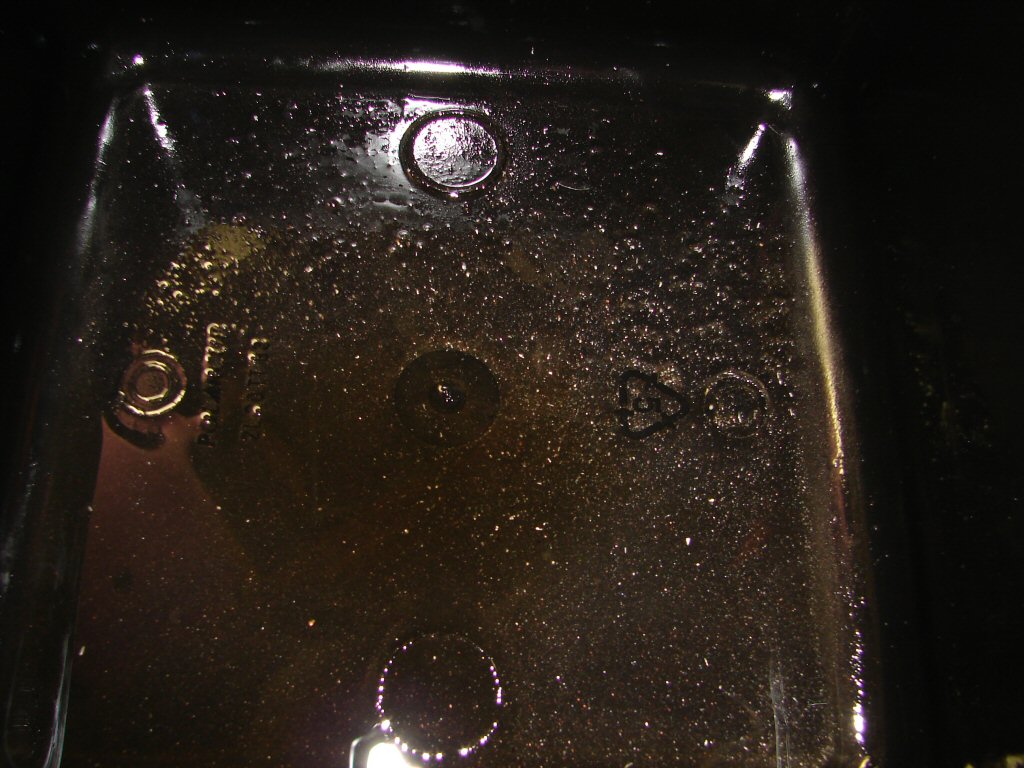
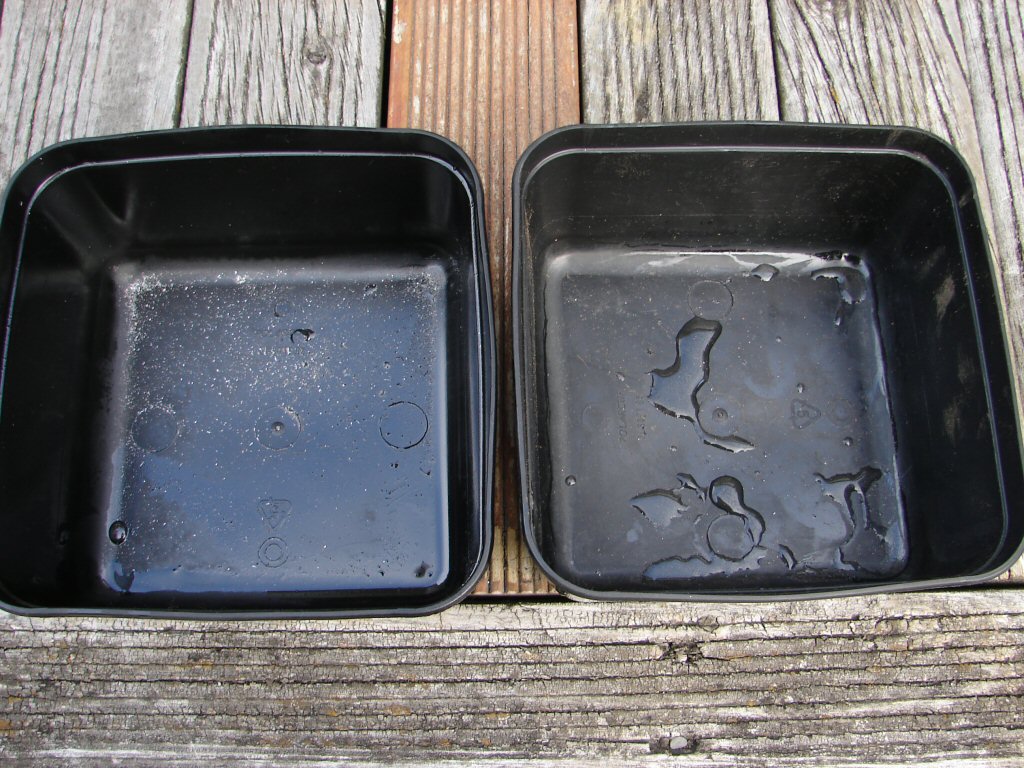
And so it came to pass - I shook it up a bit and drained it into a container. Very much as anticipated. This is the first pass.
Gold in them thar hills..
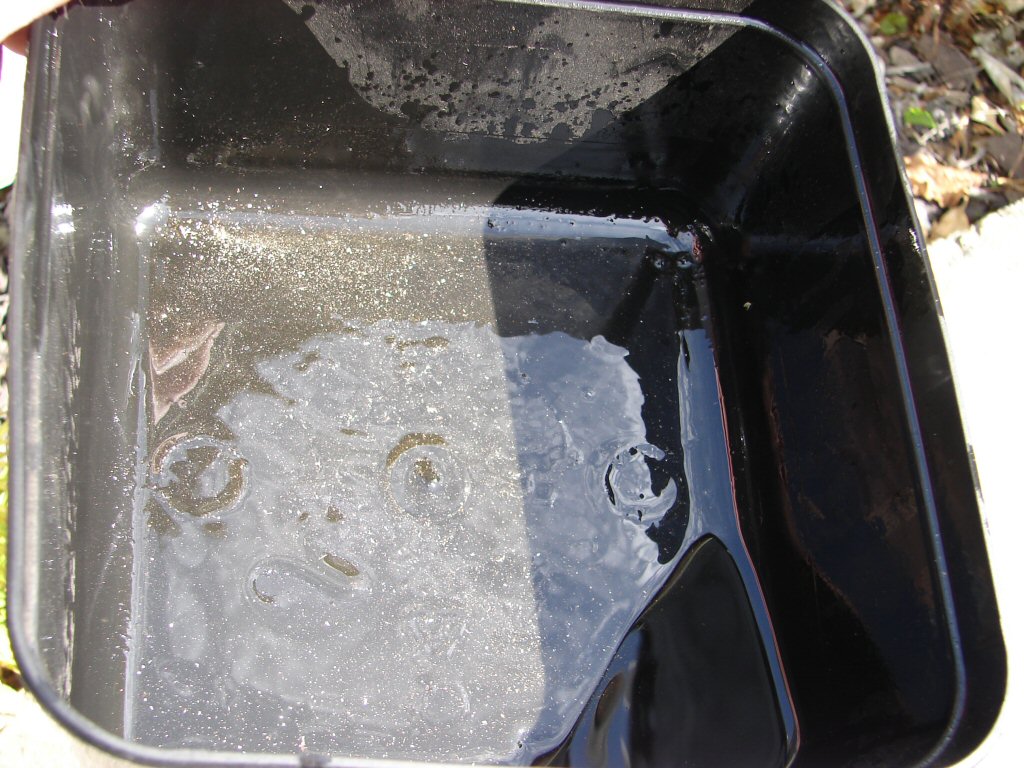
Refill and try again tomorrow.
After another 24 hours of soaking in just petrol, the contents were once again decanted into a container. This time there was much less evidence of oil, so it emptied quicker, and if anything appeared to have been more productive than the first flush.
Grinding paste..
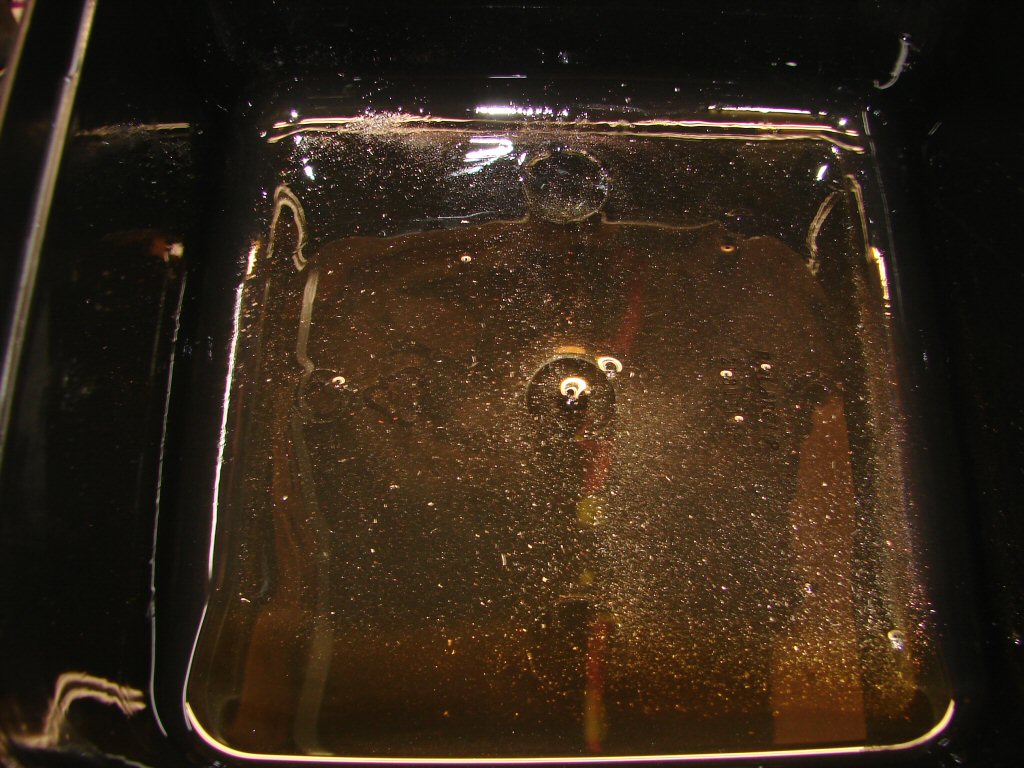
The next couple of flushes will be a good indication of how things are progressing. I do believe I can clean it to the point that I will be able to return it to service. I am also aware that the next point of call is the oil tank - which has a nice screen filter, after which there is the proper oil filter cartridge, so anything I can not detect has a good chance of being dealt with in a non-destructive way. Obviously I plan to do a number of quick succession oil and filter cleans/changes, but in the first instance I will be bleeding off several litres of oil on the first start before it even gets to the tank. I think this is a safe enough approach.
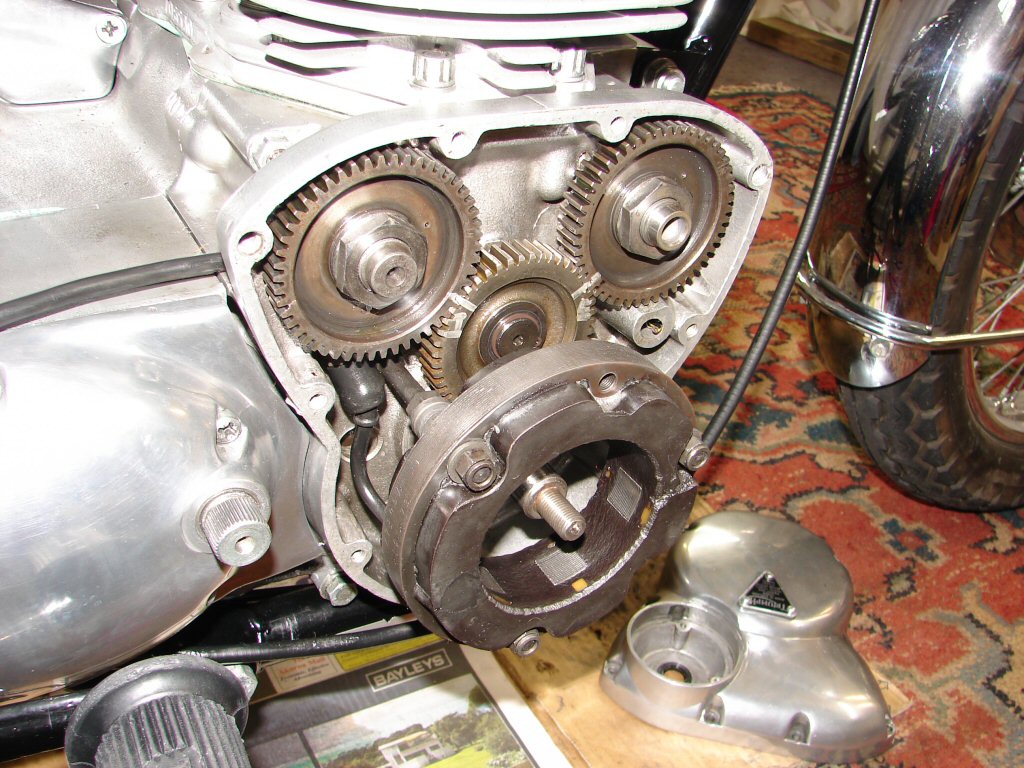
In more productive news, I have begun to complete the primary drive assembly as there is no further necessity to manually operate the oil pump. I now have a fully pressurised system with supply extended as far as the rockerboxes. I checked the supply there and found no trace of anything nasty, so the next step will be to include whichever oil cooler makes the final cut.
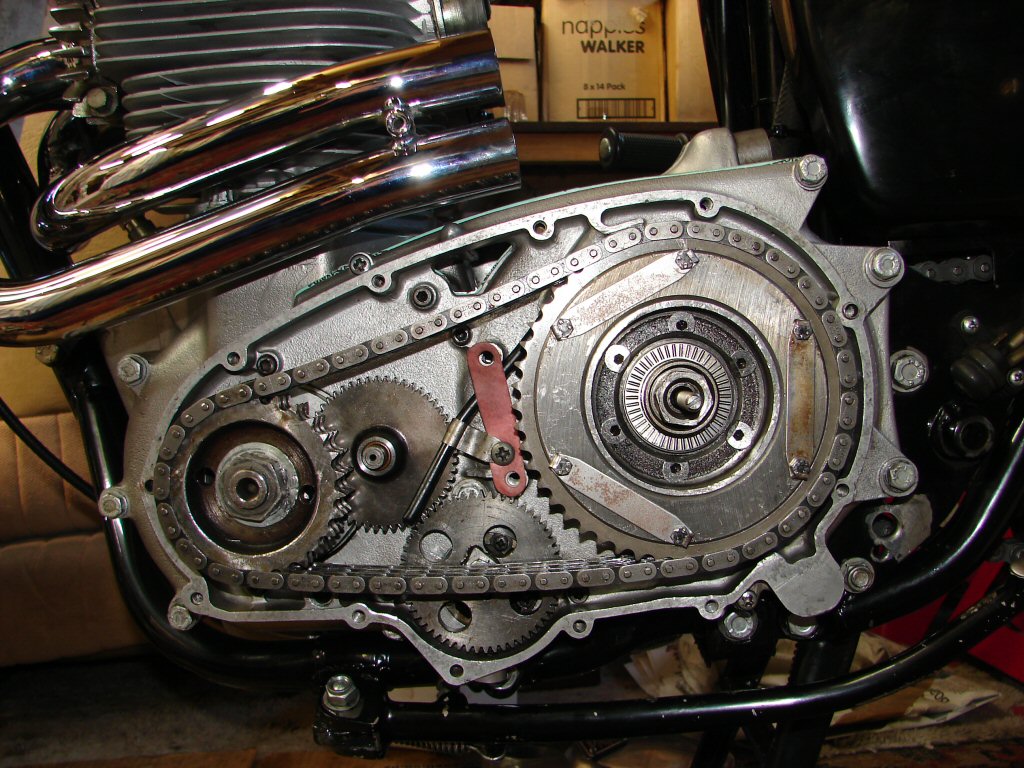
I made a final check of the primary sprocket alignment and simply confirmed my previous findings that I was happy with - so I shall button this up tomorrow. No seal yet fitted to the cush drive retaining nut which seals against the clutch pullrod. That will be the final assembly and will include a little loctite.
Another rather major possible hurdle was dispensed with today and I will comment on that as progress continues.
Today I completed the assembly of the primary drive. Brake lever was temporarily reinstated so that the front sprocket and cush drive retaining nuts could be tightened. Clutch pullrod has cellotape around it so the new oil seal would not be upset when passing over the threaded end. Loctite was applied to the threads on the cush drive nut before assembly. Front sprocket nut has had its locking washer folded against one flat. Oil has been applied to the thrust bearing and other bearing surfaces including those in the outer cover.
My work here is done.

No time to flush the oil cooler today, so it gets another 24 hours to soak. Primary outer cover will be fitted next.
Things that delay progress part III.
I am undergoing some sort of primary drive epidemic. 3 different bikes on 3 consecutive days. First Trevor's careful reassembly, then a T140 Bonneville which needed new chain tensioner and adjuster fitted, then an Enfield 500 Bullet which needed new starter gears...
3 - 2 - 1.
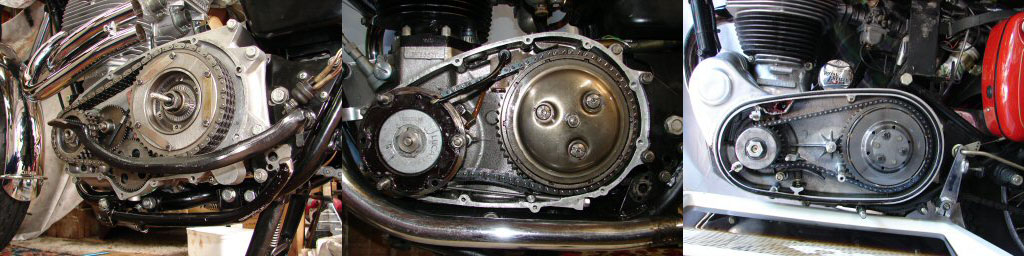
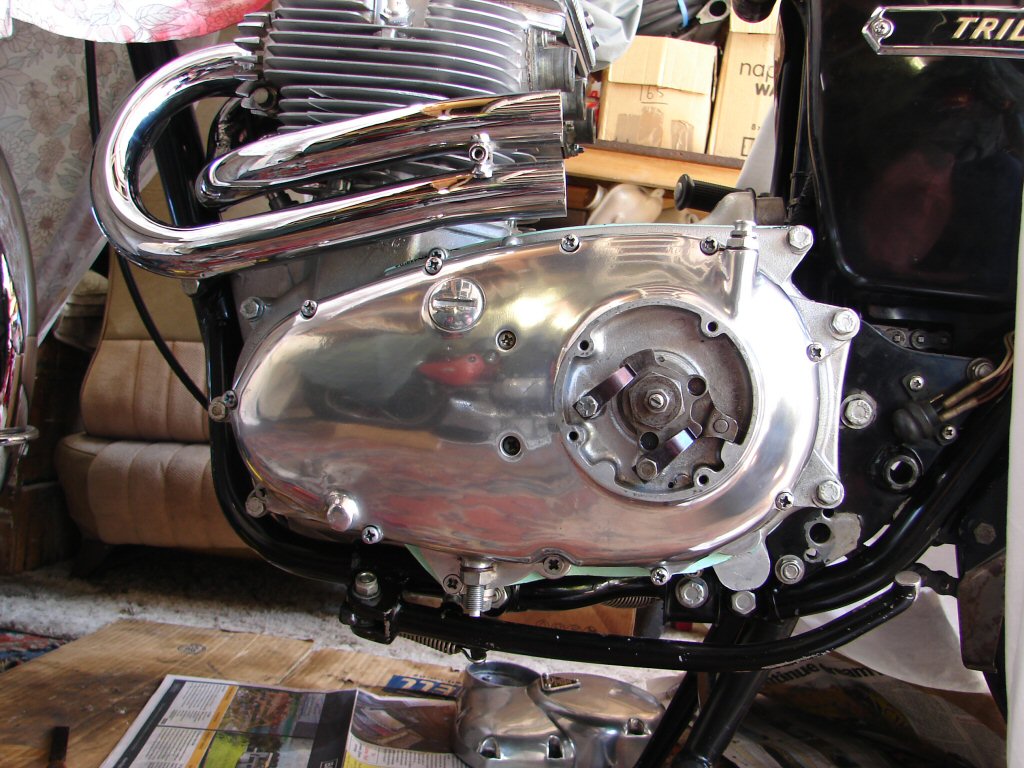
Oh well - I suppose business is business. The high point of the exercise was - Trevor's primary outer case got fitted. Yay.! Clutch operating mechanism fitted but not ready for the cable just yet.
Yes - I admit I polished it. I also adjusted the primary chain and added 350ml of oil - so it is pleasing to see that none has escaped..
Beautiful alloy on these machines.
Final manoeuvre today was to empty the oil cooler for the third time. I am not sure about the photos, but this flush was much less productive than the last by about 50%. I have refilled it and will do No.4 tomorrow.
Bear in mind that so far I have only used petrol and soaking as the active agents. Providing flush No.4 produces even less debris, I will move on to the next stage which will be to force detergent through it a number of times - once again carefully analysing what comes out.
Less is not more..
At least this is an encouraging sign as regards what may still reside within. I am sure we are on course.!
As can happen - progress ceased for a time as I had to do some riding instead of tinkering. Normal transmission will now be resumed.
Parts have also arrived, so for an easy return to duty, I assembled the carbs.
First fitted new aluminium float needles into the resurfaced float bowls.
Manifold rubbers are dual-purpose..
Next step was to adjust float heights as necessary. To do this I screwed all the bowls to a piece of wood, using the gaskets to retain the pivots as they would in service.
My currently favoured setting is to make the floats flush with the top edge of the bowl, and I had to adjust all three valve seats to achieve this. All were previously higher by varying amounts, meaning lower in this inverted position.
I used a small punch through the fuel filters and tapped lightly with a pair of pliers to test for easy movement, and all were compliant enough to move in tiny increments until obtaining the result you see. I did not have to tap them back down again because of overshooting as has happened in the past. I suspect that heating the float bowls with hot water often allows too much movement too easily to regulate accurately. Very happy with how this went.
Floats are in fact clear of the wood surface.

All bowls refitted to original bodies and manifold rubbers replaced. New items were distinctly of thicker cross section, and were also slightly shorter in length.
They fitted easily but firmly, and give the impression of being really good quality. Glad I got two sets.
Damn. Will have to reposition those clamps..
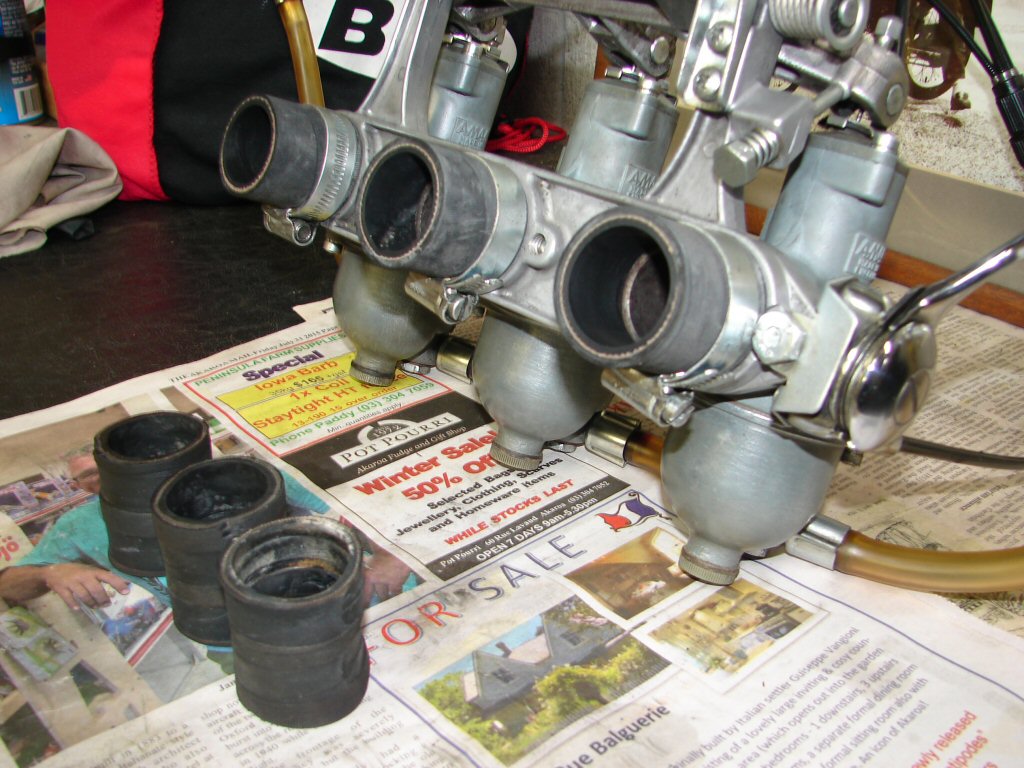
Also had to reverse the fuel lines which I had hand tightened the wrong way round. Such things become painfully obvious as you move along.
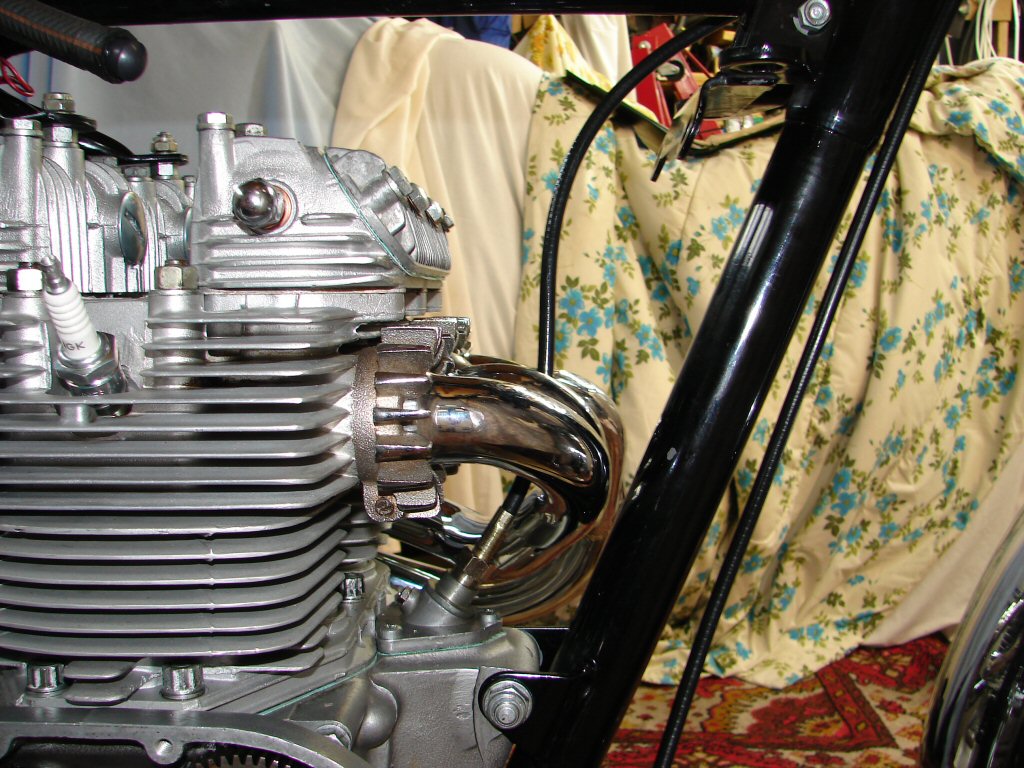
Today the carbs were fitted. What an exercise that was. Things interfered with other things in a most annoying way. I had to remove stuff to fit stuff - something I find rather tedious. The new manifold rubbers were very compliant, but the jubilee clips were a real pain. I ground one flat down on the head of the bolt that retains the choke lever mount in order that the clip could more easily fit behind it. That cured at least one sticking point.
For some reason the aircleaner collided with the frame support before it had travelled far enough to engage with the carb mouths, so I released its outer clamp and attempted to rotate the outer shell around the front and rear plates to ease the situation. It worked, and things assumed their correct relationship. Having spent 40 years with a later T160 Trident I am now extremely grateful that I chose that model as my entry point into Triples. So many features are so much more user friendly for spannering on that compared to this. For example, I can remove the inlet rockerbox cover and adjust the valve clearances on the T160 without removing the carbs - and it is most obvious that will not be such an easy case here.
Exhaust headers do not make securing the carbs any easier..
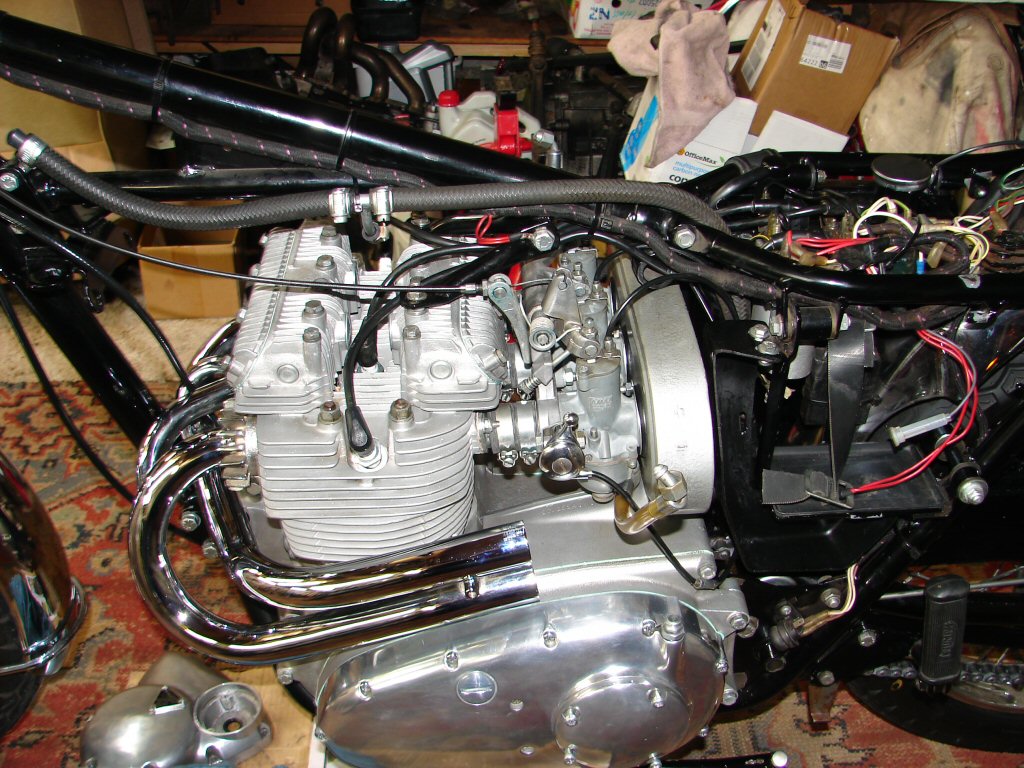
With the carbs finally persuaded into place and secured, the throttle cable was fitted, and the spark plug leads threaded through various small gaps to assume their correct connections. I have full throttle movement with no clearance issues, but may need to reroute the throttle cable once more bits are in place and I can see how they all interact.
As I am awaiting a new timing gear I have been unable to refit the alternator. As the connection point for the alternator lead happens beneath the aircleaner I am hoping I can make that connection without having to remove the aircleaner again. I guess I will become rather expert at that after several head retightens and valve adjustments during the running-in process..
Today I discovered a damp courier package in my letterbox. Yay - the missing link.! I would now discover whether the intermediate timing gear shaft was worn, or oversize, or other.
First I copied my timing marks from the old gear to the new. Next I used my oilcan to pump oil backwards through the supply holes in the shaft and heard it escaping within the crankcases. After then oiling the shaft and teeth thoroughly I trial fitted the new gear - absolutely perfect sliding fit. What a wonderful moment. I had to take some valve spring pressure off the inlet cam for the marks to align, then it all slipped neatly into place. Thrust washer and new circlip then fitted.
Timing is everything..

I fitted the rear brake lever and tightened the camshaft gear nuts. Was tempted to use a light smear of loctite but chose not to, as they are left-hand thread so should be uninclined to loosen themselves.
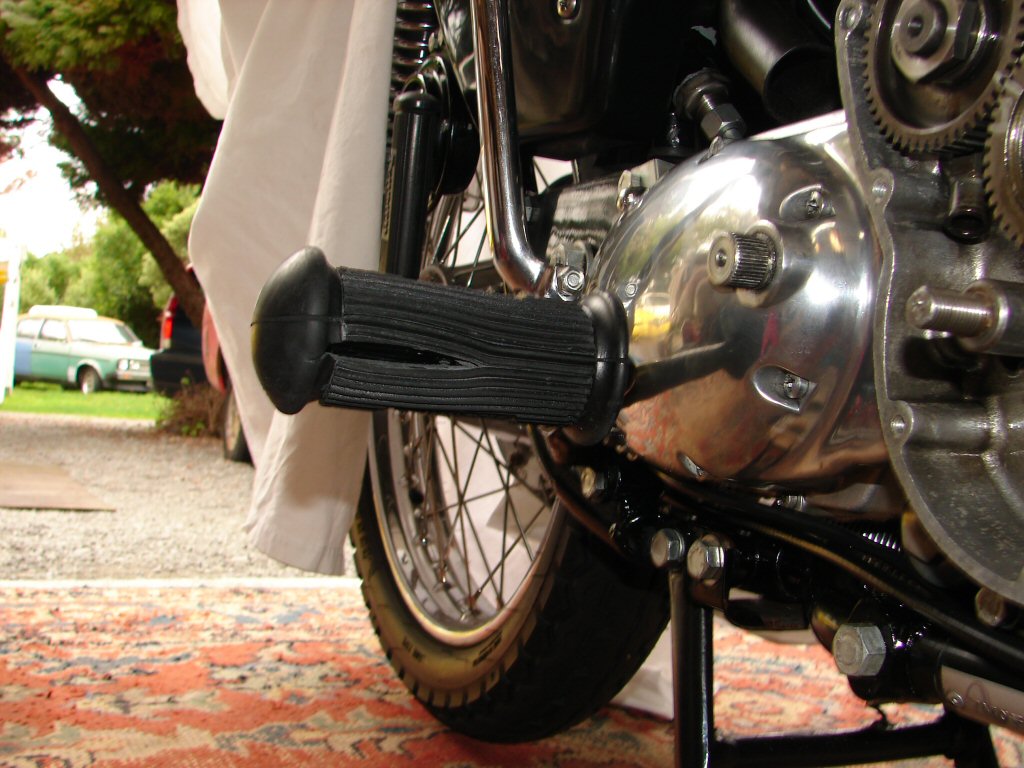
Because I was working on the right side of the bike I decided to also fit the new footpeg rubber. It split. Whoopee.
Don't make 'em like they used to..
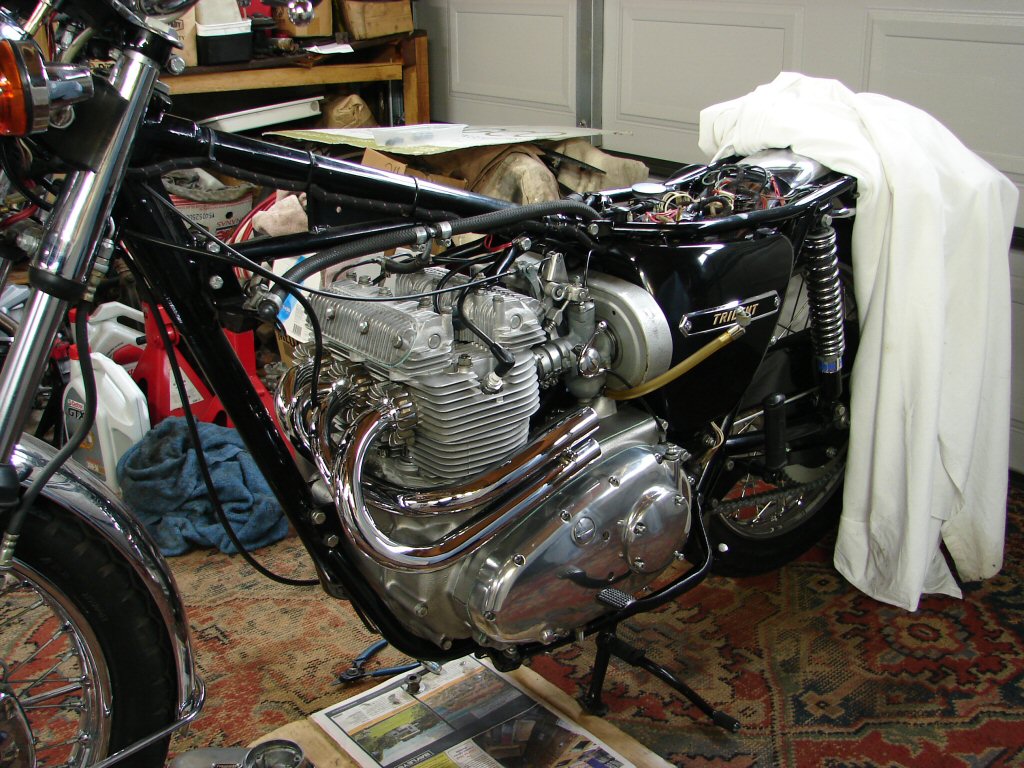
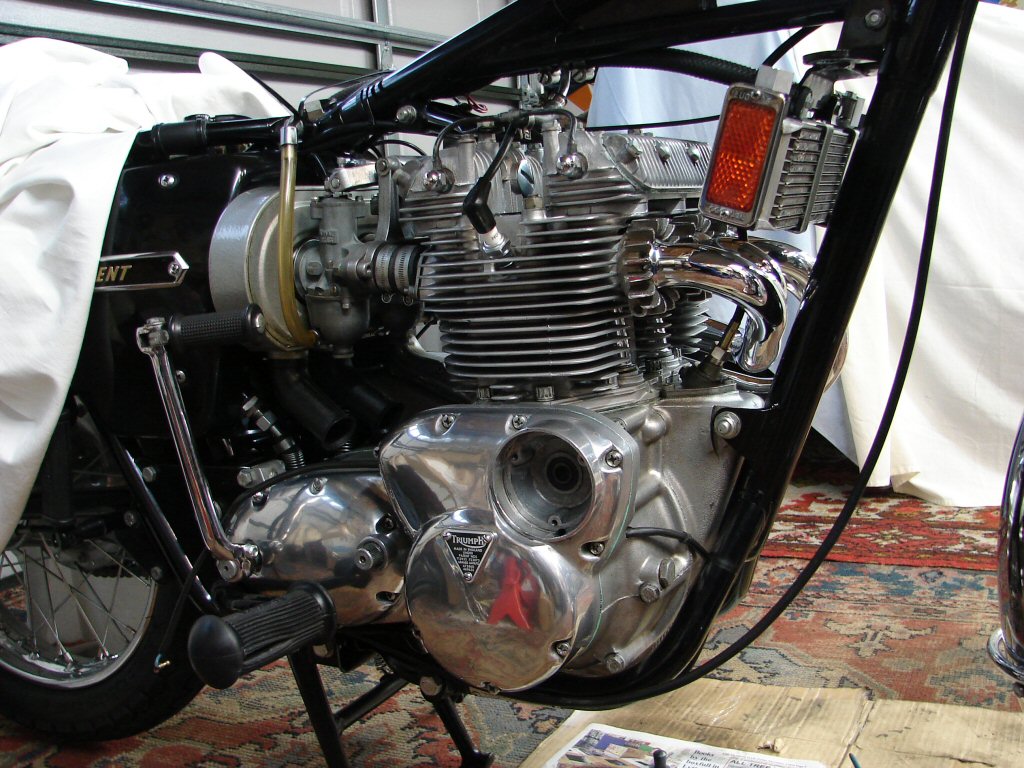
In order to restore any lost mojo, I refitted the sidecovers and took a photo of progress to date on the left side. I think this is looking real fine.
Morale booster pic..
Meanwhile the oil cooler has been languishing in the lawn mower shed. Because it reeks of petrol. I think it has marinated for two weeks now. Not a cunning plan - simply lack of time to attend to it. Shall do so next.
A few hours spare on a busy weekend. Decided it would be nice to complete the timing side by fitting the alternator and closing the whole thing up. Got the alternator mounted up and half tightened, during which process the wiring can be fed through to the outside world. The internal grommet is fine for re-use, but I have no external sleeve to hand. Seems it may be the same item that seals the ignition pickup - have not checked part numbers yet.
Energy centre..
I pinched the mounting bolts up then fitted the rotor. At this point it is necessary to ensure there is consistent clearance between the rotor and the alternator - there seldom is. I use a soft mallet to tap the alternator in the direction necessary to even things up. This unit had an average clearance of 10 thou, but most of it was on the rear side. I managed to even it up with a few well aimed blows, but after completing the tightening of the alternator mountings things had reverted a little. A few more encouraging taps resulted in a nice even gap so I left it right there.
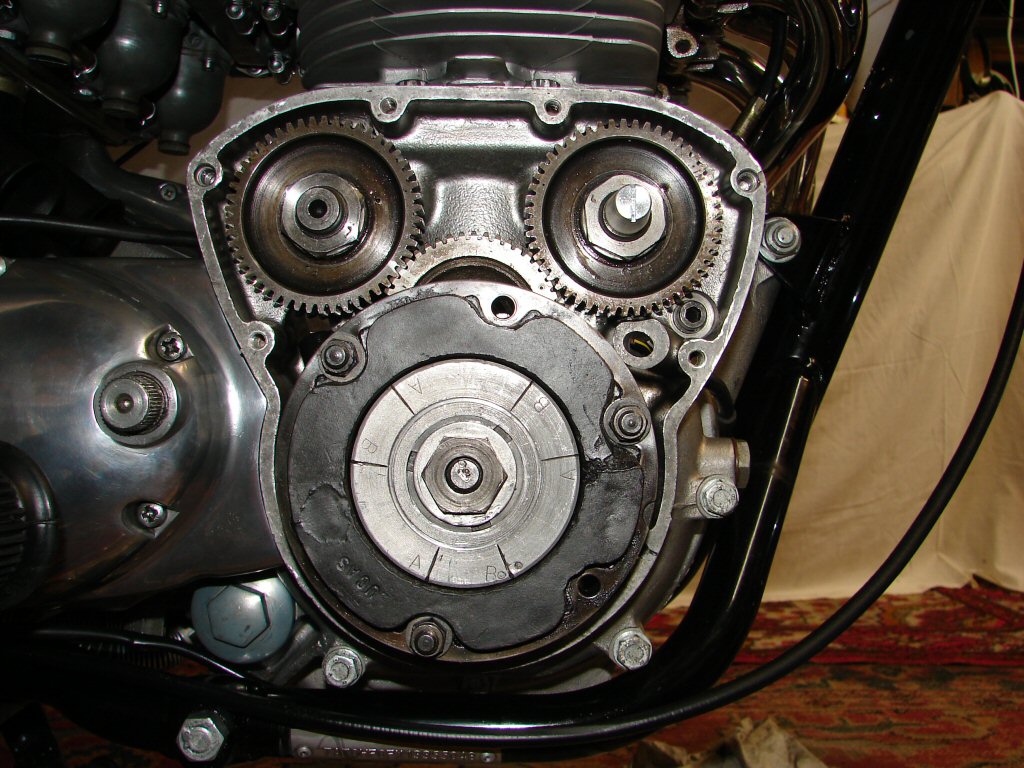
Rotor was finally tightened by locking the rear brake in top gear, and is complete in this pic except for folding the locking washer against a flat of the retaining bolt.
The guide for the timing cover oil seal is in place in anticipation of the cover being fitted. One of only two special factory supplied tools I own, this one earns its keep regularly. This particular seal is one you do not want to have trouble with, as its integrity prevents oil messing with points or electronic ignition pickups.
A friend called in while I was attending to these proceedings. While we were talking - me on the timing side - he said "I see a potential problem.."
Not something you want to hear, but he knows his way around these bikes and I let him explain. I had not even bothered to yet point my mind at the area he was observing, but it promises to be a tad gritty.
This is a '73 Trident but features the final version of the T150 aircleaner. It has a couple of "snorkels" leading down on the right side for sucking air, and which had already caused me a slight problem. This new issue was however simply related to the sheer size of the thing. It is so wide that it overlaps the left sidecover by several inches. And that places it neatly in the path of the hi-level exhaust system.
There is no way I can fit the next section of the exhaust with this aircleaner in place. There is a slight chance that I may be able to fit the pipes with the aircleaner removed - then refit it - but I suspect it may be too close for comfort even if this approach works.
Collision course..
Once again, it was inevitable that there would be issues to overcome when trialling this new approach, this one seems to suggest that an earlier version of the aircleaner would provide the needed clearance, but that would be another deviation from original style.
I decided to email the owner for his opinion.
So that's where I am right now..
But now I am back in the lawn mower shed. Time to resume my attempts at cleaning the oil cooler. First I emptied the petrol which has been sitting in it for several weeks. This resulted in a reasonable efflux but significantly less than the last one.
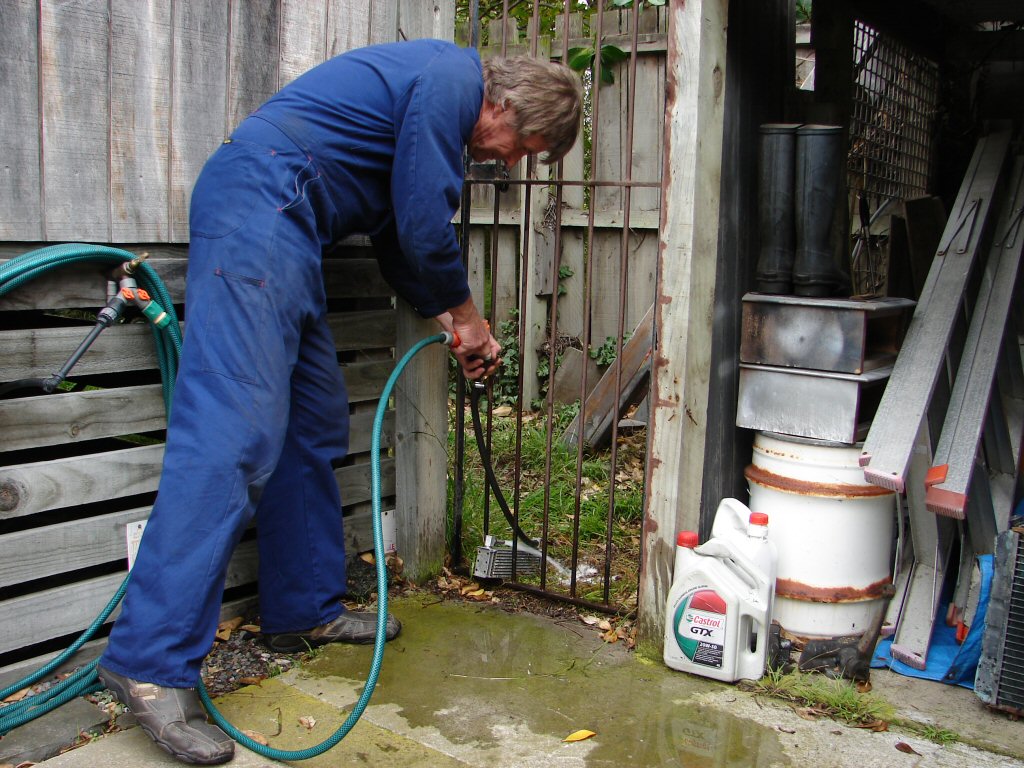
Time for another tack. The most painful stuff I have ever washed my hands with is called Napisan. It is a stain removing powder you add to your washing machine - so I figure it must be a pretty aggressive detergent. I mixed some of that in a small bucket of hot water, and proceeded to fill the cooler with it, then blow it out. I got about 6 rinses from that.
Next I ran the hose through the cooler by squirting the nozzle into the small funnel I have used for all the flushings so far. This probably lasted for 20 or 30 seconds. I swapped that for the airgun and blew compressed air through it until I could not detect any more moisture escaping.
Finally, I squirted a fair amount of CO contact cleaner from an aerosol can into the cooler and shook it up for 15 seconds. I then emptied that into a second container. Here are both the first and last flush results today.
Serious progress..
There are still a few specs of debris in the final flush, but probably 1 percent of the first one. I think that the detergent has really loosened things up, and I will give it pretty much the same treatment when I next attack it.
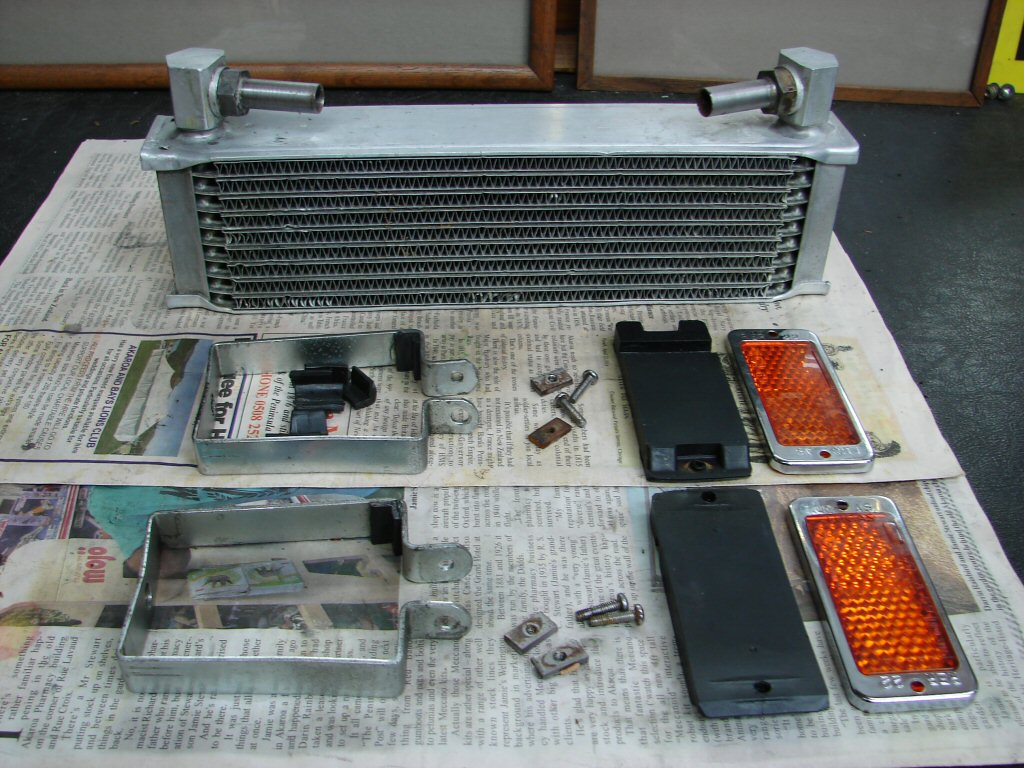
Having rid the cooler of any signs of oil I then cleaned it up, removed the mounting brackets and reflectors, then spent quite some time cleaning off the old contact adhesive. I will be wiring the reflector mounting blocks to the cooler as well as using adhesive when it is assembled so that the reflectors will not go missing. It is worth taking a few extra steps to make sure original Lucas items remain safely attached.
Somehow the cooler looks much less frightening today.
I do find the cleaning process rather tedious as it feels that little or no progress is being made. It is however most necessary, so it is just a matter of choosing the times when you can be bothered.
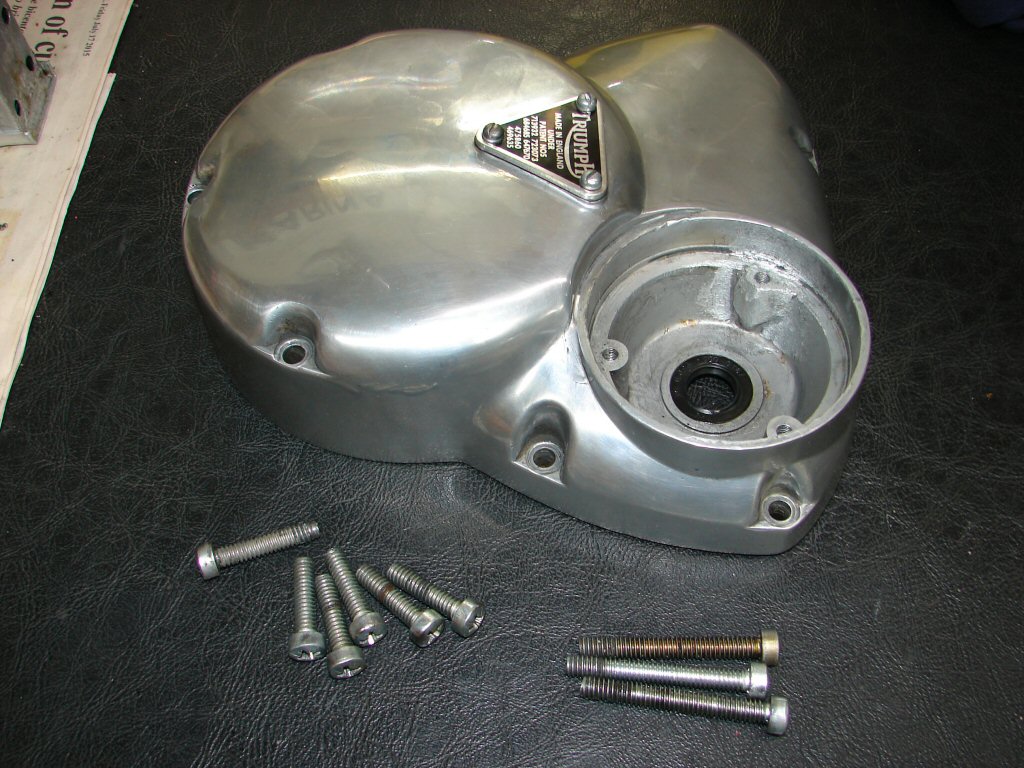
To thus cheer myself up, I also gave the timing cover a quick degrease and fitted a new seal for the ignition pickup. Incredibly, someone seems to have destroyed one of the pillar bolt threaded bosses at some stage of the life of this well-travelled veteran. The repair lacks a little in finesse, but it obviously does the job so will be ignored. Tomorrow I will install the cover and begin installing the ignition while I still know the engine is sitting exactly at TDC, as the timing marks are about to disappear.
While timing is everything - so is knowing exactly where you are.
That should polish up well..
Another day and I feel like continuing the oil cooler assault, as I am encouraged by the progress. Another quarter bucket of hot water and Napisan which got me about 8 or 9 flushes.
I have a nagging suspicion that the grass here will never be the same again.
Lavishly equipped workshop..

Slightly different modus operandi this time - I used the garden hose to power each detergent rinse through until only clear water was coming out.
No way of knowing whether much rubbish is being displaced, but as every flush I have done has been in the reverse direction to normal flow, I cannot think of anything more effective.
Strange pastimes part III..
When all the detergent was gone I used the airgun to blow all the moisture out that I could see emanating at speed. Still a few drips each time either end pointed down though. Devious contraption this cooler - no wonder it retains grunge so well.
Finally, a flush with some contact cleaner, a swill around, and lets see what its got.
Not a hell of a lot..
The camera is picking up small lumps which are actually bubbles, a mixture of water and contact cleaner. There were a couple of specs I could see with the naked eye, but I could not feel them with my fingers. We are reaching microscopic proportions now, and I am going to cease this approach.
I will fit the cooler to the bike, and during the first couple of starts I will simply bleed several litres of oil into a container. I think oil will achieve what my concerted efforts have missed. Command decision.
Now - if you have not seen the next procedure you have not been around triples for long enough.!
First you drill four holes in the end rubbers which match the position of the upper and lower holes in the ends of the cooler. Never, repeat never, drill these holes with the rubbers still against the end of the cooler. Measure it up and drill it on the bench. One reader knows exactly what I mean.
On the reflector side a sharp blade is used to cut a small valley between the holes, making sure to retain your correct number of fingers.
Aerodynamics are not a consideration..

Next step is to use some short lengths of light gauge lacing wire or lockwire to make loops through the previously described holes.
No factory part number for these..
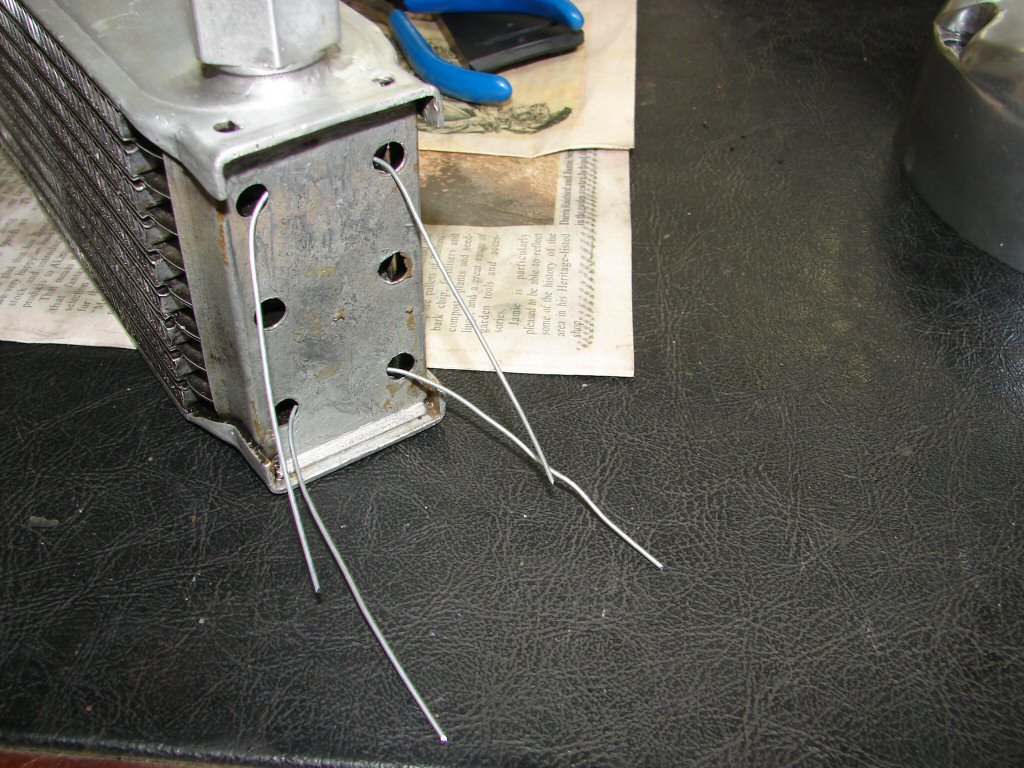
While these wires are going to secure the rubber ends to the cooler, they are really a safety measure to prevent loss of the hard-to-procure original Lucas reflectors should the glue decide that 40 years is long enough to stick around, as it were.
So - I still use glue, but now I only use silicon sealant rather than Ados F2 which makes any future cleanup a far simpler task than getting the yellow stuff off. That was a large part of the time taken yesterday.
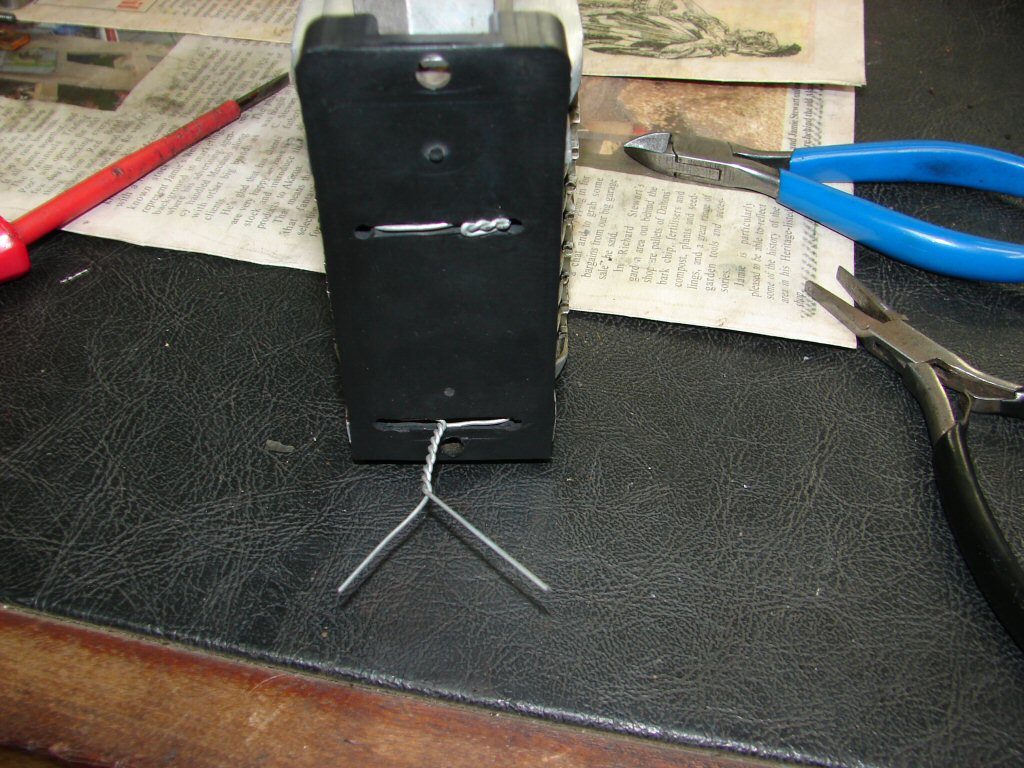
Note: that final twist of the wires is the one that makes them snap off forcing a restart. Don't bother. They do not need to be super tight - they are a fallback.
Aint gonna lose these babies..
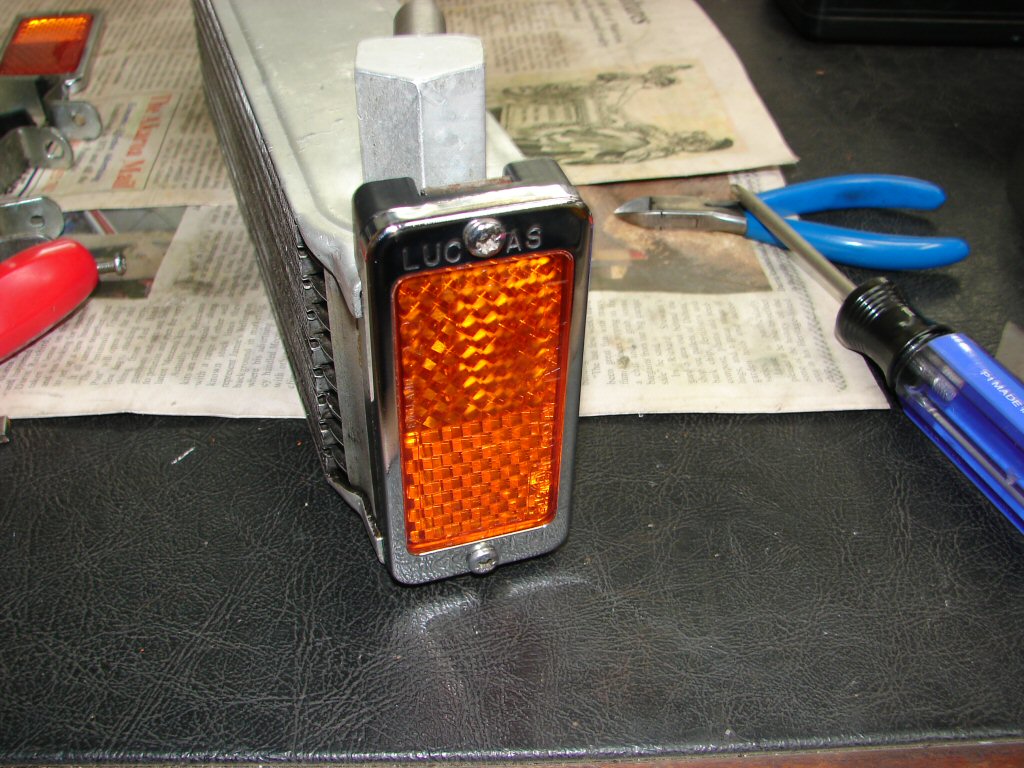
And there you have it.
Attach your precious reflectors with some degree of confidence in their continuing contribution to 70's styling icons.
Purty..
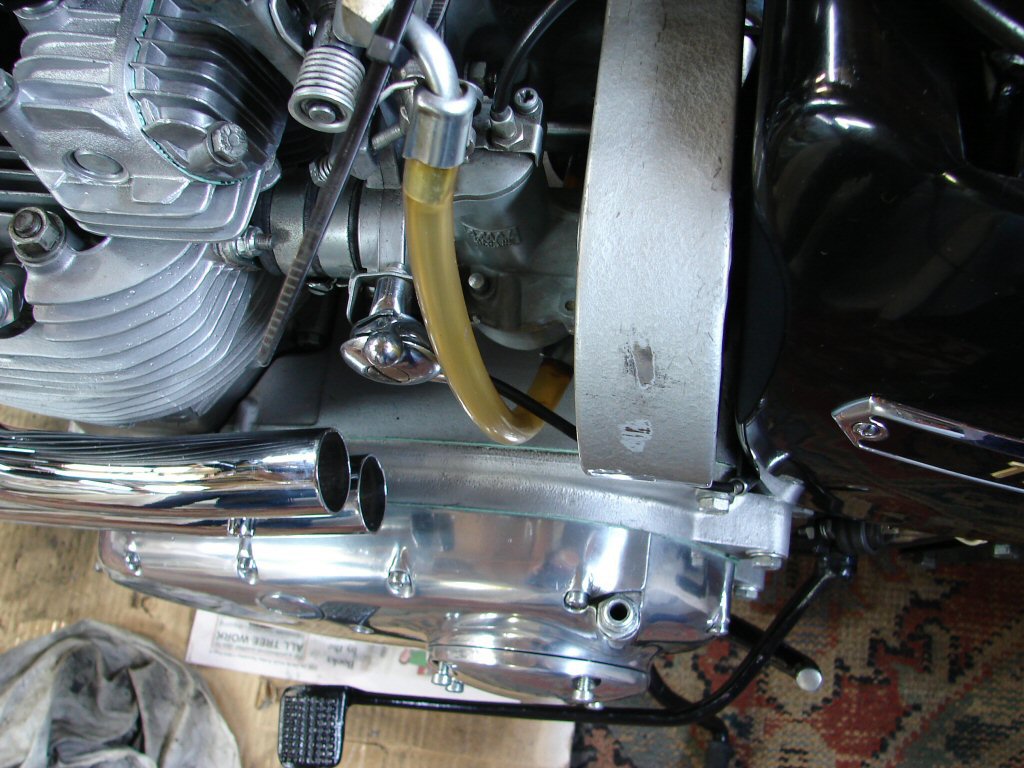
Nothing for it but to fit it to the bike then. Something I was not sure about until this took place was the routing of the tacho cable which had been forced to run almost vertical to escape the ravages of superheated exhaust manifolds. There is some more work needed to seal the base of the cable to avoid oil leaks, which I am hoping an o ring will solve, but I needed to know that the cable and the cooler could co-exist in this manner before getting too technical. I may yet need to put a set in the metal sleeve at the lower end of the cable, but we shall see.
A few more minutes work saw the timing cover fitted as well, so a quick wave of the polishing rag and here it is. The most assembled it has yet been. Yay.!
Damn that peg rubber..
Time for Part IV.