February 2023
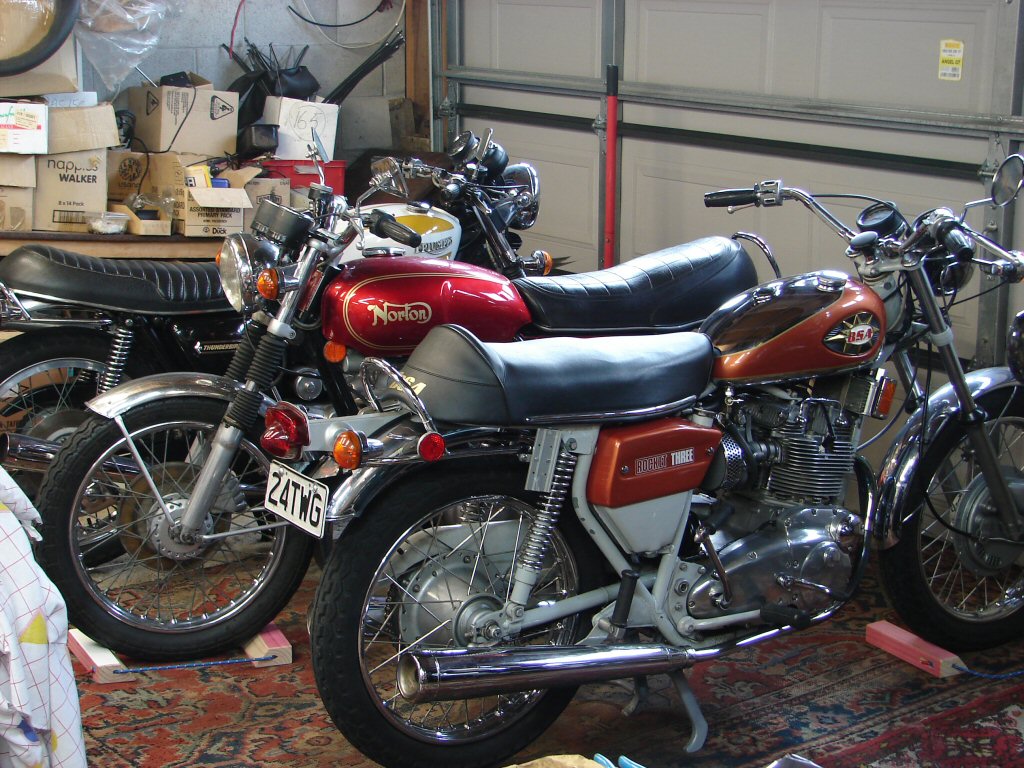
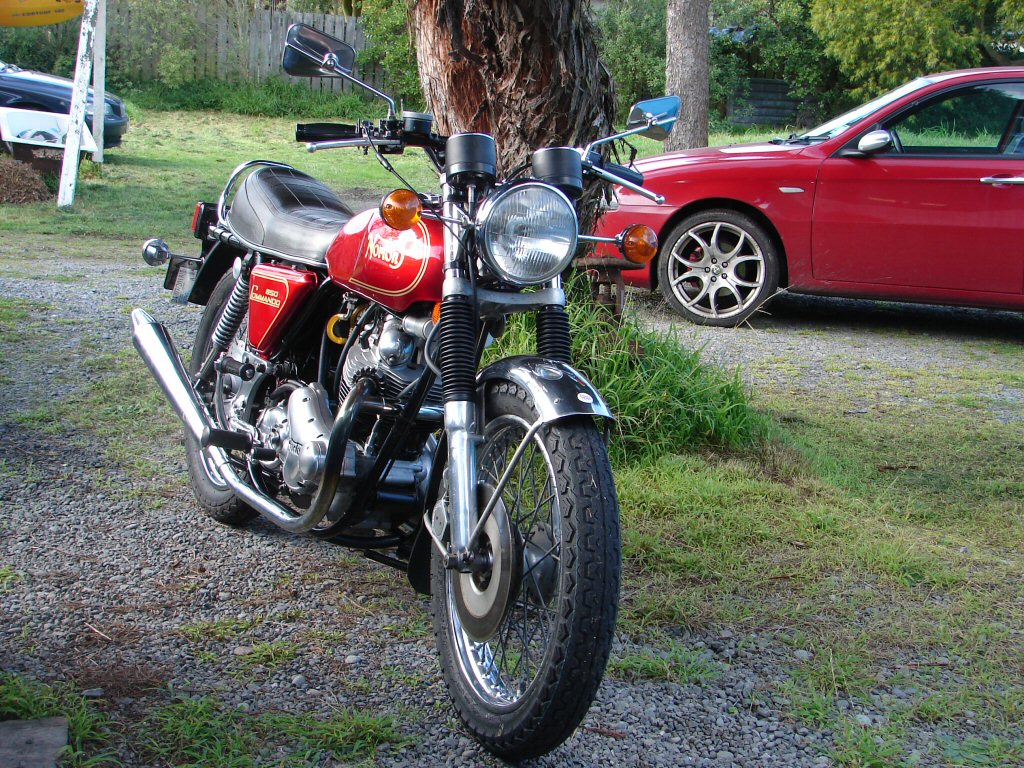
1973 Norton Commando 850
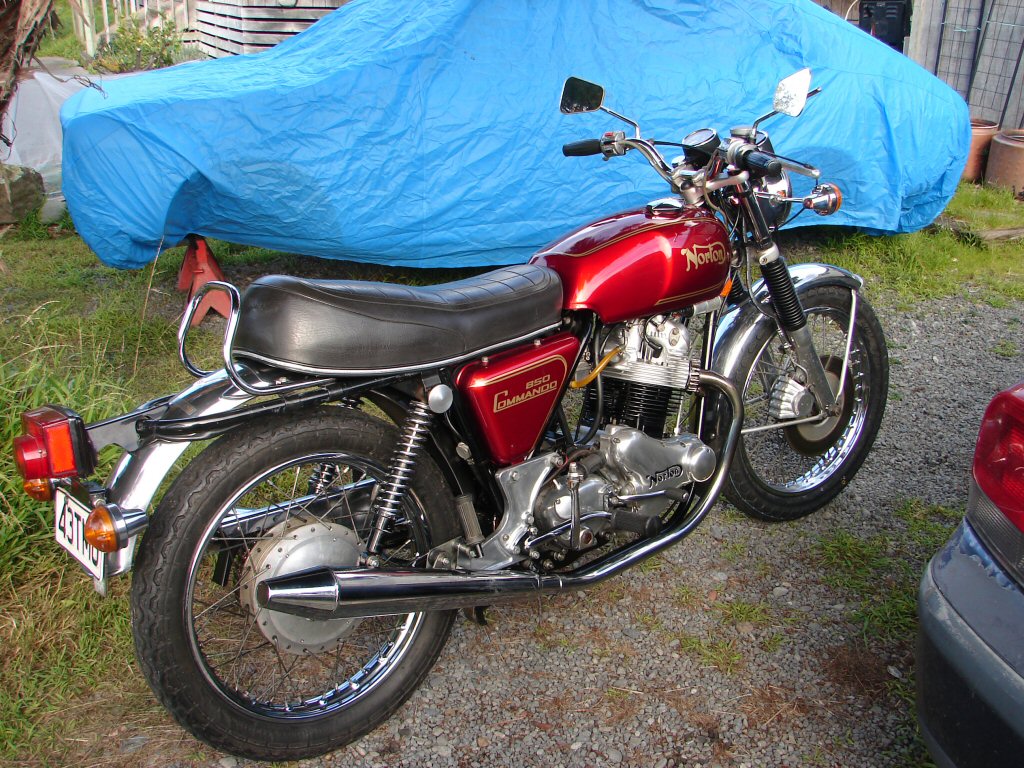
Allan's 1973 Norton 850 is a lovely original looking bike, and the all steel bodywork enjoys flawless paint. None of the transfers (?) can be felt beneath a finger, giving the impression that they were all painted on, or at least they had been generous with the clear coat.
A deal had been arranged with another good friend of Allan and Beth, so the bike had changed ownership before I began work on it. While I shall now be working for a new owner, I still get the pleasure of restoring it to the condition Allan would have wanted it to be.
I had identified quite a few things that required attention, and Allan had outlined a few as well, so I had an idea already of the order it would progress.
The front forks had to come out as the gaiters had totally turned to munge, and the front brake had seized up on first use, so it seemed that the master cylinder or the caliper, or both, would need stripping and overhauling.
While removing the handlebars it became apparent that the carb slide was jammed, and the clutch cable was about to break at the lever end. The speedo cable had been cross- threaded at the top end, so already the list was growing.
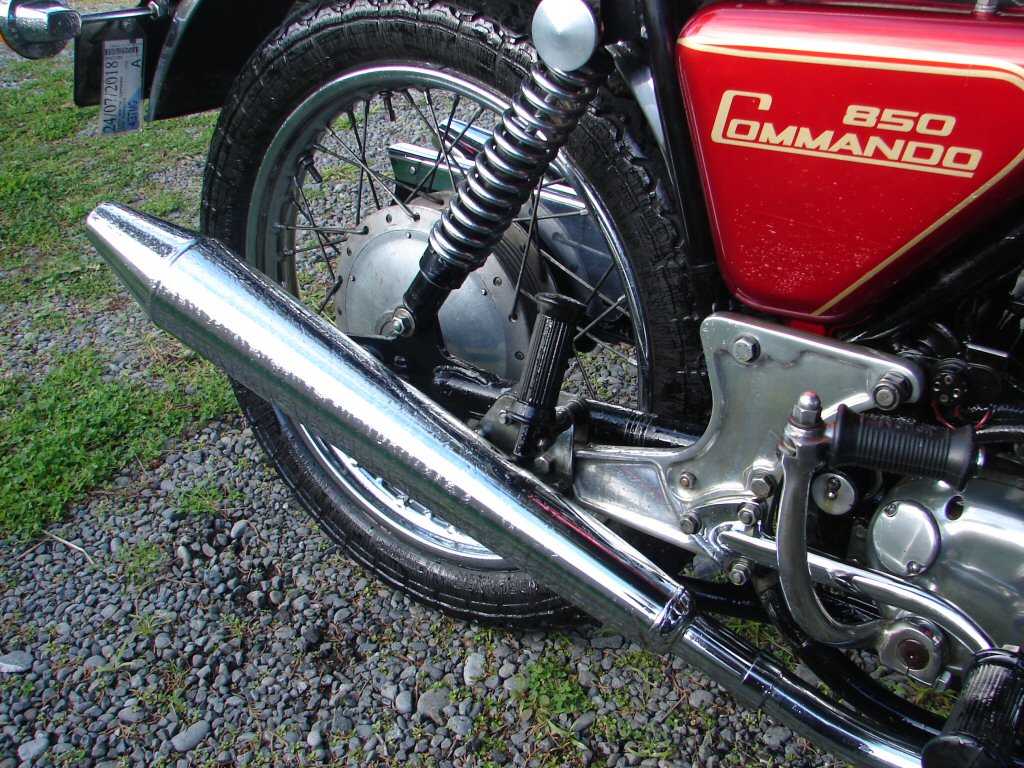
The left exhaust header clamp locking ring had broken, so the exhaust system had to come off at the same time. It did so without putting up a fight, and I found that both threaded collars were only finger tight at best.
I initially had some difficulty getting the front wheel out because the caliper was partly jammed on. I pulled the entire master cylinder assembly off while the fluid line was still connected, so as to avoid any spillage of fluid. I could not bleed the fluid out via the bleed nipple as the master cylinder lever would not move, so I disconnected the line from the caliper but found I still could not coax any fluid out. At this stage I found that I could now rotate the front wheel. Aha.! Pulling the fluid line off the master cylinder I could now pump the lever. The (not..) bleedin hose had disintegrated internally and was holding pressure on. It now seemed that both caliper and master were likely working properly. Thats a win then.!
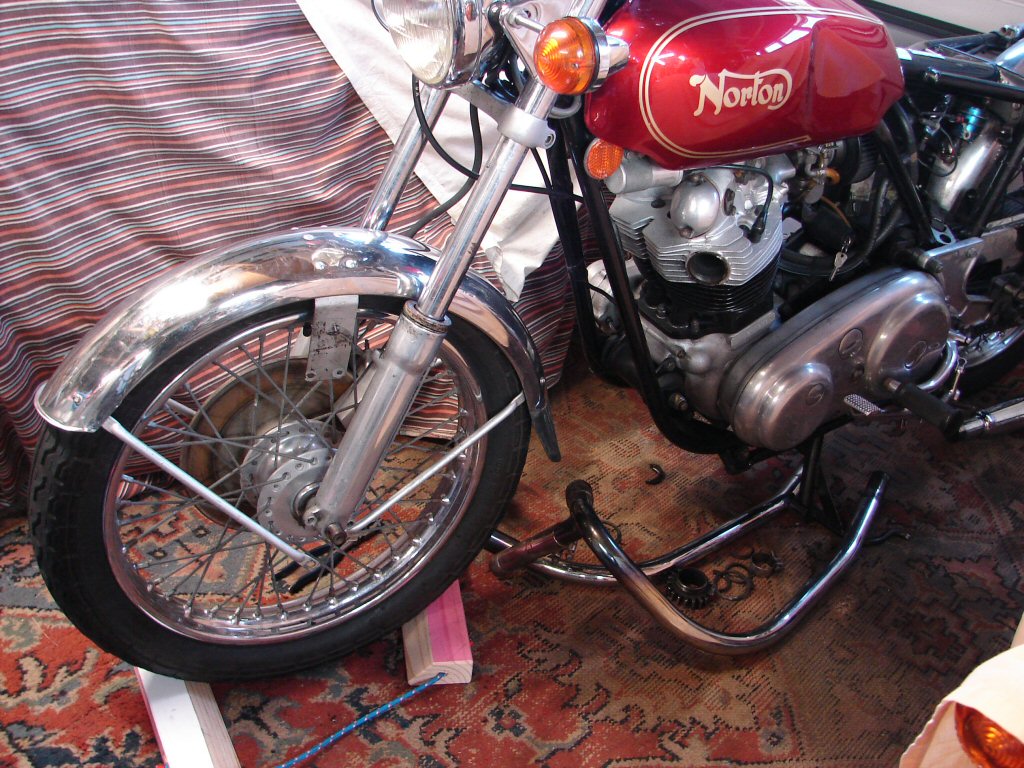
I decided it might be easiest to drop the stanchions out with the sliders still fitted, and after releasing the lower yoke clamps, removing the clocks and unscrewing the top nuts 1/2 an inch, a few sharp blows with a block of wood as a punch saw both stanchions drop out cleanly. Excellent. Big clean up of the sliders and fitting of the new gaiters later, the stanchions went back in and their fluids got replaced with 15W fork oil. That allowed the forks to be fully retightened, and the handlebars went back on.
A new fluid line was obtained, and the brakes were refitted and bled up nicely. What a relief. Stripping and overhauling cylinders and calipers is not a favourite trick.
The exhaust ports, headers and clamps all got the wire brush and polish treatment, then went back on with new locking rings. I did not bend the locking tabs yet in case the pipes might have to be removed for the swing arm or clutch removal, both of which were scheduled.
Big improvement in the look of things already.
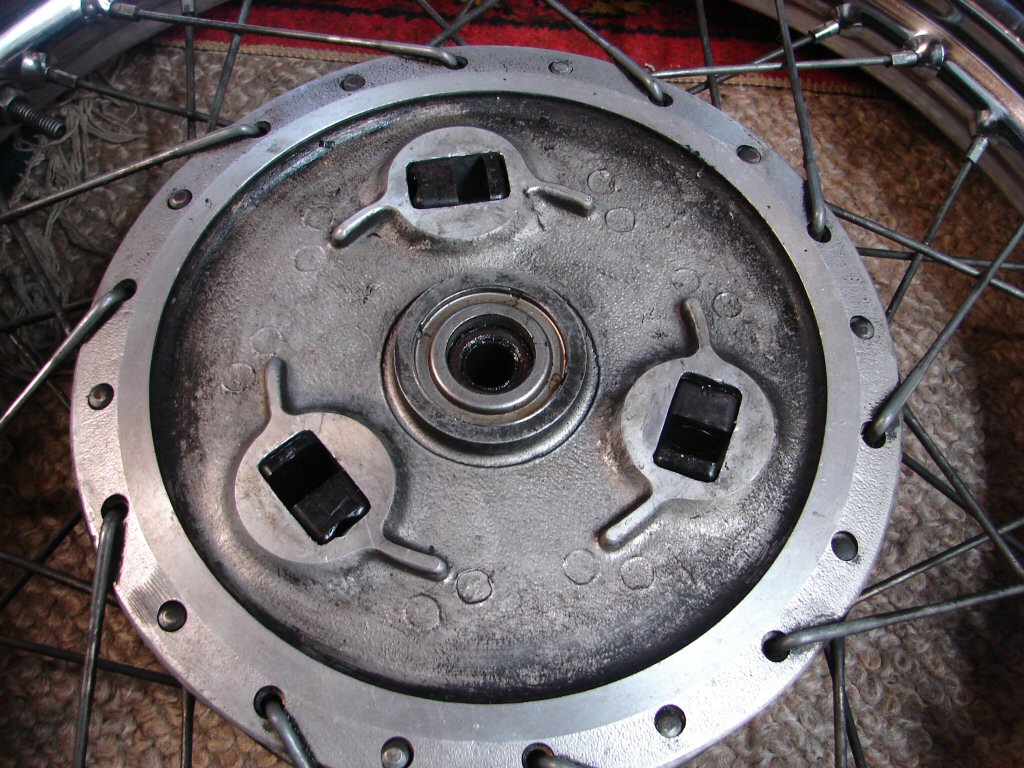
When the rear wheel came out it was apparent that the cush drive material was totalled. There was about an inch of play which would have likely occurred with every gearchange. Surprising that nobody had noticed.
Whatever the original innards were made of had melted and run across the brake drum, leaving a strange fibrous substance around the outer edge. Here the new rubbers (plastics.?) are in place after having fitted them back to front on the first go.
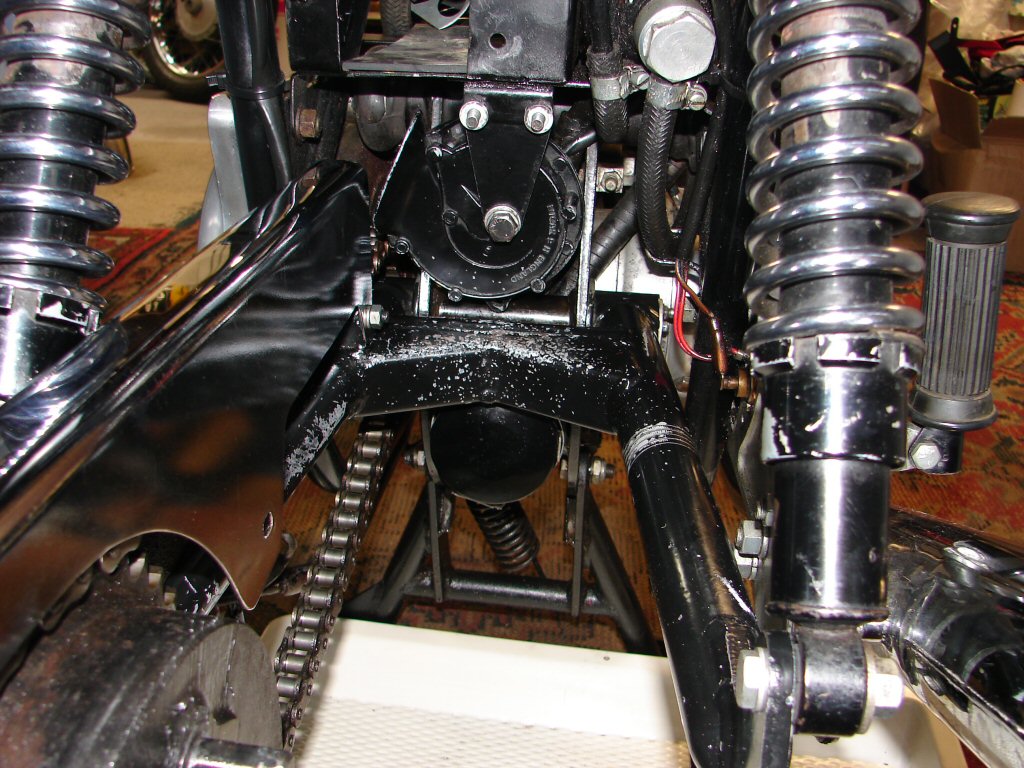
The swingarm came out with no fuss. I found I had an old Morris tie rod which had the right thread to screw into the pivot spindle and it slid out happily. Allan had fitted a new spindle previously, but there was still play, so he had bought new bushes which I was now going to fit.
When I checked the fit between the spindle and the worn bushes with the swingarm out of the bike, it seemed that there was very little play evident, but I had the new ones anyway, so they were going in. When I drove the first bush out, it was obviously not as deep as the new bushes. I looked inside the housing and there was a small segment of old bush still in there. They were two-piece bushes, but the combined depth of the two-piece item was the same as the new bush. Seemingly a change of design had taken place at some stage.
I cleaned everything up and drove the new bushes in without any undue force being necessary. I then removed the rear mudguard so that I would be able to get an oil can into the space so I could get the correct heavy oil into the assembly once it was refitted.
The chainguard got a polish and went in with it.
I had to remove the horn to get the required space to operate in, and I removed the grease/oil nipple from the end cap to let the air escape, then filled it with some 140 oil until it came out the hole. I let it sit for a while then got some more in before buttoning things up. It then sat overnight, and nothing had leaked past the new O rings by morning, so that was cool.
What was not so cool was that there was still some side play in the swingarm. The spindle was able to move in the frame, and the tiny locking bolt was hardly going to stop it. I know the Mk3 models featured a pair of cotter pins to prevent this happening, and this spindle was machined to accept them, but short of modifying the frame this small amount of play was incurable.
Should it become a wof issue I will claim that it is a design fault, as all replaceable parts have been. I think it is slightly better than it was, and while forcing grease in there might improve it still further, I would rather leave it as is unless absolutely necessary.
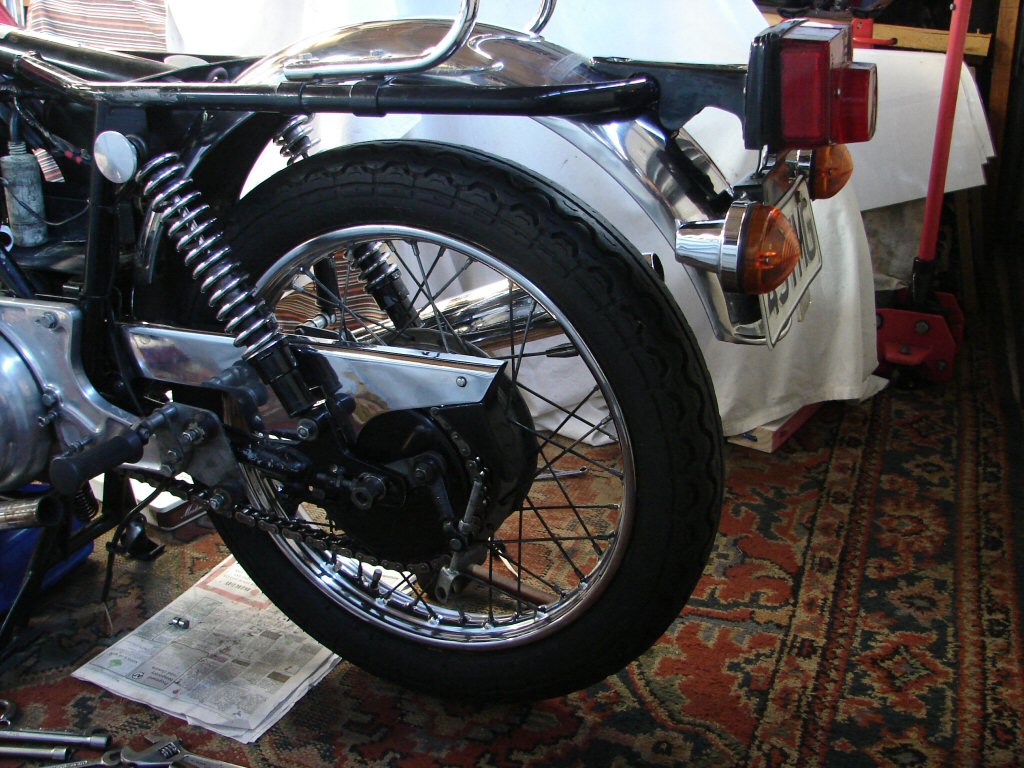
The rear mudguard got a polish before refitting, and the rear wheel needed some persuasion to enter the new cush-drive assembly far enough to get the axle spacer in on the right side.
There was also a bolt beneath the left pillion footpeg which an eagle-eyed Norton type visitor noticed was slightly too long and was making contact with the swingarm, so that had been removed and got the chop to an acceptable dimension.
Spiffing.!
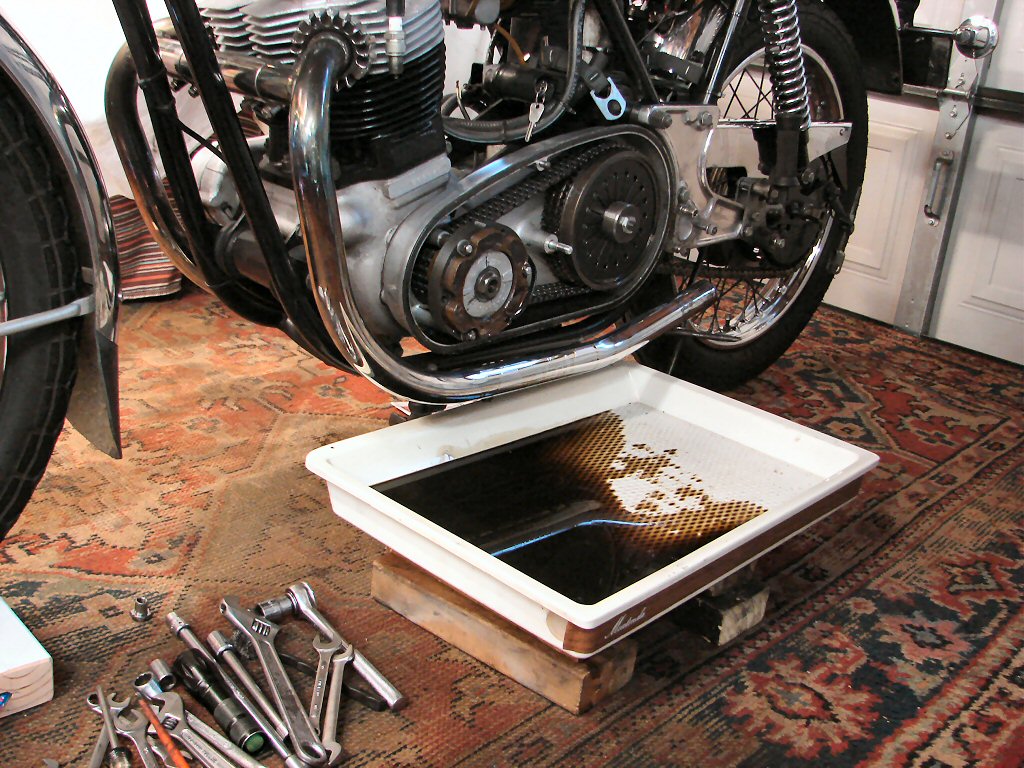
That got us to the point where all the oils needed to come out. Crankcase first, which contained the entire contents of the oil tank which was last full maybe 4 years ago. That was immediately followed by the primary, whose contents looked to also be rather aged.
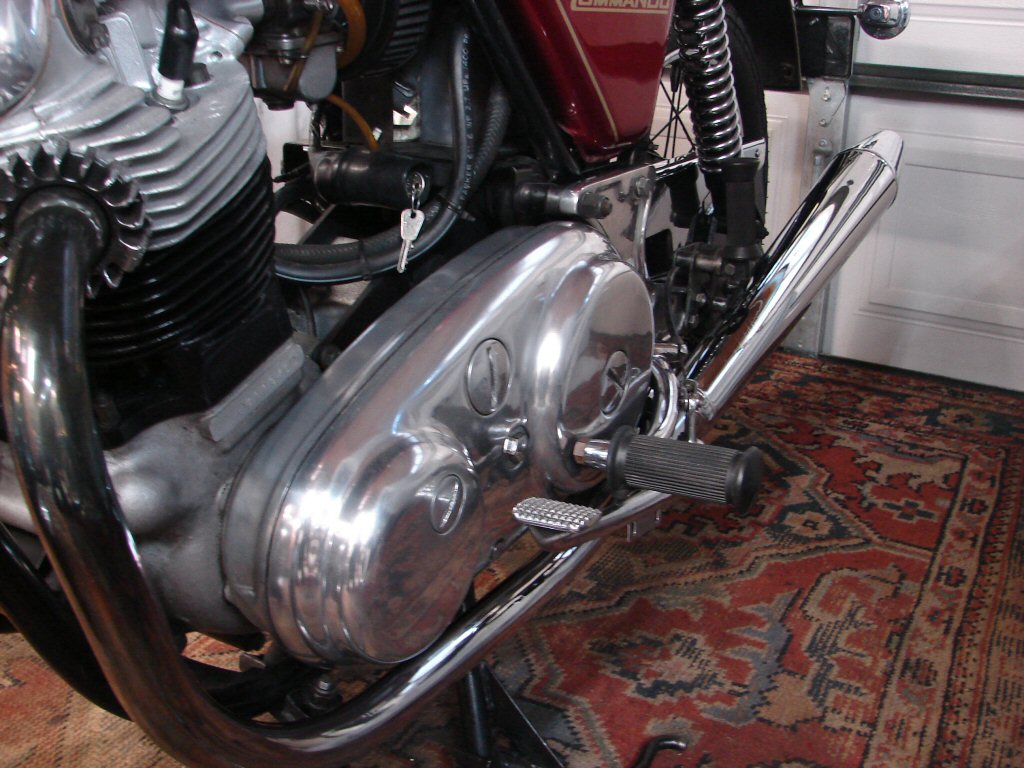
Next the primary cover came off, as the clutch plates are in need of a clean. The outer cover took a bit of convincing, as the last refit involved a coat of something very sticky, which was still very sticky. It had certainly done the job, as everything had been completely oil tight, but I prefer working with silicone, if for no other reason than it being very easy to clean off. And it usually works.
Today I cleaned up the primary outer cover and refitted it until a clutch spring compressor turns up. After that the gearbox got a polish before the kickstart lever went back on with its new locking bolt. Once it was in place a new rubber was fitted after a quick bath in hot water. The footpeg was the final move, and as it all looked kinda nice and shiny I fitted the seat and the sidecover so as to record progress.
All good this side at least.

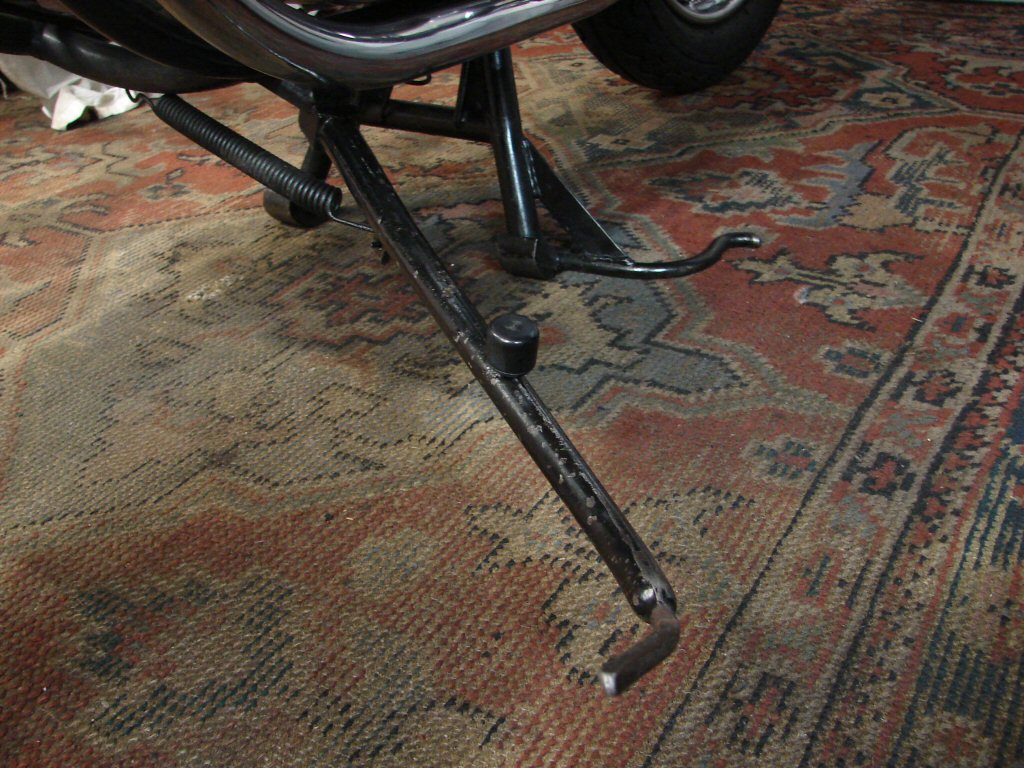
Final job was to repair the side stand. It was a bit floppy, and the park tang was in danger of slipping under the frame. Also the extension for connecting one's toe with was bent down a bit making it hard to find when seated. That straightened ok, and after cleaning the mounting bolt and bush they got greased and reassembled with a thin shim washer around the outside of the bush between the stand and the mounting lug. It is now completely without any play in the pivot, which is a fluke as the washer just turned up in the gash tray.
Last thing was to order a new bump rubber for it, along with new O rings for the primary cover, a tab washer for the clutch, and a washer for the primary cover retaining bolt. Things get discarded along the way, as ordering one washer or rubber bit is hardly worth the effort, so now is the time to make sure everything is where it ought to be.
Today I removed the outer primary and began polishing it whilst waiting for a clutch tool to mysteriously manifest itself. It didn't. So I figured I could probably invent one considering all the automotive stuff in my shed. So I took -
- 1 special tool for overhauling Borg Warner auto transmissions
- 1 rear spring retaining plate from a Morris Marina
- 1 tie rod from a Morris Marina - also fits swingarm spindle
- 1 nut and washer to suit
And I ended up with this.
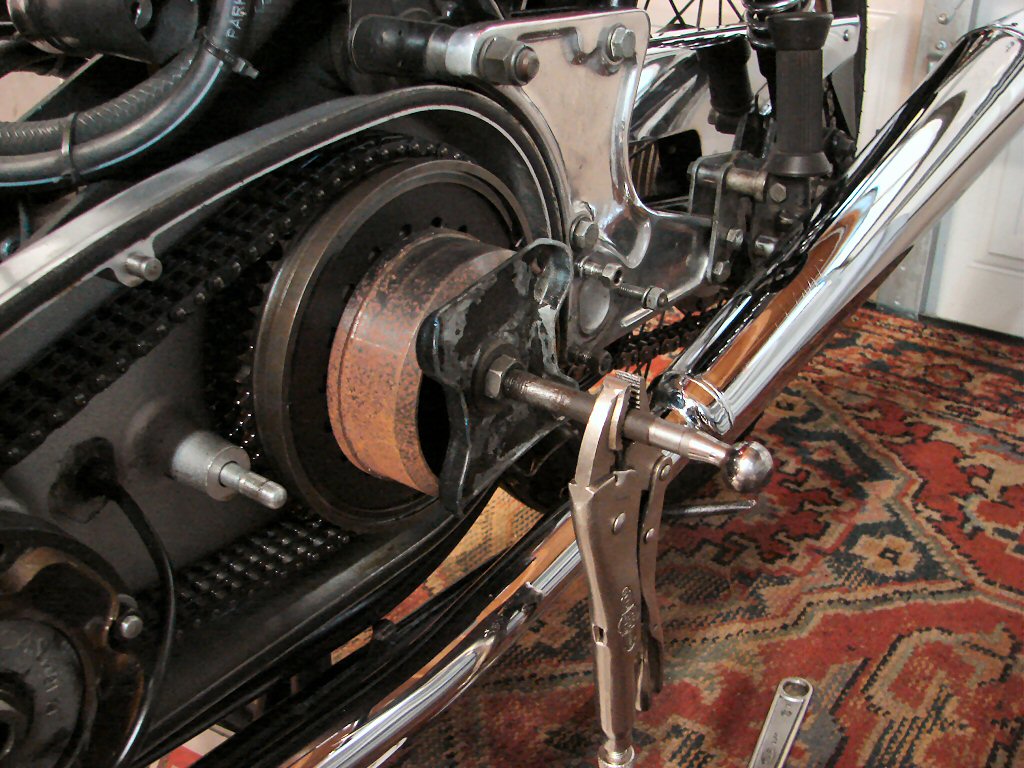
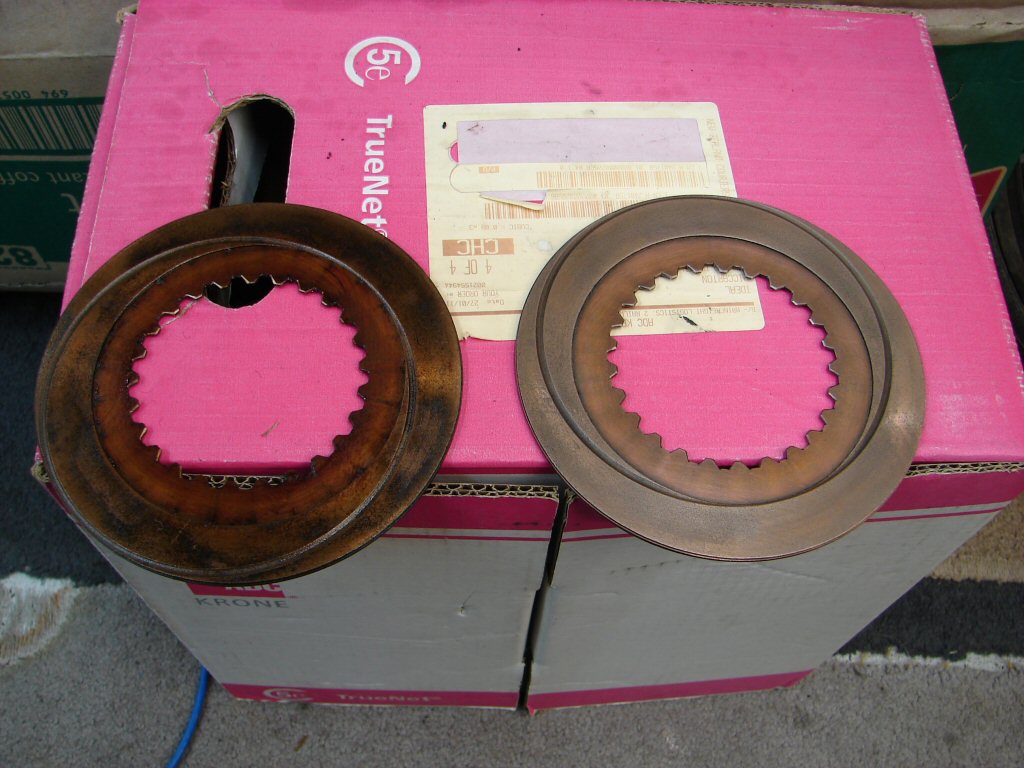
It worked a treat and the clutch plates were revealed in a trice. Unfortunately they were not in a hurry to leave home, being rather sticky and all, so I found a piece of wire with a suitable spike at the end and picked them out one at a time.
While they all looked to be in good condition, the middle ones had what appeared to be burnt oil residue patches on them, which after cleaning with a rag, I was able to remove with some stainless pads. Now you see it, now you don't.
After that it all went back together without a fuss, and got adjusted as the good book suggested. We now have a clutch that disengages cleanly at about half lever travel.
Play was then suddenly interrupted, so it awaits another day to finish polishing the cover and buttoning all up.
The polish happened and the cover refitted.
I then refilled the primary with oil and left it overnight. It did not disgrace itself.
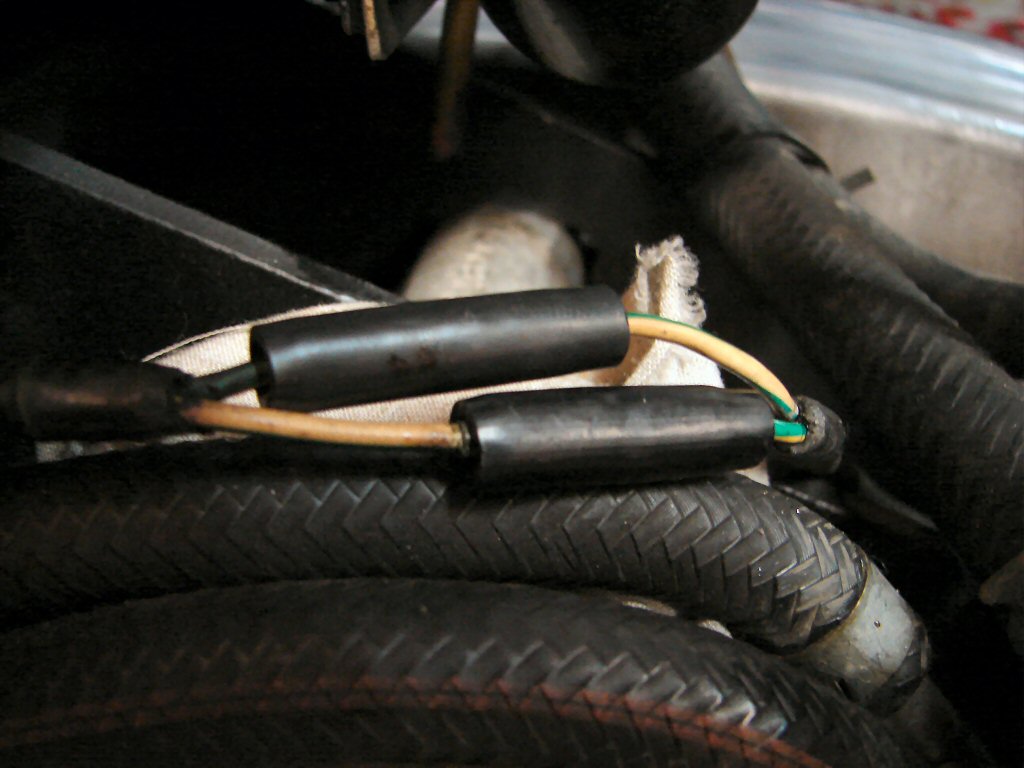
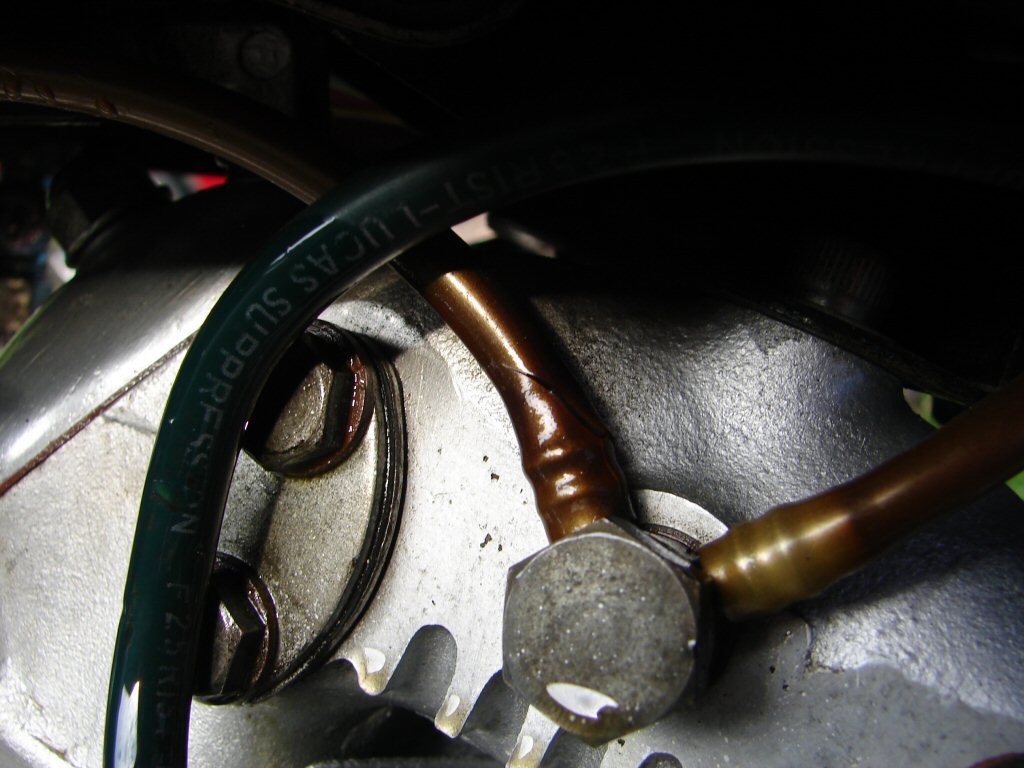
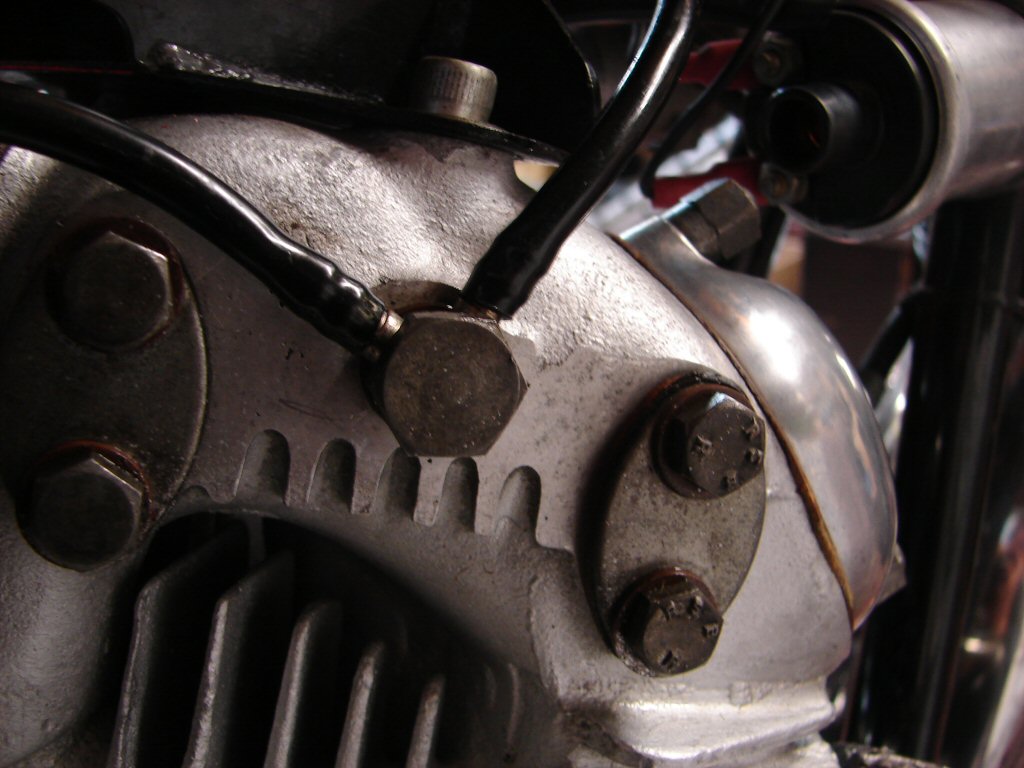
Next job was to repair the alternator wiring. I had noticed that one of the connectors looked a bit melted, and when I touched it the bullet fell out. The heat generated by the loose connection had melted the outer insulated cover, and the bullet was history, as was its mate at the other end. Neither were original type, and it would seem that they had been a poor fit from the get-go.
I keep old bits of wiring looms that have solder-type bullets, as they can be used again, and are the perfect fit in a new connector. I replaced both bullets and it all looked happy again. Can only imagine that the charging system must have been minimal on last use.
A new battery was obtained and fitted into place with a new pair of retaining straps. This allowed a final check of all things electrical. The brake light was found to be permanently on, which was a legacy of adjustments made to the brake pedal rest position, so a quick adjust of the brake light switch cured it.
The front brake light switch turned out to be defunct, easily proven by shorting the terminals and finding that the wiring was ok. This was a nuisance, as removing and refitting the plastic cover which conceals the hydraulic switch had been a pig. The switch was a monster, and it soon became apparent why it was not performing.

I fitted a rather smaller new Lucas switch, having drained the fluid again to avoid any spillage. Once reassembled the brake got bled again, so it got an extra flush, which will not do it any harm. It is certainly an easier brake to bleed successfully than the Triumph version.
All tucked away and operating as it should.
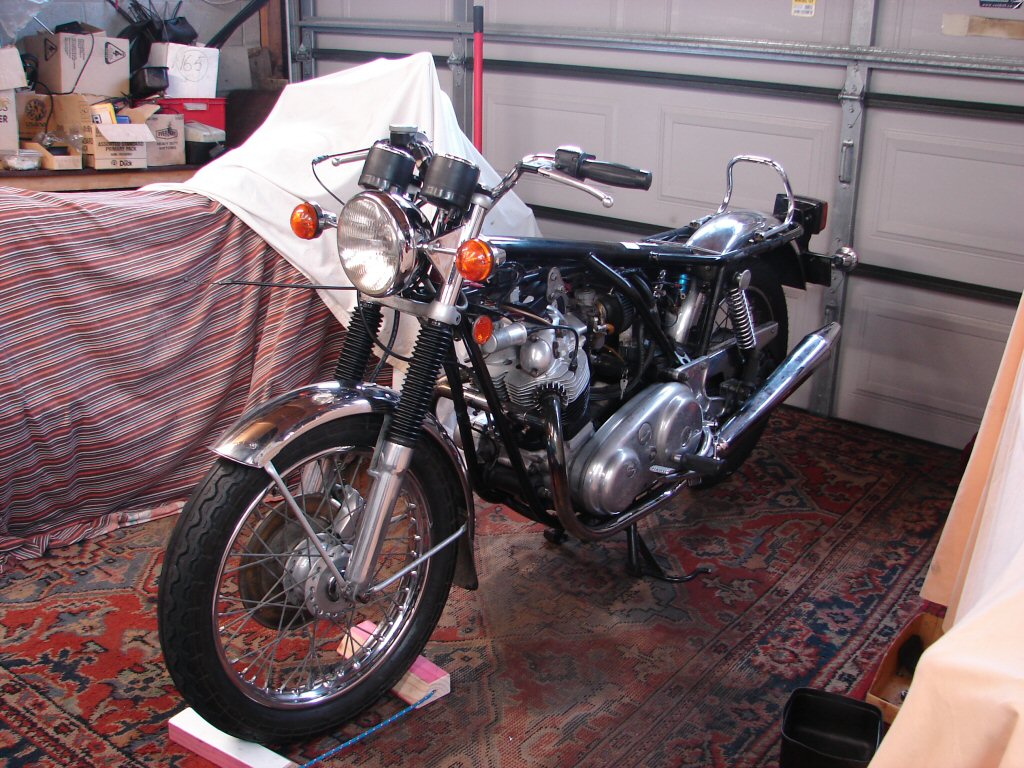
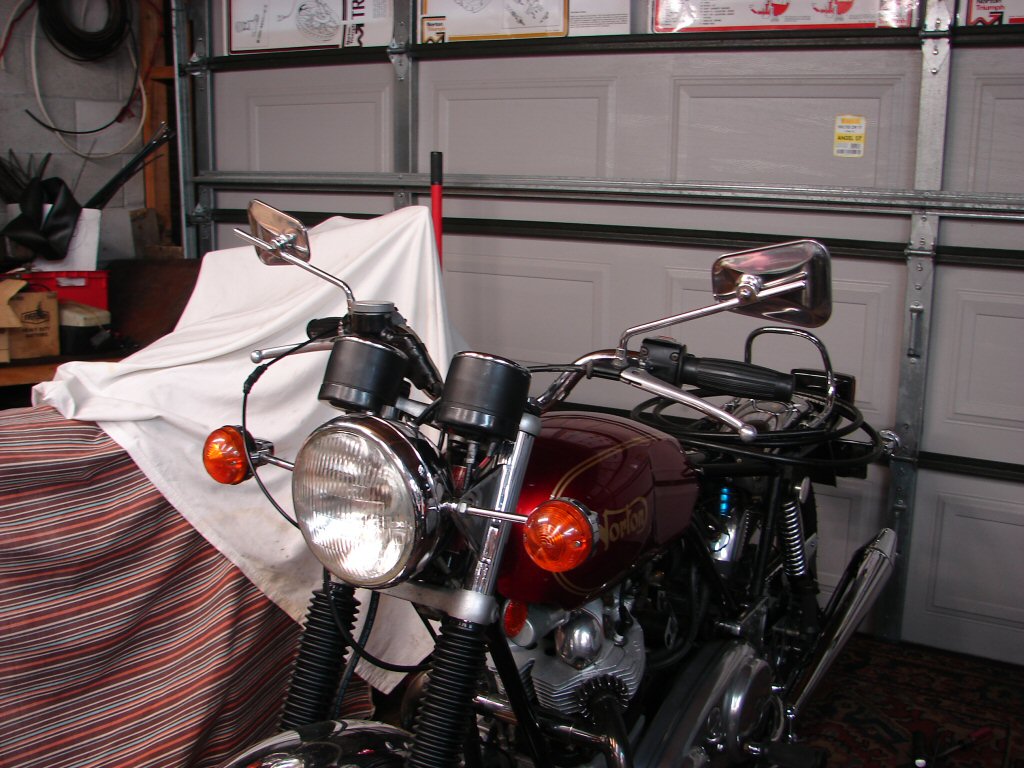
At this point we were getting close to preparing for its first run, so I decided to clean the mirrors up and refit them.
Hey - if it goes, I'm gonna ride it.!
They cleaned up well.
I made an attempt to start the bike, but it did not even try to fire once. A quick check of the spark plugs showed that they sparked when the ignition was turned on and off, as a Boyer tends to do. However, there was no spark when kicking it over.
It is a mistake to ever think the job is complete, at least not until it is riding down the road. And even then there will be more to do.
I removed the fuel tank in order to access the Boyer unit and associated wiring. Obviously the Boyer was getting power, but it was not triggering, so the pickup and the connections inbetween were the primary suspects.
I was unable to fault the wiring, and I figured it highly unlikely that the pickup plate would have failed during the layup.
I turned the key on and off again and now we had no spark at all. Dayamn. What now. While pondering this new development my eye fell upon the killswitch. Ah. I operated the red button a few times and immediately heard the spark noise from the plugs.
I kicked it over and behold, we had sparks. Well, at least that would make sense after a 5 year layup. Contacts can corrode in the shed after all.
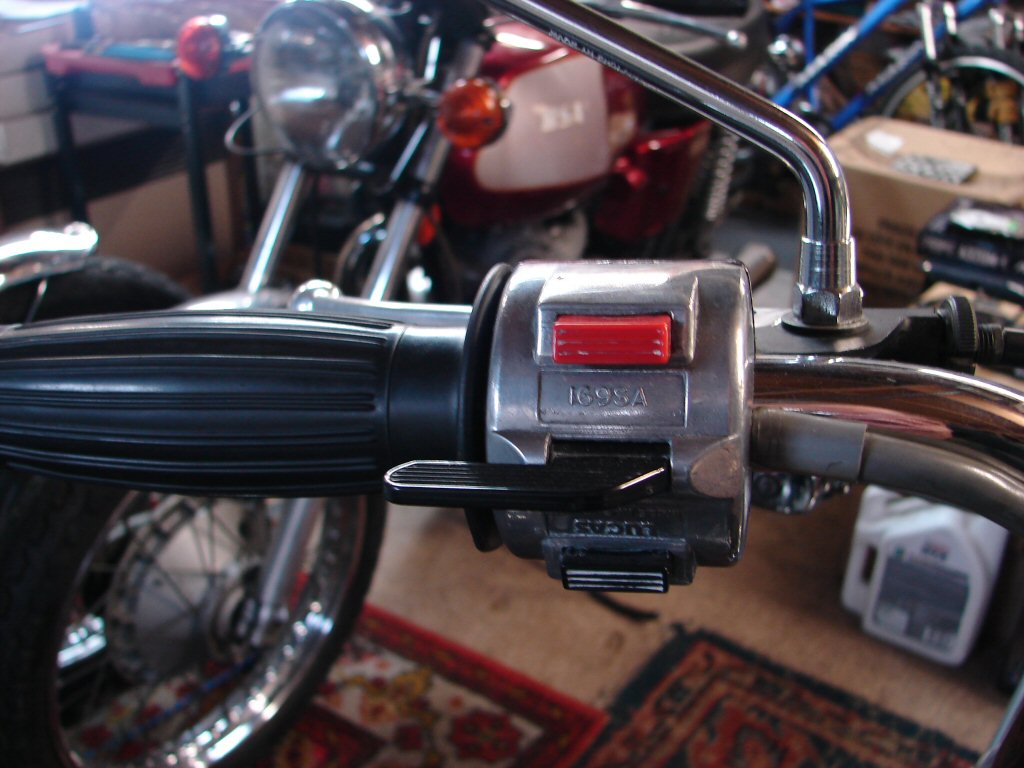
I do appreciate the fact that Lucas switchgear can be pulled apart and usually fixed. As this was just an intermittent connection it was highly likely that would be the case.
They are still fiddly things though, so some extra care is advisable.
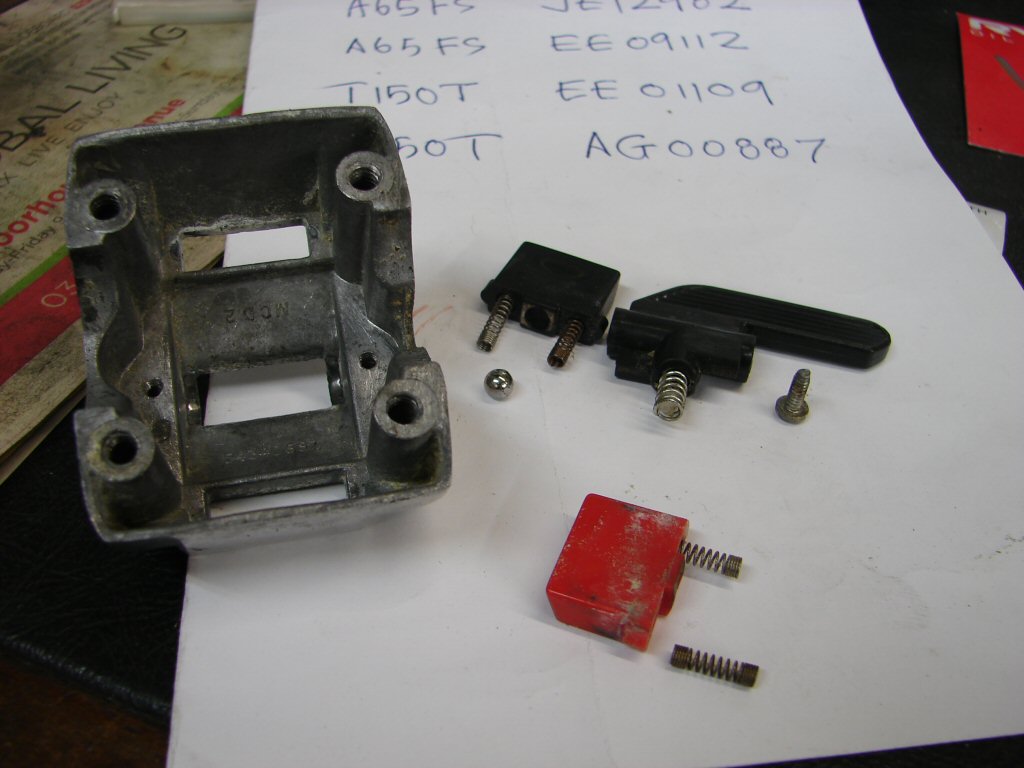
With contacts cleaned, I treated the housing to some autosol, then reassembled it with silicon grease on the moving bits.
Looking suitably pleased with itself it went back on the bike, and a quick test of all functions now proved we were AOK, including sparks arriving at the appropriate time. The tank and other bits also went back on.
Nothing for it then. Video here.
While a first-kick start is most impressive, a few things were less desirable.
Although the ancient GoPro camera gets a bit quirky when close to electronic ignitions, you can clearly see that the fuel tank was rather loose. I had forgotten to tighten the front mounts properly. Also, the carb tuning was extremely rich, so the choke went off immediately, but you can still hear the unmistakeable sound of too much fuel happening.
After I stopped it, I checked the carb settings. The mixture screw was fully tightened. Perhaps someone had thought it was coming loose.?
Another brief run and I tuned the Mikuni for a much happier state of tune. No wonder the plugs looked so sooty.
I was rather astounded to watch the video and notice how much the engine appeared to be moving vertically, but then I also noticed some seemingly weird behaviour from the front wheel and mudguard, so I think it is the GoPro gremlins at work. I will try another video with the camera a little further away.
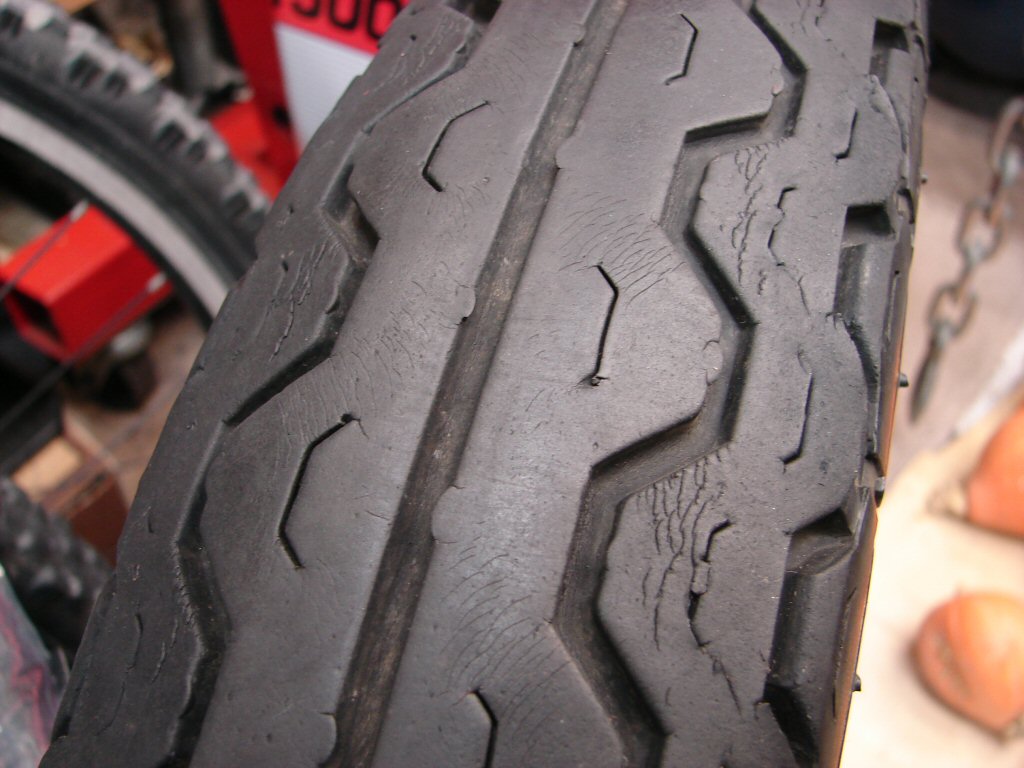
A Norton owner friend dropped in so I could order some engine parts for him, and we had a good look around this bike. One of the things I had not liked the look of was the front tyre. It was an Avon Roadrunner, of the type Norton fitted from new, and this one looked as though it might have still been that one.
Now it had my complete attention, I could see that not only was the tread beginning to break up, but the surface almost had a polished look to it, and felt way too smooth.
I decided to forego any thoughts of a test ride until this thing was gone.
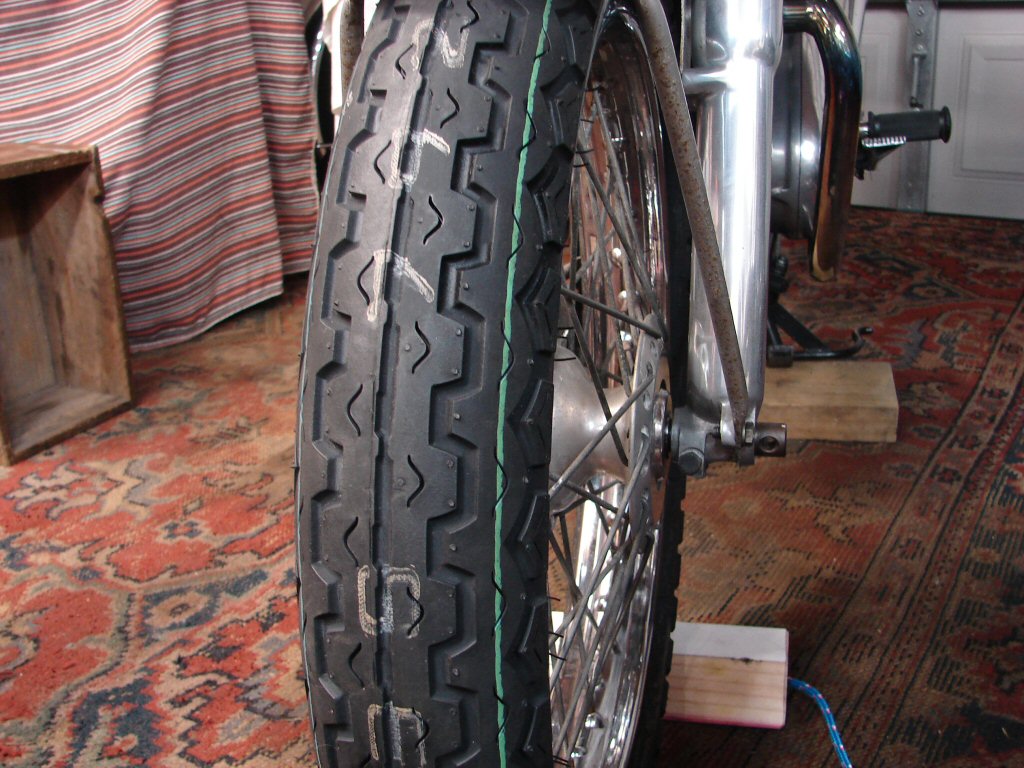
Today I purchased a pair of Dunlop TT100 GP tyres, and fitted one to the Norton. Using my levers to remove the Avon I found lots of fatigue cracking all around the sidewalls. I figure it was about to dump someone on the road, so I feel much happier about the prospect of road testing before the rain sets in this coming week.
The bike fired up on first kick once again, and I rode off quietly rather than prolong the warmup at idle. It did everything it should for a few blocks, then suddenly stepped out at the rear as approaching a roundabout. I glanced down on the right side to see oil spraying over the right exhaust clamp. I stopped immediately. Both of my boots were awash with oil, as was the entire bike down the right side. I limped quietly home to find an oily trail leaving my drive on the other side. More telltales on the gravel where I had fired the bike up showed it had leaked from the get-go. The culprit was obvious enough, the rocker oil feed like had cracked at the top banjo, and even though it was still attached, the oil had sprayed out with great gusto. Seems it has full pump pressure.
Not rain folks - that is fresh Castrol.!
I made several attempts to repair the line by chopping bits off and refitting it to the banjo, but it simply split again and was obviously past its best-by date. The line was marked as for "pneumatic" use, and some enquiries revealed that this type of line had been used by others.
Here is the alaska pipeline masquerading as a rocker feed..
None of the local suppliers had the rocker oil feed assembly in stock, so I was asking around as to what others had sourced when a mate said he thought he had got a spare line when he bought his Commando, and would look it out. He duly appeared at my place with it, and it was in fact a brand new one. Perfect.
We agreed that I would replace it with another new one as soon as they were available, and on it went.
I think we have future-proofed the bike in that department at least.
A few minor adjustments were carried out, having been identified by another brief ride, so the third ride would be to obtain a new wof.
It passed with flying colours of course.
That meant time was up in my shed, so it was off to its new shed for its fourth and final ride in my care.
An extremely pleasant and well-sorted bike, and lovely to sample. I imagine the Mikuni might be easier to live with than a pair of Amals.
I hope Allan approves of the final state of his Norton.