November 2022
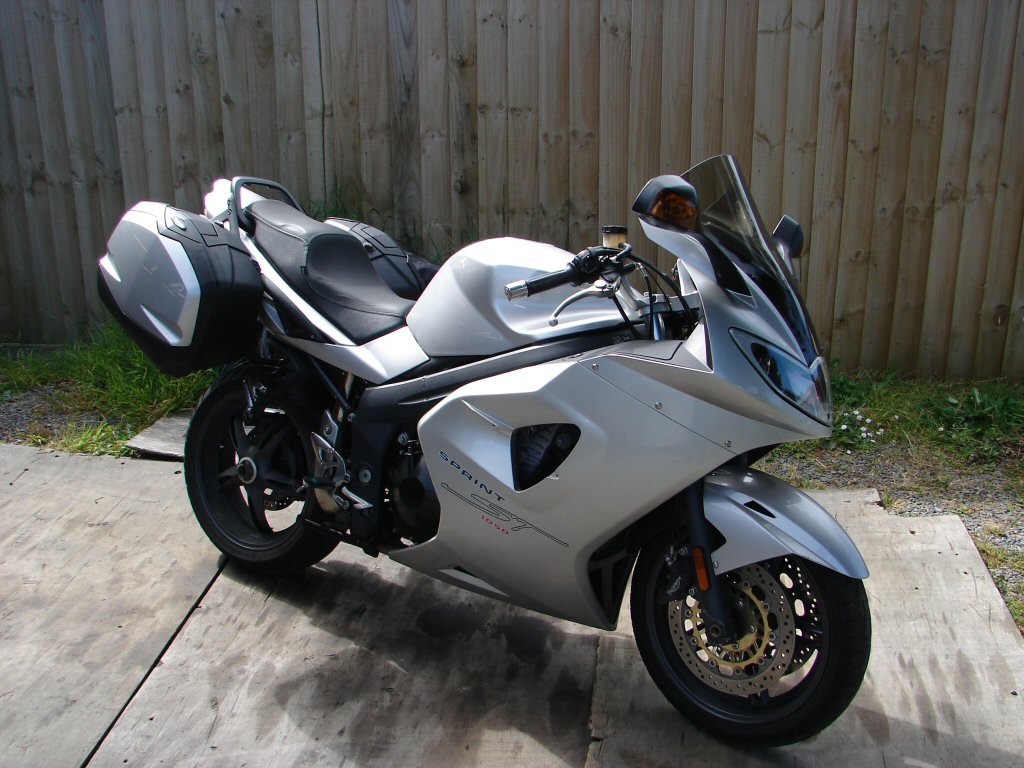
2005 Triumph Sprint 1050
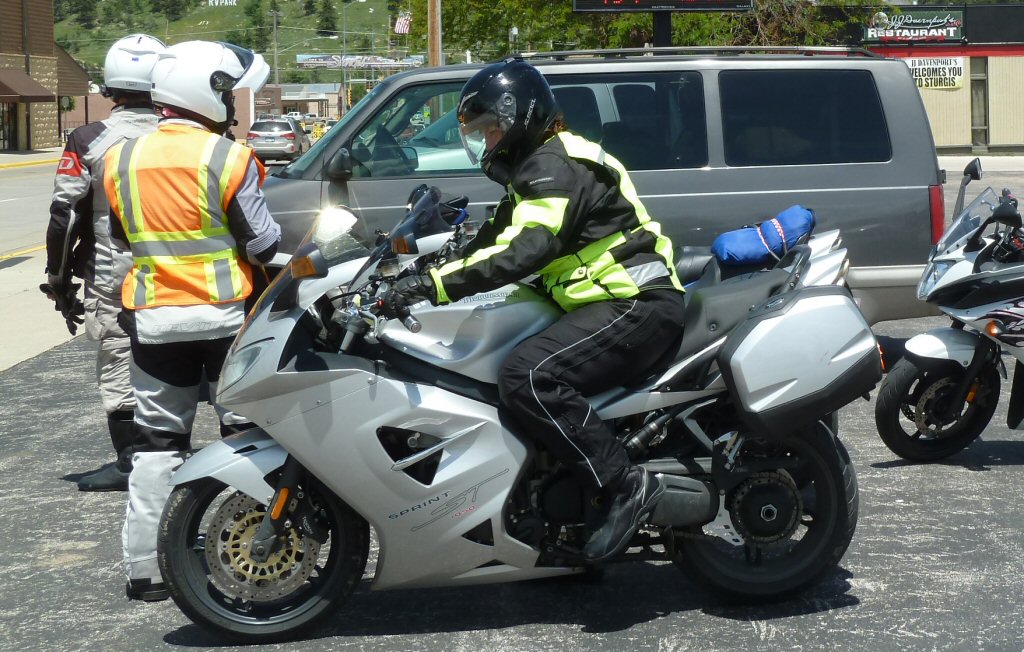
One of the Sprints that served us so well in the USA has been sold to a friend in the UK, as his permanent steed in NZ when he visits.
You can read the account of the USA tour here.
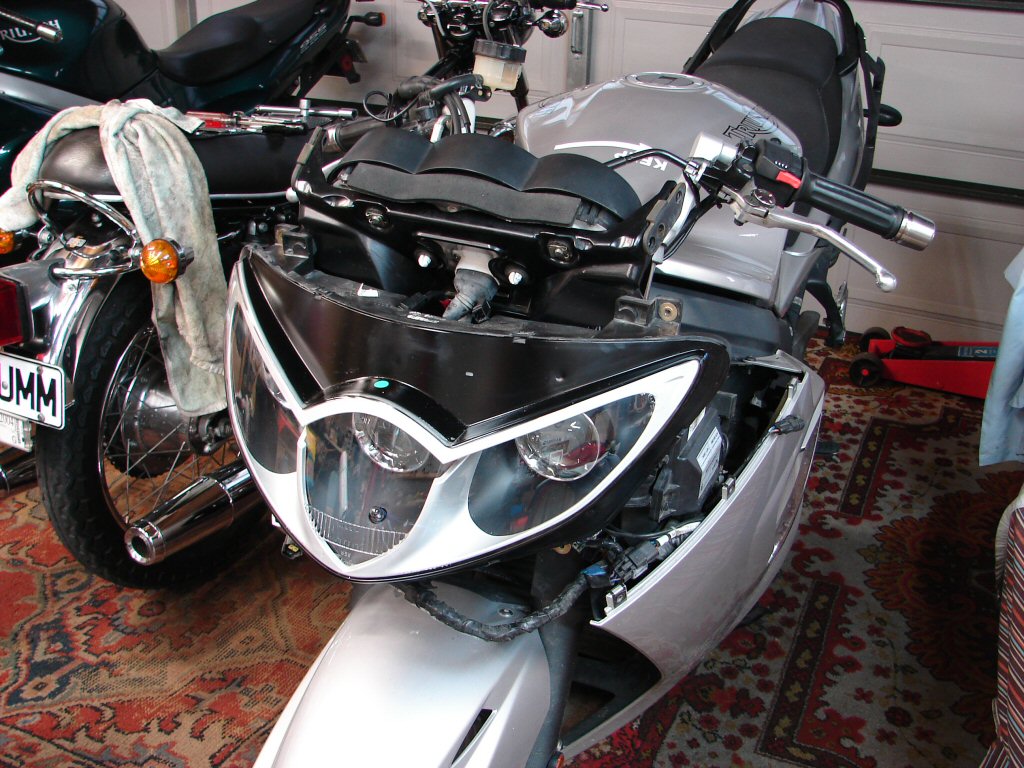
While it should not present too many problems to get it up to scratch, the neon headlights which had been fitted by a previous owner in the USA had been problematic once already in NZ, and now two lamps were in trouble. Neons utilise high voltage power, so electronic devices are used to produce it. These are expensive and possibly hard to find locally.
I decided that it would be the cheaper route, and a better one long term, to revert to the original H7 halogen lamps and bypass the issue.
Of course, it means pulling stuff off, but without headlights we will not be getting a wof.
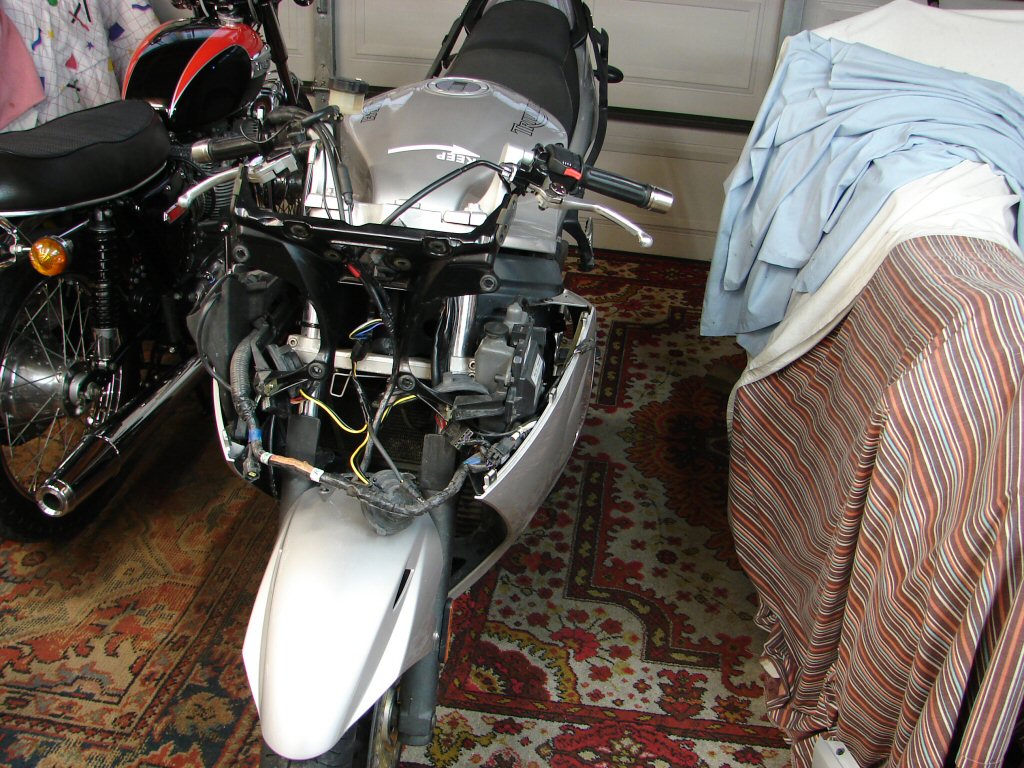
First step was to reinvent the original wiring and connectors which had been removed during the conversion process.
This must rate as one of the most difficult bikes to change headlight lamps on, so all the more reason to make it as reliable as possible.
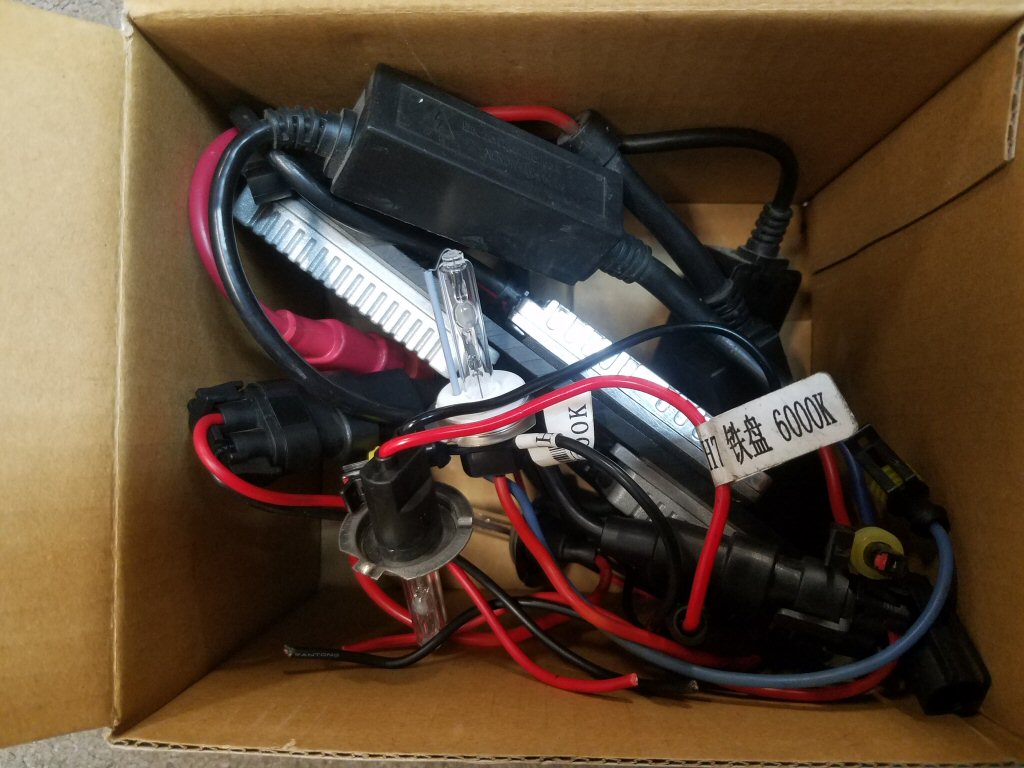
The three H7 55W lamps were obtained online in NZ for a princely $9 each, which would not have covered any single part of the neon system.
Repco supplied the connectors with wiring attached.
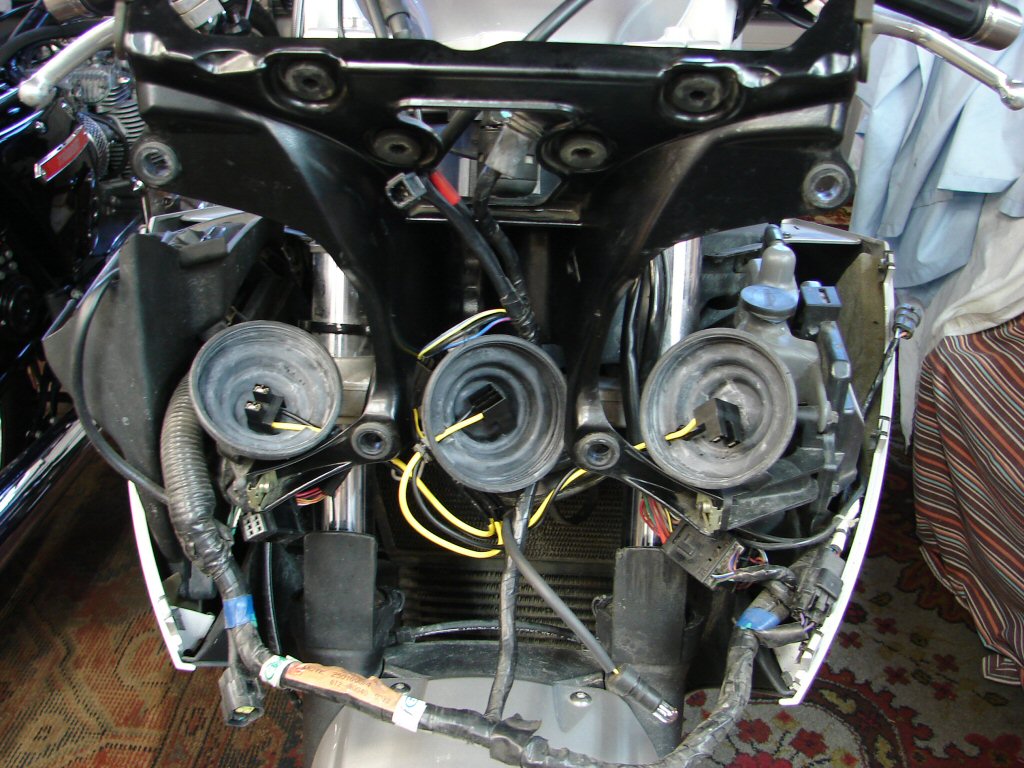
While all 3 lamps are the same, the outer two lights have a metal shield inside the lensed housing making them dip only, and the centre is the full beam.
Simplicity itself.
Gone will be the overly bright flashes in my rear vision when travelling with this bike in the future.
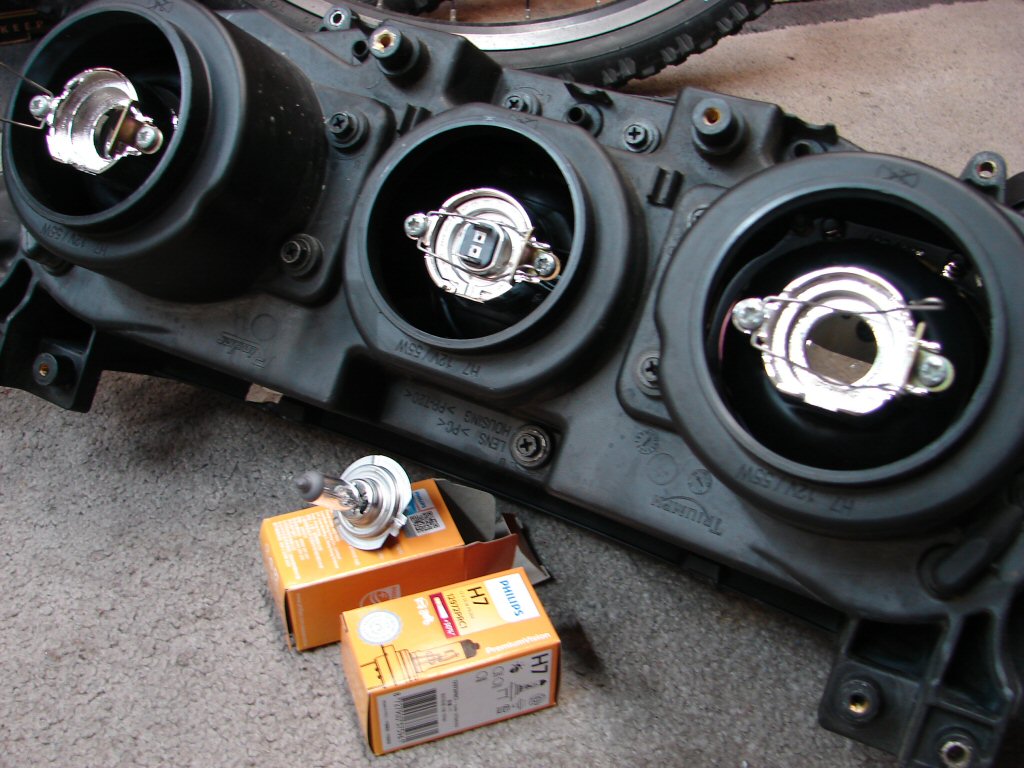
Finally, the cleaned up assembly was refitted, and some clean instruments as well.
While it looked rather daunting, the dismantling and reassembly was pleasingly straightforward.
Nice to know that there are a lot fewer parts now involved in keeping the lights on...
The last items to bolt back on as the fairing comes together are the mirror/indicator units.
The left side unit had once been broken while manhandling the bike. While the mirrors are made to fold back, they do not do so when forced forward. Allan's garage door had a minor argument with this one, and the mirror lost. I was able to repair it at the time by removing the broken tube that it swivelled on, and replacing it with a bolt, suitably drilled down the centre for the wire to pass through. While preparing for one of our final rides together this mirror foolishly challenged the garage once more, so it was again in trouble.
This time when I stripped it I found that two of the three small ball bearings that it used to swivel on had made their escape, hence its current lack of enthusiasm. I fitted two more and was then able to bolt it up so it no longer drooped, but I could not restore the folding function.
Actually, after numerous 'foldings' these jolly mirrors begin to vibrate annoyingly, so being rigid can be a good thing.

These small jobs can eat up an hour with consummate ease, but the devil is in the detail, and it is all a part of the riding pleasure - or not.
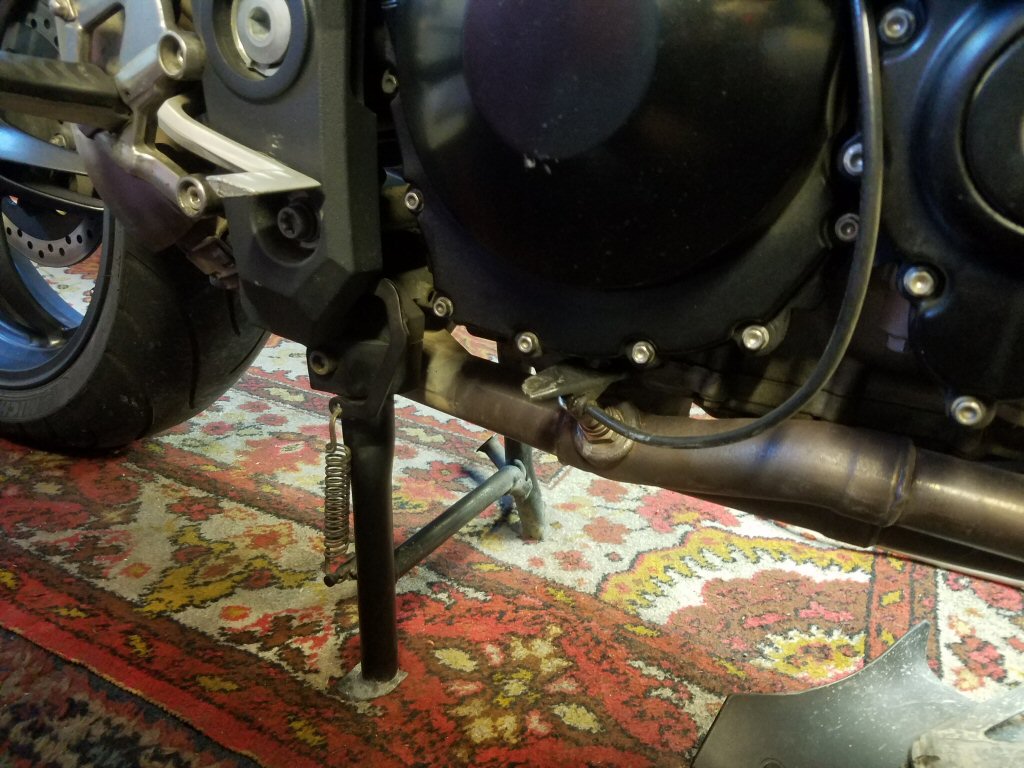
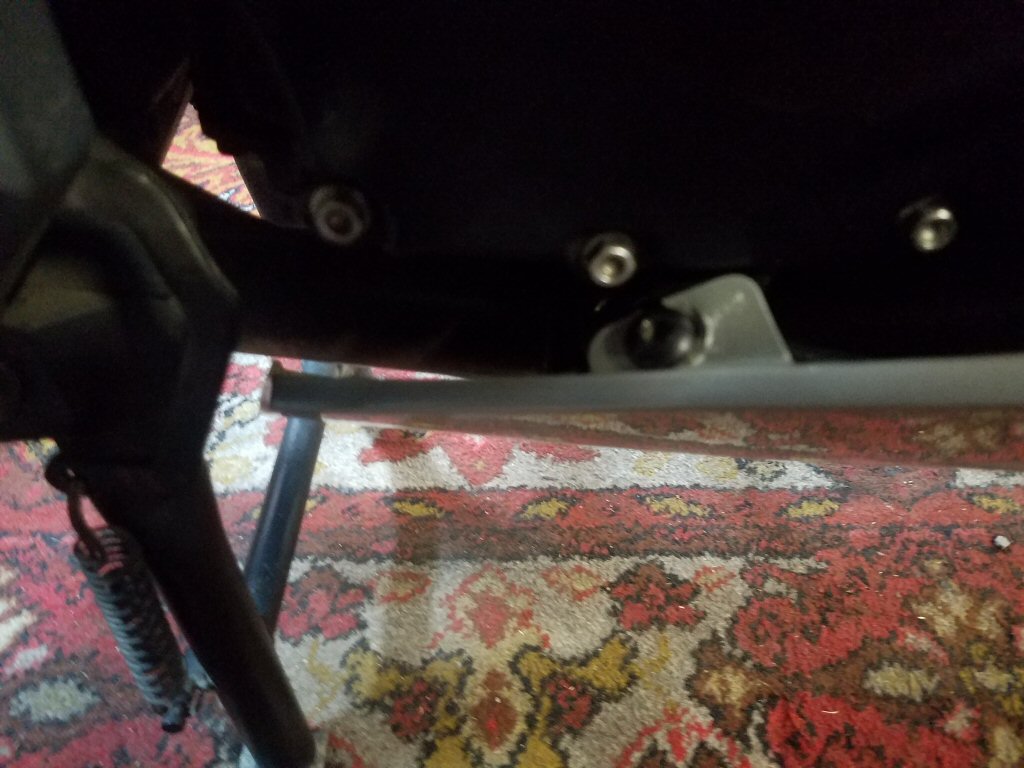
The rear shock absorber on this bike is an aftermarket job. While its damping ability is beyond reproach, it is longer than the original to the point that the wheel rests on the ground when the bike is on the centre stand. A problem during maintenance work. I tried reducing the spring preload by a number of turns to see if it would make a difference, which it did, but not in the way I wanted. It simply made the rear end settle lower with rider aboard, so the wheel remained on the ground, but at least it gave the rider a better grip on terra firma once aboard.
The rear chain adjustment is effected by rotating the hub which is eccentric. The axle centre is below hub centre, but there seems to be no reason why it could not be rotated a full 180 degrees so the axle was above centre, thus lowering the bike by raising the wheel.
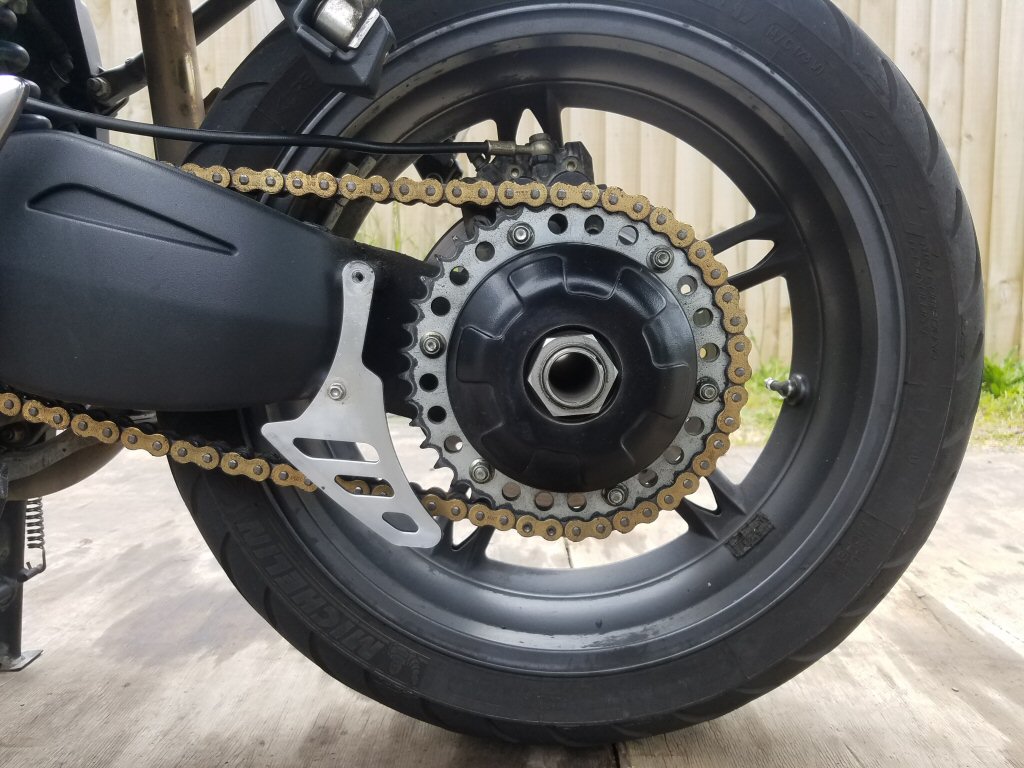
So I did that, as seen above. While it all worked as intended, the fly in the ointment appeared when I went to refit the chainguard. The brake caliper is 'slaved' to the hub, and during the rotation process it moved forward by 20-30 degrees, so the brake line would no longer follow its intended path along the top of the chainguard. I guess the brake line could be altered or replaced, but I decided discretion being the better part of valour I would leave the whole plot as it was originally.
With everything buttoned up it was time to test ride the bike to see what might need adjusting from the riders perspective. Unfortunately, it would not start, so I removed the battery to check its condition. It had a date scratched on it indicating that it was 5 years old, and after charging it up, the charge decayed gradually over 48 hours, so a new one got fitted.
The bike now started and rode well, with only levers needing some attention, and the rear chain felt a tad tight. Unfortunately an engine fault light showed up, which may have been caused by the failed start. I chose to leave it and see if it cured itself now that everything seemed happy. I rode it again to the wof place and we now had all the legalities sorted.
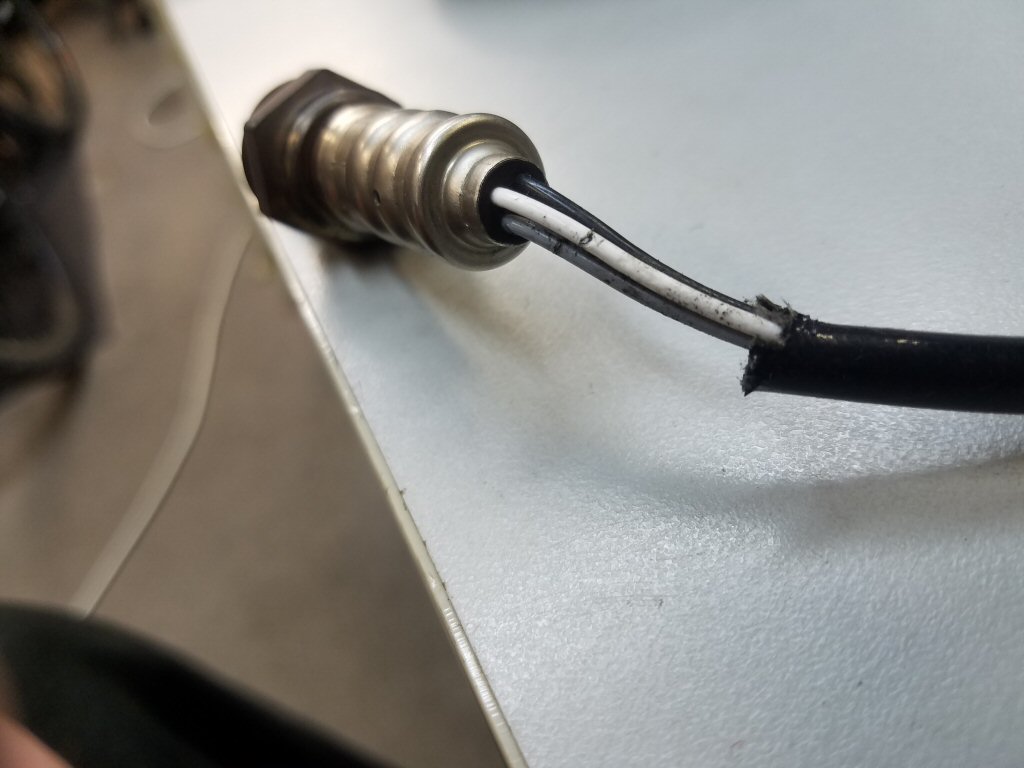
Unfortunately the engine fault light stayed on, so I attached my laptop to the diagnostic port to see what it was trying to tell me. The eror code said "oxygen sensor heater open circuit or shorted to earth". Well, at least that was very explicit. I looked about for the sensor and found it tucked behind the lower right side fairing, beneath a mounting bracket which had no bolt in it. Removing the fairing revealed that the bracket was a bit munched, hence the missing bolt.
Not only was the bracket rather bent, the sharp edge of the bracket had definitely made contact with the wiring.
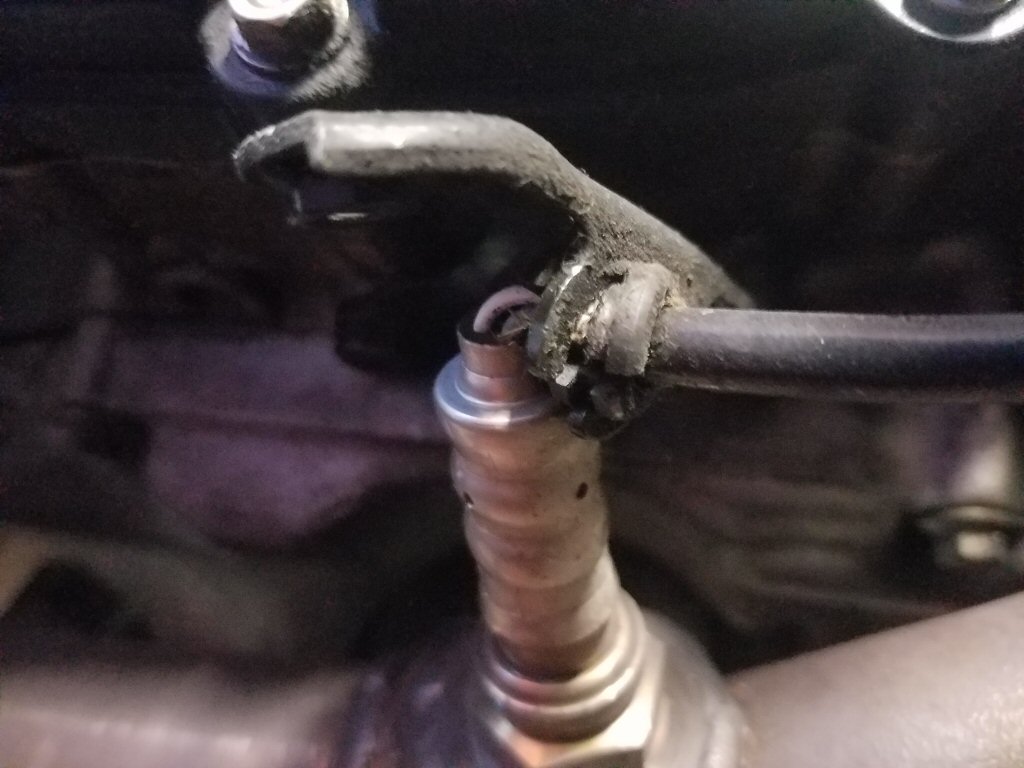
Removing both items I found that the bracket had cut into one of two white wires, which proved to in fact belong to the heater element in the sensor, so it seemed we had found the culprit. Rather fortunate that it showed up when it did, as it would have otherwise caused the new owner some consternation.
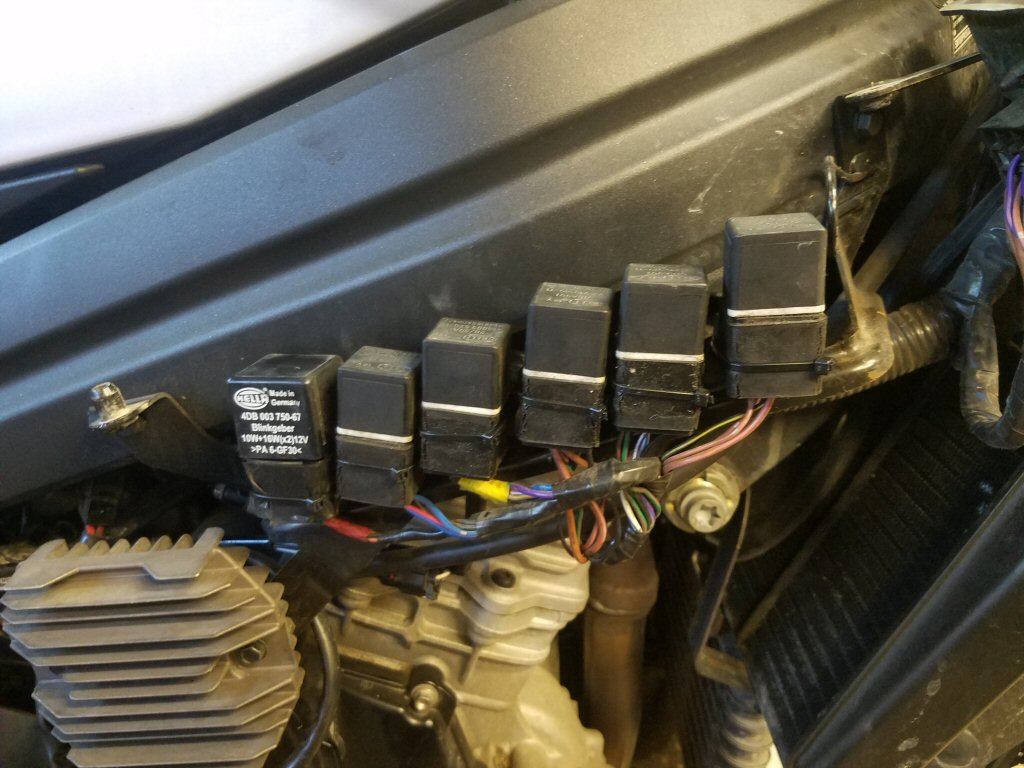
With this fairing removed, a few badly taped up relays were also revealed, so they needed to be convinced to stay put.
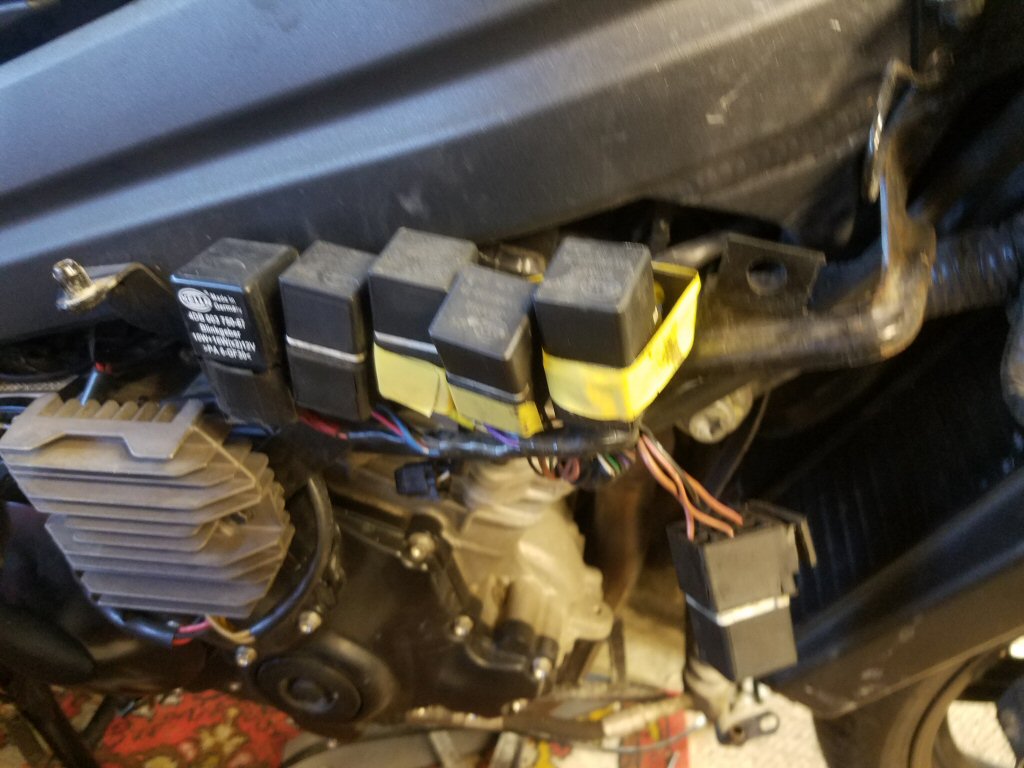
A few well placed cable ties made everything look a bit happier.
With a bit of fiddling the bracket was straightened out and refitted, and the fairing went back on. It all lined up and now it received its missing bolt, albeit black instead of shiny, because I did not have one.
I connected up the laptop again and cancelled the fault. A final test ride was taken and everything performed as it should, and no more fault lights.
I think that's a wrap.
I hope it gives the new owner as many carefree miles as it has for us.