November 2021
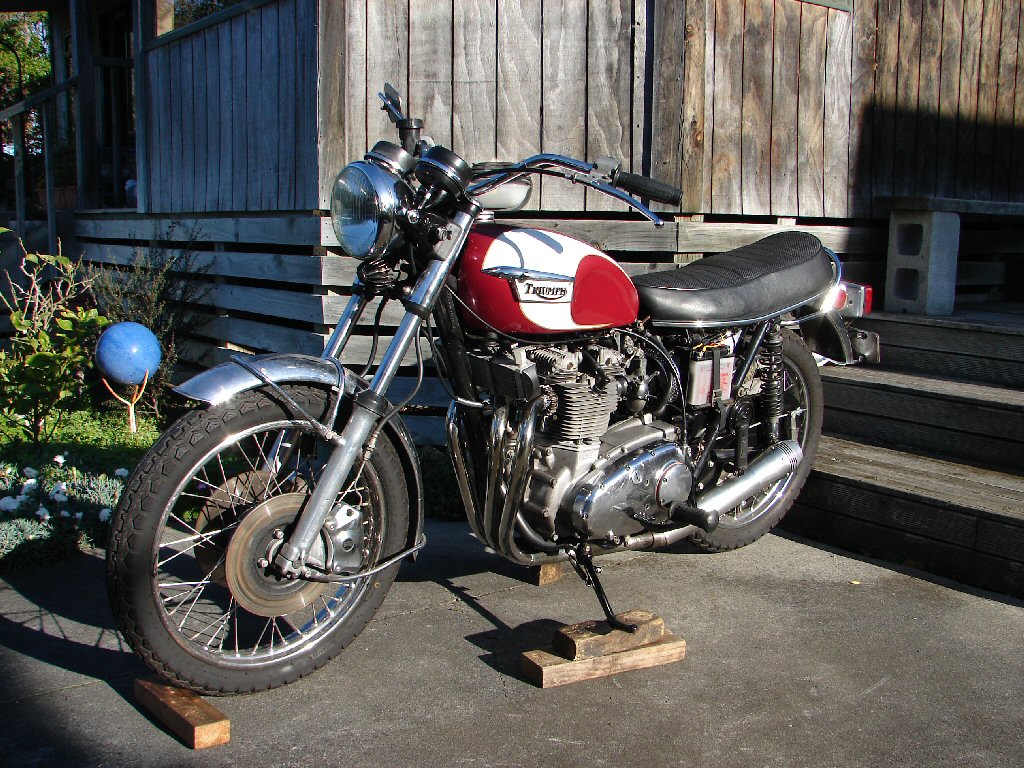
1974 Triumph T150 Trident 750
The second T150 from Brian came my way when he arrived to collect the first one. I was initially reluctant to take this on, as he was pretty certain that it had run a crankshaft bearing, and if so, this thing would be littering my garage for months and would cost many thousands of dollars in the process.
I figured that if he had bought it "as-is" then he may not have spent too much in doing so. I advised him to sell it, as it would still fetch a good price, but he was attached to it and wanted to fix it. He had heard it run and was convinced that a bearing was the issue.
As he would be bringing an empty trailer anyway I said I would examine it and find the extent of the damage, then we could decide what was best.
It duly arrived and I messed with it. Kicking it over did not elicit any odd noises. I could not get it started, although it fired for one brief rev, and I heard the noise - more of a rattle than a knock I would say. I pulled the exhausts and dropped the sump plate. The strainer was clean as a whistle. I removed the oil light switch and fitted a gauge. I was able to get it up to 85psi oil pressure just on the kickstart. I do not think we have run a bearing.
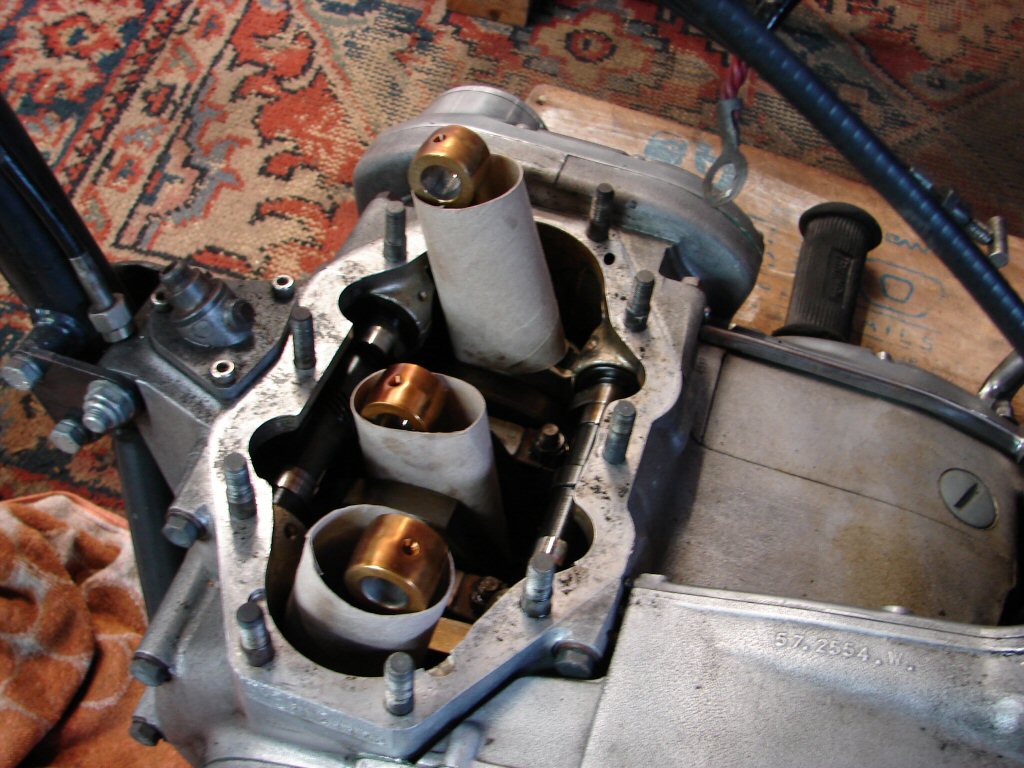
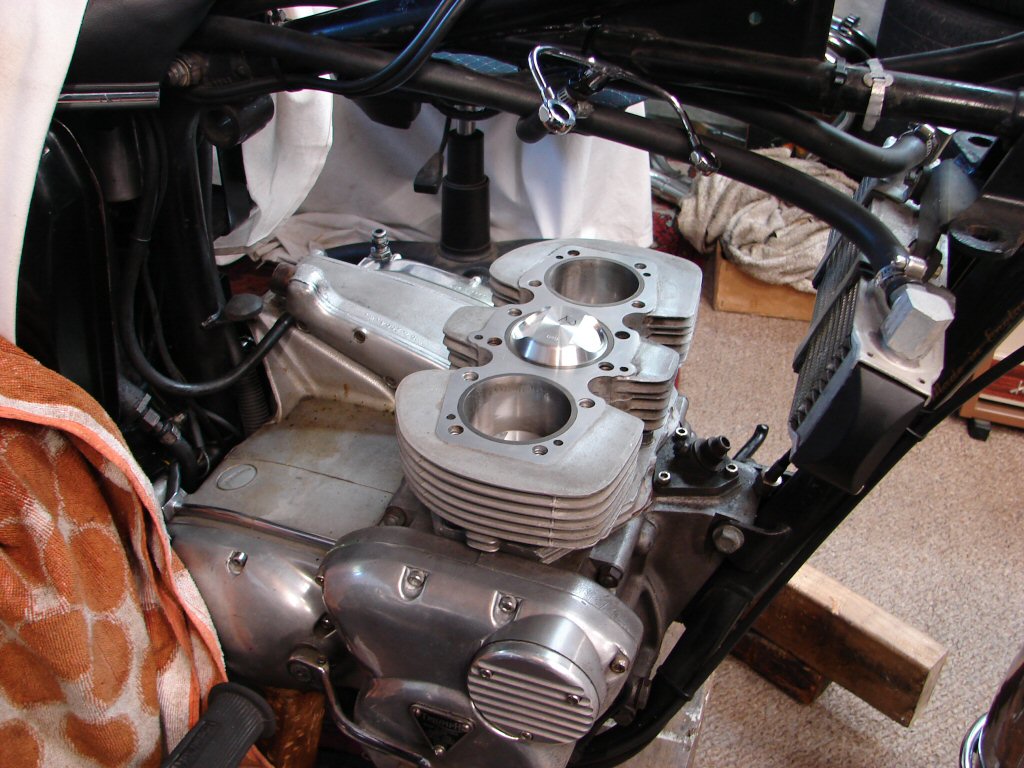
The rattle seemed to have come from the left side, so I opened the rocker boxes and checked for anything odd. Nothing to be found. Looking down the spark plug holes I could see a lot of oil on the left piston, and the centre one was covered in thick carbon. Perhaps a piston had lost its skirt or a ring.
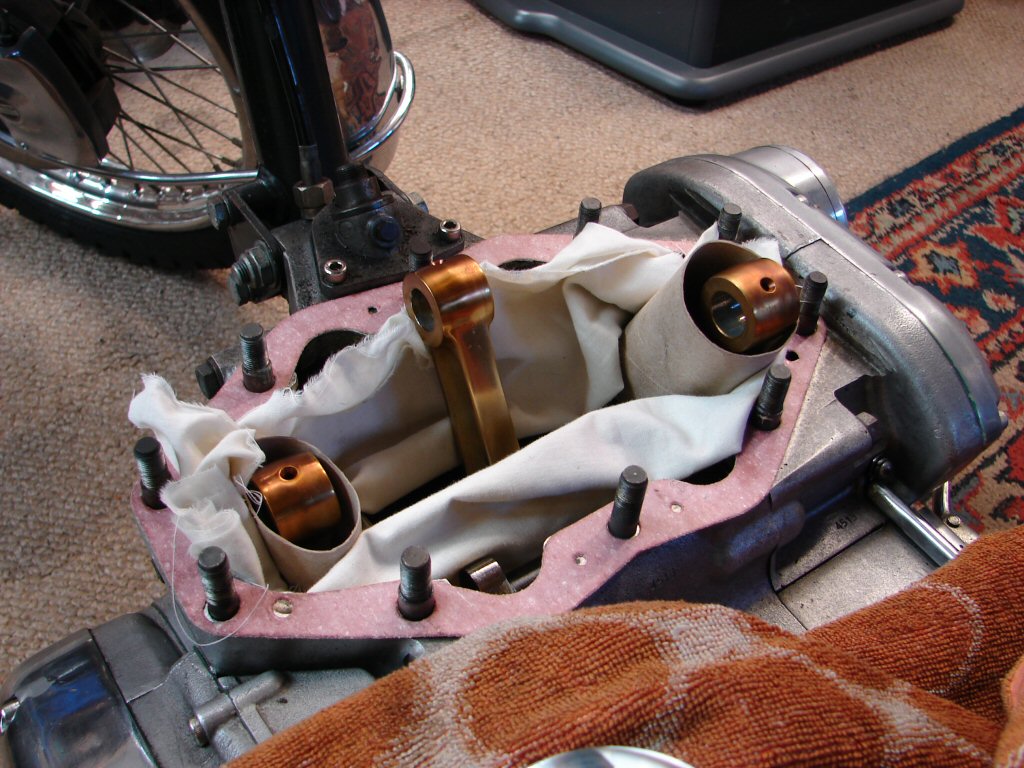
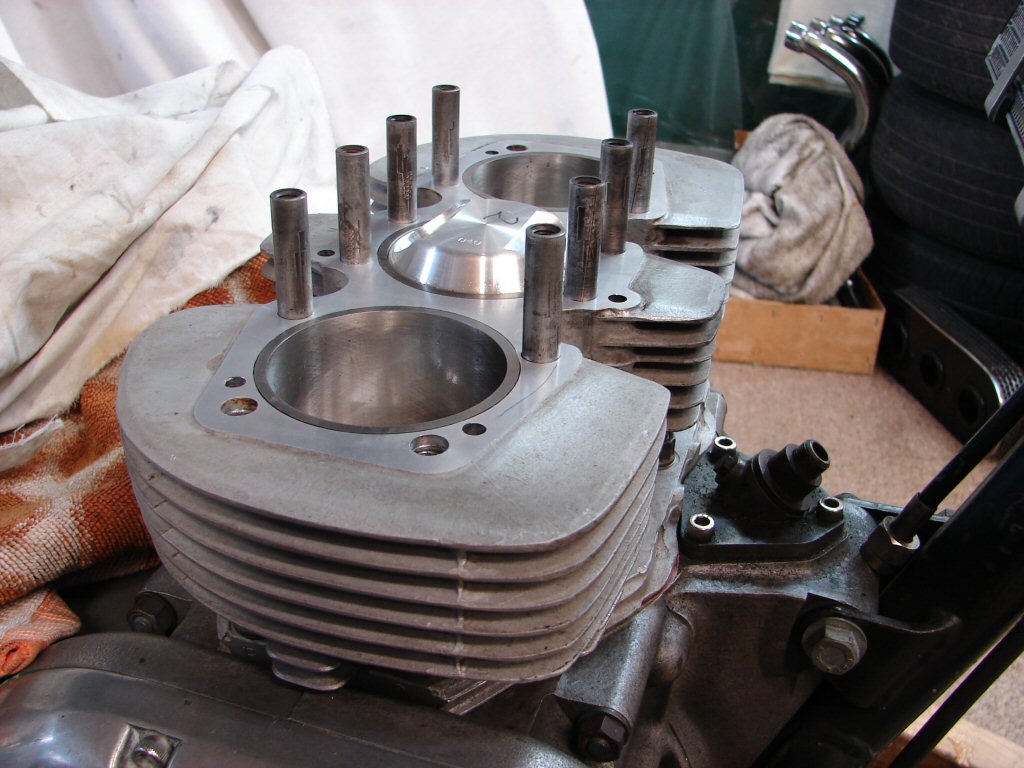
Off came the head. Nothing out of the ordinary. The piston crowns looked intact, but there was a lot of observable play in the pistons to bores, so the barrels came off. All pistons were intact, but noticeably worn. I removed the pistons from the rods and spent some time moving the rods in all possible directions, but no excess play was evident.
We had an enigma.
I took the barrels and pistons to my engine reconditioner to find out what we needed to be aware of. As suspected, the bores were worn out, so at minimum we would need a rebore and new pistons.
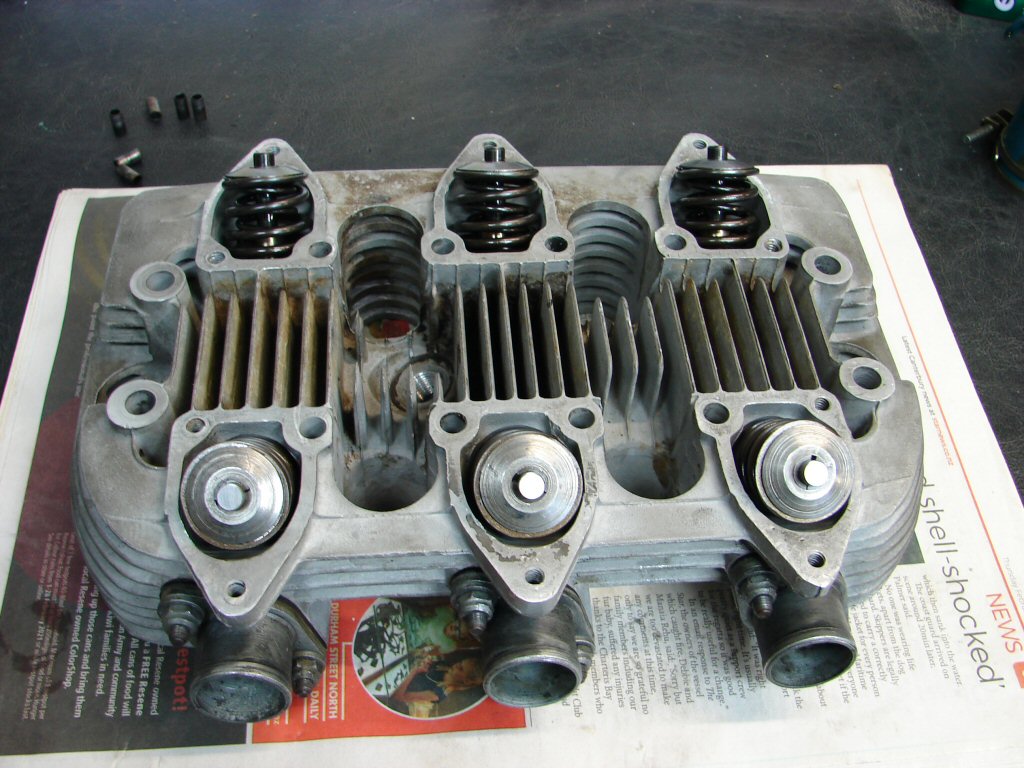
I had noticed that the inlet valve guides had seals fitted, so it would need new guides and probably valves. The list was growing.
I decided to check the primary chain tension in case something had come unstuck in there. To my surprise I found it had a belt drive fitted. I am not sure if Brian knew this or not. As some early belt drives had suffered from crankshaft pulleys coming apart it would be necessary to check inside the primary.
So it came off.
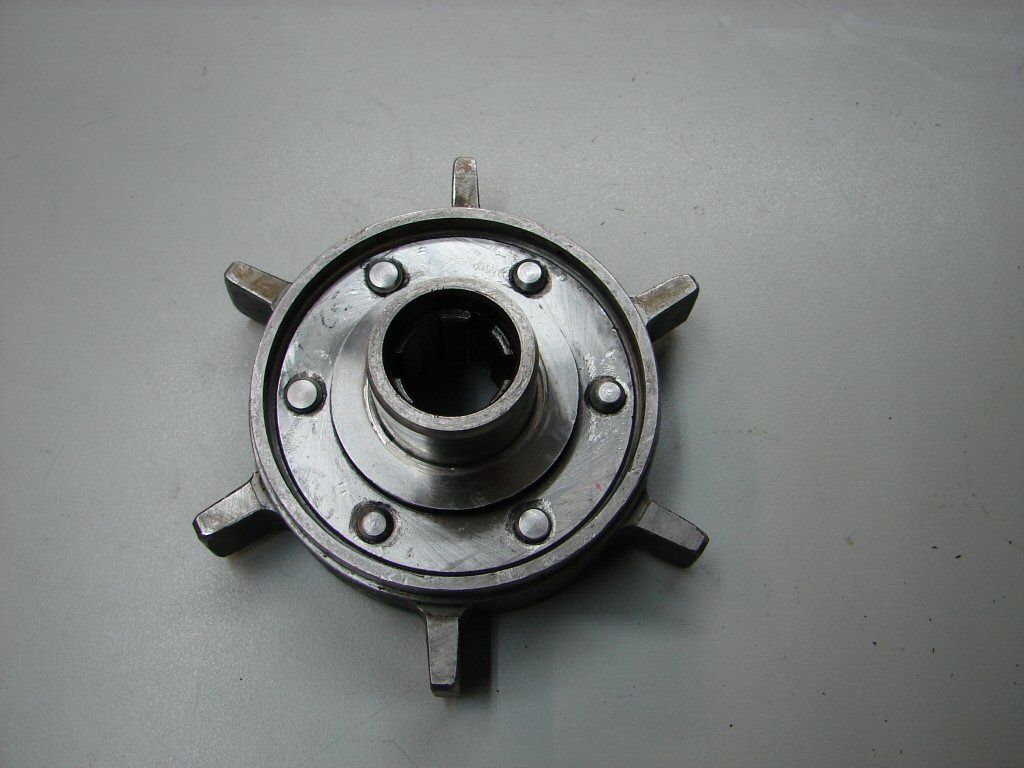
I checked the front pulley carefully. It was perfect, and seemed quite new. I looked at the rear pulley/cush drive. There was a rivet sitting inside the spider recess. Hmmm. I grabbed the outer edges of the pulley and gave it a pull, whereupon the whole thing plucked right out of the bike.
I think we have found the problem.!
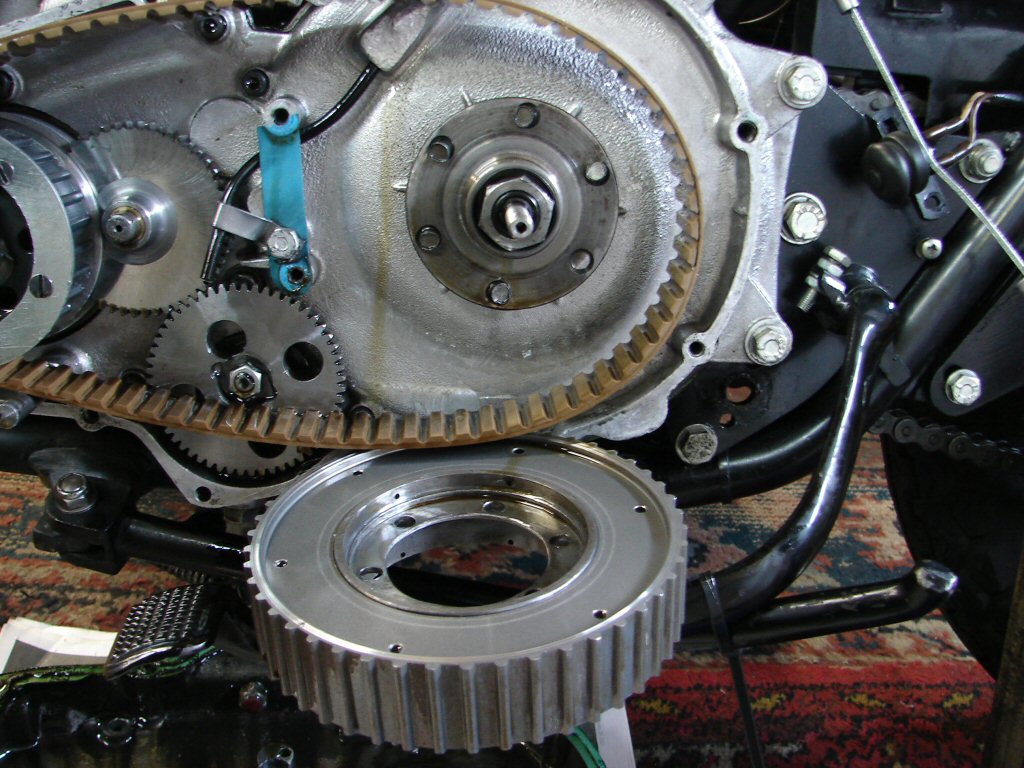
The way this belt drive has been made, it is necessary to drill the rivets out of the original spider, insert it into the cush drive from the opposite side and re-rivet it. Obviously this is necessary to correct the offset so the belt runs parallel. Unfortunately they had made a mess of drilling out the old rivets, leaving rather large holes which the new rivets had no chance of surviving in for any length of time. That time had elapsed. All the other rivets remained in place, and it occurred to me what a mess this was about to make of the primary cases when it all finally fell apart. Even the rivets would be enough to bust the chain up.
A timely intervention then, and it looked like this engine would be well worth repairing properly, at much less than a crank bearing failure would have cost us.
While I was pondering what to do about repairing the pulley I gave the barrels, head, and sets of pistons and valves and guides to my reconditioner, a man whose talents and thorough approach has saved me from much grief in the past. He eventually phoned to say the barrels were done, but that he had found a crack in the head.
Dang.!
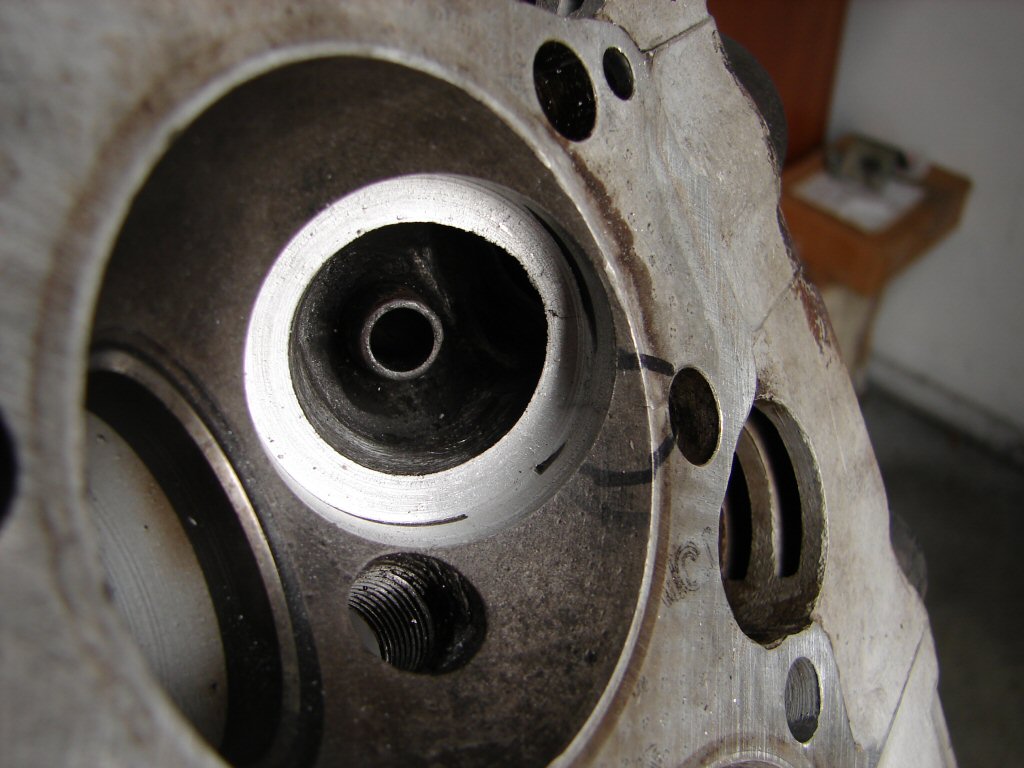
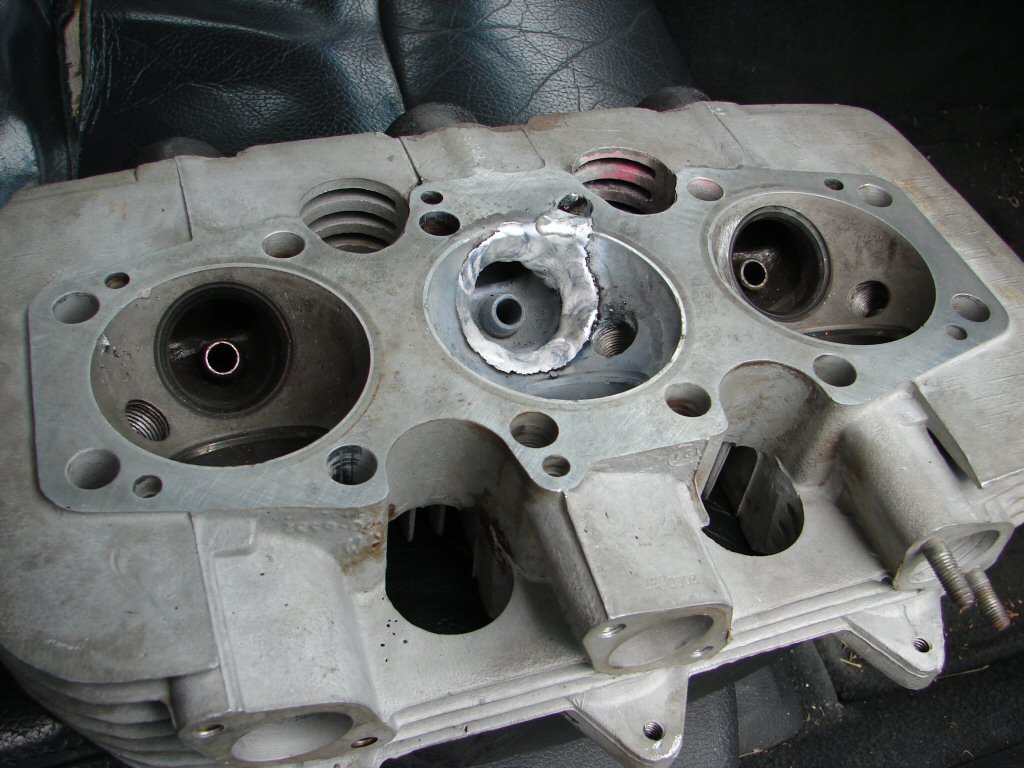
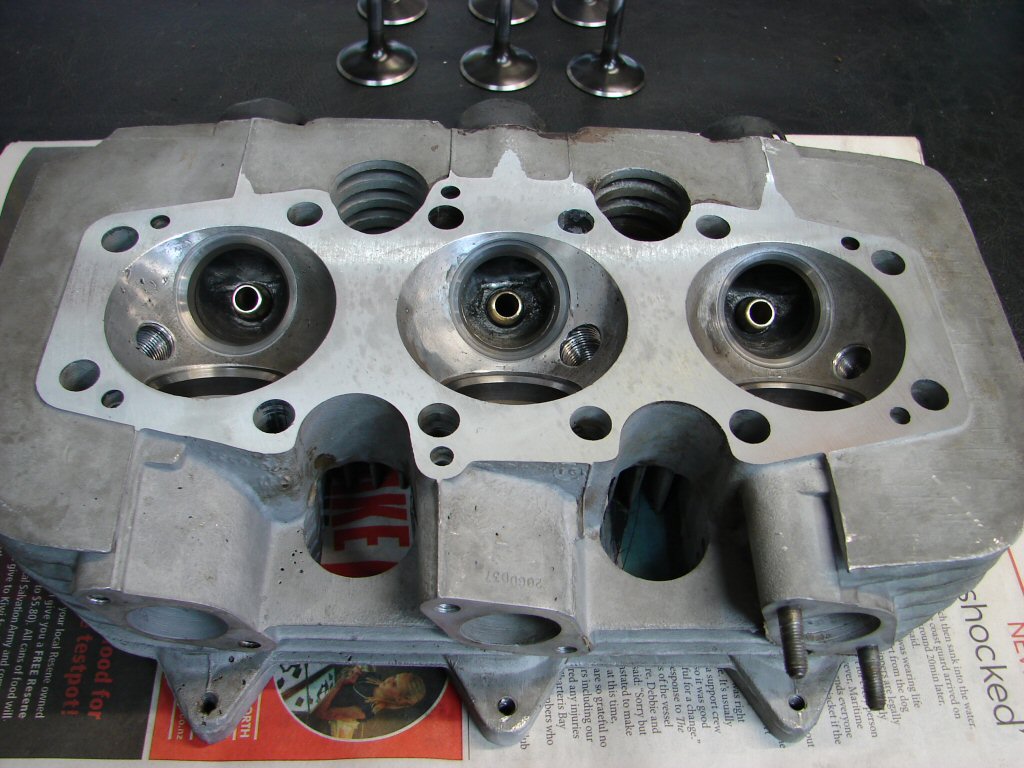
I was hoping we had found all the bad bits already. Oh well. I made enquiries and found a good alloy welder who agreed to weld it up. Glen said the crack was between the centre exhaust valve seat and one of the head stud holes, so he had to machine the seat out before it could be welded. He did that and I collected it on my way to deliver it to a friend who would pass it on to the welder who was a good friend of his. That's how it works hereabouts. I took a photo of it on the way through. I was surprised how much alloy had to come out to free the valve seat, but the head is cast around the original seats. The crack can be seen between the black felt pen marks.
The head came back a week or so later and I dropped it back to Glen for machining and the valve guides to be replaced. Once again, I recorded the progress. Tidy work and a good amount of new alloy to prevent a recurrence.
About this time a mate dropped in to look at progress. He has engineering skills so I asked him how he would repair the failed drive pulley. He figured it needed the rivet holes enlarged so they were uniform, and some larger rivets made for the job. Beyond my skills and machinery. However, he suggested that his brother, who has an engineering business, owed me a favour for brokering the purchase of a T160 recently, so he took the bits off to see what could be done.
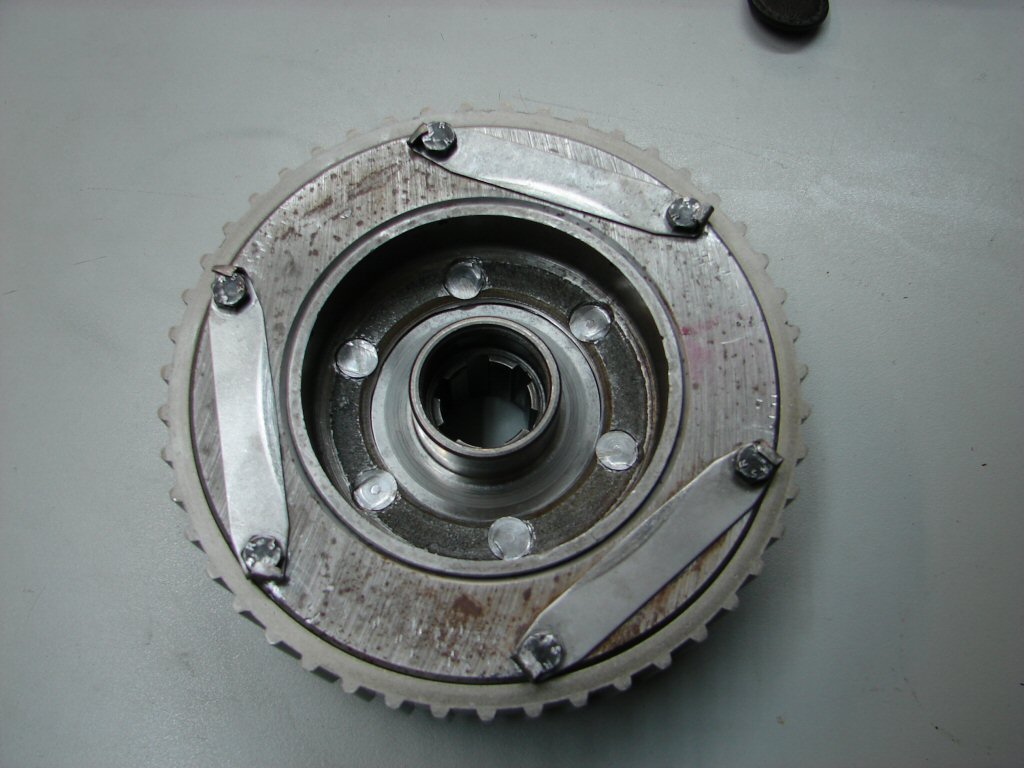
What was done, was that it came back better than new.! They did a fabulous job, and even made a special mandrill for the job.
Just superb.
The original cush rubbers were up for another tour of duty, so they were convinced to play ball..

.. and then the whole thing was buttoned up and ready to go.
The thought of some forward progress got me enthused, and the primary drive was reassembled and closed up. I even gave it a token polish for good measure.
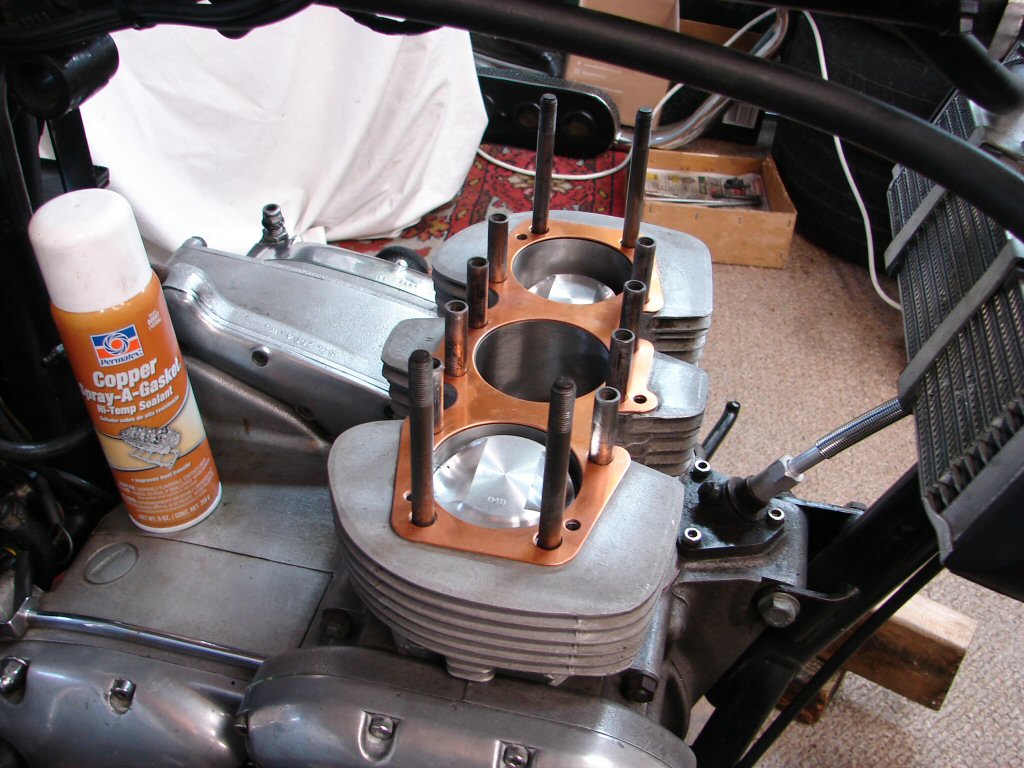
So we were now to the point of refitting some barrels and new pistons.
Never forget to fit the base gasket.! I put it there as soon as I have cleaned all traces of the original off, just to be sure to be sure...
The rings were now gapped and fitted to the pistons..
.. and the pistons were fitted to the rods, and the circlips fitted.
I always draw a deep breath at the thought of fitting the barrels. It is necessary to arrange a good amount of time, turn the phone off, and lock the door. While I have managed to do this job with the help of some people, I find it is best to do it myself and just take my time.
Fortunately, Glen, the wizard that he is, increases the amount of taper at the base of the bores, so the rings are easier to coax in. I do not use ring compressors, just a small screwdriver and a lot of patience.
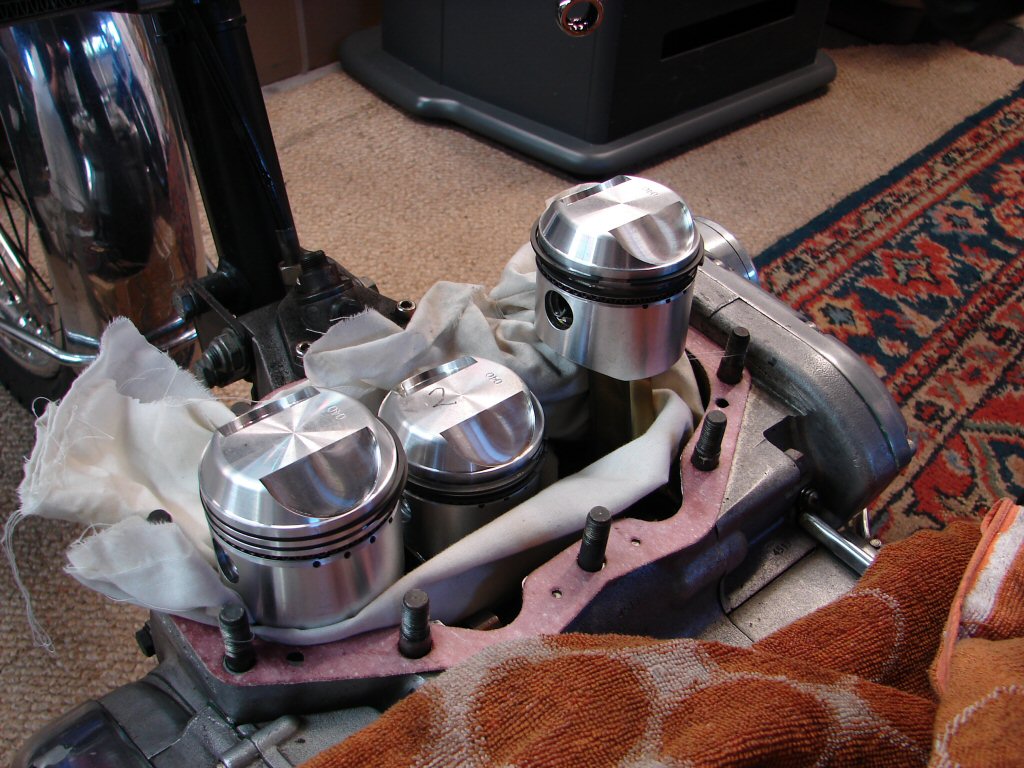
I will only use ring sets with 3 piece oil rings (CX3) which have a centre spacer and two outer scrapers, as they seal every time and last well. They are however rather fiddly when it comes to that very last scraper. For this reason I insert the outer pistons first, and the centre last, as you have more space to operate in.
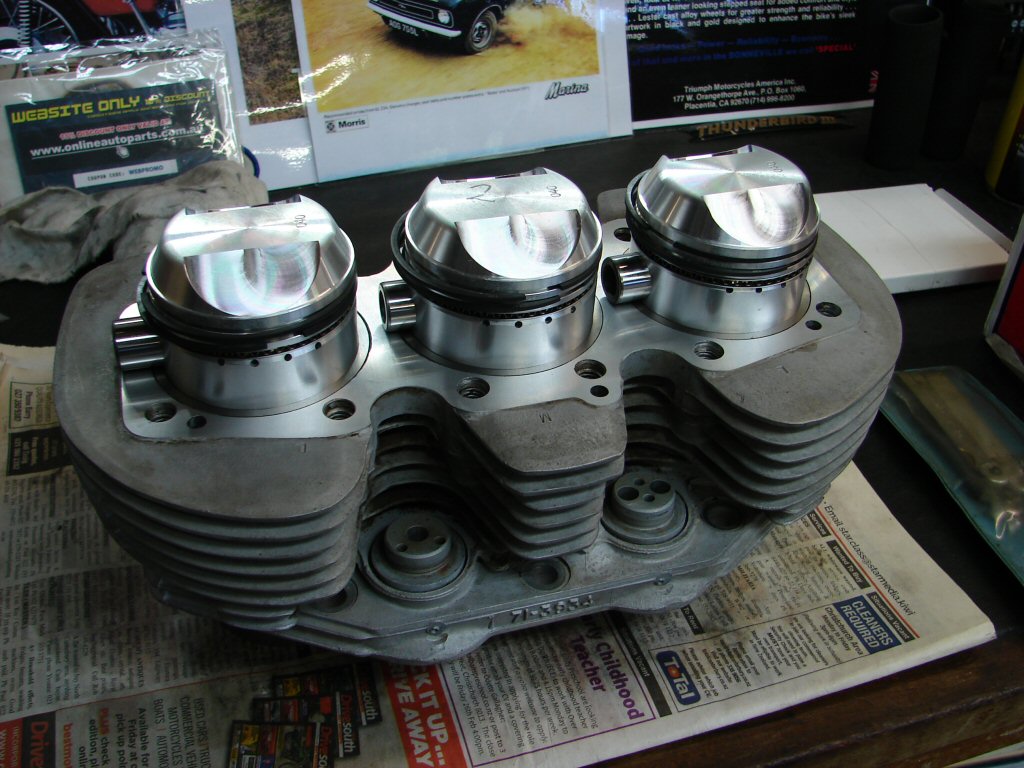
It is good to reach this point without feeling frazzled. That means you did not rush and you did not damage any rings.
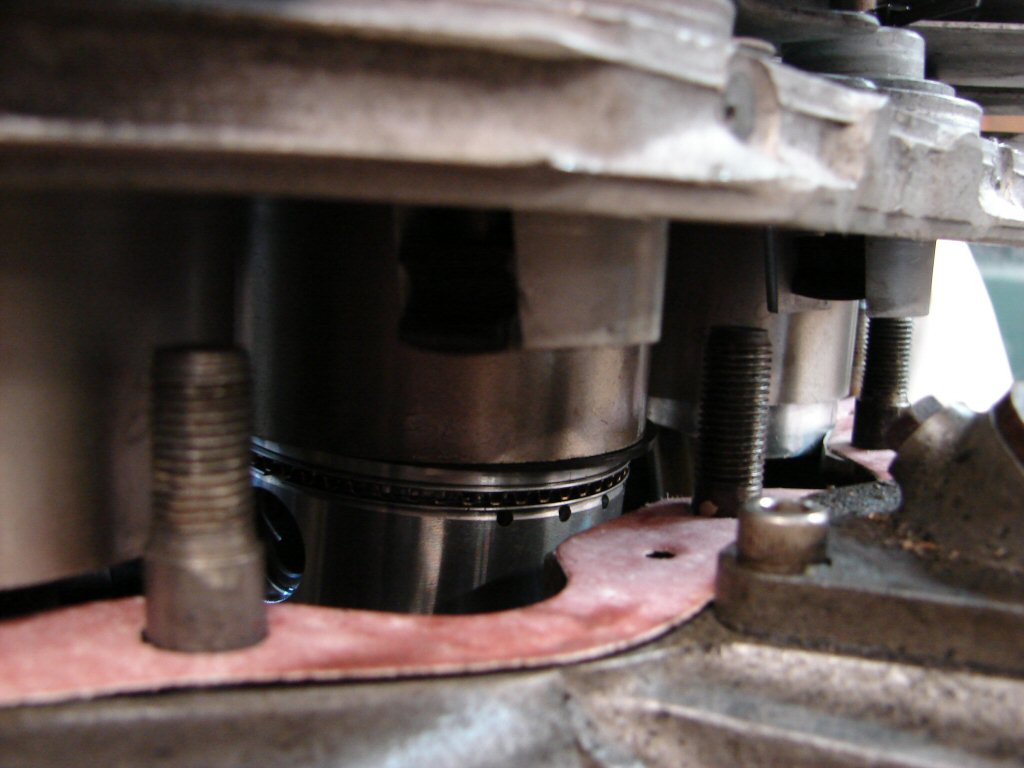
I had some trouble getting one of the pillar bolts to screw right down. After several attempts I discovered that the hole was full of carbon. It was of course the hole that the crack had led into, and exhaust gases had been blowing in there for a while. The engine bath that is used after reboring softened it all up and it settled to the bottom of the thread. A bit of poking with a screwdriver got enough out to allow normal transmission to be resumed.
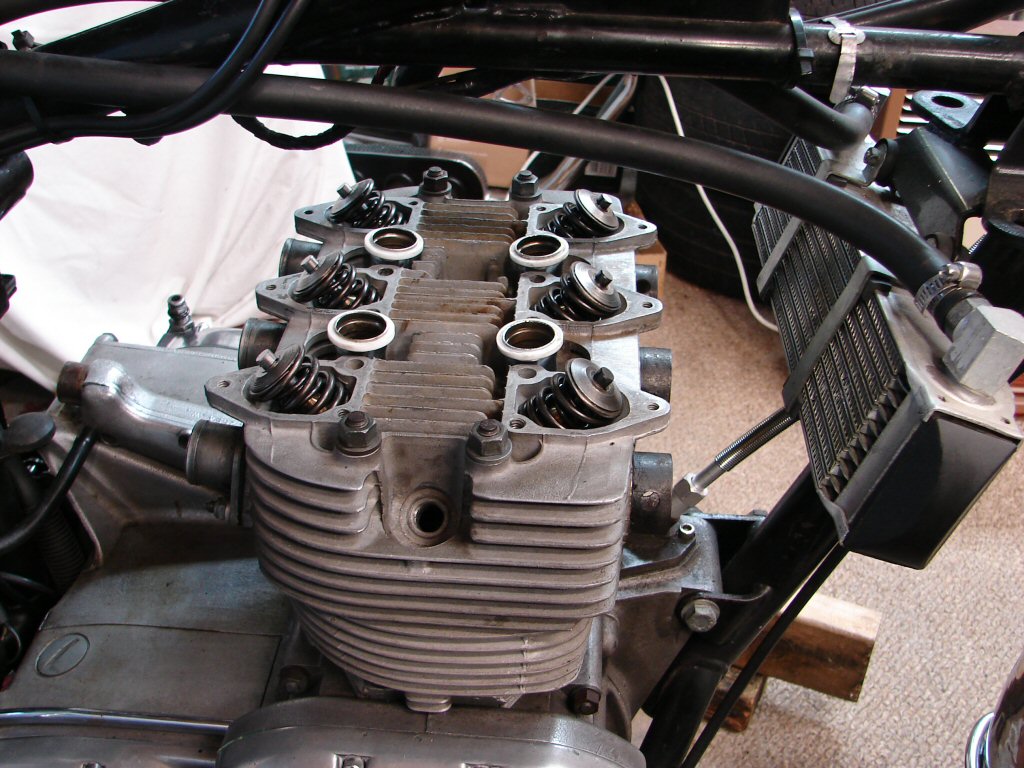
In a great piece of timing the cylinder head came back with new valves and guides, with the combustion chambers cleaned up where a few previous misdemeanours had obviously taken place.
This bike has had a lot of money spent on it by some owner(s), and been pretty run down by others. From here on it should be top knotch in all aspects.
Valve gear fitted and inlet manifold stubs also. There were some failed gaskets between the head and the stubs, so some air leaks may have been a nuisance here in the past. Its not like you ever take them off to look unless the head is being worked on.
New copper head gasket with a fresh coating of copper gasket spray applied. Just provides that extra insurance against leaks.
Head on and outer nuts given a slight tension. The pushrod tubes and seals are fitted but no pushrods yet, as it is necessary to ensure that the rocker boxes will apply enough compression of the seals to ensure they don't leak. I aim for about 0.050" gap between the rocker box and the aluminium rocker box base gaskets. Fibre washers are added beneath the lower seal cups to achieve this.
Rocker box gaskets are given a light smear of silicon sealant before the boxes go on. The cap screws at the outer edges of the rocker boxes get new alloy washers, and are tightened as per normal. However, the recent versions of the washers are very narrow in surface area, so they can crush outwards quite a bit. This results in the screws being loose after a few heat cycles during the first runs. For this reason I do not put any silicon sealant down the cap screw threads until the final head retighten after the first test ride which is long enough for the engine to get fully up to temperature.
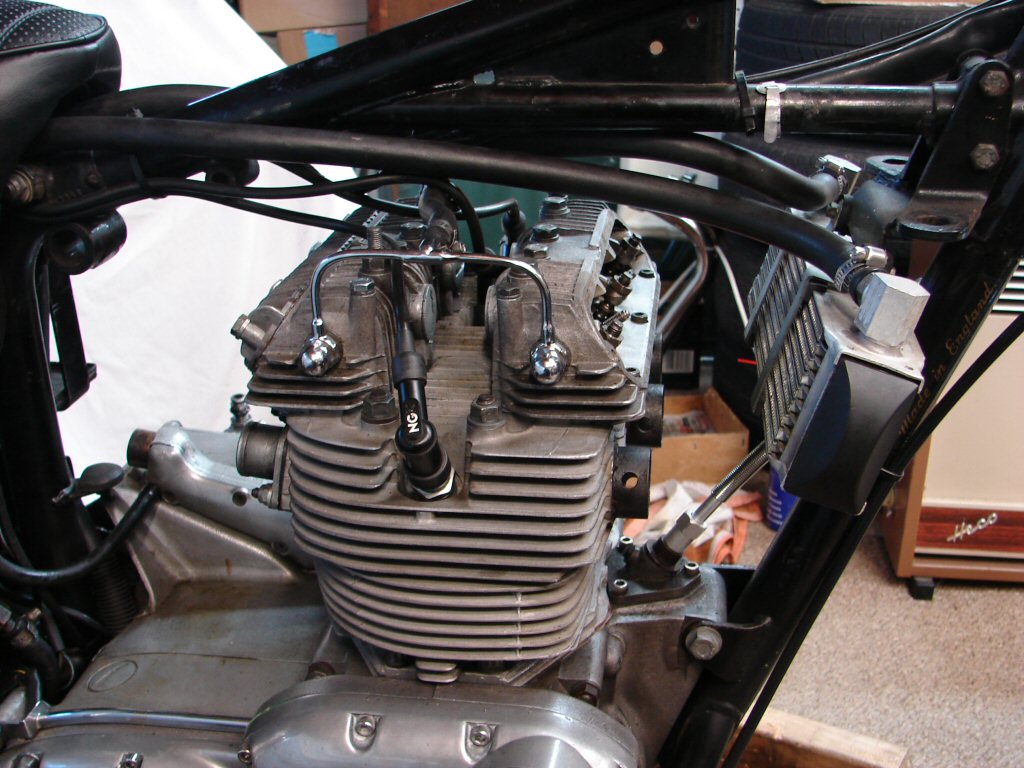
After the head gets tightened down the first time the exhaust system goes on. As this bike features a special custom job with 3 seperate headers there is no issue fitting the exhaust up after everything else is in place. I did not record that process.
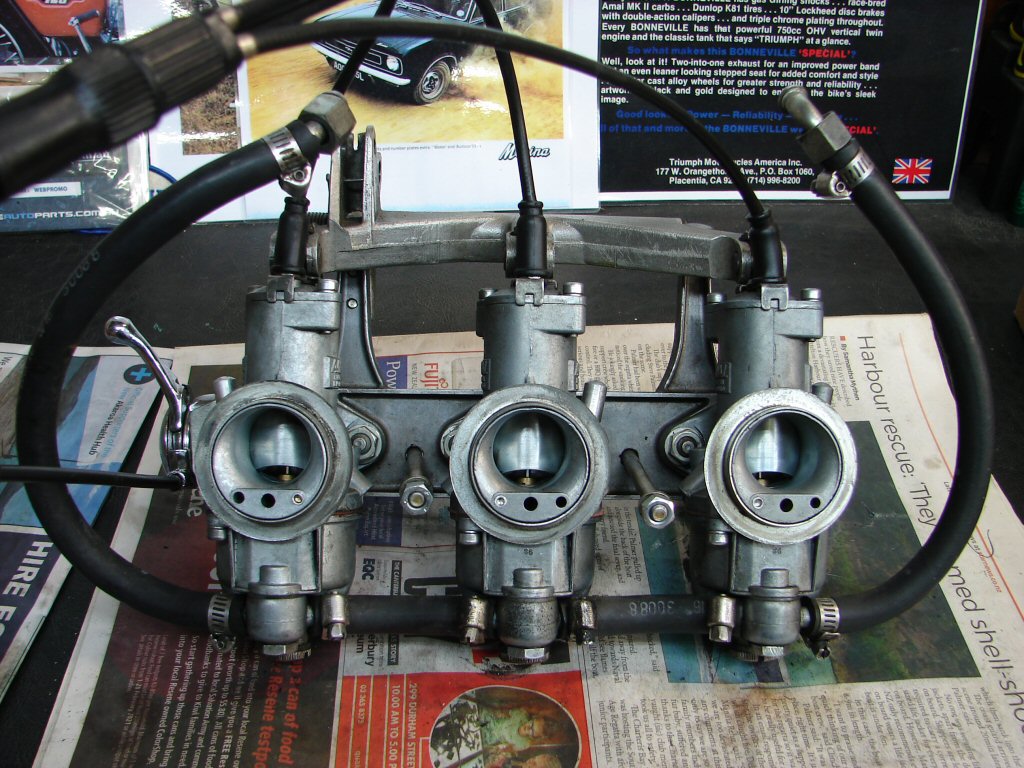
Before refitting the carbs it would be foolish not to investigate their condition. As per usual, there were brass float needles fitted, which tend to restrict fuel flow due to their inherent weight. The cure is to fit alloy types, which I did. Remainder of old fuel residue got cleaned off jets, and float heights reset to slightly below the top edge of the bowl.
When reassembled as a unit, the slide heights were set the same using small ball bearings to synchronise them. After that the carbs went back on and air filter fitted.
There are always incidental issues which come to light when things are being removed or refitted. The clutch cable inner was too long and both adjusters were out to the max, so I had the inner shortened and was then able to set it up as it should be.
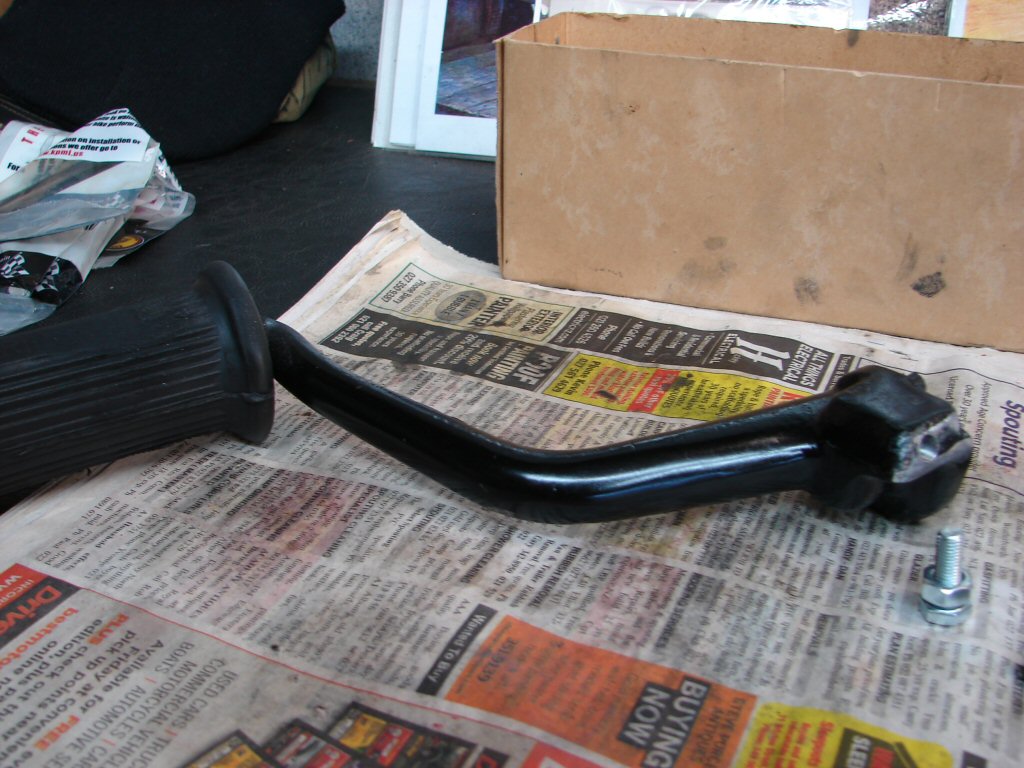
The left side footpeg had been replaced at some stage, and it was both a poor fit, and it lacked a mechanical stop for the brake lever, which just came up until it hit the underside of the footpeg. This meant that the pedal was higher than the footpeg, so the rider had to lift their foot before applying the brake. There was also no clearance between the footpeg and the clutch adjusting cover, to the point that the footpeg would not bolt up tight.
To remedy the first issue I drilled a hole and tapped a thread in the base of the footpeg so the brake lever could now be adjusted to any height.
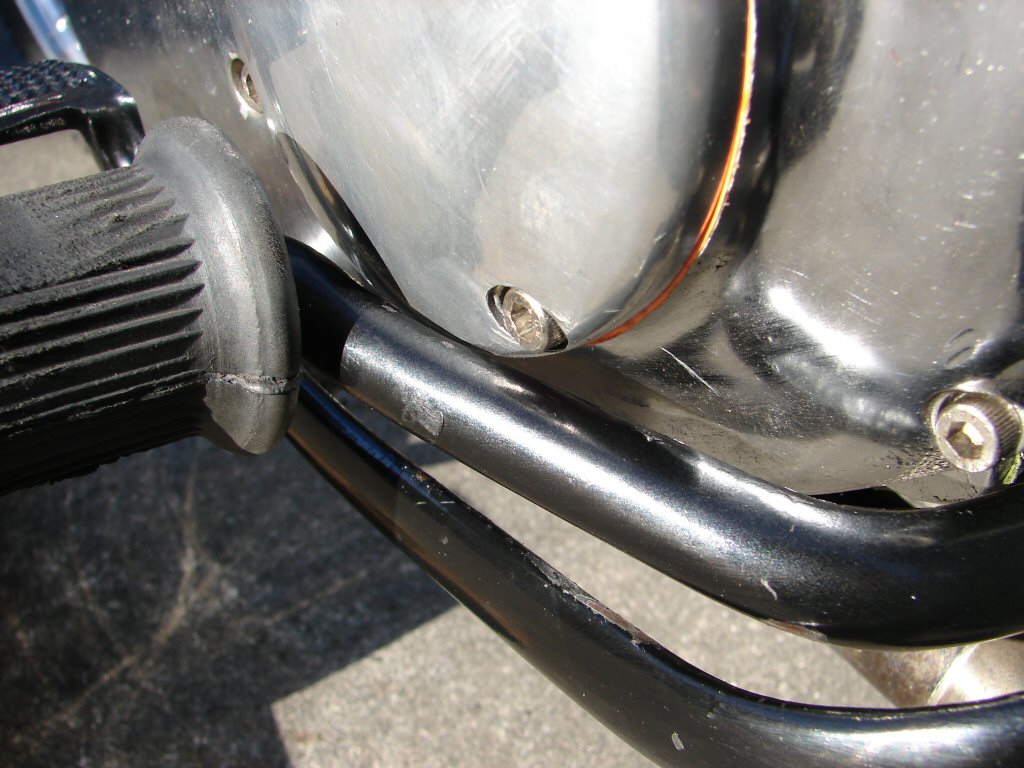
The second cure was to fabricate a spacer to fit between the footpeg and the engine mounting plate, in order to add clearance for the clutch adjusting cover.
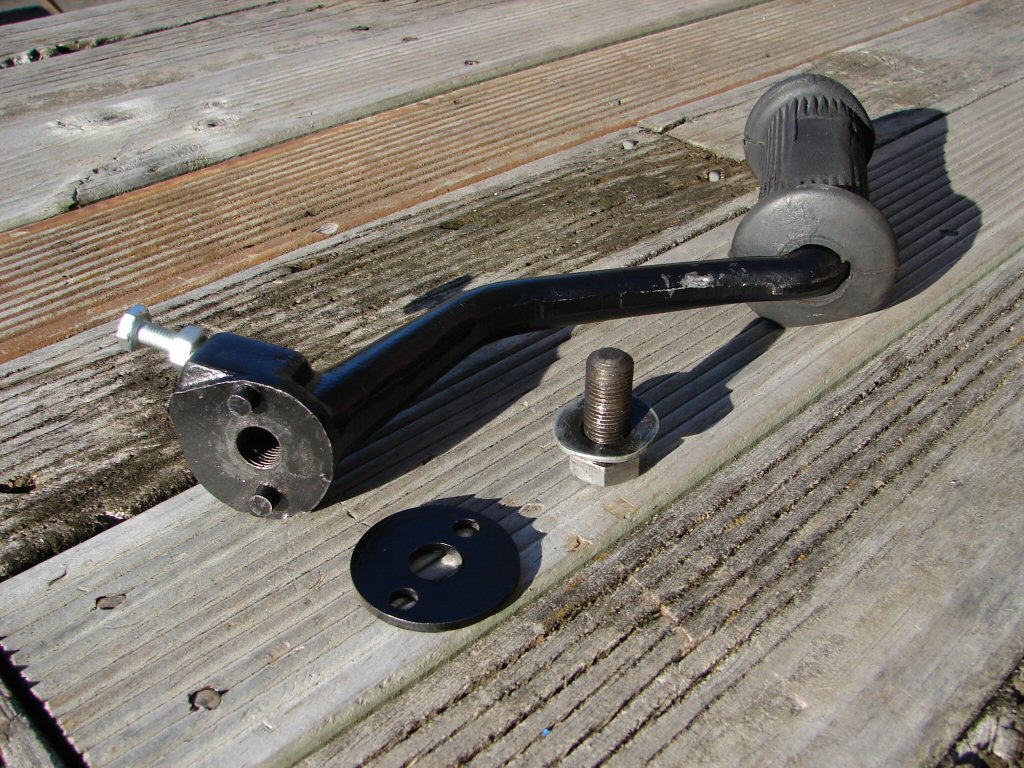
That all worked out well, but it takes an inordinate amount of time compared to bolting the main bits together.
A fresh load of Castrol was added to all the right places, although the old filter was left in place. After an intial test engine run, the bike will undergo about 30 miles use, after which the head will receive its final retighten, valve clearance check, cap screws sealed, and new oil and filter.
So now we were ready for the first start.
In the same fashion that I could not get the bike to start when it first arrived, nor could I now. It simply did not fire. I checked the timing of the Boyer ignition and it was certainly close enough not to be the problem. The battery was fully charged. I got the trusty avometer out and checked the voltage arriving at the Boyer unit.
A measley 6 volts..!
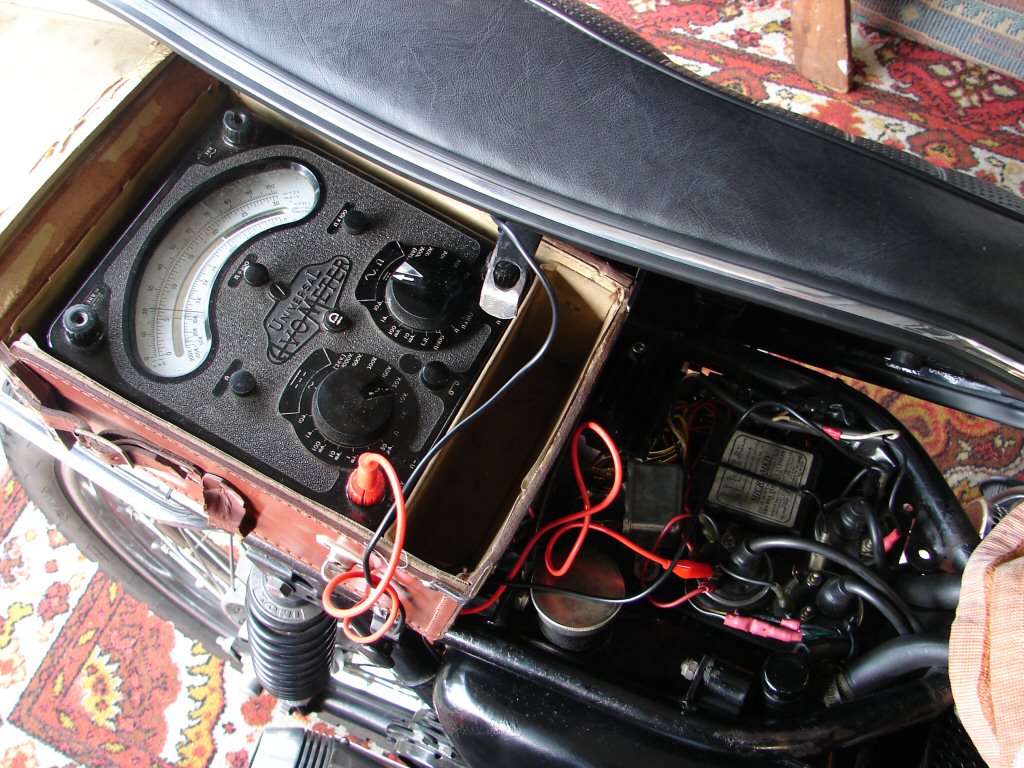
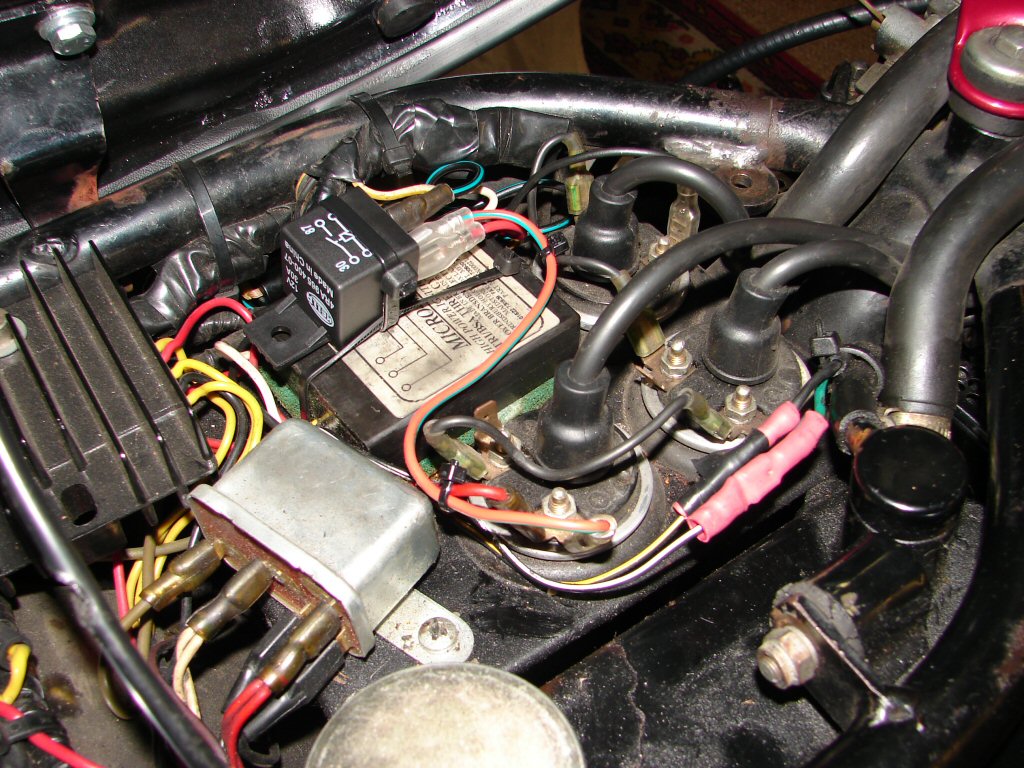
This means 6.5 volts are going missing between the battery and the Boyer, caused by corrosion in old connectors, ignition switch and killswitch. The latter is often the culprit. Rather than embark on a complete rewire, I fit a relay in cases like this. The relay is now operated by the old circuitry, and the relay switches full battery voltage to the Boyer.
So here is our relay, fitted and wired. It makes a happy 'click' when the key is turned on.
Well, that did it, and a few kicks later we were alight and running happily. I let it warm up for a minute while adjusting the pilot screws for happiest idle speed. After shutting down a quick tour to make sure we had no escaping oil. There was some, from the rocker oil feeds. I had reused the original copper sealing washers, and despite being tight, they were weeping. Quite a lot of oil can issue forth from the rocker oil feeds, so it is best not to encourage it. A new set of washers was fitted.
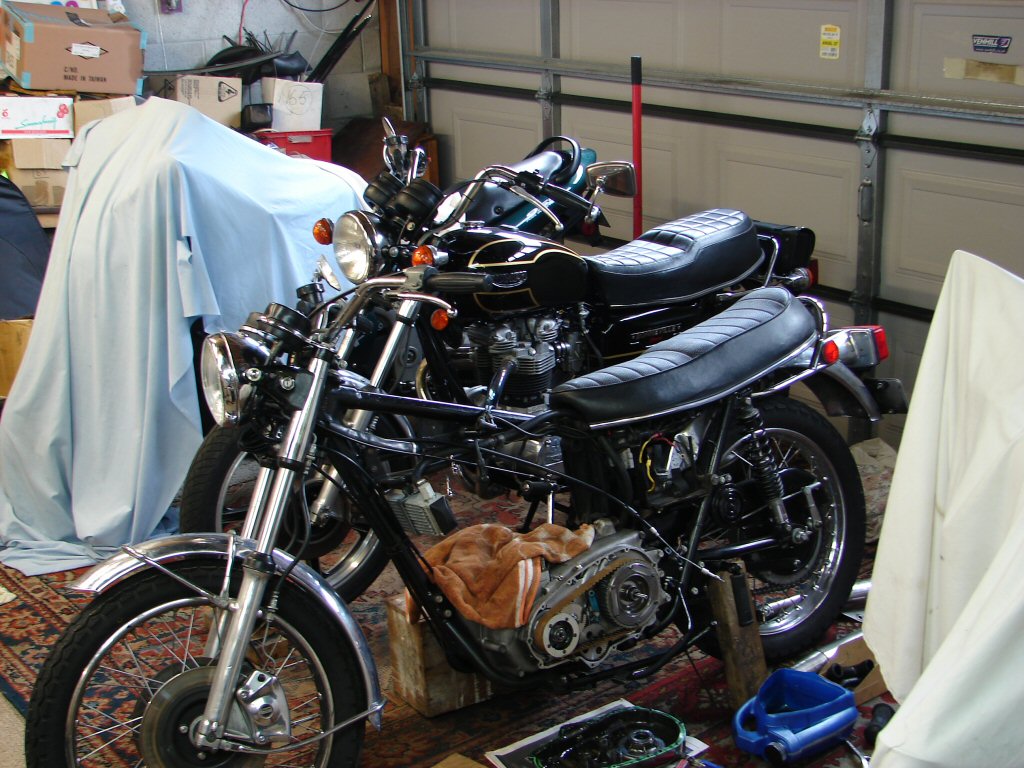
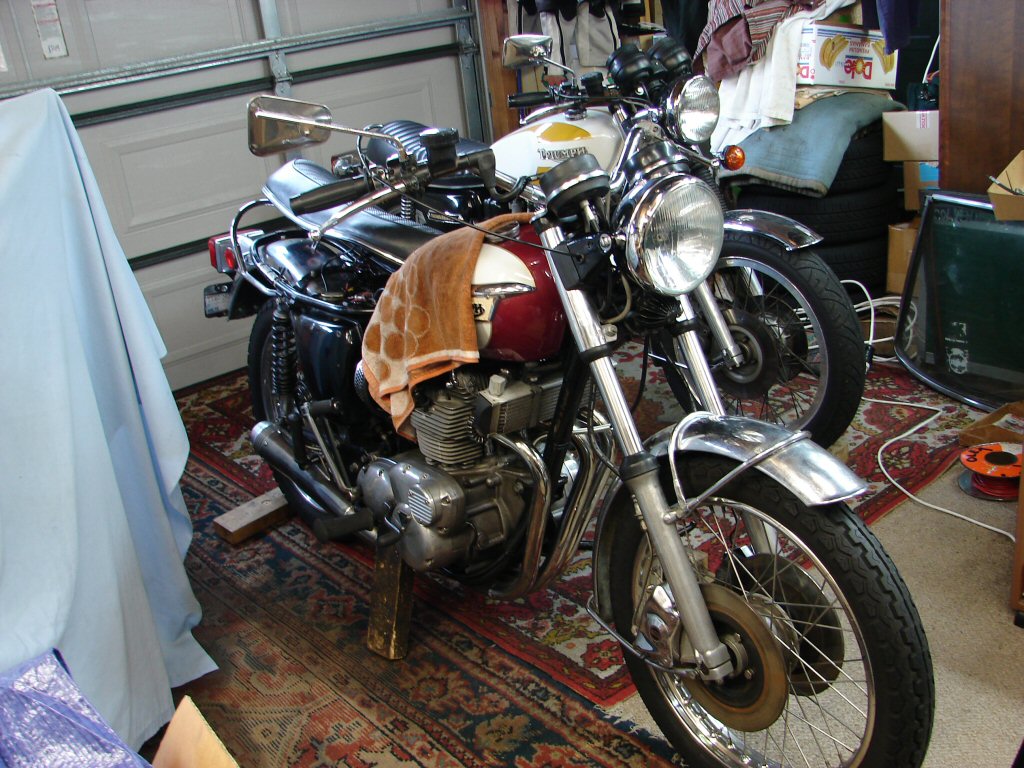
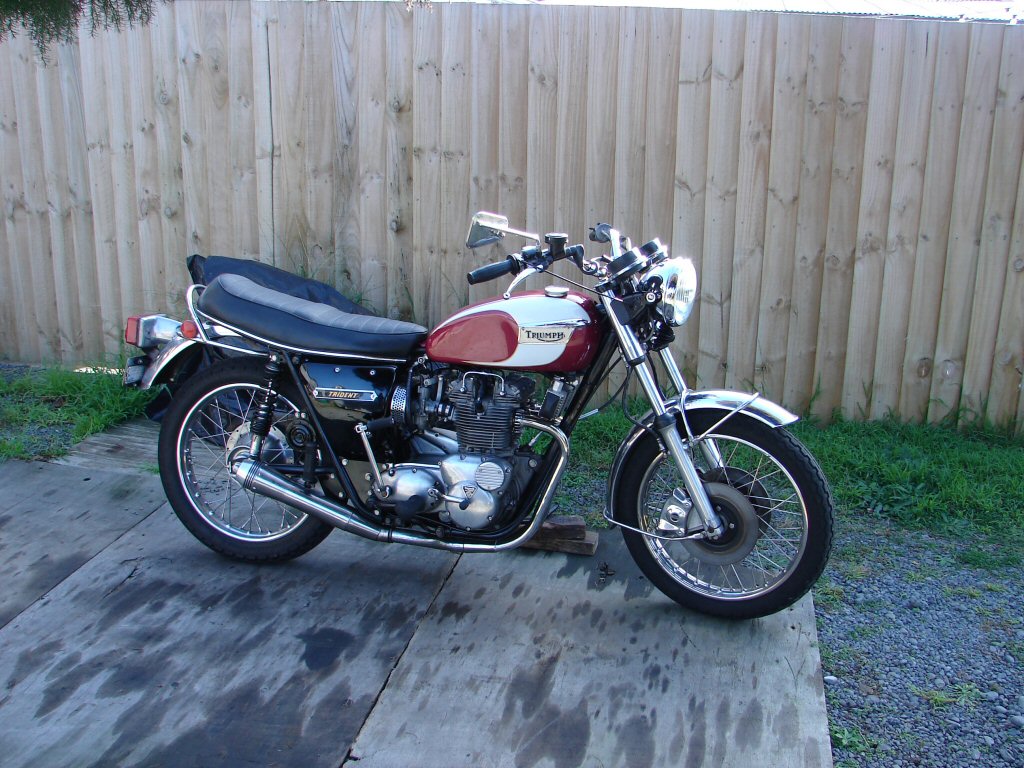
Now its alive we shall take a few pictures.
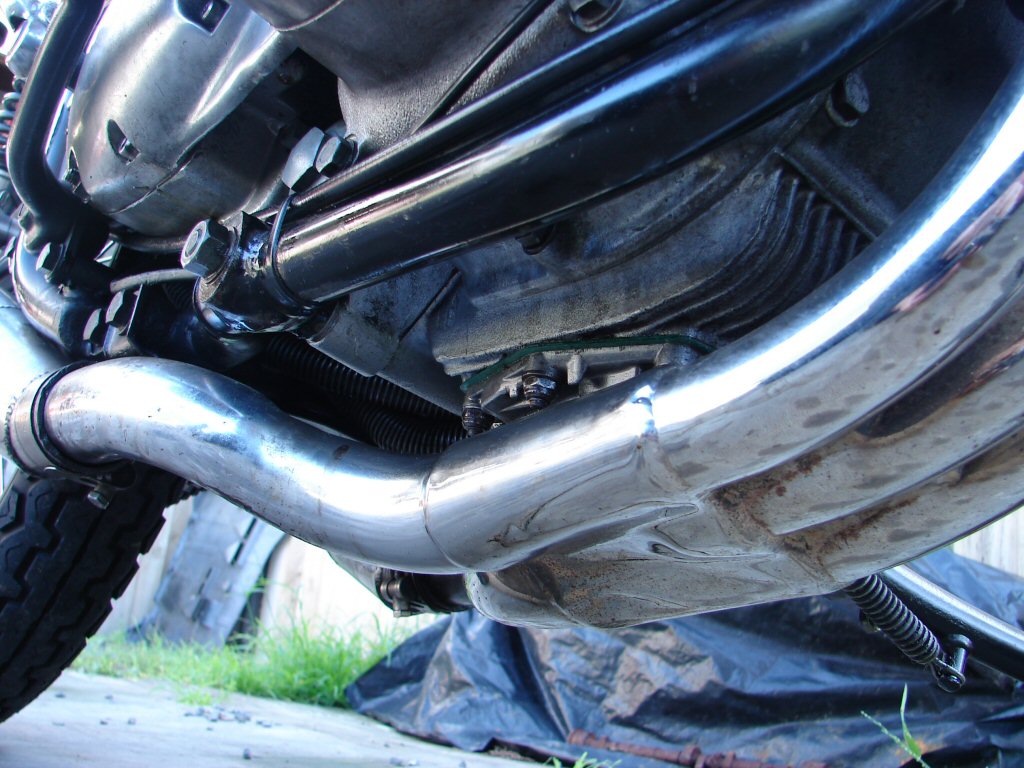
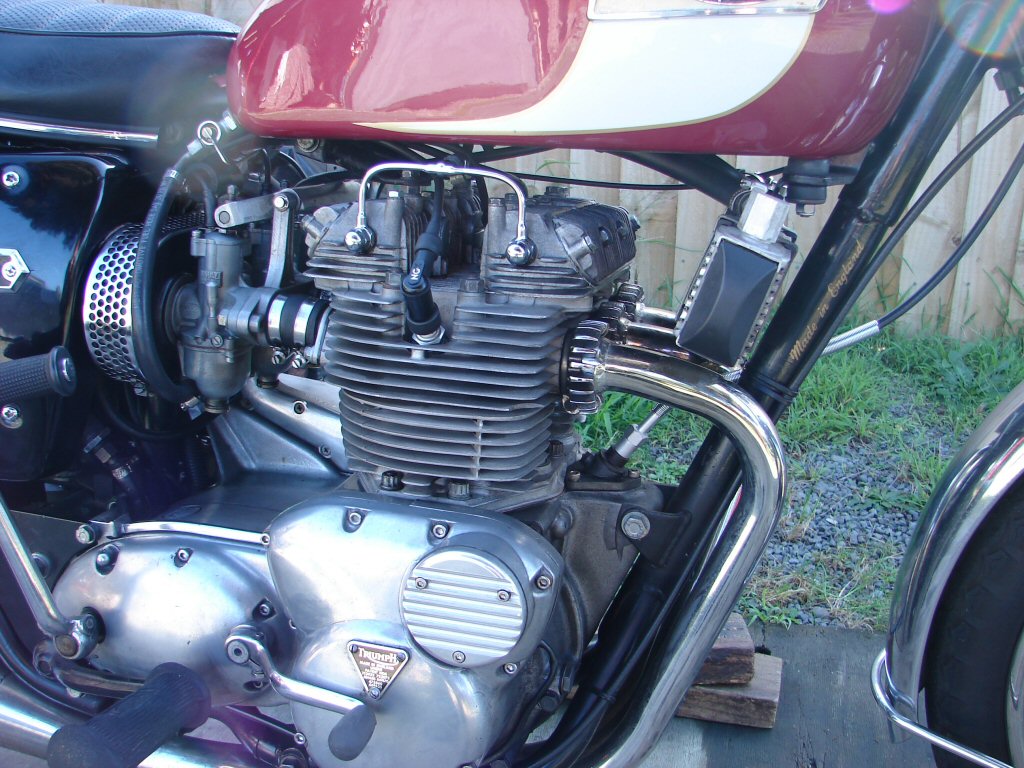
Koni rear shocks and large bore exhausts into fairly demonstrative mufflers demonstrate a businesslike approach.
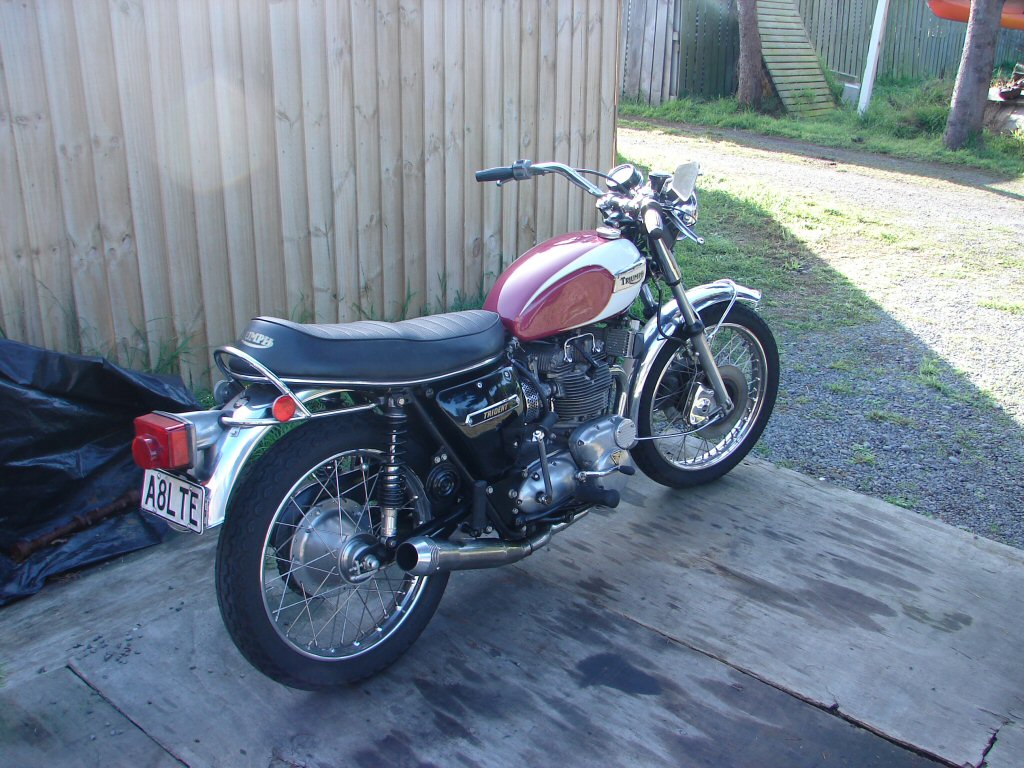
The system is a 3 into 2, with the large bore pipes all the way from the head to the outlet, so it should be efficient at moving gas.
Add a twin disk front brake and a belt drive primary and you have a pretty impressive sum of parts right here.
A short test ride of about 3 miles was undertaken, everything worked very nicely, and the idle was fine tuned on returning, with everything nicely hot.
No signs of a drip anywhere.
Next ride was a few days later in about 10 degree air. I even put my thick gloves on. I intended to put about 27 miles on the bike, and I would do some of that at open road speeds, so it was going to be kinda chilly.
Besides sounding like a hotrod, this thing accelerates like one. Its only departure from standard is the exhaust and the lighter belt drive, from a performance aspect, and yet it feels really strong. No doubt the compression afforded by a new bore helps some, but it sure is a fun ride.
Once again, no leaks at the end of the ride, so the only things left to do are final head tighten and related bits, and oil and filter change. I dropped the oil while it was still hot, plus the primary oil and the filter, then a fresh load of Castrol once more.
It is officially finished.
And Brian is going to ride another T150 up in order to ride this one home.
I am so pleased we managed to restore this bike, as it feels kinda special.
I do hope the new arrival has a few less issues though...