January 2021
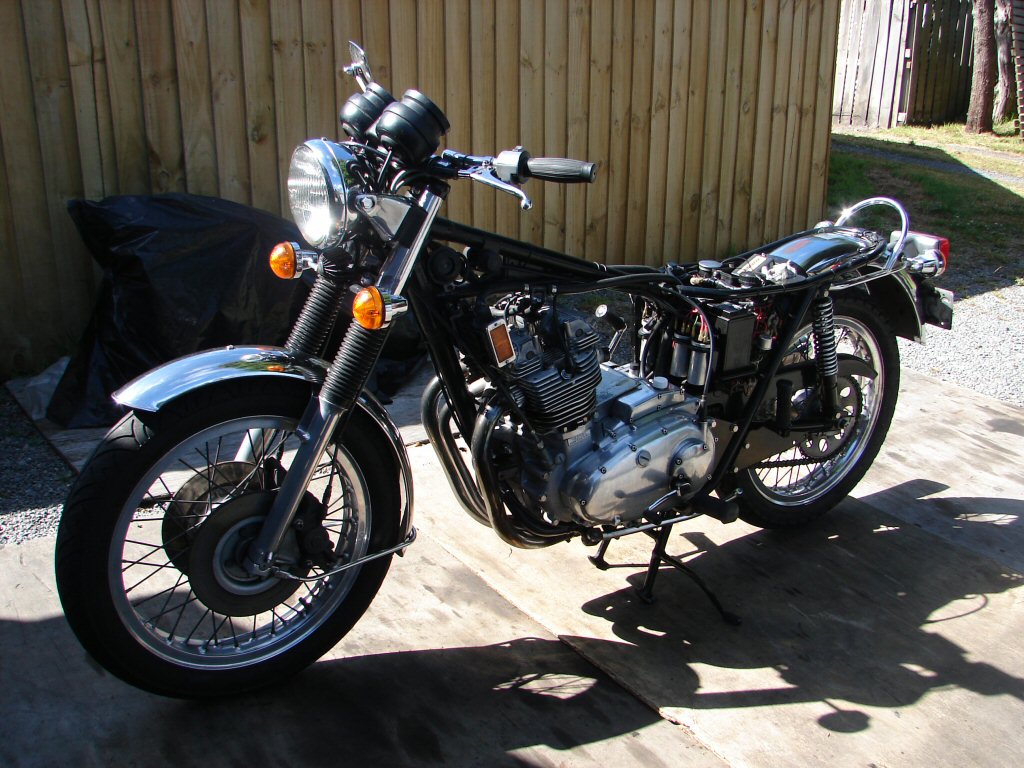
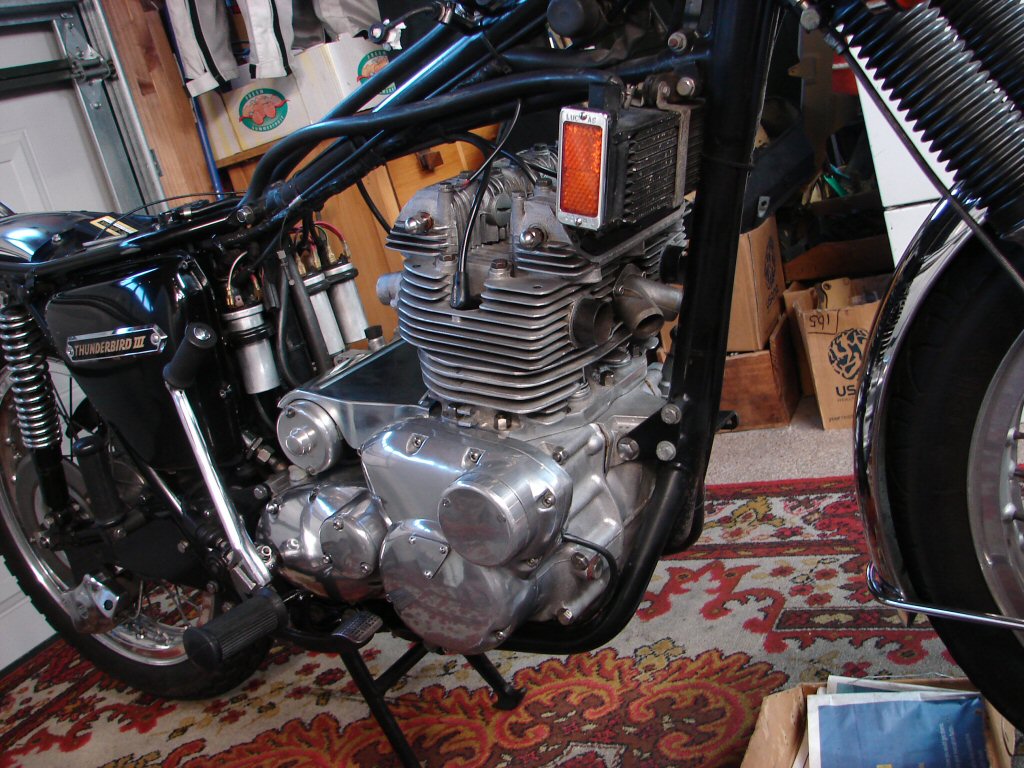
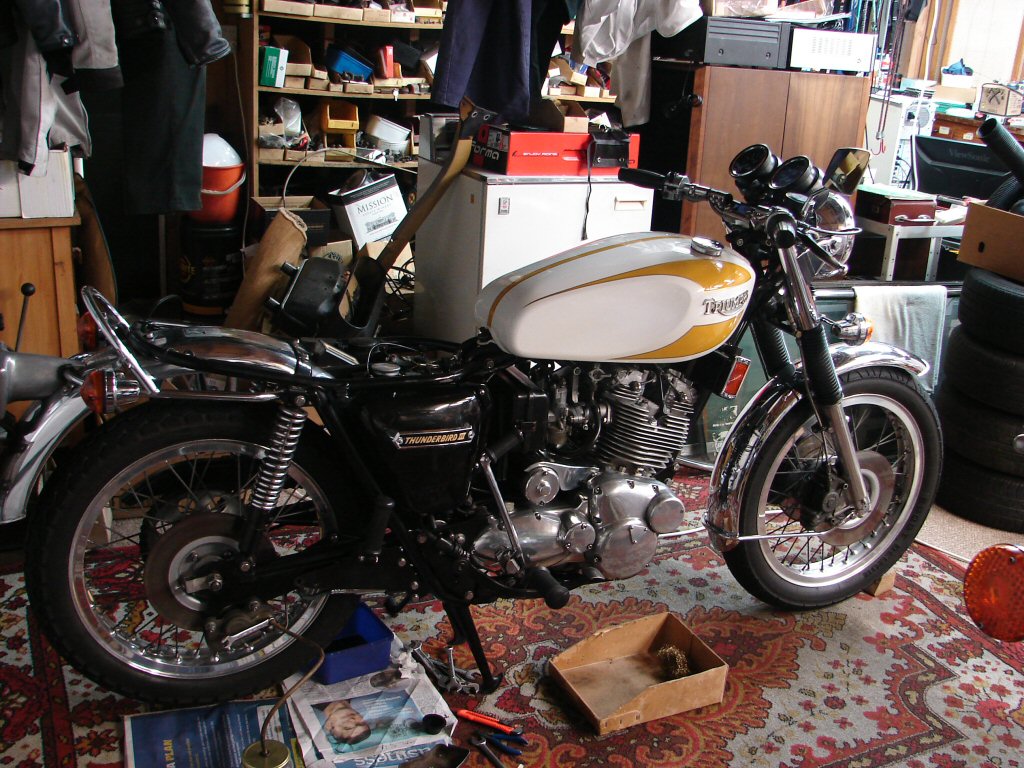
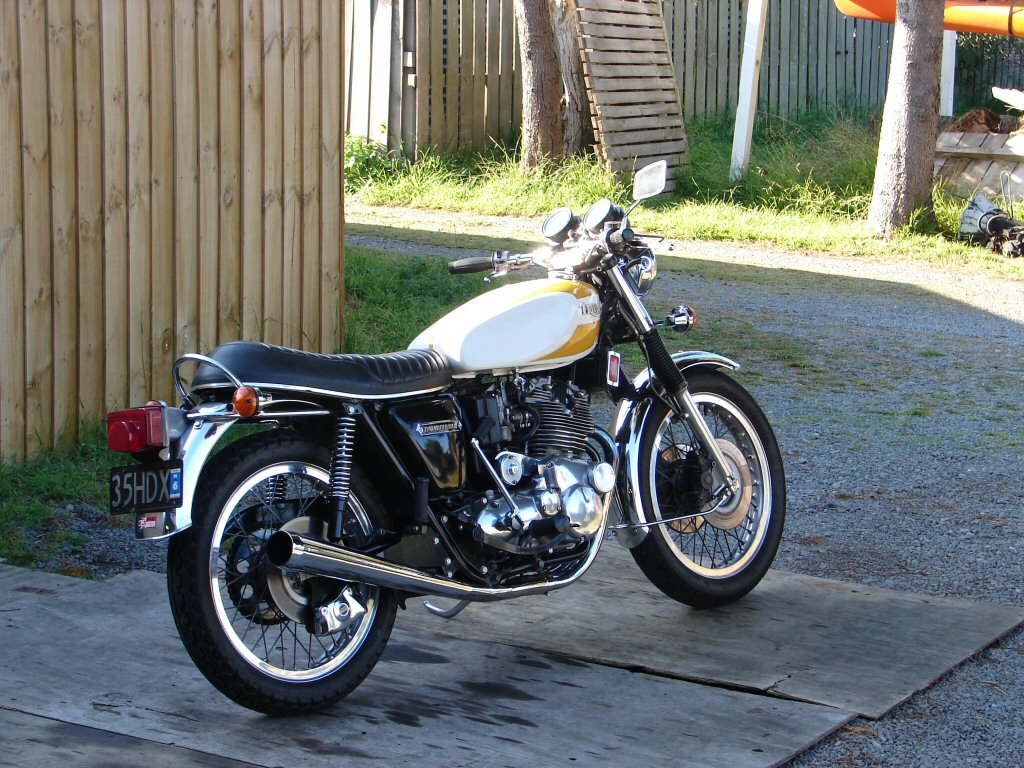
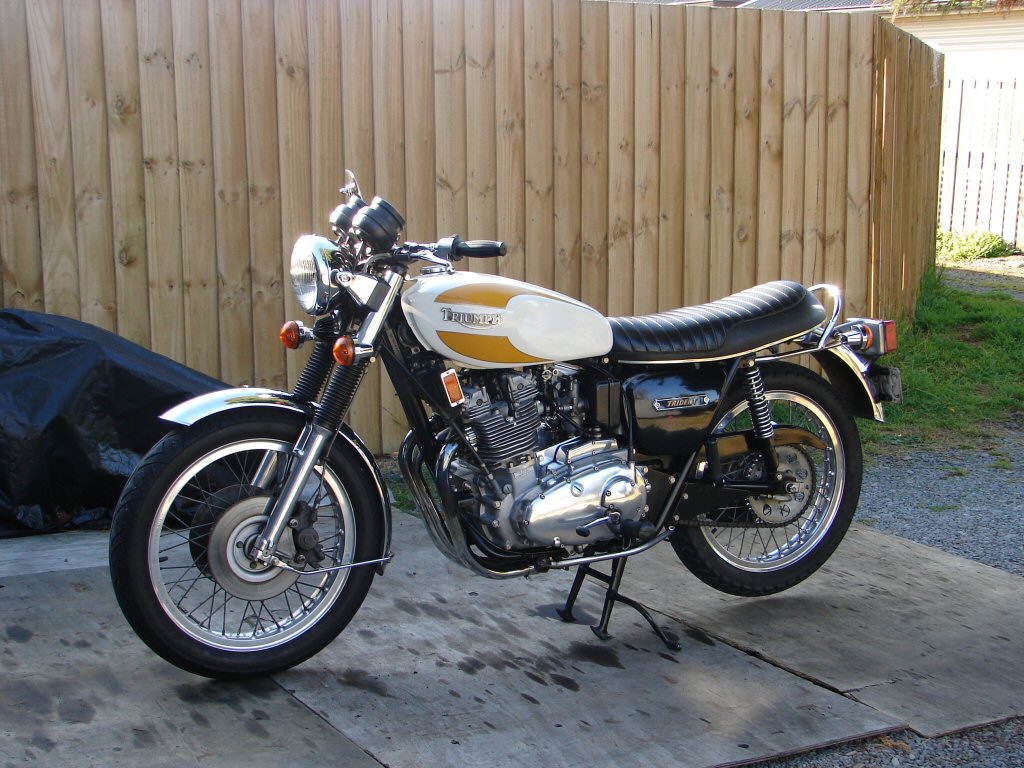
1975 Triumph T160 Trident 830

My own T160 from new has been denied much overdue attention for at least a decade. While I feel extremely negligent in this, there have been many demands on my time dictated by both natural events and other time restraints, but now is the time to bring it all up to scratch.
There has been another reason for my reluctance to begin this task. The bike has been performing flawlessly for all this time, and I simply did not wish to disturb this most desirable state of affairs. However, the degree of anxiety has been increasing due to my knowledge of the main problems which need addressing. A pillar bolt in the Hyde barrels had stripped long ago, meaning one head bolt was doing nothing, and was encouraging oil leaks. Also, the nasty clutch plate I was supplied during the last rebuild in 1991 has become increasingly worse and it seemed was in danger of imminent failure, which would result in a total breakdown involving roadside recovery, and that would simply be boring.
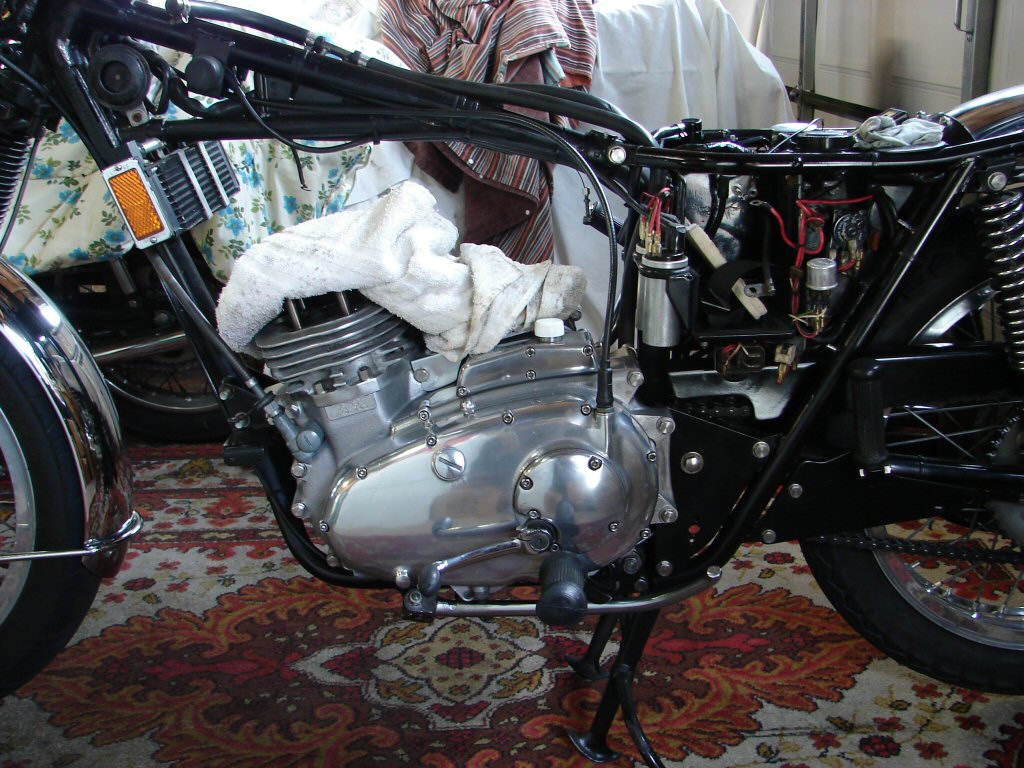
As the level of my neglect had included a lack of cleaning, I decided the first step should be to degrease and wash off the worst of the grubbage before pulling bits off it. So that is what I did.
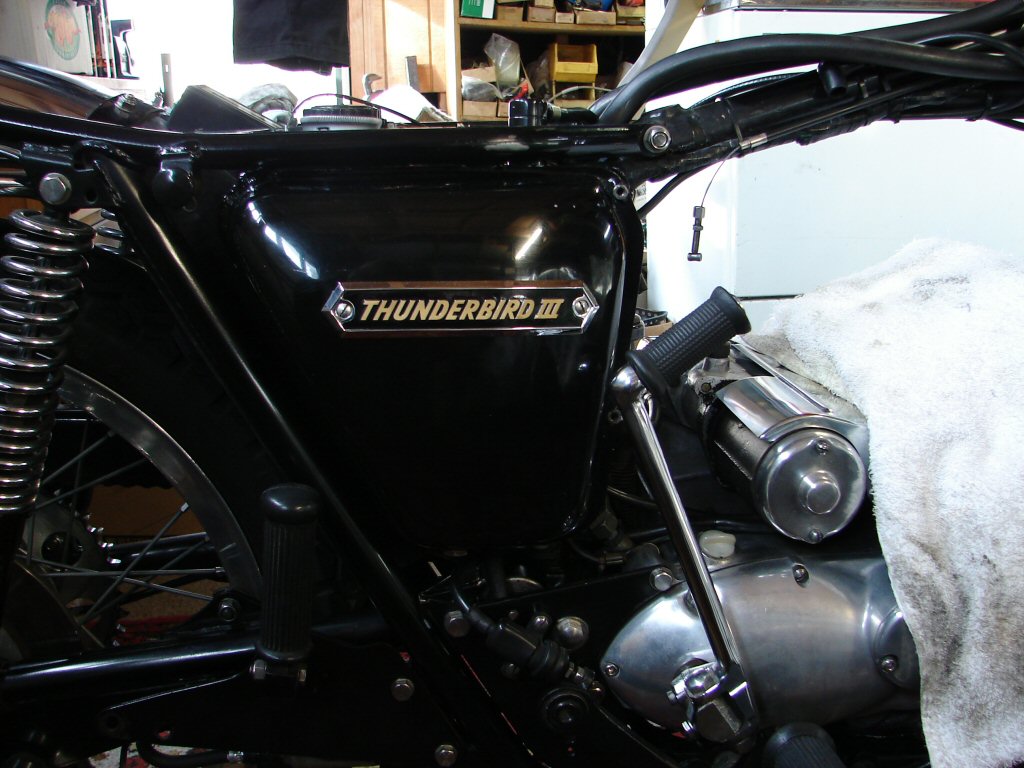
Another issue was a cosmetic one. The original starter cover had been either a satin chrome or some other form of plating, and this had lost it's appeal long ago. I do not like chrome finish as it subdues the look of the lovely alloy surroundings, so I was keen to pursue what alternatives there may be. I had previously painted it with silver wheel enamel, but our modern fuel had made short work of destroying that.
Apart from those considerations, there had been inlet valve guides with seals fitted by Les Williams when I sent the head to be gasflowed in 1991, and I had found that this arrangement caused accelerated wear of the valve stems, so I was keen to fit a new set of standard type valve guides and likely a new set of valves, considering that 30 years and 22,000 miles had elapsed since my last attention.
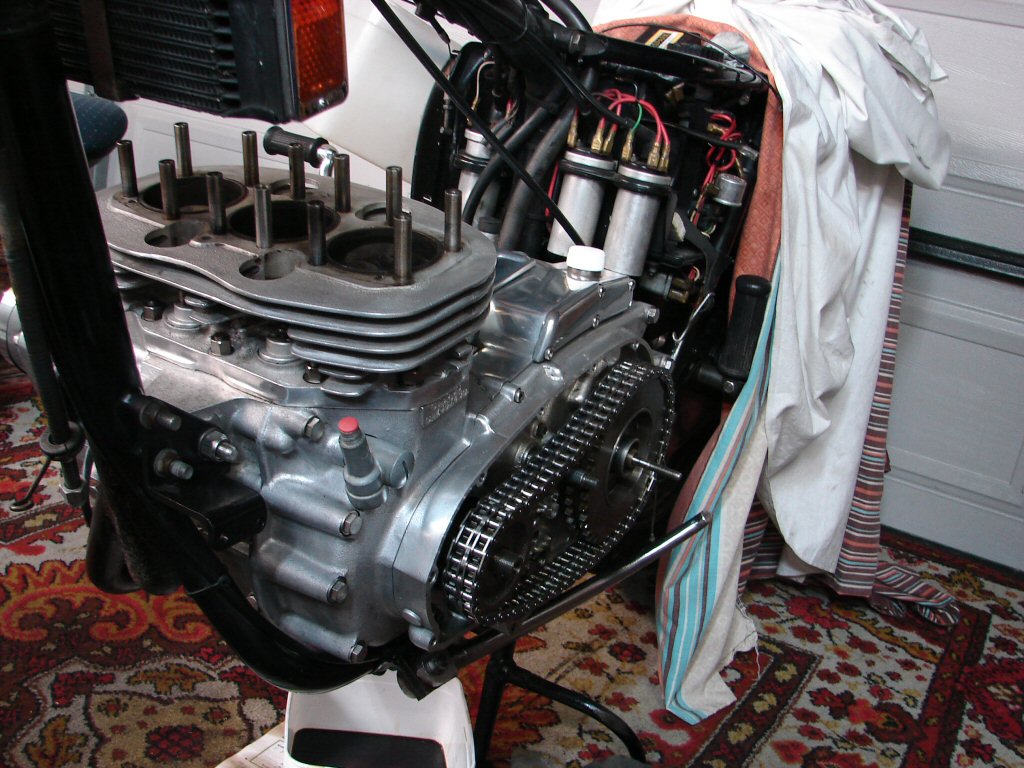
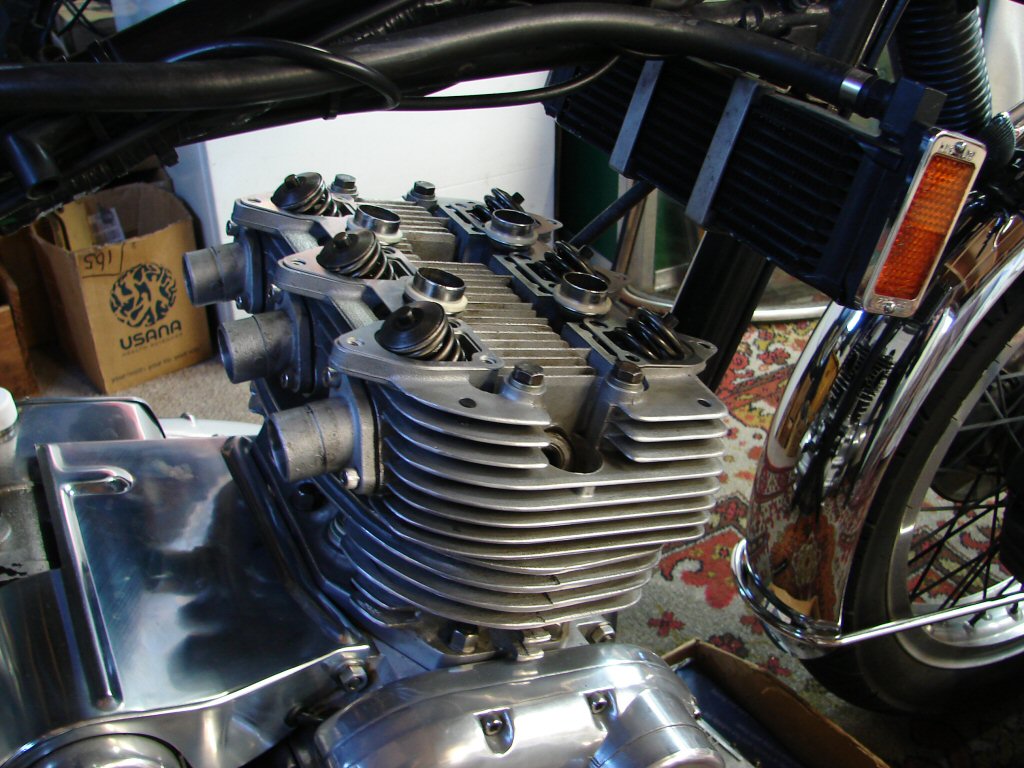
This meant that both head and barrels would be coming off. And they did.
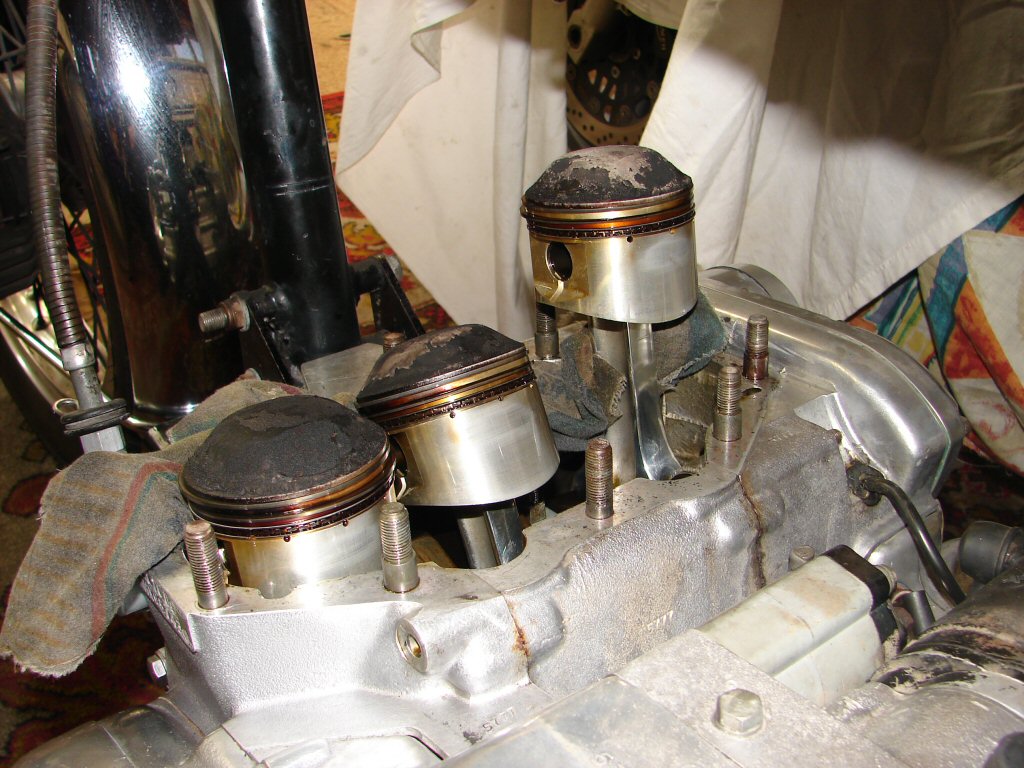
I was most pleased to find that there was little or no oil stain on the piston skirts below the rings, and the alloy rods I had hand polished during assembly in 1991 were still as shiny now as they were then. I attribute this to the use of synthetic oil which has been my policy since an initial running-in period of 500 miles after the rebuild as an 830cc unit in 1991 - the first rebuild since new, and with the crankshaft remaining on standard journal sizes all round, with only a polish required.
I decided that I would neither disturb the rings nor clean the piston crowns during this intervention, as they simply did not need it.
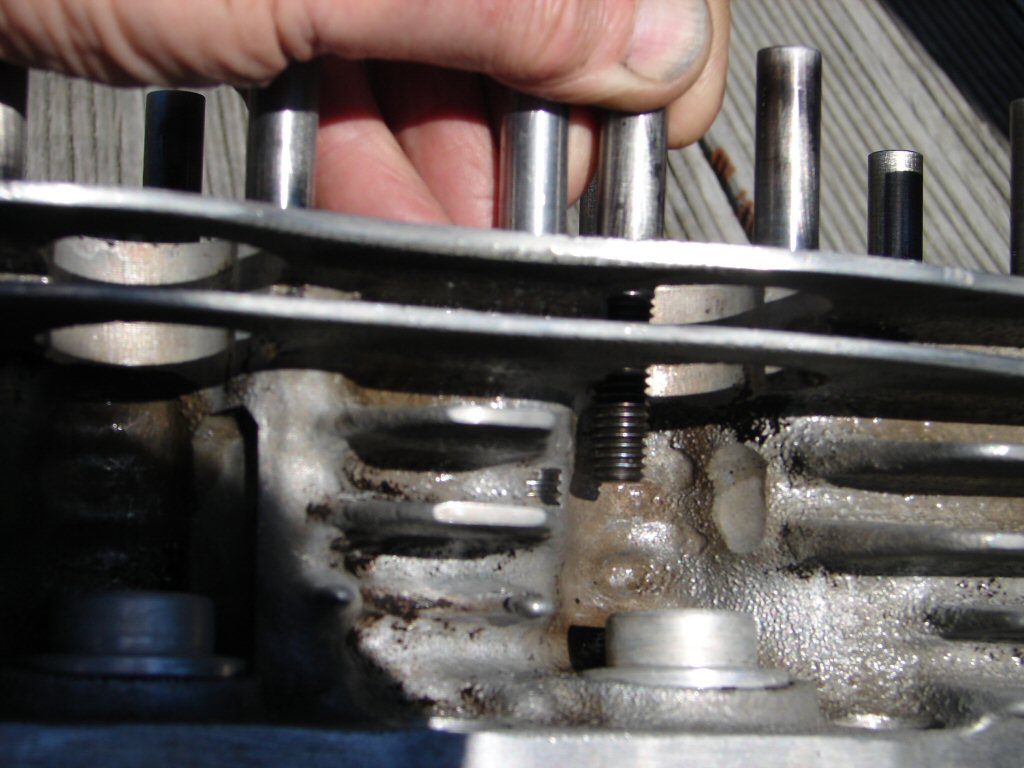
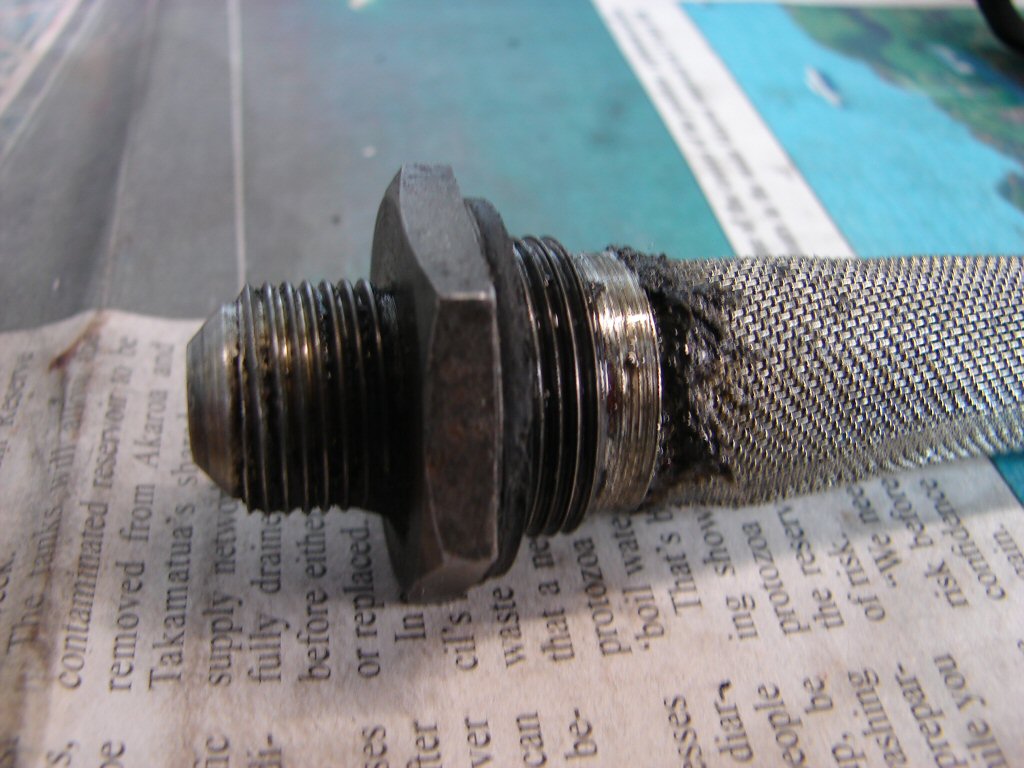
So this was what I found When investigating the stripped pillar stud. The thread had mostly pulled out as is often the case. What I do to provide a permanent cure for this is to fit a custom made pillar stud which has a rather large 1/2" UNC thread into the gone soft alloy barrel, and as yet none have ever let go. Unfortunately, as soon as I looked at this I realised that option would not apply here. This is a Hyde 830 barrel, and as such features larger cylinder bores, which means the pillar studs are right up against the outer edge of the cylinder liner, and there is simply not 1/2 an inch to be had.
Bother.
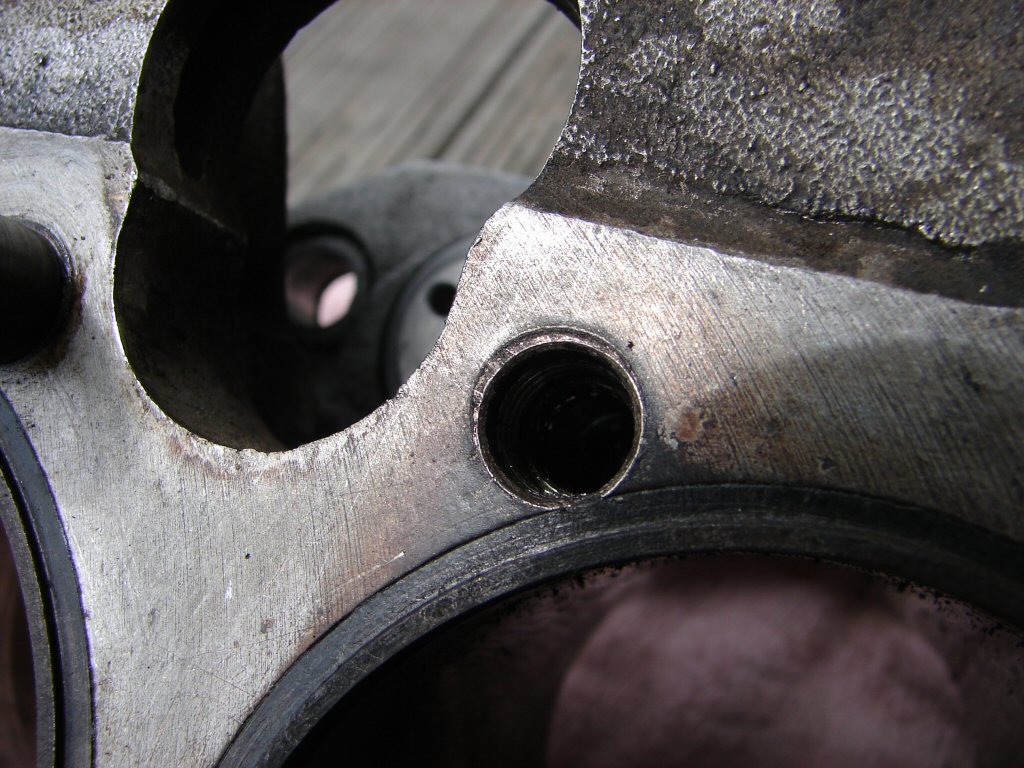
However, half of the outer lip of the liner is actually just a 'top hat' flange which locates on a shoulder inside the alloy barrel to prevent it dropping any further than it was originally pressed in, and it might be possible to grind a little of this away in order to adopt the next size up from the original thread which was only 3/8" to begin with. A hole of at least 7/16" would be needed to even fit a helicoil, but as I have seen many helicoils pull out in this situation, that would not be an option I would even consider.
I discovered that there was about 3/16" depth in the original hole that had never been tapped, as the pillar stud length did not require it to be. After a chat with my excellent engine reconditioner we decided that the strongest solution would be to make a one-off pillar stud which was 7/16" OD and also 3/16" longer than original so as to use the maximum amount of alloy we could possibly engage to hold onto the new stud. His Dad was an engineer and would be up to the task of making such a beast. Cool.
One feels far more optimistic when there is a plan, and I had very skilled people on my team.
As the head and barrels were now consigned elsewhere I could only persevere with the other considerations for this operation, such as stripping the primary drive and clutch in order to replace whatever was needed, although I already new the clutch was history, and I had decided to change my final drive gearing.
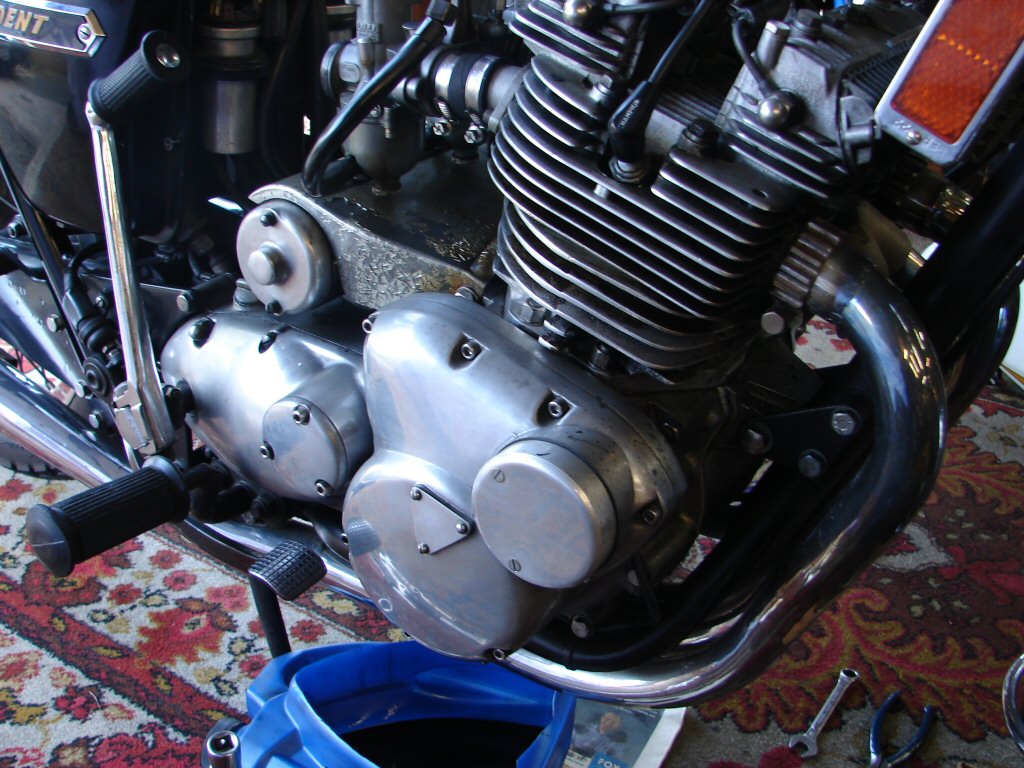
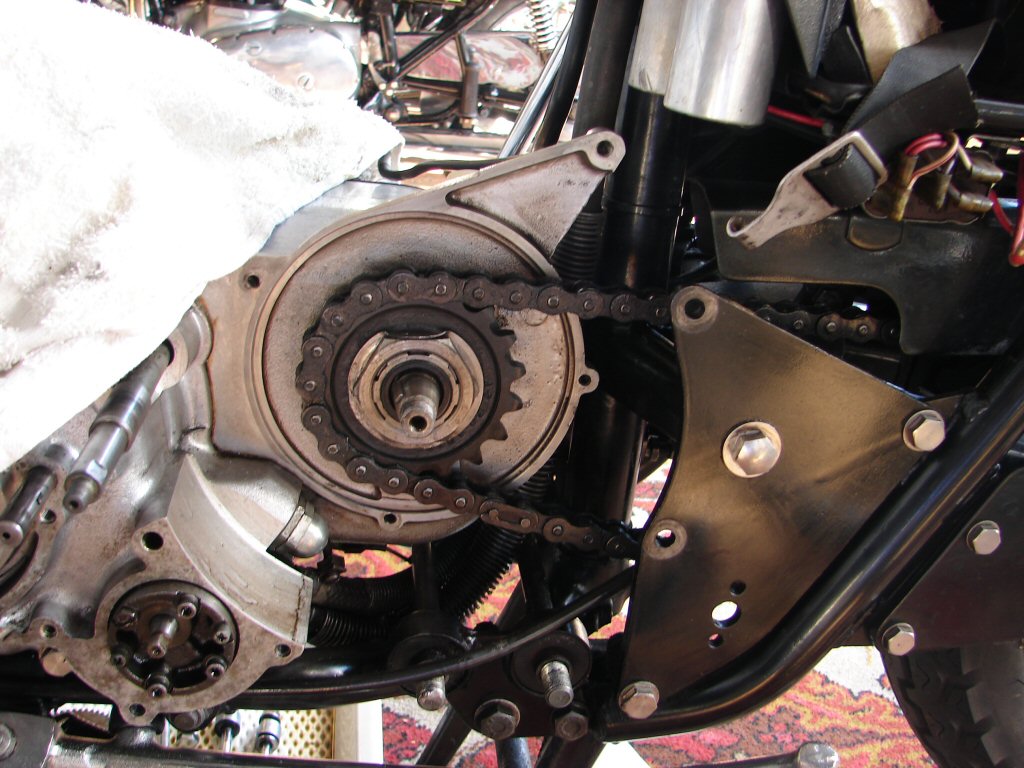
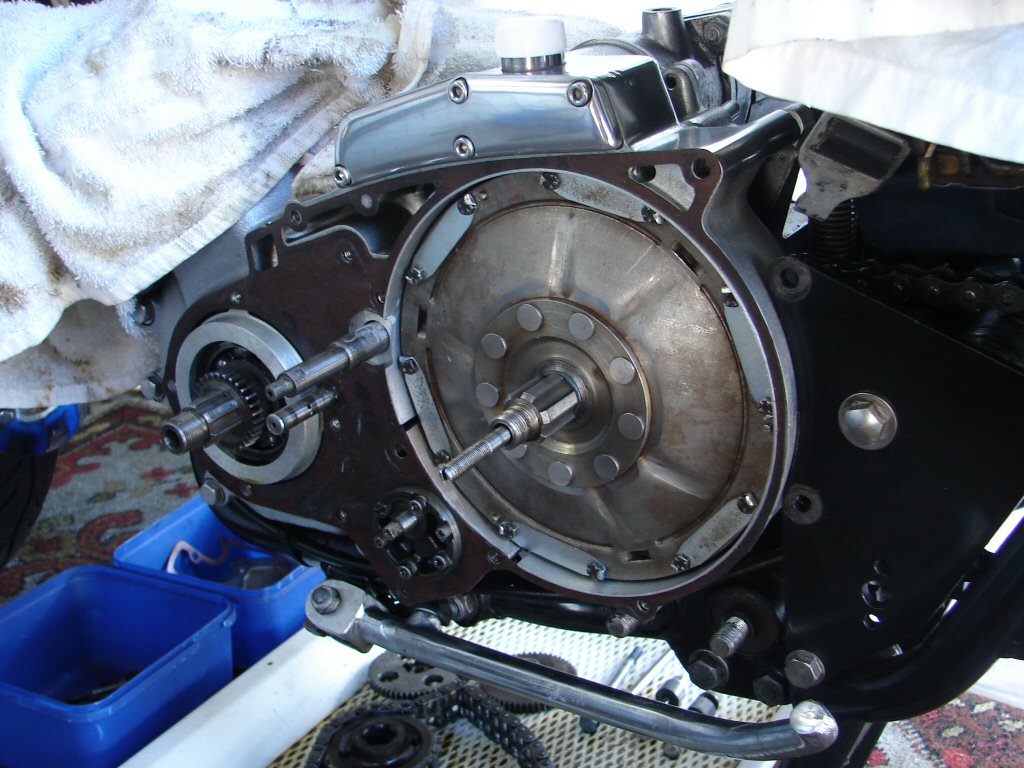
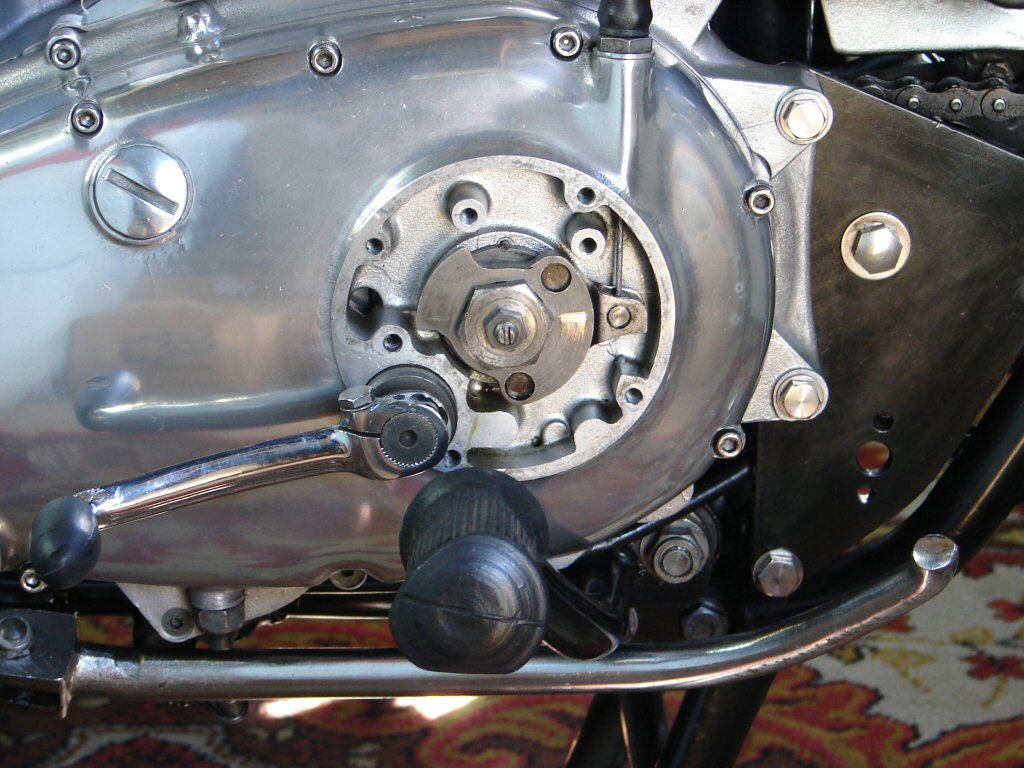
So, first step was to remove the primary drive. This has been trouble free since it went in here 30 years ago, and it certainly looks quite happy now..
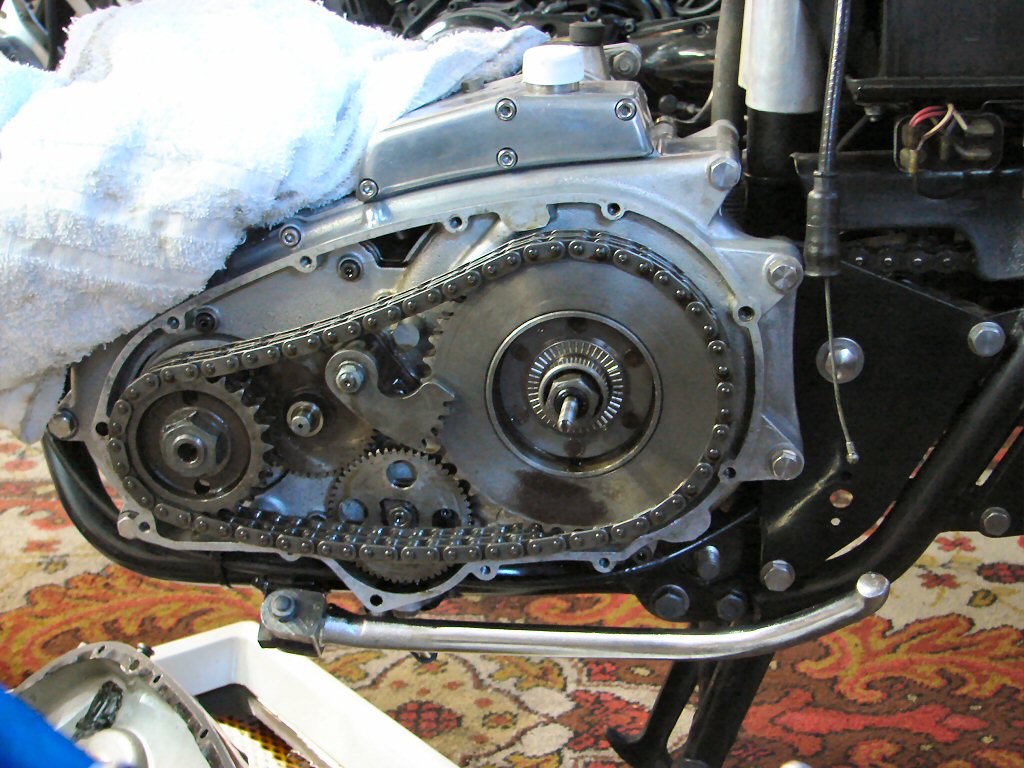
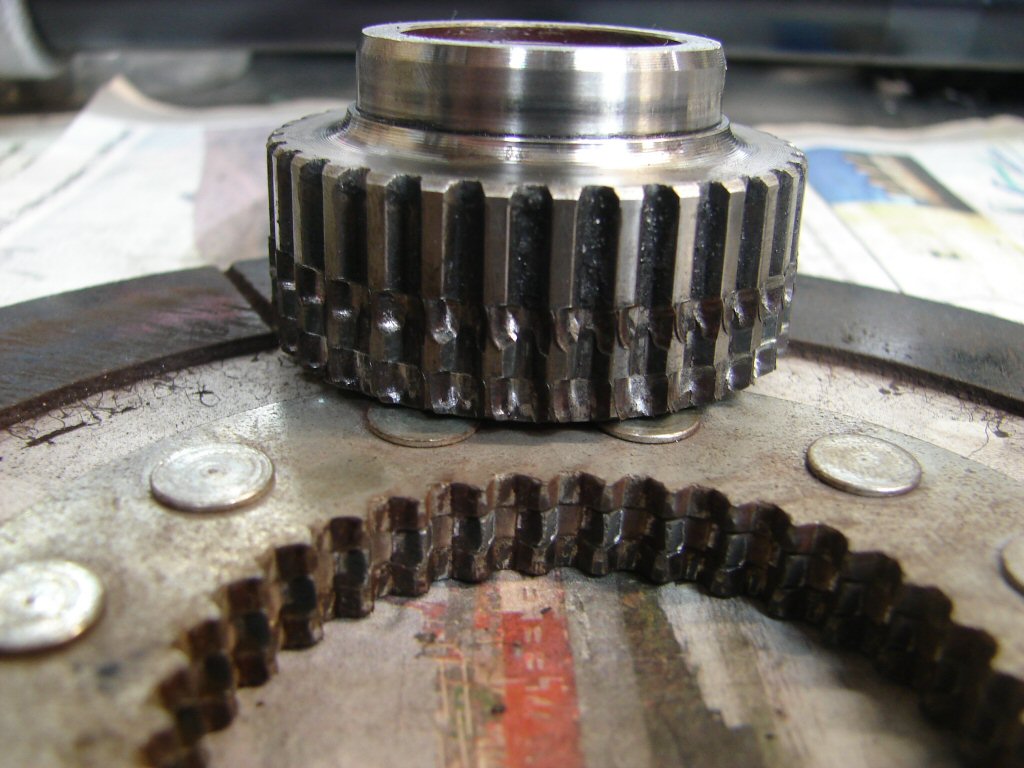
Removing this lot gets you to the clutch, and it was in a very sorry state, and well on its way to total failure as suspected. The Barnet clutch plate has only about one third of the amount of spline that the original type featured. As such, it wears much faster, and because it has three sections of differing materials, it wears in such a way as to preclude its ability to slide on the splined hub at all. This means that while one can free the pressure plate away from the clutch plate by pulling the clutch lever, the clutch plate remains resting against the drive ring face, so is constantly dragging if one should come to a stop while still in gear. It also makes selection of neutral virtually impossible if one does not do so well before forward motion has ceased. I have been nursing this clutch in this fashion for at least one decade and will be very relieved to see the back of it.
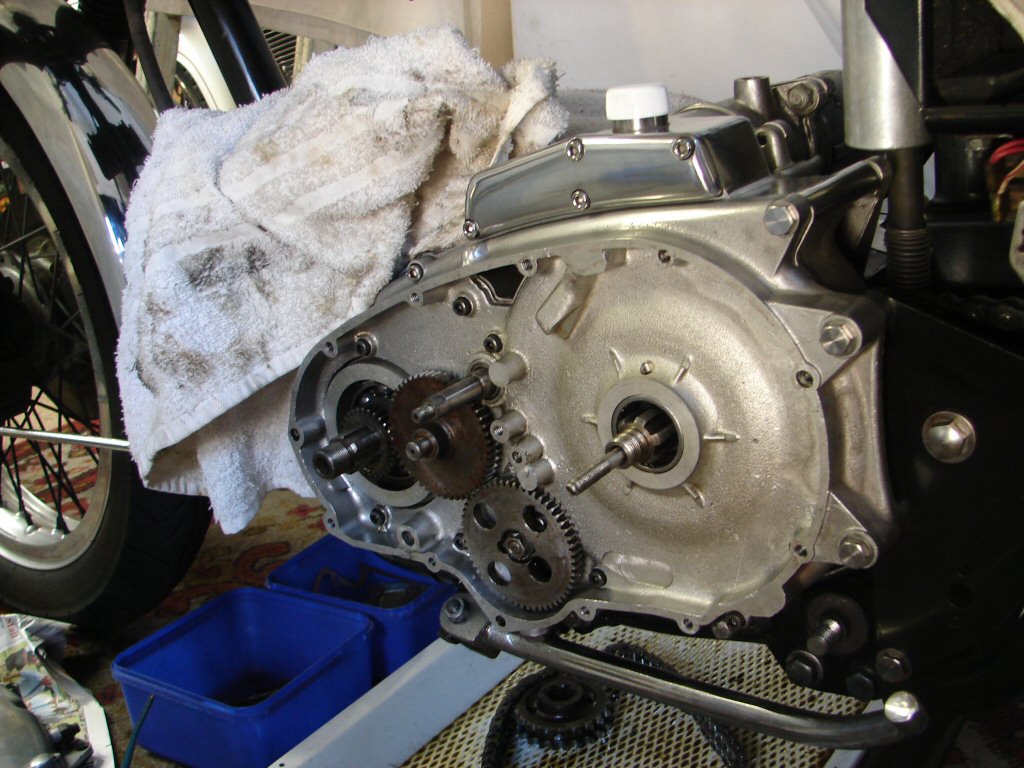
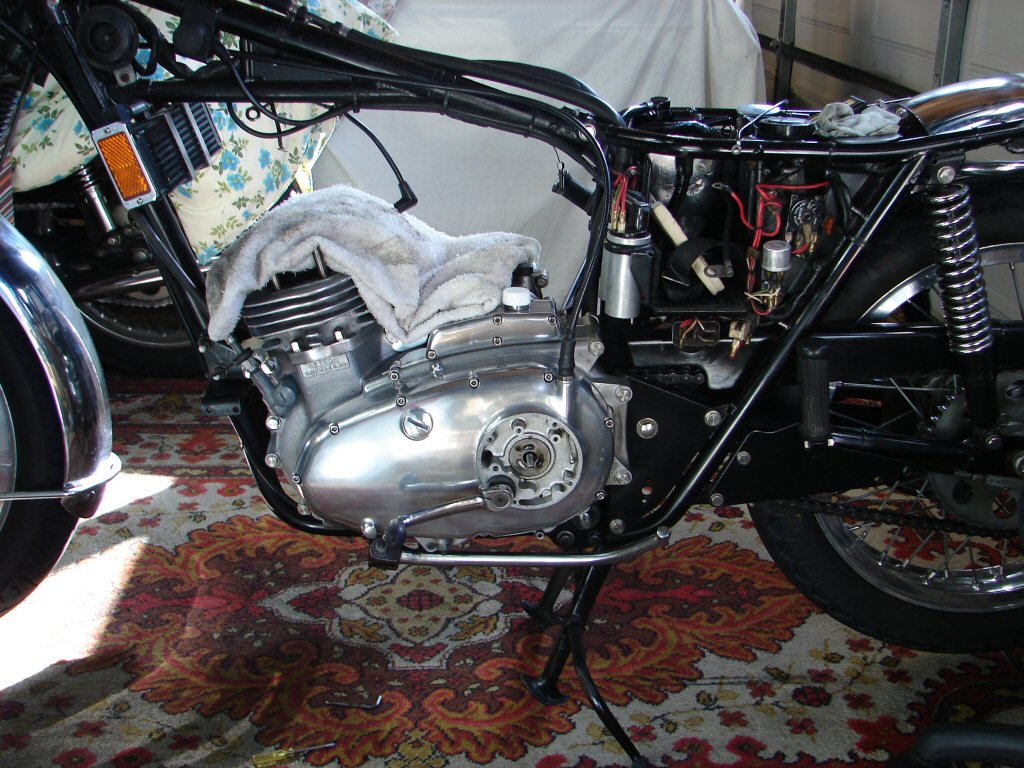
With clutch and hub removed, the entire starter and clutch cover assembly can be removed as one piece, which then allows access to the front sprocket of the final drive.
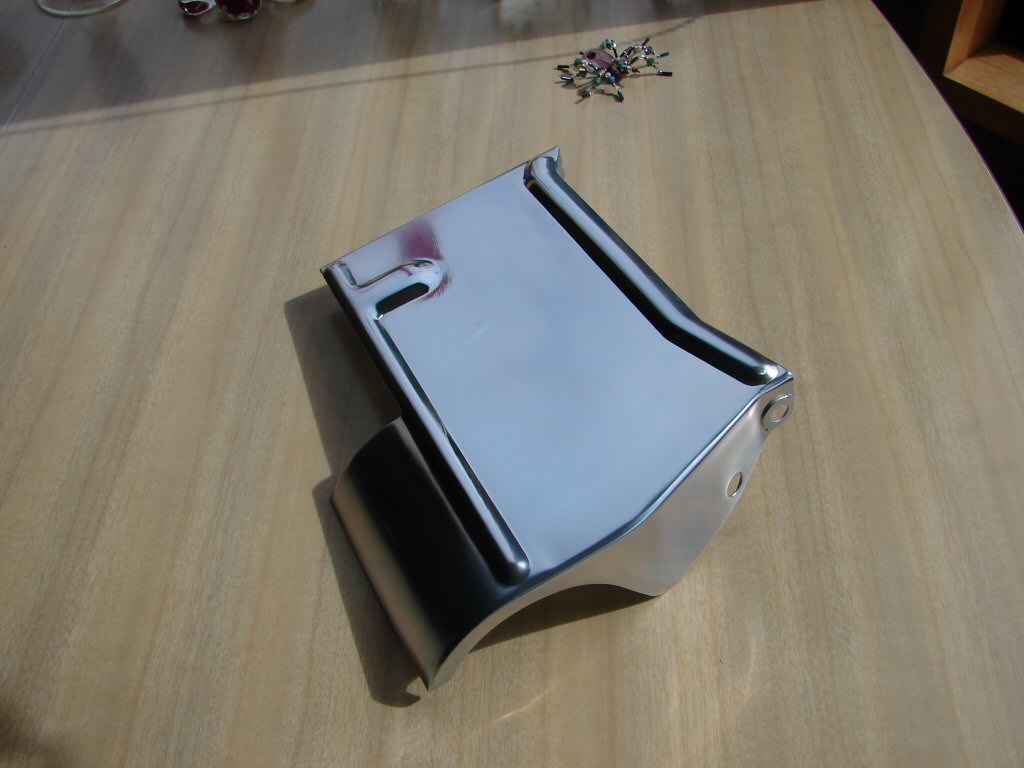
This is my starter, clutch cover and breather housing all cleaned up and ready for reinstallation when it finally happens.
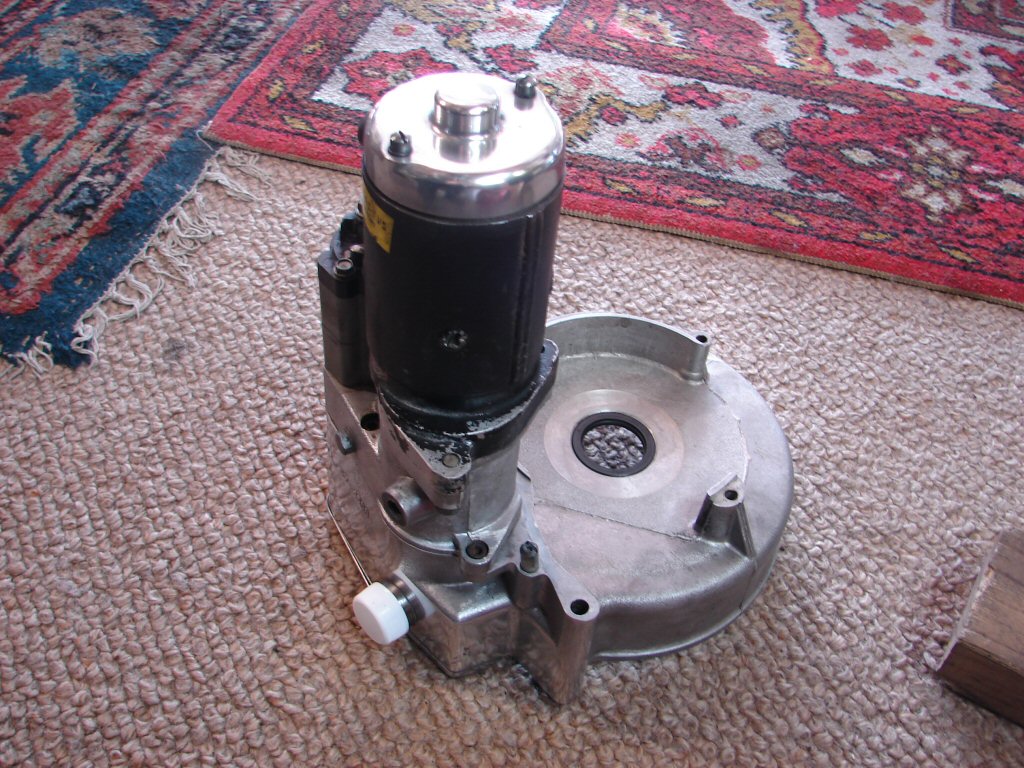
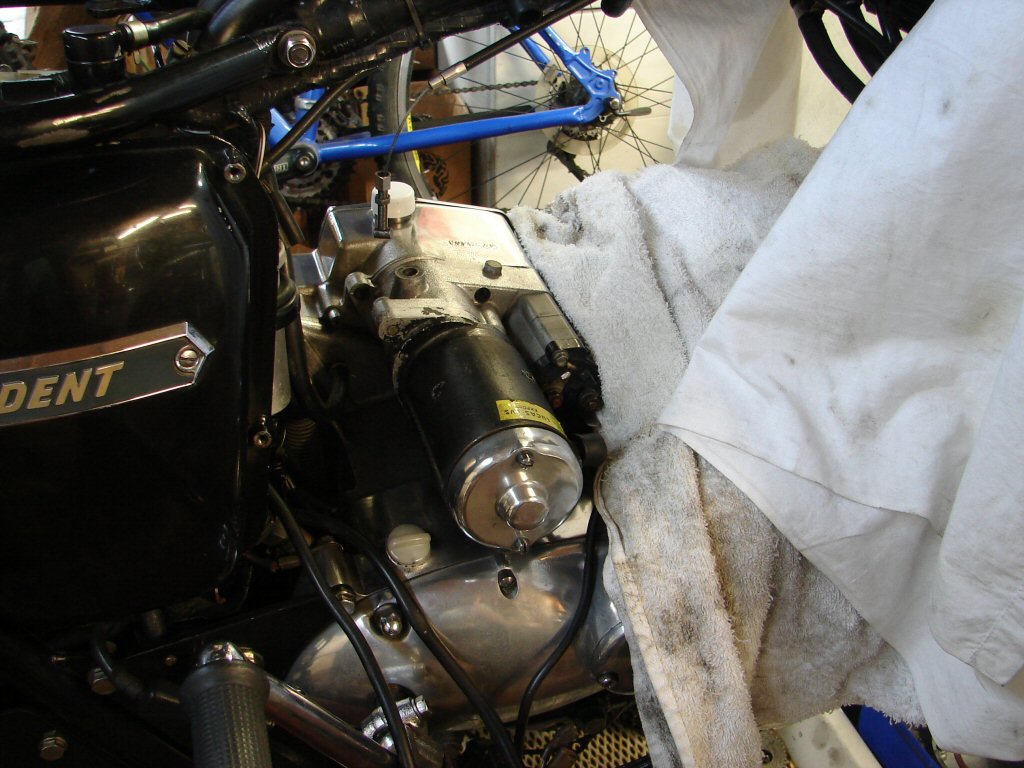
I would like to make an observation here. So many adverse comments are regularly made about Lucas products of the era, and many of those are from people who do not undertake much maintenance of their machine's electrical equipment. When this bike was released with it's "electric starter" in 1975, nobody considered for a moment that it was going to be anything but a half-hearted attempt at paying lip service to the Japanese offerings which featured such niceties. Well, not so.
This starter has never been opened up in any respect whatsoever. I will admit that back in the day when the batteries we could get were half shagged off the shelf, one did not bother using the starter very often, but by the 80's there were batteries of all sizes being manufactured and a suitably sized one could be fitted that allowed this starter to light the engine up every time. Not only but also, this unit features a solenoid operated engagement system just like cars of the time, rather than a sprag clutch such as the unit that sadly let the Norton Commando version down badly, and led to many condemnations of electric feet of the day. This starter continues to work perfectly after 46 years of zero maintenance.
Bloody fine show that.!
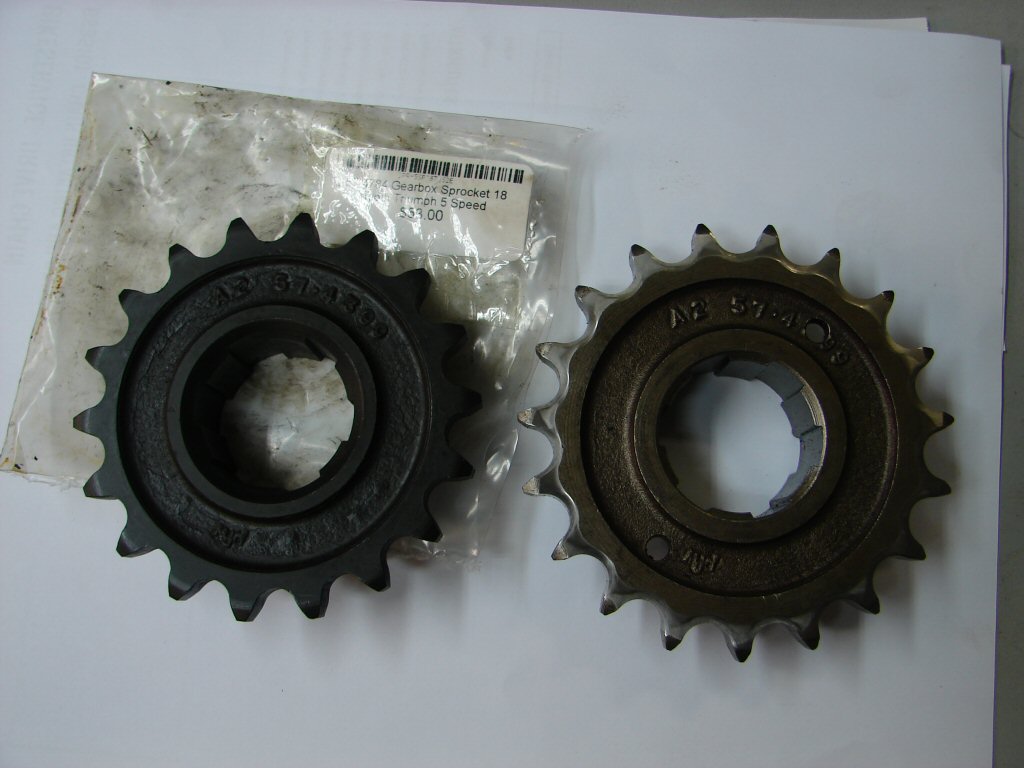
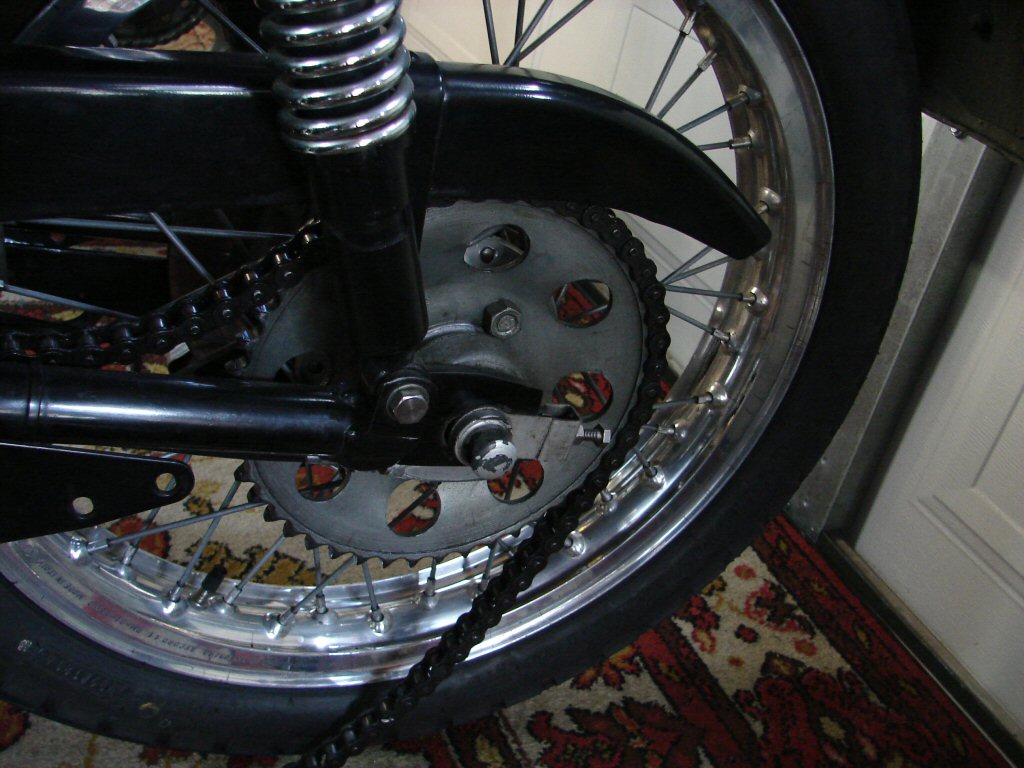
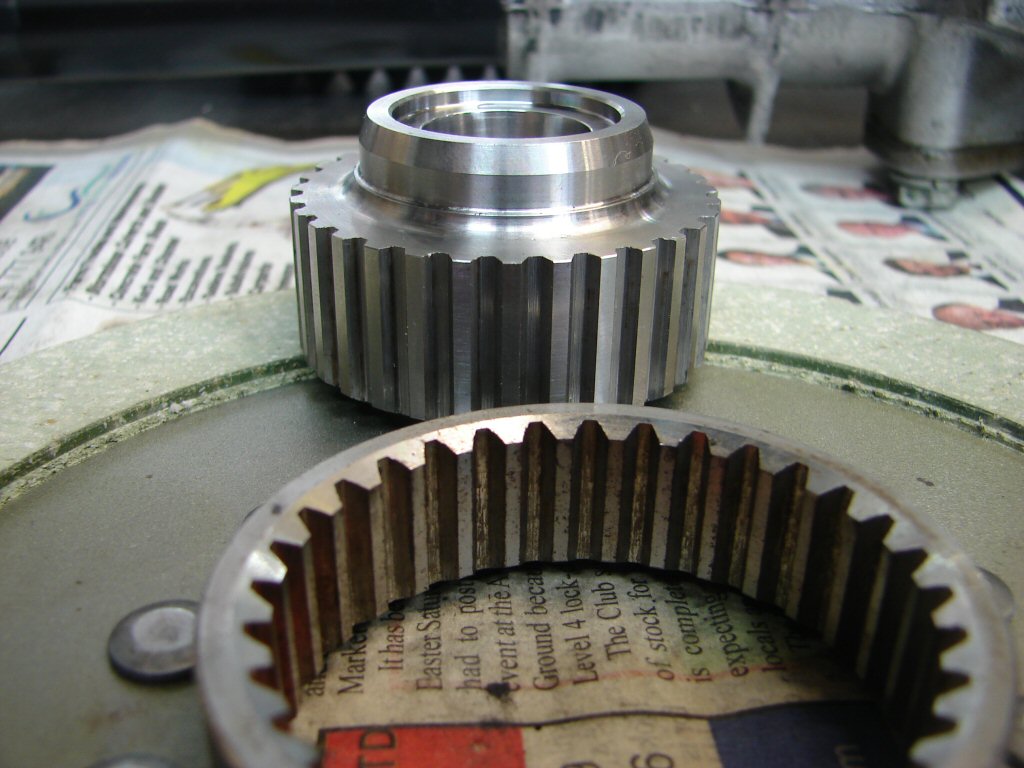
Anyway, now I had the sprocket exposed it was time to fit a new one. The 19 tooth one I was now removing had been here for all of the bike's 46 years, and frankly, it did not look as if it was in any distress whatsoever. That was not the reason I was replacing it, although I will admit that I had not sighted it for the last 30 of those years, so I was not sure what state it might be in. I may as well not have worried it seems.
Here are the pair of them, the new 18 tooth and the ancient 19. I shall not be throwing it away even though the wear is apparent after 62,000 miles...
When I rebuilt the engine of this bike as an 830 in 1991, I found that the extra torque it developed made gaining speed a somewhat more rapid process, and I began looking for a 6th gear, as I seemed to arrive in top too soon. After a while I decided to raise the gearing in order to make touring a less fussy affair, and the simple route was to fit a 45 tooth rear sprocket in place of the standard 50 tooth. This was the only option back in the day, and the 45 tooth jobs disappeared within a few years.
This one has been here 30 years and will remain, as it is far less inclined to flick chain oil up the back of Sue's pink jacket than the larger diameter 50 tooth jobs do.
Now. Going from a 50 tooth rear sprocket to a 45 tooth was a fairly massive step. No less than a 20% increase in gearing. While this was great for a touring mount, it made getting off the line a more difficult manoeuvre, especially with a pillion. It also meant that I was now half a gear away from the stock triples I was often riding with, so I would find myself too slow for one gear and too fast for another in their company.
There is a very popular gearing that many adopt on the T150 trident that makes a great compromise between the rorty 'town' gearing they came out with, and something more suitable for highway touring. It is known as "19/47", as those are the gears adopted, the "47" rear being smaller than stock and thus raising the gearing around 10%. By using an 18 tooth front sprocket with my 45 tooth rear I shall now enjoy exactly the same ratio as their 19/47, while dropping my overall gearing by 10% at the same time. This should make things a tad more lively through the gears, and more suitable for the use the bike currently enjoys.
Hence it now has its new 18 tooth safely secured in place.
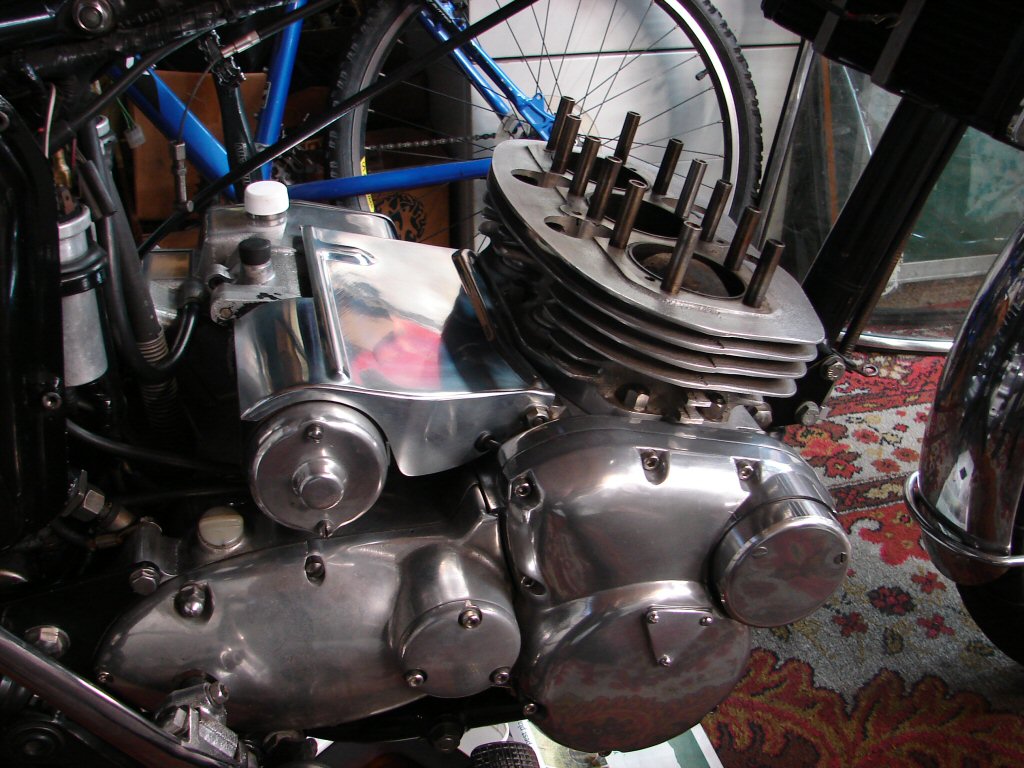
With that done there was nothing stopping me reinstating the starter assembly, and it felt good to be putting bits back on rather than still pulling it down.
Meanwhile, the starter cover had come back from the metal polishers. It would appear that they had stripped some previous coating off it, as the base surface was looking like new metal, but the result of their polishing was brilliant.
With luck this should look very good against the polished alloy that surrounds it, without making the alloy look dull as chrome would.
Now it was time to assemble my new clutch arrangement, with a Hyde hardened hub and a Surflex plate whose dimensions closely match the original type.
A much healthier setup.
So here is the clutch assembly all good to go apart from the lock tabs not being finally fitted. Reason for this was that I was waiting for a new bearing to arrive, which is an improvement over the original release bearing in that it is an angular thrust type, and thus better suited to side loading which is what the clutch bearing experiences.

Bearing arrived and was duly fitted. Clutch finally assembled and fitted over the new clutch hub with a coating of white lithium grease between the two. The pullrod is still the factory original and in fine shape.
This bike seems to be a contrast of parts that last forever and parts that do not. More to do with the parts in question than the design methinks...
Completion of this stage now allows the fitting of the inner primary chaincase, having replaced the oil seals in it as a hedge against future oil leaks. The bearings were in great condition and shall do another tour of duty.
One additional thing done was to add an O ring to the clutch shaft at the far end of the spline. This gets crushed by the shock absorber shaft when the two are bolted together, and thus prevents any oil finding its way along the shaft and into the clutch cavity from the primary chaincase.
Oil pump drive gear and idler gear have been fitted as well.
In a most timely fashion, the barrels and head came back from their respective overhauls. The head got new valves and guides, and it was discovered in the process that the exhaust guides were oversize, so they had been fitted by Les Williams when the head went to the UK for gasflowing etc.
The new stud in the barrels had turned out well and my man was happy that it would be a permanent fix. The lowest part of the thread had broken out where the alloy had been too thin to take the oversize, but it allows a visual comparison of where the original stud finished.
Fitting the barrels can be a demanding task, but having some time during which interruption can be avoided helps immensely. As I had hoped, the fact that the rings were used meant that they were more easily coaxed into the bores and the whole operation went very smoothly.
Before this happened the cam followers were fitted to the barrels and the cam lobes were treated to some assembly lube to tide them over until hot oil came their way.
When I built this motor I used dial gauges to get a more accurate timing of the camshafts than the factory had provided. Because the results were difficult to repeat I was never quite sure that I had succeeded to best effect, and had decided that at this stage I would compare the current status with my latest method of using centre lobe timing, which I had used to great success with other engines.
This unfortunately required disturbing the ignition timing and removing the timing cover, alternator and incidentals. Well, you don't get anywhere without making a mess.! As this needed to be done before the head went on, now was the time.
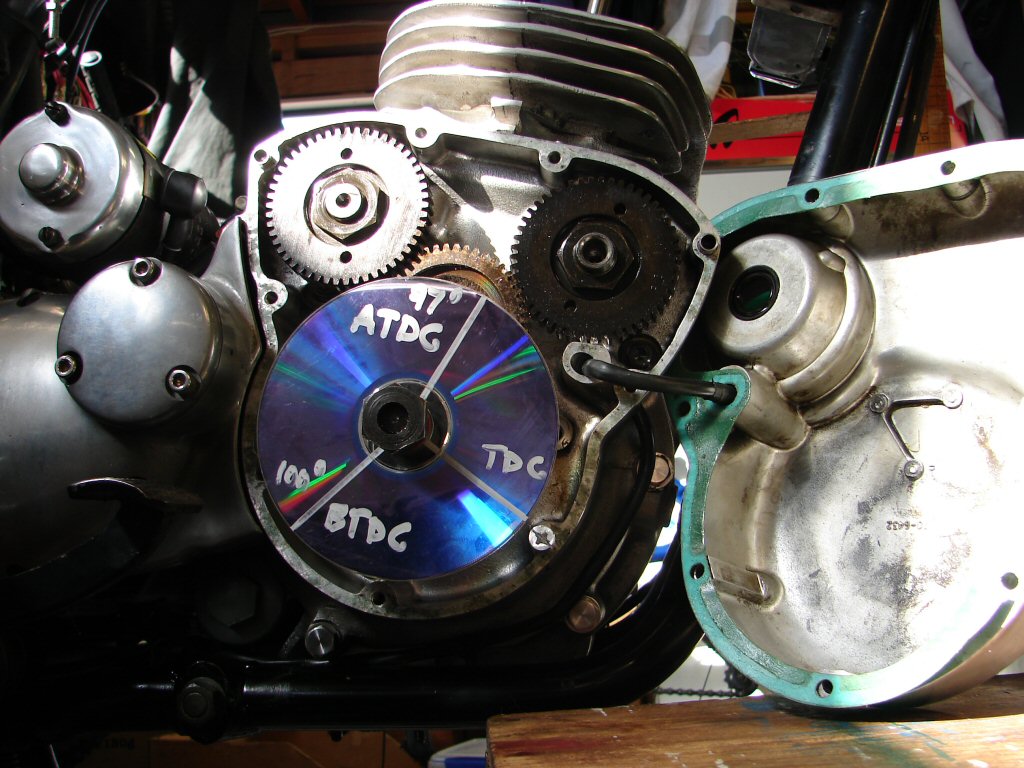
What I had found at that previous attempt was that the exhaust cam timing was spot-on, but the inlet was quite retarded. I had advanced it by the 1 tooth that the factory had deliberately retarded it in order to meet the then new USA emission requirements, but found that it was then still retarded. By moving it the minimum amount of 1/3 of a tooth of the cam wheel by changing keyways, I then achieved it being slightly advanced, but less advanced than it had previously been retarded. My new method showed that I still had the same result, so no changes were made, but at least I now know that it is as accurate as I can get it.
So the timing case got closed back up with a new locking washer on the rotor bolt and a new camshaft seal behind the ignition rotor. I also fitted the starter cover and was very pleased with how it managed to look almost alloy.
The next slightly annoying job was to remove and clean the oil tank. It has not been disturbed for 30 years, nor has the outlet filter been removed for cleaning, so I was keen to see what it might have collected in that time.
Removal of the oil tank is one of the changes made between T150 and T160, and is extremely easy on this bike. So that was nice..
Also pleasing was the fact that the filter had very little foreign matter attached to it, but as with several other bikes I have repaired, there were traces of a fibrous material mixed with sludge deposits at the base of the filter. The fibrous material can only have come from the oil filter innards, but all things considered, this was a very good result over the time period, and a good advertisement for the behaviour of synthetic oil.
Next move was to tidy up all the stuff that usually lurks behind the oil tank, as it is inaccessible once the tank goes back.
Besides the oil lines themselves there were a few wires that would benefit from being held in place more permanently, and some general cleaning of old grime.
During the cleaning of the oil tank the original decal began peeling off. The ancient self-adhesive had called it quits decades ago, and even the lettering was beginning to fade. While I had some T150 'Trident' decals, I had none for a T160. The T150 items can be cut down to work, but as T160 decals are still available I figured the T150 decals would be better used on a T150. However, I did have some other decals which I bought from Les Williams in the 80's, and I figured there was no point in having bought them if I never used them. So now was the time. They were intended for a 'T180', which never went into production, more's the pity, but maybe I have built my own anyway.
With the tank fitted I could now complete the assembly of the primary drive. The chain and sprockets were in place, and now I had the lockwasher to convince the engine sprocket to remain so it was just a matter of torquing it up and folding the edge of the washer. The nut that retains the gearbox sprocket/cush drive is recessed so no locking washer can be used. Instead I rely on some loctite to keep it honest. The pullrod threads are covered in tape to protect the edge of the new oil seal within the nut as it goes together, and it all behaved perfectly.
So now there is just fitting the clutch operating lever and cable adjustment to be completed before putting the footpeg back on.
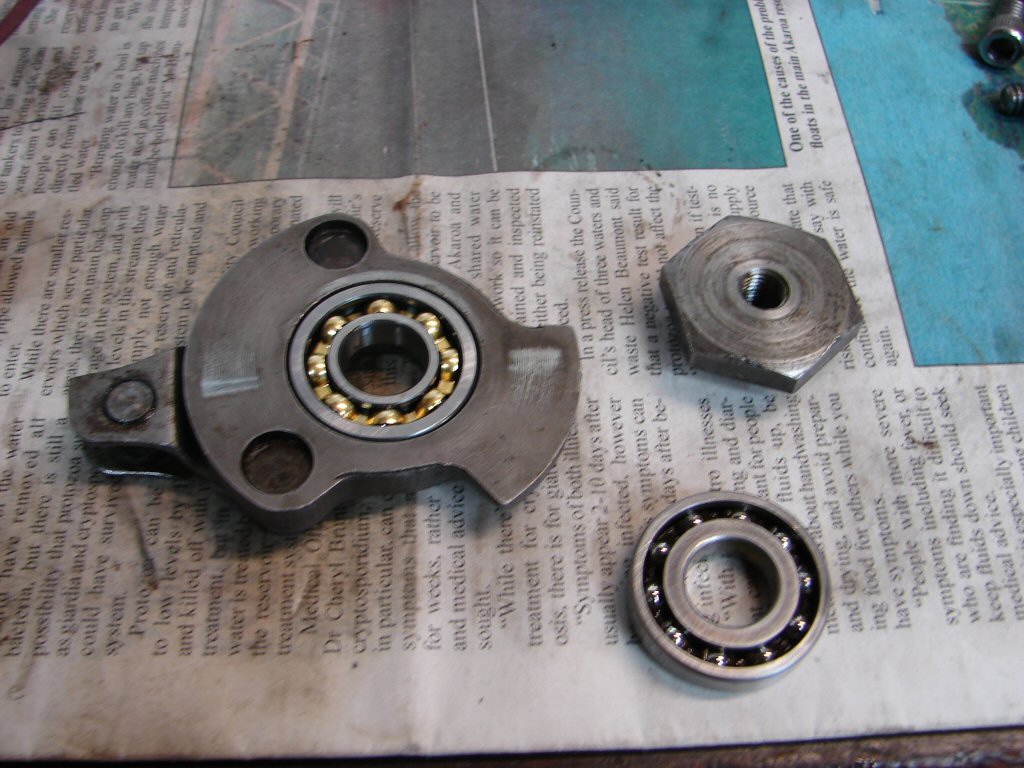
As with the bearing in the clutch pressure plate, the bearing in the clutch operating lever gets replaced regardless of age. Why risk it. I was pleased to note that the new bearing appears to have larger balls in it, or maybe its just that the fancy cage is larger. This is a Swiss made RHP bearing so I have every confidence it will not be found wanting.
Having said that, the old unit felt perfectly happy too, and I have never experienced a failure with either of these important clutch bearings on my own bike or any other as yet. Which is nice, as often when they fail the pullrod tends to exit through the inspection cover...
I had found that with the currently fitted clutch cable, the adjusters at both ends were wound out to max, suggesting that the cable inner was too long. Comparing a few others that were on hand proved this to be so, and another cable was selected. While it had slightly less overall length I was able to make it happy by altering its route.
When adjusting the cable I aim for the kickstart to free up just as the handlebar lever reaches half travel. Because I now had the operating lever exposed, I would also set that to be exactly at right angles to the cable pull at the same instant.
To do this one simply winds the pullrod in or out of the sleeve nut to give that result, independant of any suggested clearance settings.
So here we have the handlebar lever held at half travel with a cable tie, the kickstart lever has just come free, and the operating lever is at the point of maximum leverage.
Noice.
That allowed the primary to be buttoned up, and the only outstanding thing would be to add oil to the case before the first start.
After 10 years without, I think the current level of polish is adequate...
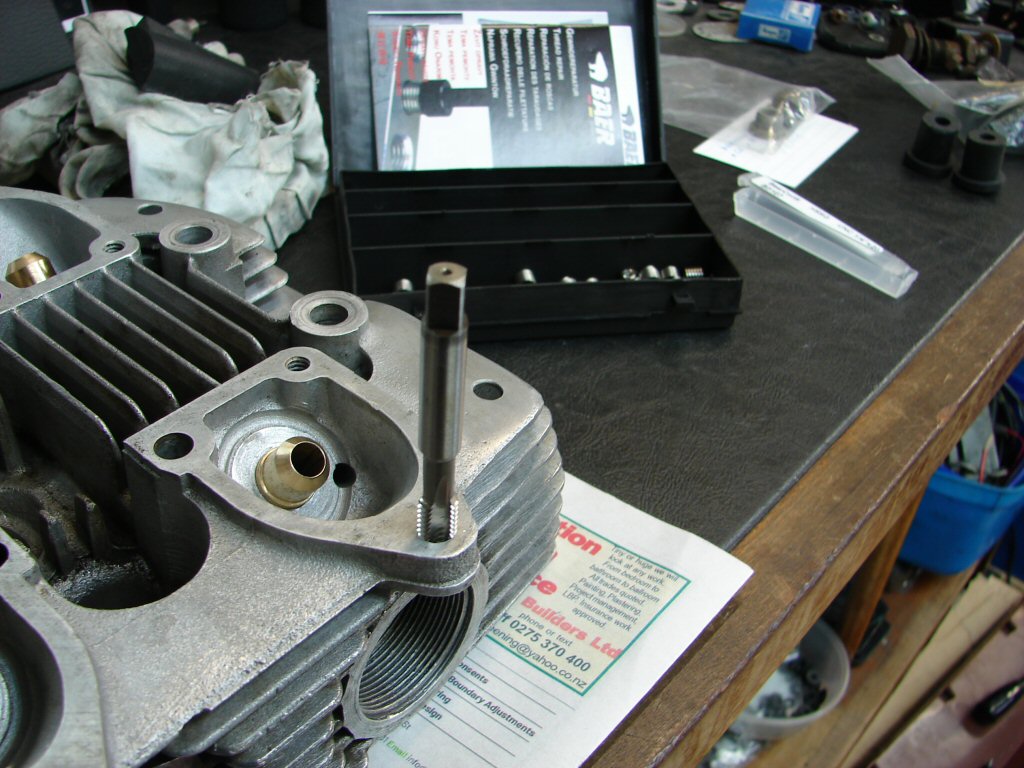
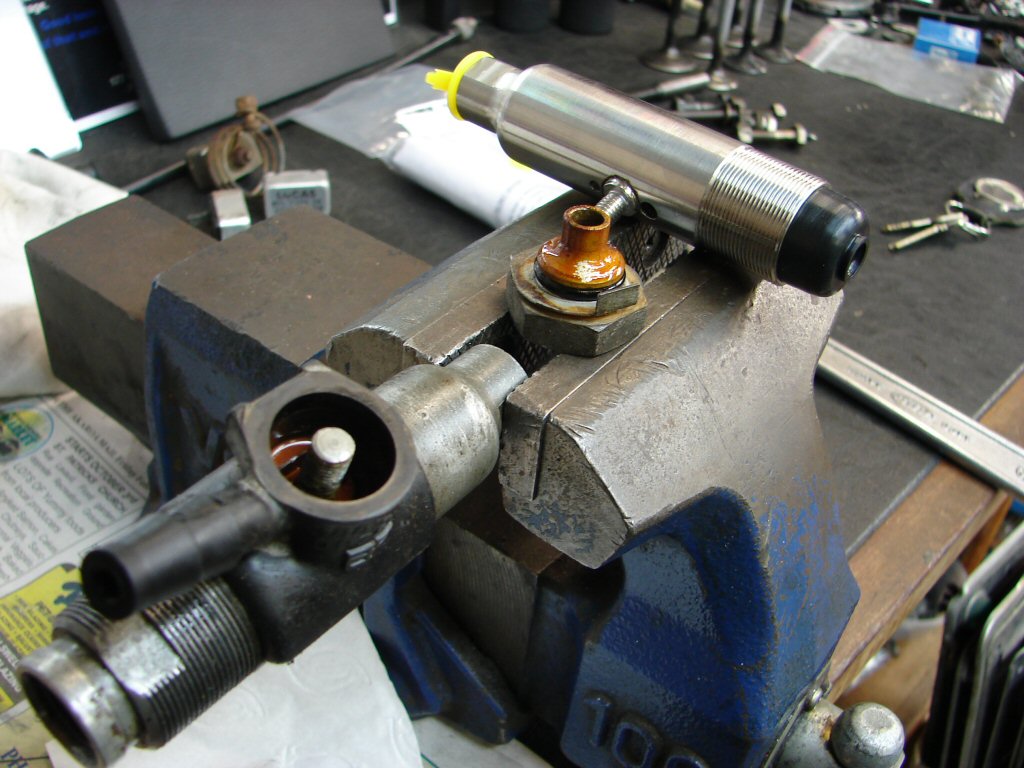
Next major step will be to assemble the cylinder head. Before doing so there was one cap screw thread which needed to be helicoiled. I had asked my engine guy to leave it, as I had purchased a kit for these particular threads which are often stripped due to over enthusiasm with allen keys. Mind you, they are a very short thread so perhaps they are just a tad under-engineered.
Wishing to leave nothing to chance I set the head up on my drillpress, and having centred the hole using a drill bit that just passed through it, I continued increasing the drill sizes until the correct tapping size that came with the kit got it's turn. I was pleased to note that comparable amounts of thread could be seen at each stage, so we had managed to remain concentric.
I then placed the tap in the drillpress and wound it around by hand as the tap began its journey south. Once I had progressed far enough I released the tap and finished off by hand.
Very happy with that result I fitted all the valves and springs, then the exhaust stubs and finally the inlet.
It will never be this shiny again, so worth recording. Only the oil drain dowels left to fit.
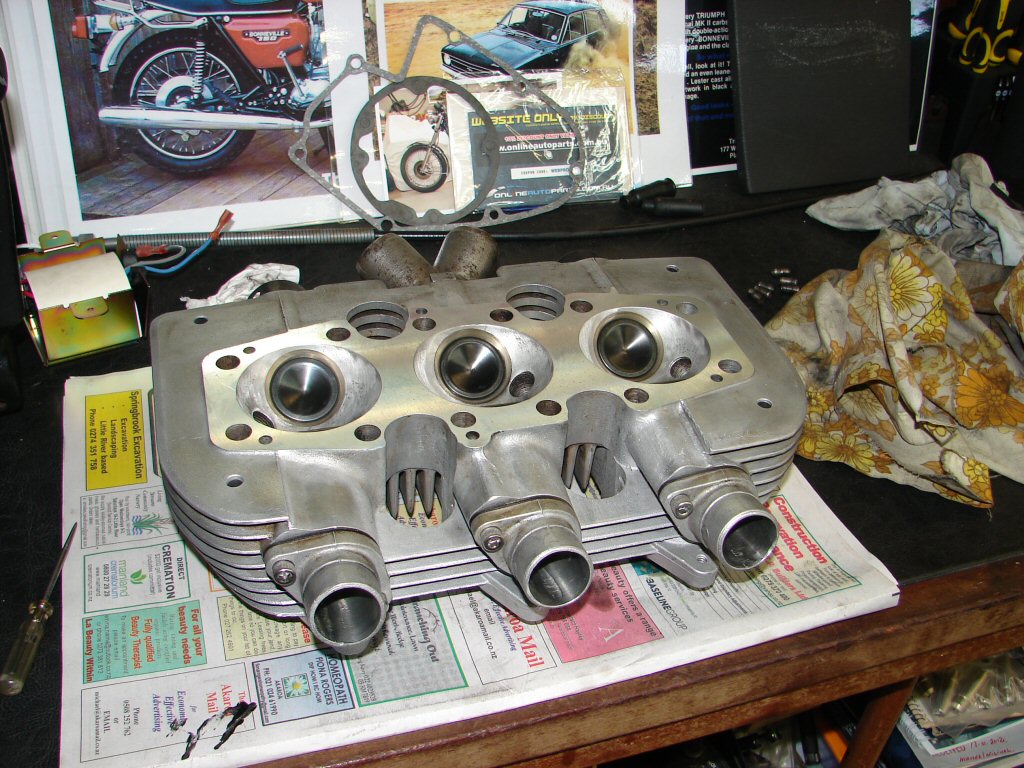
Dowels fitted and head ready to go. Gave the annealed copper head gasket a good coating of copper gasket spray and plonked the whole lot together. Next step is to ensure that the pushrod tubes are going to get enough squash to make their seals do a proper job. This was going to require some attention as we were going from thin copper rocker box base gaskets to aluminium versions which were about 3 times thicker.
So here we have the new gaskets sitting in place while I trial fit the rocker boxes and establish how our dimensions are looking.
I found that with the original spacers in place I had zero compression at all. I added another fibre washer beneath the lower seal cup and found this was still well short of being good enough, but I did not have many of them in stock.
About now an ancient memory crept into my mind. The Hyde barrels were supplied with a set of 4 alloy spacers whose job was to correct some dimensional change in the pushrod tube dept, between themselves and the standard Triumph barrels that one had presumably just removed. Looking at the copper gaskets again it was obvious that they were considerably thinner than a conventional rocker box gasket, so I figured that I must have removed those spacers when the copper gaskets were first installed. While I cannot remember when that actually was, by searching my photos I can see that the copper gaskets were in place by late 2003. Lawdy. The bike had already done 12 years service since my rebuild in 1991.
After some searching I found the alloy spacers within a bag of old pushrod tube seals under my bench. So pleased I keep everything.! Removing all previous washers and installing the alloy spacers now showed I needed one fibre washer on top of each spacer in order to give me around 30 thou compression for the seal pairs on each pushrod tube. Excellent.
With that sorted, and a light smear of silicone rtv on the aluminium gaskets, the rocker boxes went on. The alloy spacers are just visible if you know where you are looking.
After this the head was torqued down successfully and the valve clearances set for the initial run. That will be fun.! All the valve clearances were too great, which makes sense considering the thicker gaskets, and all by much the same amount, which is reassuring. The oil lines to the head were then reconnected which means I will be able to circulate some of the new oil I have poured into the oil tank. I will give it a few miles on GTX 20W/50 then dump that and refill with my synthetic 20W/50. This is just a flushing procedure after having things apart, and mineral oil is much cheaper to sacrifice than synthetic.!
So now we have progress to this stage.

As I reflect on my life with this bike, I am happily amazed that this is the first major intervention in the last 30 years of reliable use. From new I only got 14 years before the only major rebuild I have undertaken, and that unfortunately included the dud clutch which I have only now replaced. Quite remarkable when considering the lesser amount of usage I have gotten from all my other vehicles over the same time period.
But, pressing on. Next move was to remove the carb float bowls to install larger main jets. While I am very happy with the current tuning, I have reason to believe that my current main jets are not allowing the full potential of this engine. From the birth of the 830 kit I had fitted 180 main jets, but during a ride to higher altitude while running in I found that the bike could only handle half throttle, which suggested that the mixture was way too rich. I decided then to go right back to the standard 150 main jets and see what happened.
What happened was that it became the most enjoyable machine ever, over the normal range of conditions I expose it to. However, on the rare occasion when I had subjected it to wide open throttle, it had seemed a little 'flat', as though all was not as good as it could be. Various comments from other owners of larger bore Tridents suggested that I might be at risk of damaging my pistons if I were to keep the throttle wide open for very long, so I decided that I would now experiment with some larger jets. To be safe I have fitted 170's so that I can undergo a full throttle plug chop without fearing any harm. If that should prove a bit too rich then 160's will be my next trial.
So with the carbs now assembled they got installed along with the airfilter box. It makes a huge visual difference when that large space gets filled...
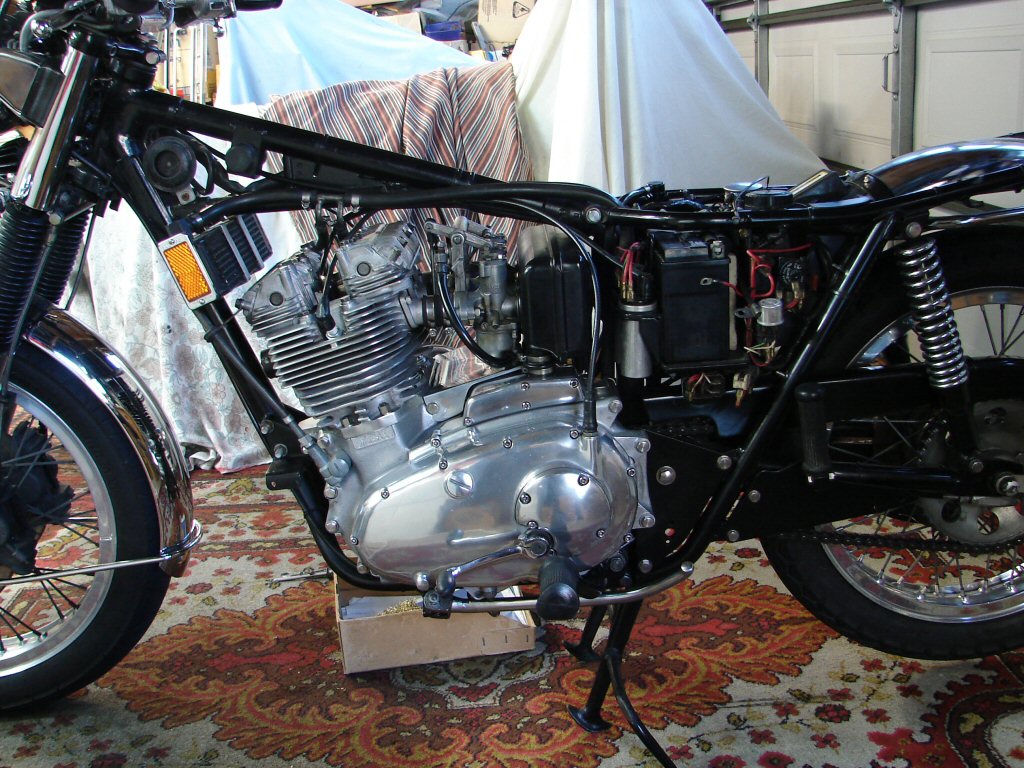
I had also fitted the battery and cranked the engine over with the plugs out until the oil light went out. It took nearly a minute before it came back on. Castrol GTX certainly has a much greater viscosity when cold than it's synthetic counterpart. I also allowed oil to bleed out of the oil filter cavity before fitting a new filter and closing it up.
Next thing will be to add oil to the primary drive and then the exhaust system needs to be fitted. Very close to firing it up.!
So I poured about 400ml of oil into the primary drive, as some of this would filter through the main bearing into the crankcases and begin the scavenge process.
Then I got the fuel tank down from the loft and polished its undersides. Then I sat it on the bike and polished its topsides. Then I considered putting the seat on.
But then I remembered something else.
Prior to the strip the rear brake had begun to drag a bit. Not long ago I had stripped and cleaned the master cylinder, but at the same time found that the flexible hose had broken down and blocked internally. A new hose had been fitted, and although the cylinder was the original factory fitment, it seemed to be fit for another tour of duty.
Not so it seems, as it continued to drag, and whilst working on the bike I had discovered traces of fluid leaking from the alloy housing that the cylinder screws into. I figured it was time to fit the stainless job I had purchased some time last year when I began investigating this problem.
As fitting the seat would preclude access to the fluid reservoir it seemed that now was the time to tackle this job. The absence of an exhaust system would also simplify matters.
Even though the cylinder had recently been stripped and cleaned out, it was evident that a degree of moisture had been present, and perhaps the cylinder bore was no longer viable. Nice that a shiny new stainless job was on hand.
I transferred the fluid inlet housing which is fed from a remote reservoir under the seat, and it was now ready to be fitted to the bike.
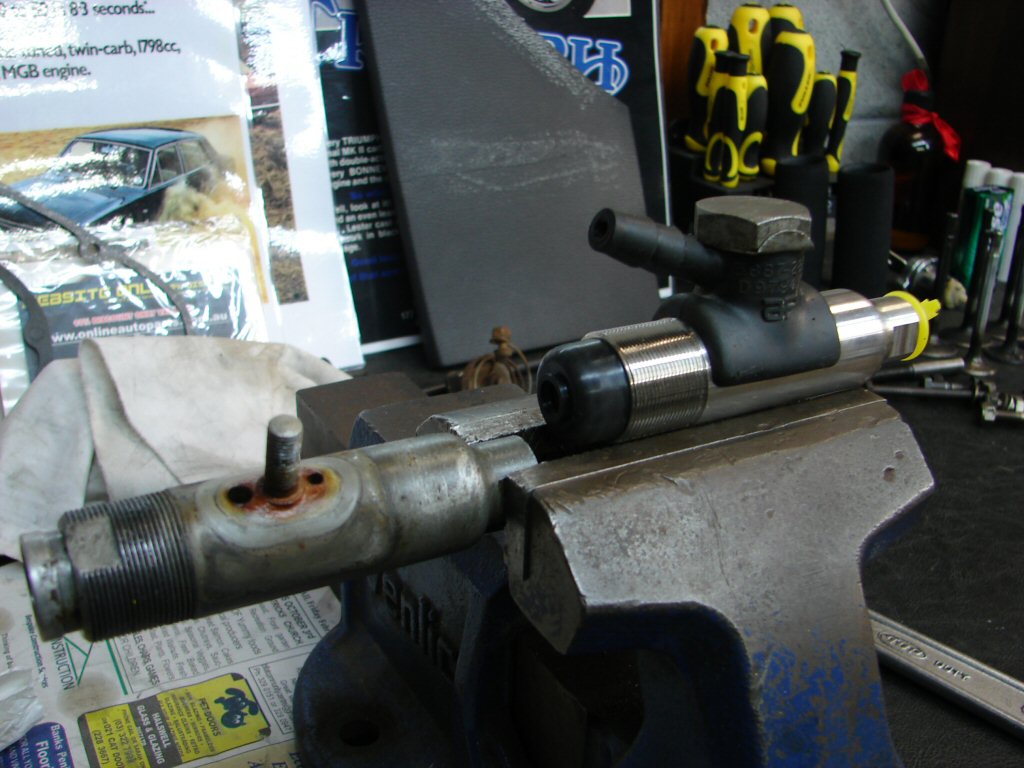
So I did.
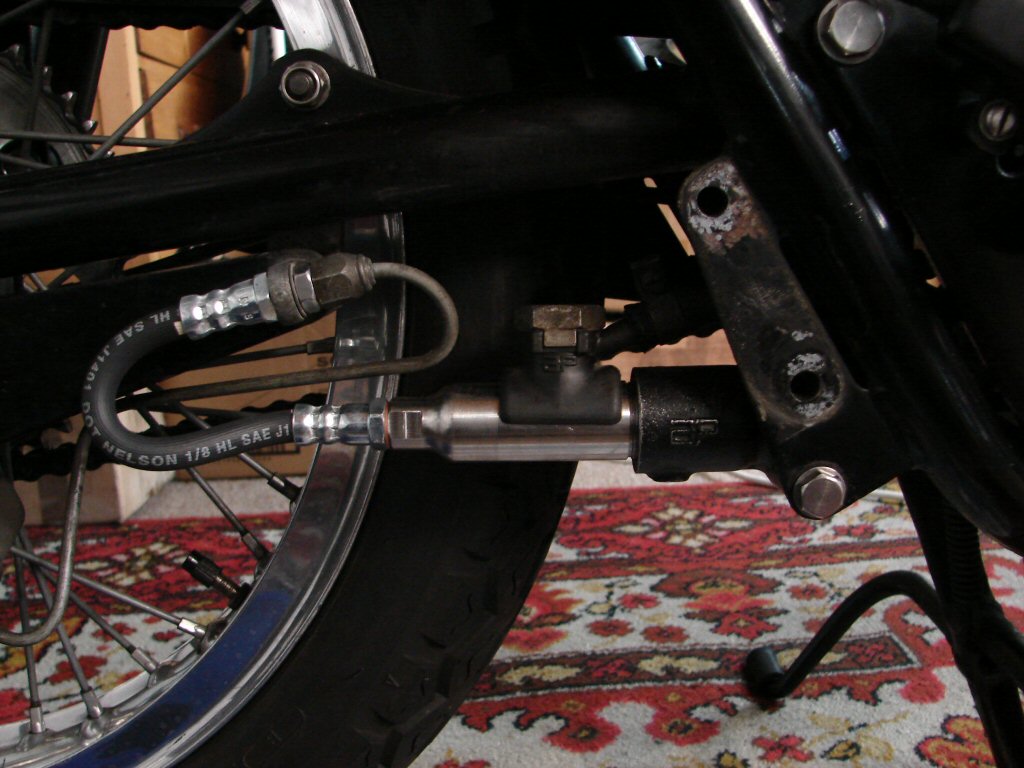
Then I had to bleed new fluid into it, which involved removing the anchor plate from the rear axle and hanging the caliper vertical to assist bleeding at one stage.
So now it is working happily and we can continue as previously intended.
Unless I remember something else..
Nothing else so far...
Actually, I did think of something else. I need to replace the fork seals, but as the weather is drawing thin I figure I should get the bike back on the road, and do the seals over winter.
So I fitted the exhaust system, poured some fuel into the tank, and made sure I had done everything up properly.
After that it was just a matter of finding the right time to attempt a start, knowing that it would involve flushing oil and timing with a strobe.
The time arrived.
I then refitted the return oil line, topped up the oil, and checked the ignition timing with a strobe light. The timing was fractionally too advanced, so after making a thin pen line between the Trispark pickup plate and the alloy housing I retarded by the thickness of the line. Another quick rev and I had managed to correct it by half, so same again and we were spot on. Buttoned that up.
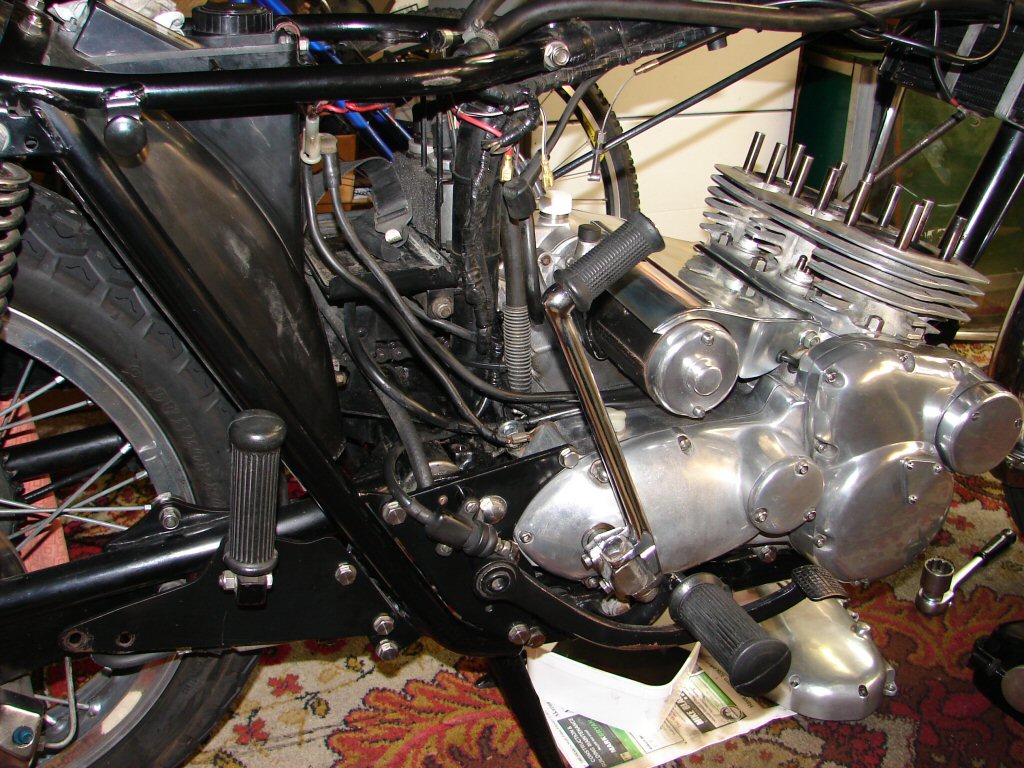
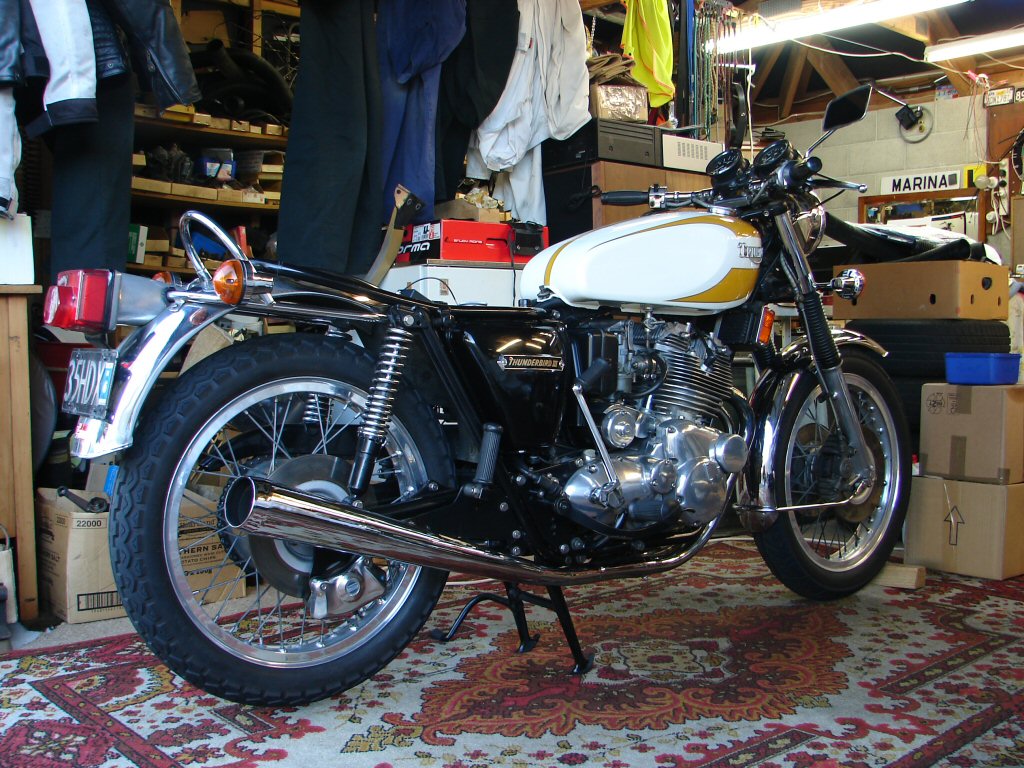
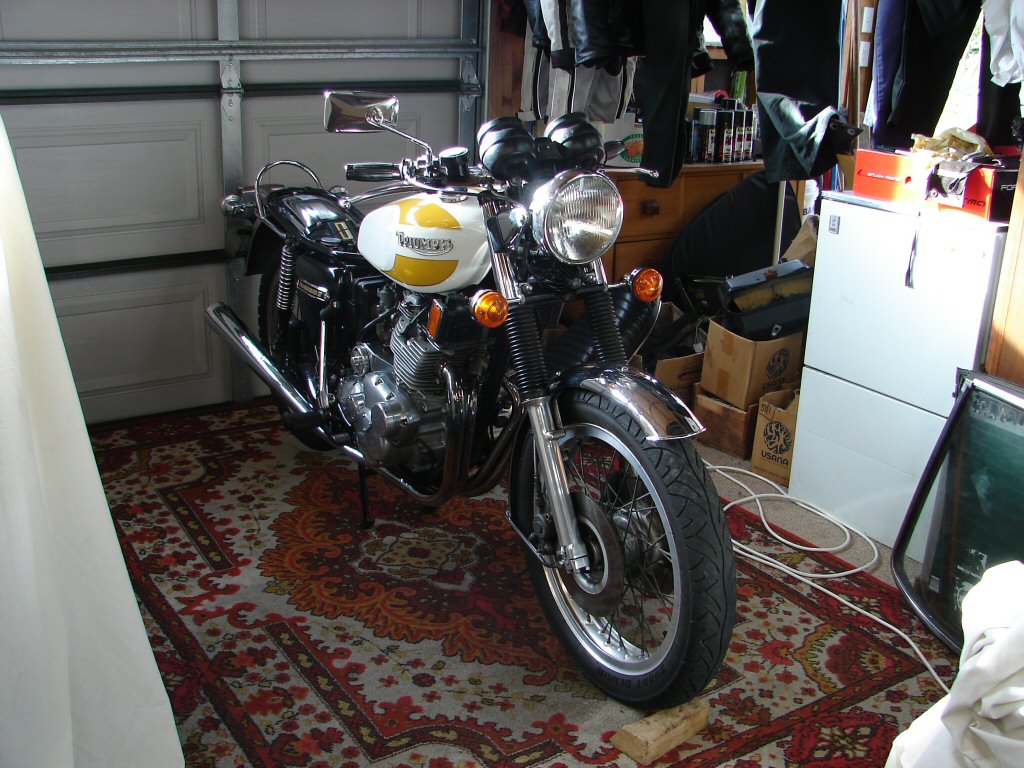
Seat and sidecover went back on and the bike went outside ready for the first test ride.
Well. Bit of a revelation. The reduction in gearing gives it a rather more excitable nature, and the larger main jets seem to have liberated some more grunt at higher throttle settings, although I did not pursue it too far as I am mindful that there needs to be a head retighten before I get too exuberant.
Back home I adjusted the idle and the pilot air screws. While doing so the Trispark gave a couple of hiccups, which I have experienced on other bikes before but never on this one. No idea what might have changed its behaviour, but hopefully that will not become an issue.
After that it was back in the shed and dump all the oil. Tank first, primary second, then oil filter cavity, standing the filter on its end to see if anything might have been caught inside it, but while it continued draining for some time, no lumps. Plucked the return line off the tank as only synthetic oil would be going in there from now on.
I had 3 quarts of Mobil 1 V-Twin left, so I put 350ml in the primary and the rest in the tank. I then turned the engine over until new oil appeared from the filter cavity, after which the filter went back in and the cap refitted. Spark plugs out and cranked the engine until the oil light went out. Plugs back in and started the engine to flush the return lines and oil cooler. About 400ml drains before it goes all frothy, and you know that the sump is now as empty as it is going to get, so game over. Oil line refitted and fuel tank bolted down.
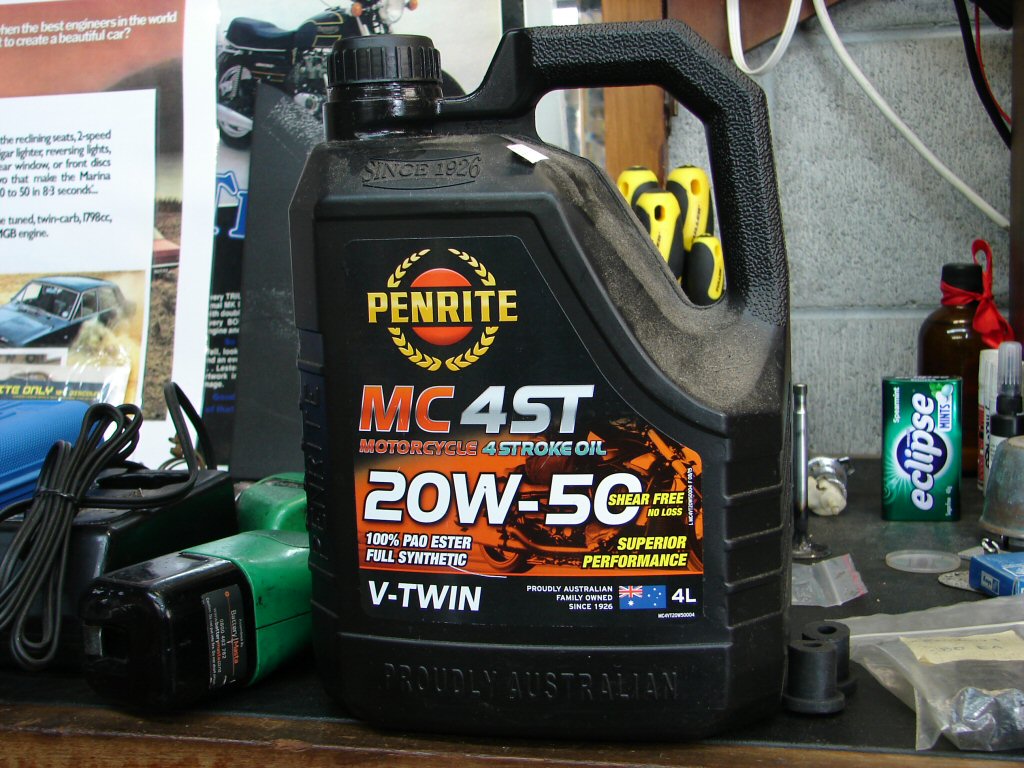
Checking the oil tank showed that I needed a bit more than a pint to fill, so I did that with Penrite MC4ST which is now my 20W-50 synthetic oil of choice. I have not seen any technical reviews of it, but it makes the right noises on paper and is somewhat cheaper than the Mobil. I shall monitor its performance.
At this point I would normally wait until the engine cooled then do the first head retighten, but of late I have found that hardly anything moves when only solid gaskets are in use, so I shall not interfere until a few more moderate miles are covered. Maybe 50. I am aware that the danger time for pillar studs is during the retorquing process, so one less can only be a safe move. If nothing alters much during that procedure then it will be the only one I do.
So thats how we sit to date. Pleasingly not a drop of oil anywhere to be seen, and I shall now go over a few bolts on engine mounts and the like seeing they were disturbed, and this will be the final quality control.
An excellent day's progress.
Progress to 6 May 2021.