January 2020
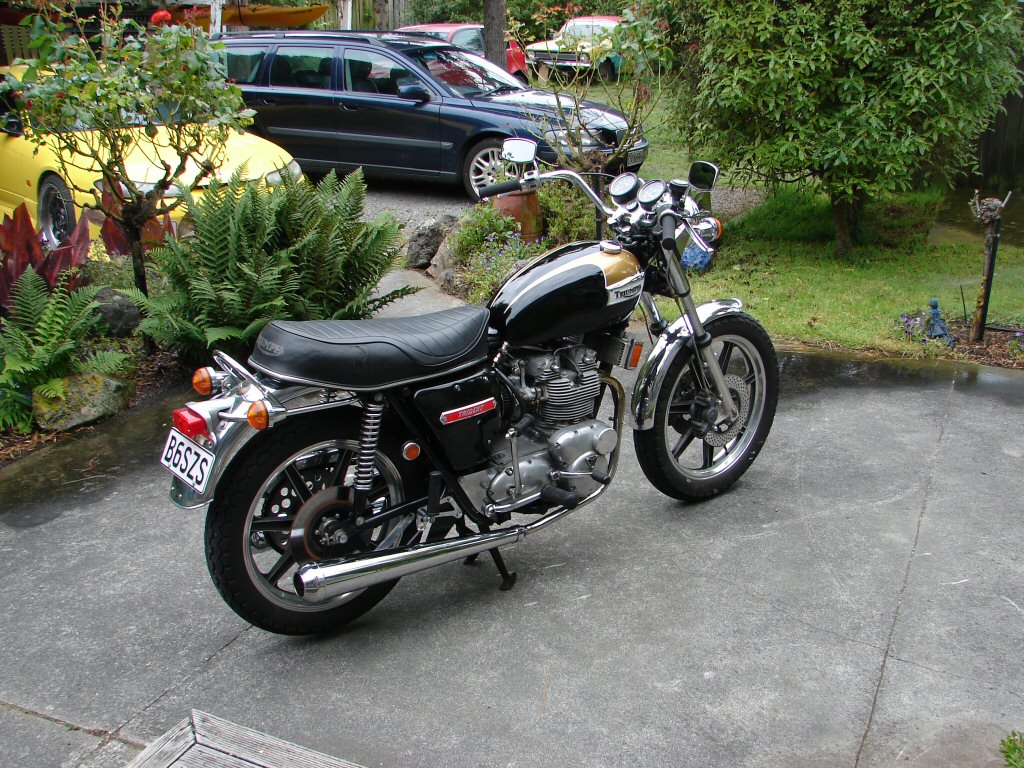
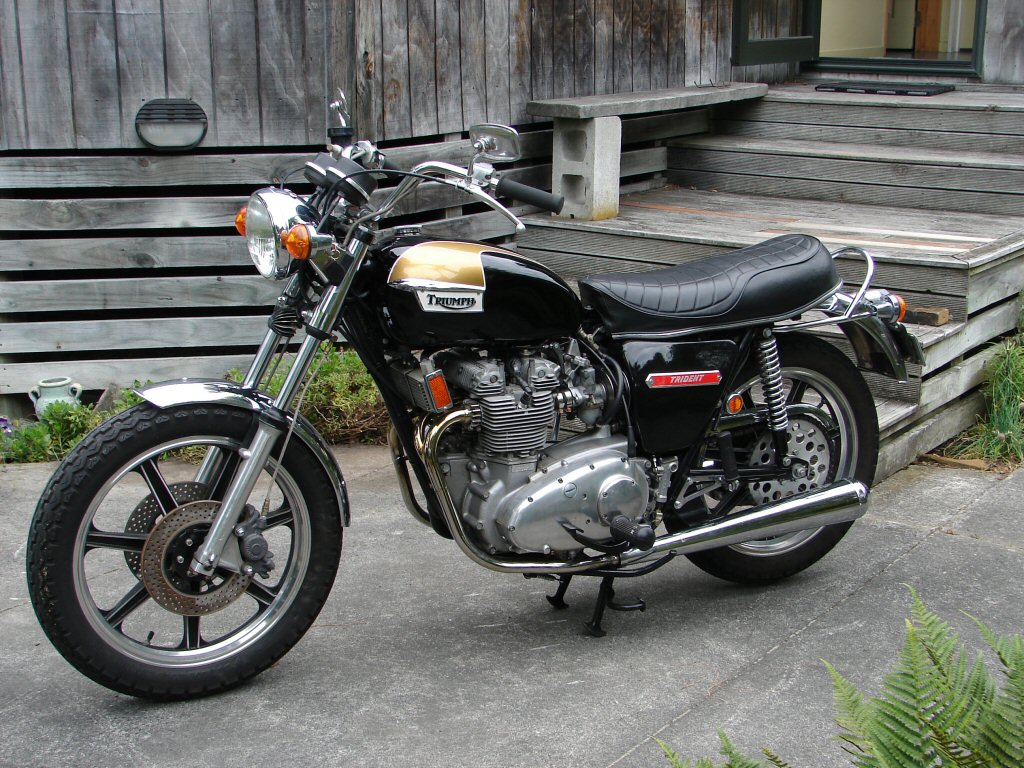
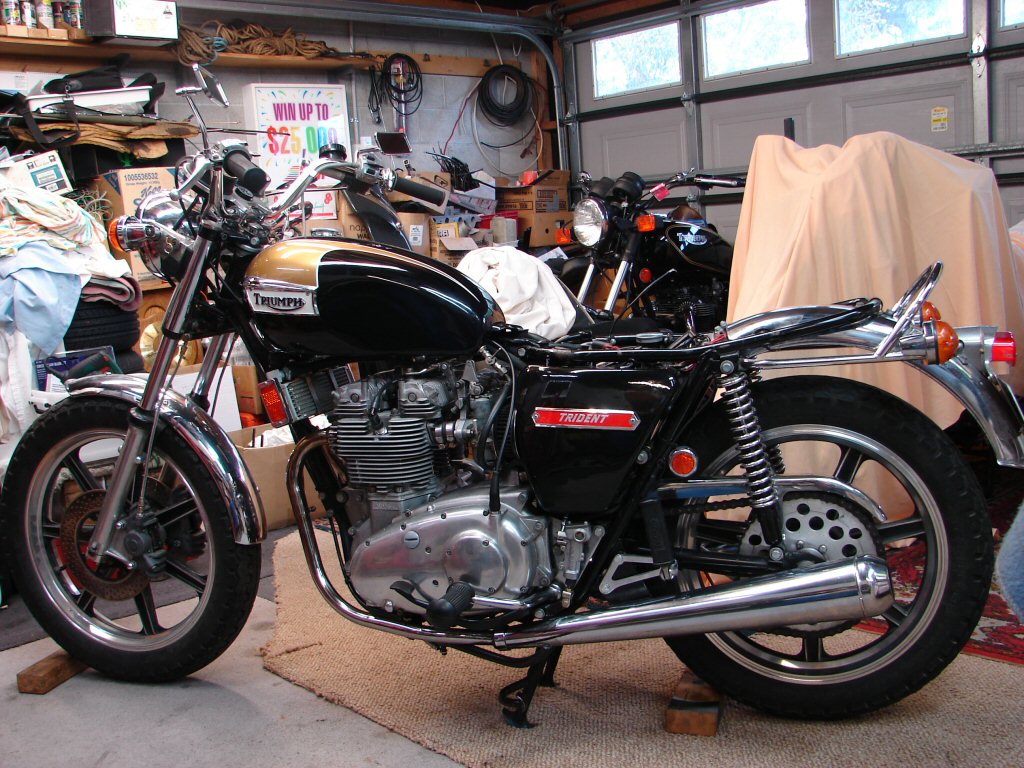
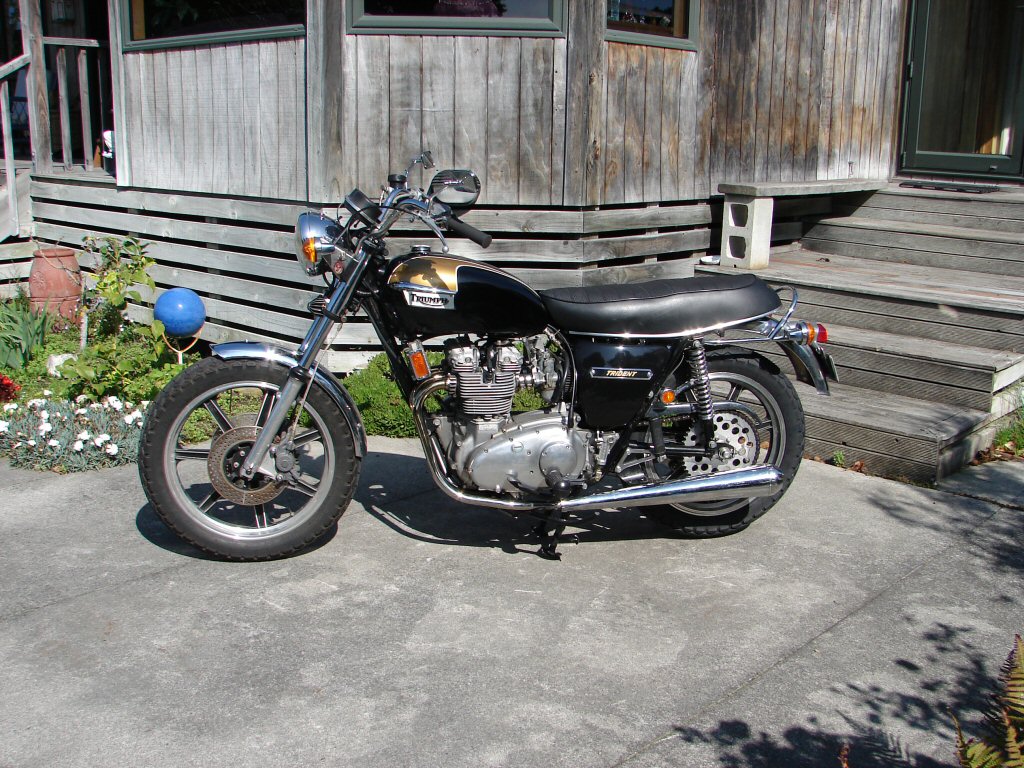
1974 Triumph T150V Trident 750
A later date arrived.
I had decided that the cylinder head would need to be removed to find out why the drive side piston crown was very shiny and apparently covered in oil. This may lead to some rather expensive discoveries but it was necessary. As I prepared to remove the exhaust system I was considering how the very low mounting of the mufflers was the most unfortunate styling cue on this bike. A lot of work had been done to lift the visual appearance of the bike overall, and this was totally letting the side down. Not to mention the lack of cornering clearance it resulted in.
A quick look revealed that some different mounting plates had been fabricated, but it seemed that there was room to drill some new holes higher up the brackets. Unbolting the mufflers showed that this would indeed work, so I found the highest location that would be possible on both sides.
Just my personal preference but I think its a winner.

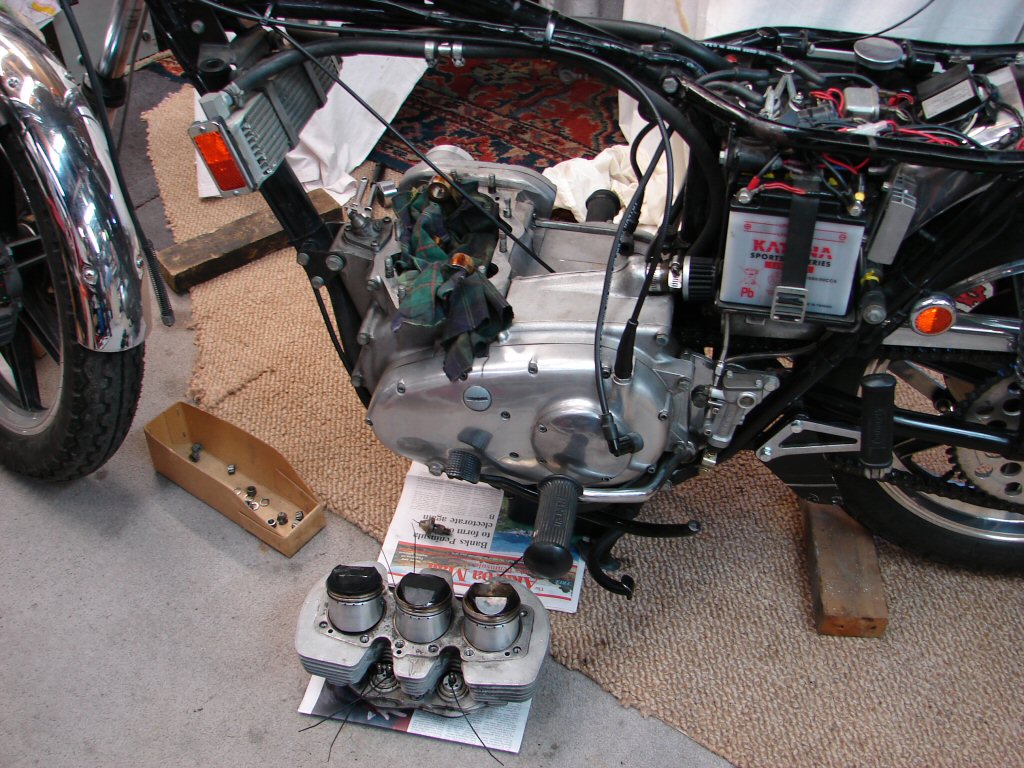
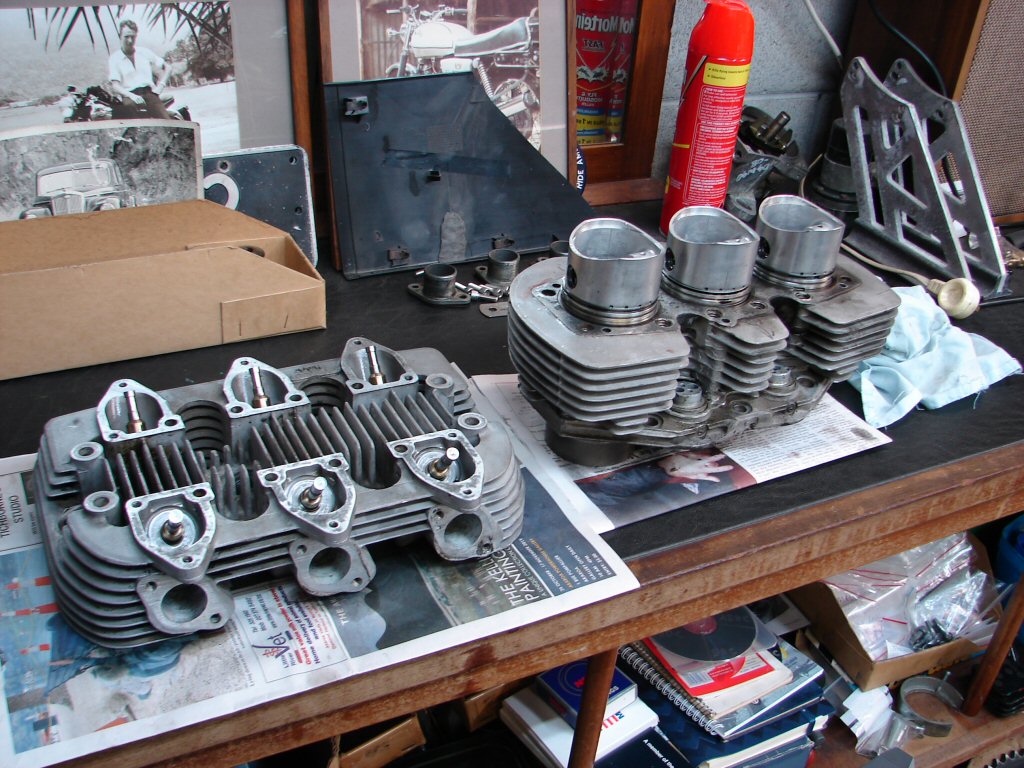
I then removed the exhaust system and the cylinder head.
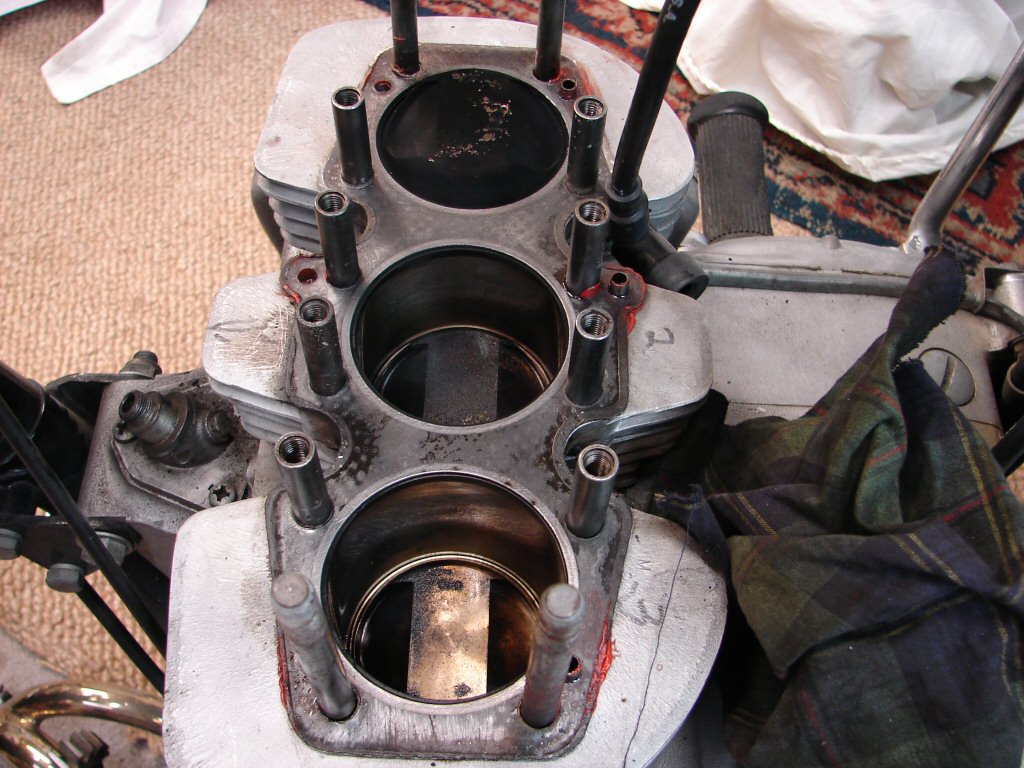
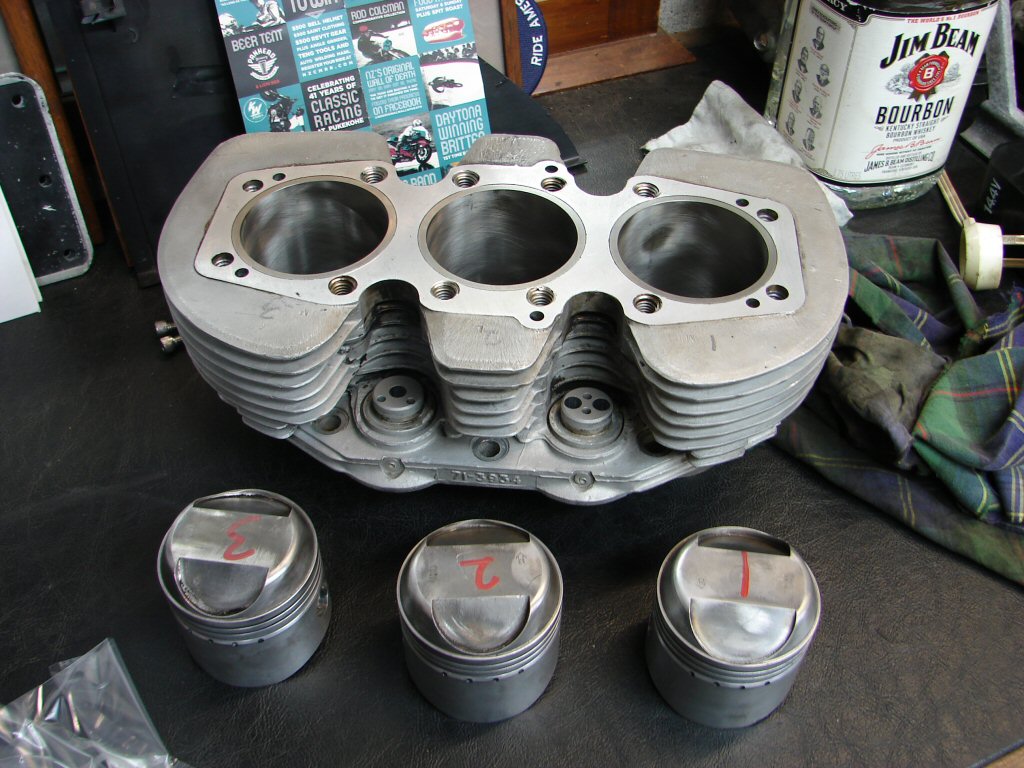
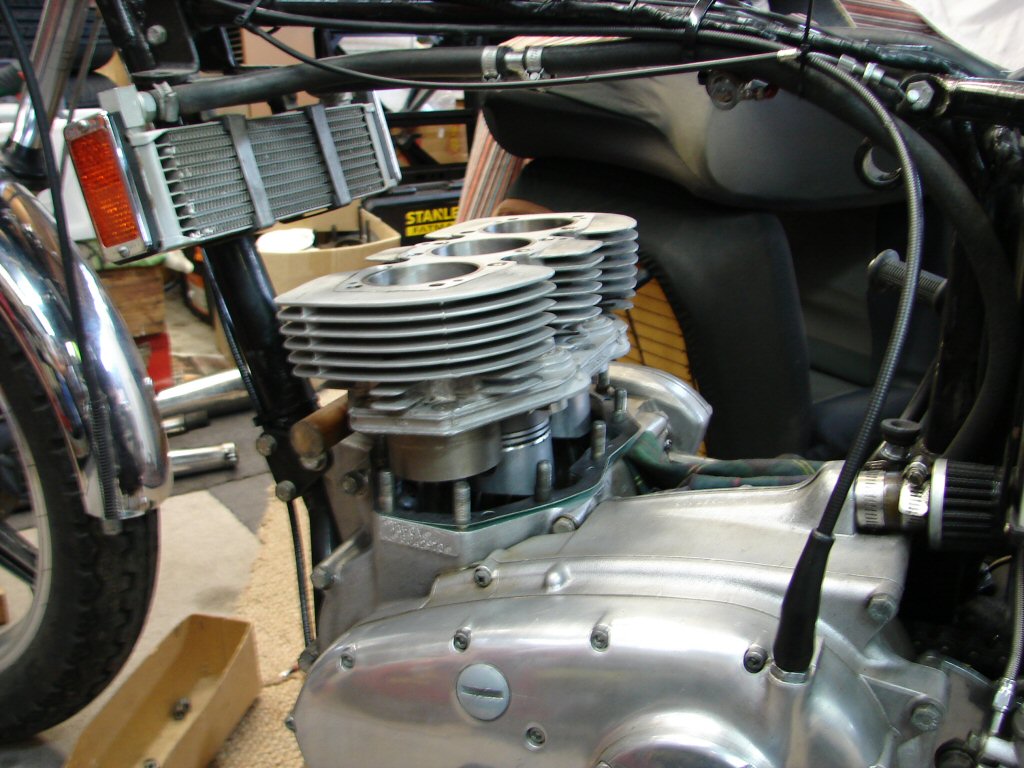
Next job was to remove the barrels and pistons. The left side piston which had evidence of much oil activity seemed to have a fair bit of play so I was hoping that the bores would be ok, especially as the pistons were already .040" oversize. Removing all the studs revealed that a number of helicoils had been fitted, and it seemed there were large helicoils with smaller ones inside them. A couple of these had moved up in the barrel so were now proud of the surface. That may require some remedial treatment.
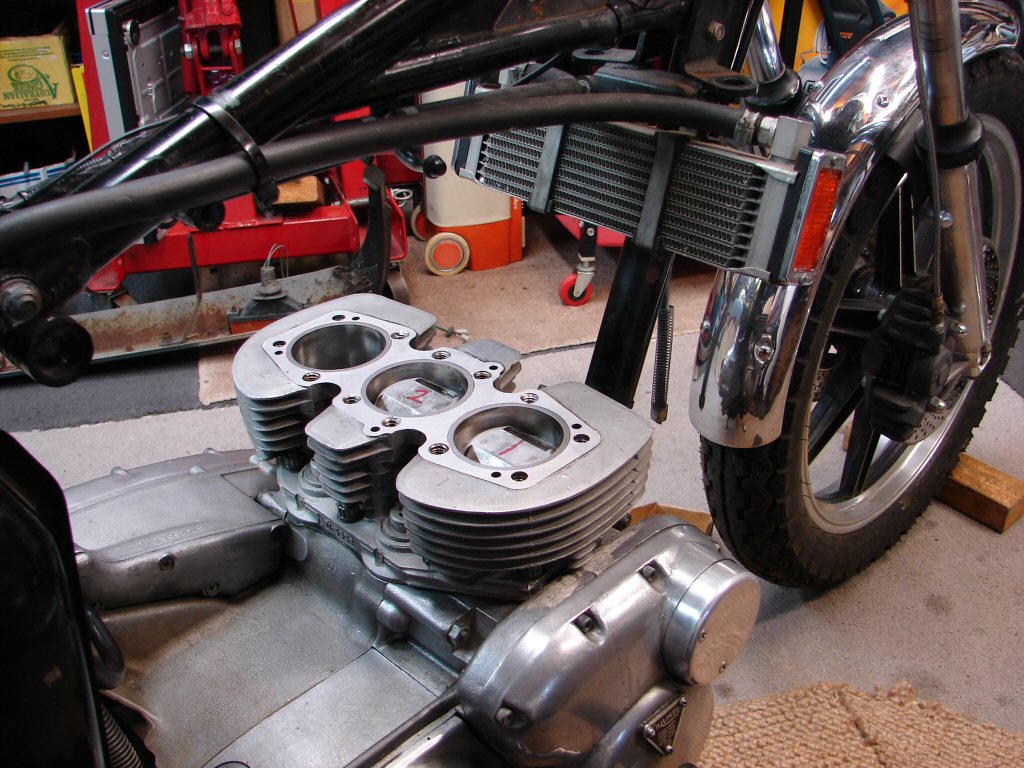
Once the barrels were off I could see that the bores were ok but perhaps somewhat glazed. The pistons appeared to be of recent fitment, but had cast oil rings, so that may be the explanation to both the glazed surface and some of the excess oil.
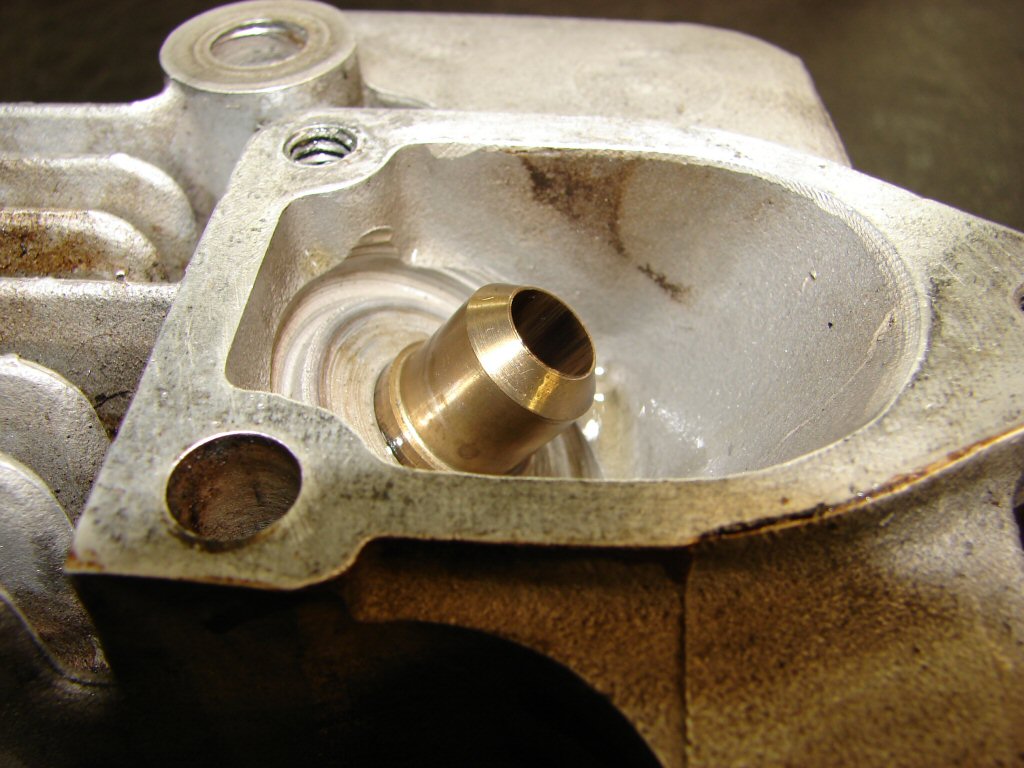
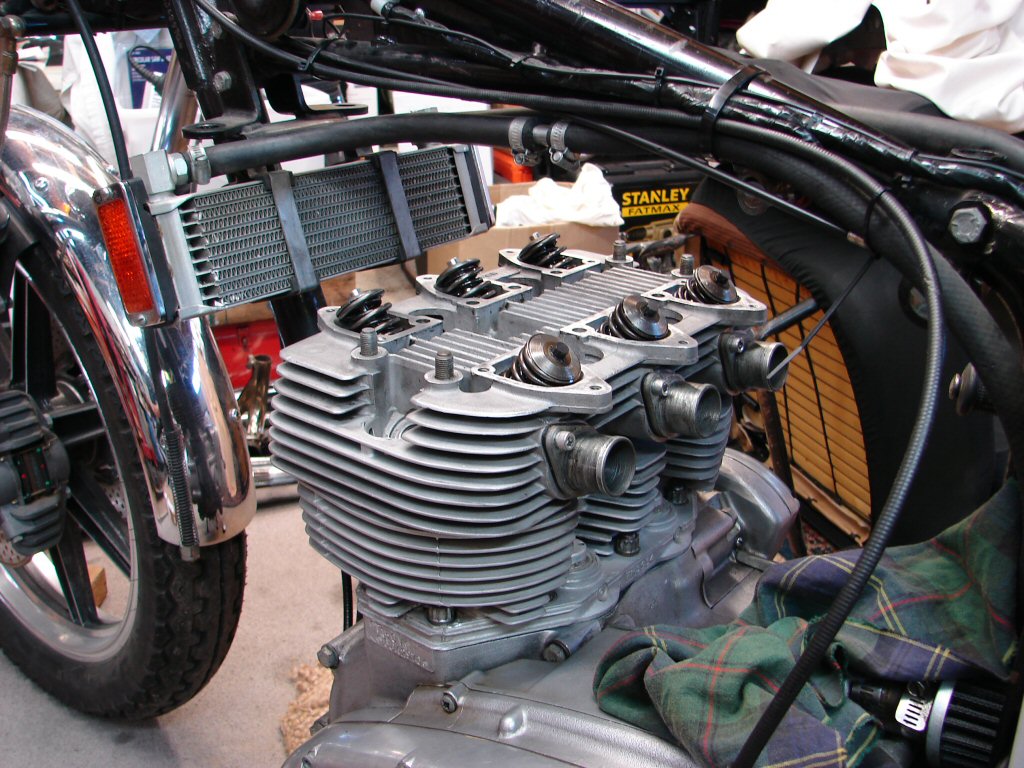
Inspecting the cylinder head I could see that oil had been getting drawn down the inlet valve guides on at least two cylinders, which suggested that either the guides were worn or the wrong type of guides had been fitted, or perhaps the valve stems were worn. An old chap who used to do machining for me had once observed that every time he was given a Trident head to repair which had seals fitted on the guides, the valve stems were always worn badly - obviously due to being robbed of enough oil.
And indeed there were guides fitted which required seals, and there was play between the valve stems and the guides. Normally I would fit the original type guides which have a steep taper at the top to shed oil without the need for a seal. The seals fitted here were of a type which had no spring to hold tension against the valve stem, so oil was still getting past the seal. I will fit the original type guides so It would be nice if the valve stems were good enough to be reused.
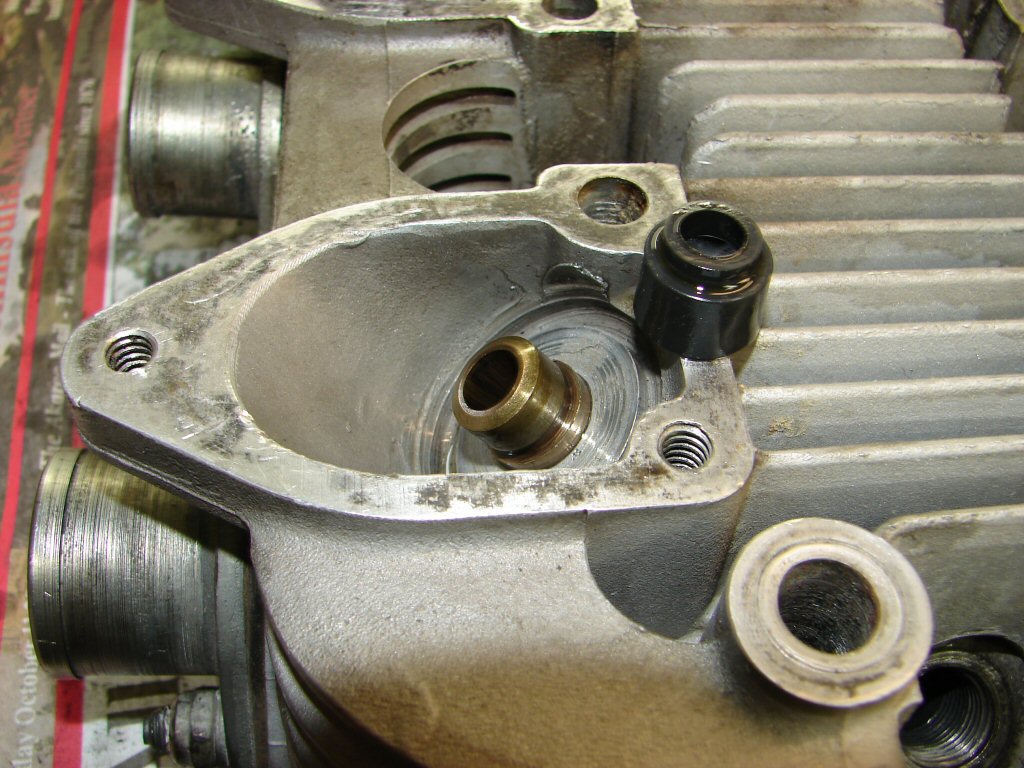
Removing an exhaust valve revealed original type guides and no appreciable wear, so at least these would not require anything more than refacing the heads and seats.
That thread in the shot which retains the rocker box is partially stripped and will require helicoiling.
I am currently able to obtain ring sets with 3 piece oil rings which do a good job of controlling oil in these engines, so if the bore to piston clearances prove to be ok we may get away with a hone and a set of rings, plus a set of inlet valve guides. The answers to these questions will be revealed once my engine reconditioner has measured it all up and given me his verdict. I will not purchase the valve guides until he has removed the old ones, in case oversize items are required.
Could have been a lot worse, and I get the impression that the pistons and bores will be fine.
Improving the top end of an engine puts more stress on the crankshaft bearings, and I had no real idea what shape they may be in. I fitted an oil pressure gauge and kicked the engine over to see what pressure I could get. 60psi was all I could manage on cold oil, which is a bit lower than I would have liked, but not disastrous. I shall leave the gauge in place until it gets fired up for the first time and we will know more.
I also discovered today what appears to be a leak from the rear of the oil tank. There are brackets brazed to the tank to support the coil tray and it seems that oil is weeping from one of those, so it may need brazing again. No better time to deal with such things than when it is already in bits.
Today the task was to entirely strip the head and barrels in order that they may receive whatever machining is deemed necessary so they behave themselves in future.
Progress at last. All the bits came back from the machinist and everything worked as hoped. Cylinder head got a helicoil, surface skim, new inlet valves and guides.
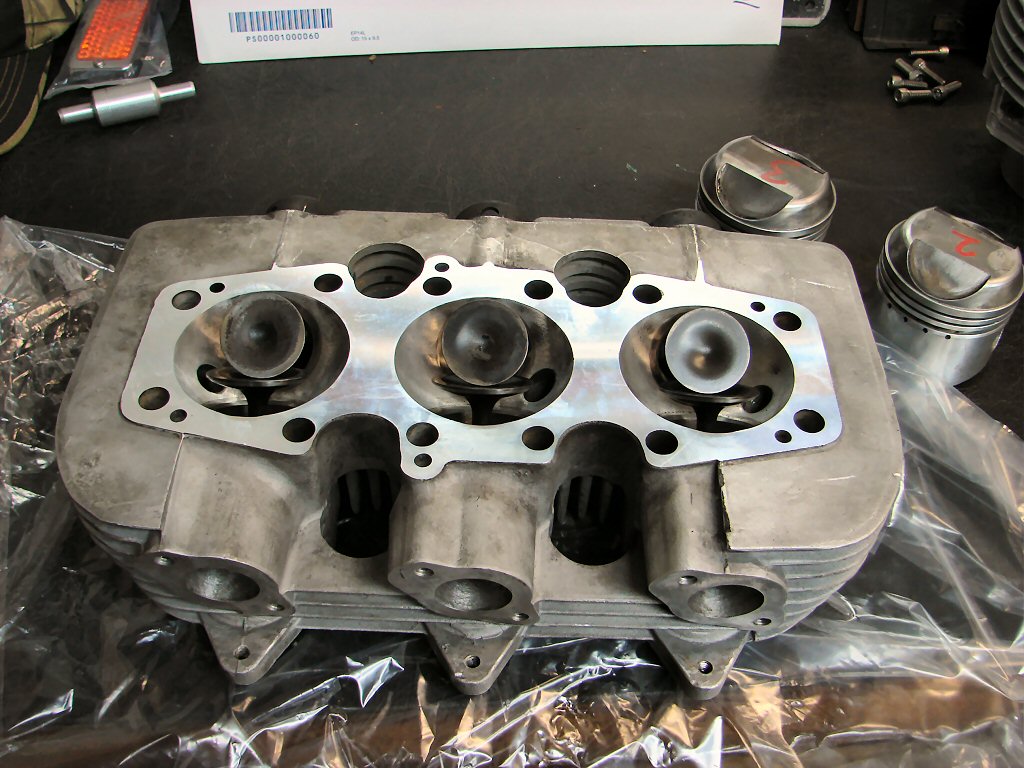
Barrels were a little more complex as a number of double helicoils had to be repaired in order to skim the surface because the liners had dropped. Bores got a good hone and pistons were cleaned up. Machinist found that the rings had all been installed upside down. This engine had certainly had every reason to burn a lot of oil.!
Rings got gapped - all were within correct tolerance, which reassures one that the manufacturers knew what they were doing. Rings fitted to pistons, and pistons fitted to conrods. That was the easy bit. Of all the tasks involved with bringing triples back to life, the most demanding is the fitting of the barrels over the pistons.
I had been reading an article by Arthur Jakeman about top end rebuilds, and he advised dropping the centre piston to the bottom of its stroke and fitting it last. I thought I would try this approach, seeing as how he was an expert and all. Thus began the operation.
Well, that proved to be a bridge too far. While I have ring compressing clamps, I find them too clumsy to use in such a confined space as beneath Trident barrels, so I prefer to use fingernails and small screwdrivers to coax the rings into the bores. Despite having a friendly extra pair of hands, the job proved too troublesome so the barrels were pulled off and the whole job started again, this time with the centre piston first.
The major problem is with the CX3 3 piece oil rings. They have very thin scrapers top and bottom of the groove with a spacer inbetween. While the top scraper naturally wants to seat in the groove, the lower one prefers to roll out of the groove given the slightest chance. This is why the compressors tend to fail, as the ultra thin lower scraper pops out between the compressor and the bottom of the barrels, and can be badly distorted in the process. Such was the case today, so I straightened it out and instead fitted it in the top of the groove instead. Now fitting the offending centre piston first, it was much easier as the piston was at the top of its stroke and everything was easy to reach. And see. I find increasingly with my diminishing sight, that artificial light is seriously limiting, and tiny things can be difficult to gauge accurately.
Never mind. This time working slowly by myself I was able to convince everything to go where it needed to go. I shall not be persuaded to alter my approach in future. When you have a method that works - stick with it. That got us to here.
I also got some oil pressure whizzing the engine over on the kickstart after giving the oil tank some new Castrol. Houston - we are looking good.
Cylinder head assembled with T160 type mounting for the inlet manifolds, and trial fitted to the barrels to see what might need fine tuning. Pushrod tubes checked for compression of seals with the new aluminium base gaskets. All looking good.
In preparation for the exhaust rocker box to be fitted the pushrods get assembly lube down at the cam follower end, and oil in the top. This ensures that the pushrods will not get accidentally displaced by being lifted by the rocker arms as the assembly lube sticks like the proverbial. Aluminium gaskets will get a light smear of silicone sealant and a new set of pushrod tube seals are ready to be squished by a calculated amount.

Everything progressed in a nicely controlled fashion with no upsets at all. There are a new set of valve adjusters as the original ball-in-socket type were on the way to doing what they do as they age - first rattling then breaking up. The head torqued down nicely and the valves were all adjusted to the 8 and 10 thou clearances which I currently favour. Rocker oil feeds went back on so from now any oil returning will visit the rocker shafts first.

From there it all came together fairly quickly. Covers on, exhaust manifold on, carbs on, and so much easier to secure to the manifold stubs without the clumsy studs and nuts in place.
It is most encouraging to see all the spaces getting filled up as everything goes together, especially as this has been sitting for some months while awaiting other people to do their bit. I fitted the sidecover as well to make it look even more complete for the photos.
The fuel tank is just sitting in place as the return oil line will need to be removed from the tank for the first start in order to flush the oil cooler.

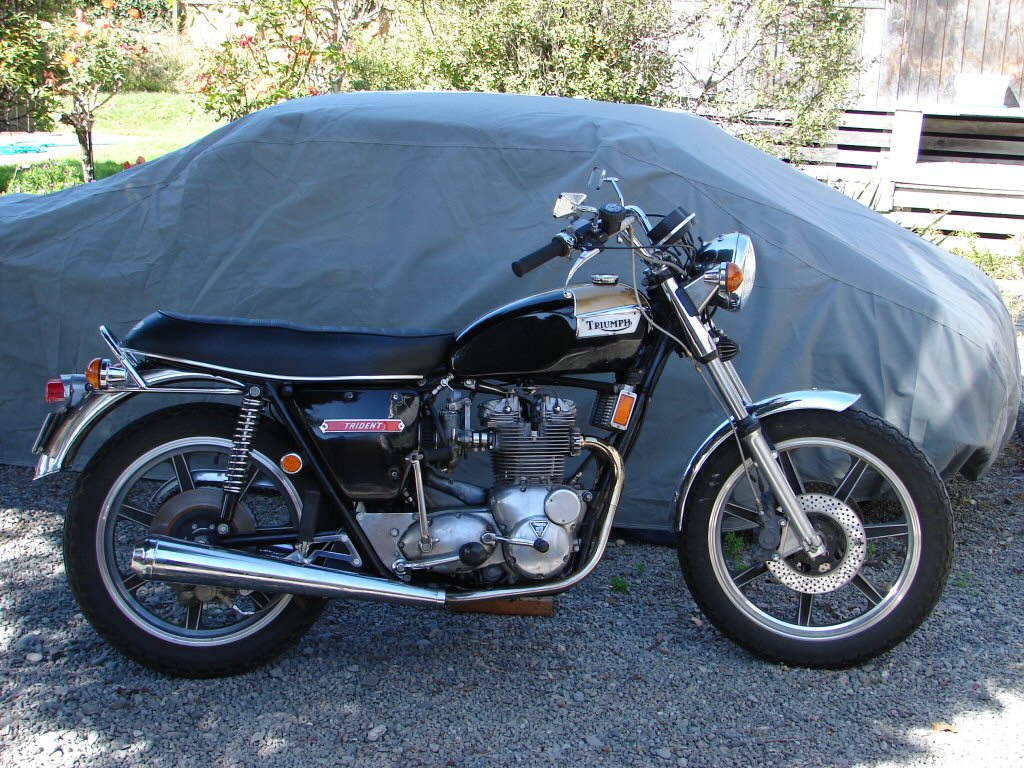
I am very pleased with the new look afforded by lifting the mufflers as far as the headers would allow. It really changes the look of the bike, and also hides the huge rear sprocket to some extent. The eventual fitting of the correct rear tyre - a 4.25x18 - will also improve the balance of the side view.
I kicked the engine over a couple of times after fitting the spark plugs. It has tremendous compression compared to its previous incarnation, but this will reduce a fair bit after the first couple of runs. Getting somewhere now.
Next move was to start the bike and flush the contents of the oil cooler. After this the oil line would be restored and the oil topped up so that a full warmup could be completed.
So that happened..
This allowed the first head retighten after it cooled down, and as the head went down a bit there was a subsequent checking of valve clearances. I had not been very successful at tuning it and it did not matter anyway as there were going to be more adjustments after a few miles were put under the cast wheels and the tuning would be an ongoing thing.
A warm day showed up which looked like the ideal time to undertake a test ride. I geared up and started the bike without too much trouble, but as soon as I went to ride away it simply died and would not restart. Gear off and investigate. I was suspicious of the spark which had seemed a bit irregular. I checked the wiring down to the Boyer pickup. Seemed ok even though the wires at one end were different colours to what appeared at the other. I checked the pickup plate and the magnets on the rotor. I then checked the static timing and could not fault any of it. I did find 2 wires that simply pulled out of their crimp connectors at the pickup plate, so those connections got replaced. If it was not a problem now, it would certainly become one later. The bike still did not want to start. Then I had a thought. The spark plugs looked quite new, but they had been exposed to the copious amounts of oil that were going through this motor before this rebuild. Maybe they had been adversely effected. I decided to fit a new set of Champion N3C's.
Lawdy Doris. That did it. It lit up on the second kick and ran smoothly at last. Very little evidence of smoke even though we had new rings in here. I donned the gear and headed down the road for some first impressions. It ran really well on most throttle settings, but the idle was rather high. I soon found I could adjust that on the move, and we settled into a nice rhythm. The bike is really low geared thanks to an undersize tyre on the back as well as a monster rear sprocket. 5th gear happens around 60Kph and I find myself looking for 6th. Brakes are great. Clutch is very on/off and groans on takeoff. I suspect it is a sintered type, which sounds good on paper but is definitely not as nice as an original in normal use.
When I returned there were only 3 more miles on the clock, and the bike idled happily while I adjusted idle and pilot air screw settings. This bike has never been as happy since I have known it. Some smoke as I revved it to clear the throats while tuning continued, as I would expect. New rings suck oil up the bores on idle. The bike looks great.
Happy with all of that I took it out again. I needed to check out a Ducati in a bike shop for a friend, so I went there and the Trident got noticed immediately. I then called on a mate who was out, so over the Port Hills we went, for my usual break-in run. Unfortunately they have now made it no passing all the way to the top of Dyers Pass, and I got a really slow lady driver who had me in first gear a lot of the time. Once at the top she pulled over, so off down the far side at more acceptable speeds, and some serious revs and braking ensued. Hard left at the bottom and around the harbour to return through the tunnel, with some 70mph open road which saw more than 5 grand on the current gearing.
Back in town I slowed the idle yet again, as things were beginning to settle and free up a bit. The idle was totally reliable and the engine felt smoother already, short shifting up through the gears. This is more like it.
Back home and we have done another 30 miles. No more tuning required. I whipped a plug out for a look. You have to be happy when a 33 mile old engine runs a plug like this.
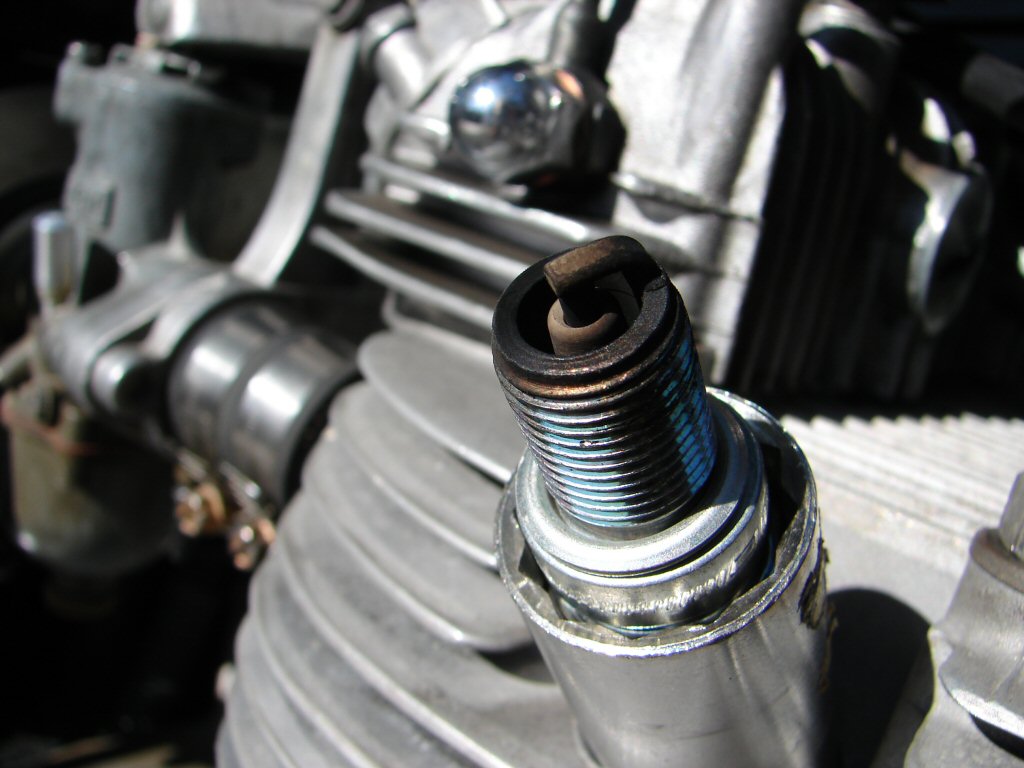
Once it has cooled I will do the final head retighten and check the valves, and the rocker box covers can be sealed properly as they will hopefully not be disturbed for quite some time. Very pleased with the look of the bike now, but even more pleased with how it runs. We have a result.!
Head work completed, with some slight adjustments required for valves, a good sign as the head has settled slightly.
The owner got in touch. Having read the updates on this page he decided we should change the rear tyre to correct the gearing a little. It will also make the bike a lot easier to get onto the main stand, as well as increasing the ground clearance. There used to be some complaints from the left rear of the bike when cornering in a slightly enthusiastic fashion, and some of this seems to have been improved by the raising of the mufflers. I suspect that the main stand is one of the culprits, as it has been modified in a fashion that makes its outer extremes lower than they should be. Perhaps the larger tyre will help this too. Tyre fitted today and wheel now back in the bike.
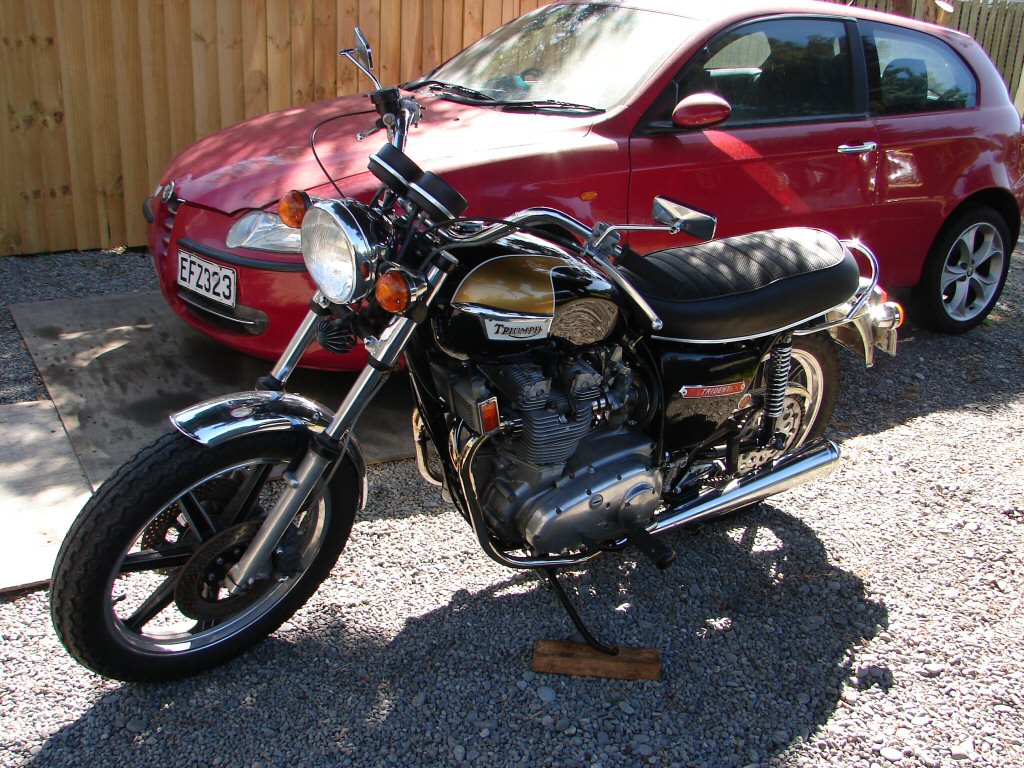
While untested since the most recent work, this bike is to all intents completed. The new rear tyre will certainly alter the overall gearing because it has a larger diameter. I simply had to make one other small change to the appearance of the bike because it offended me. You will either see it or you will not. Although I also see that I have fitted the muffler mounts in the wrong holes. Dang.
A brief ride will confirm if all is as it should be. Whenever that can happen.