August 2019
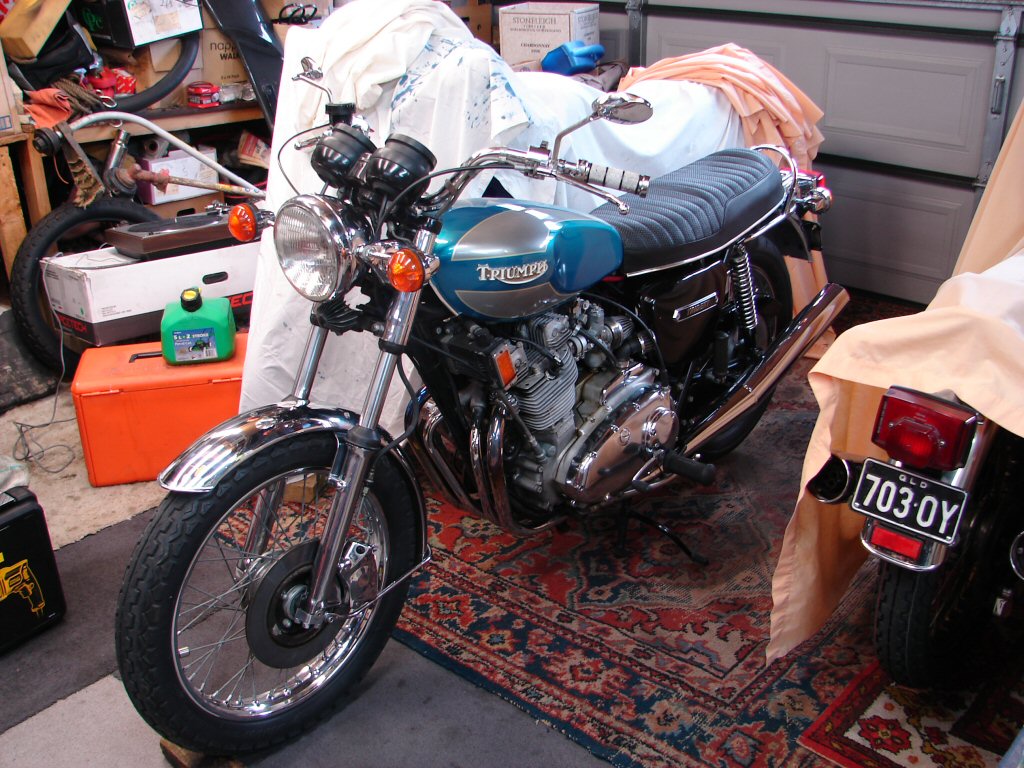
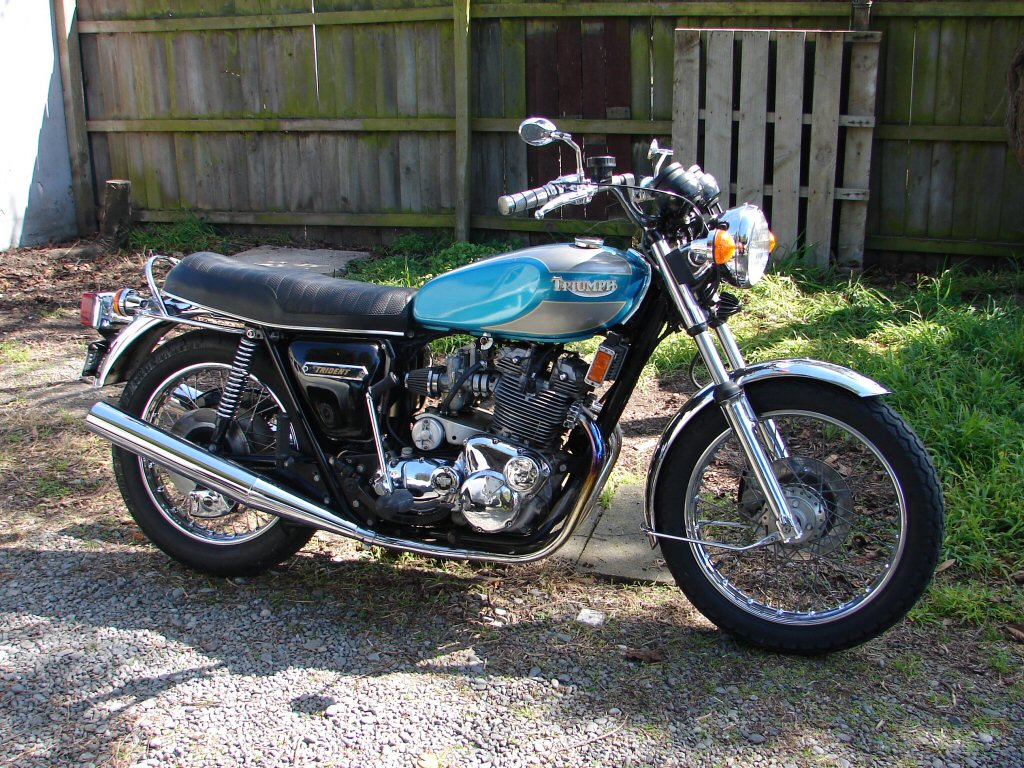
1975 Triumph T160 Trident
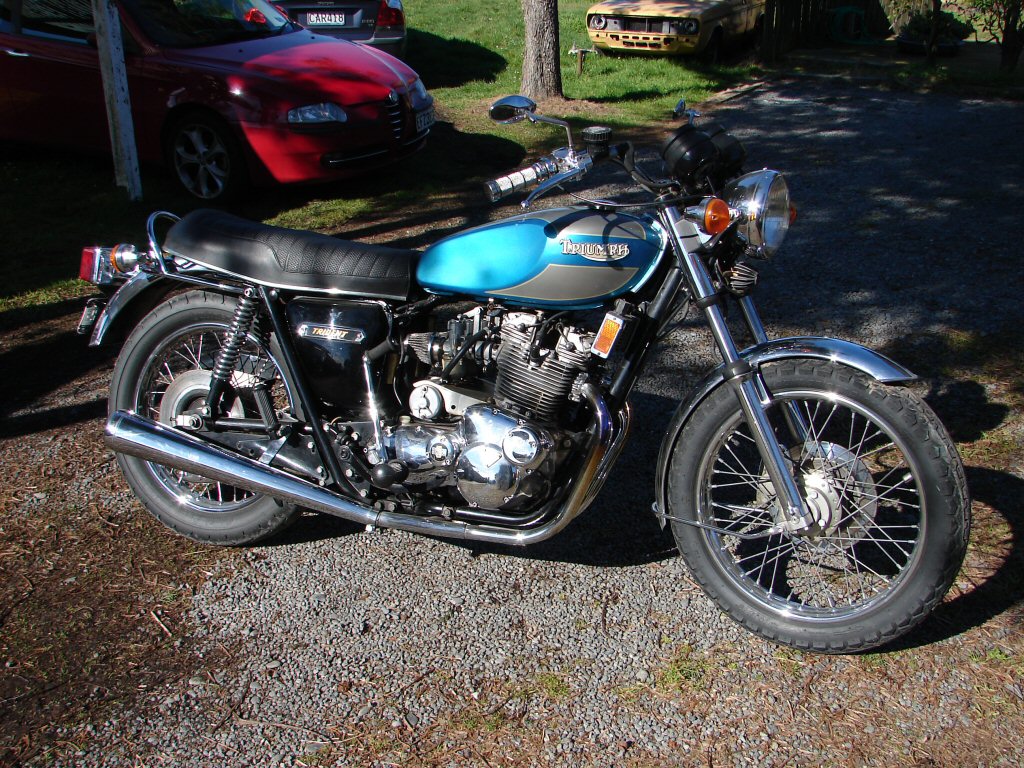
An American import this time, complete with its Michigan plate despite having been first imported to Perth then brought here by the then owner when he returned to NZ. It had now changed hands again and it was time to sort it out and comply it for local use.
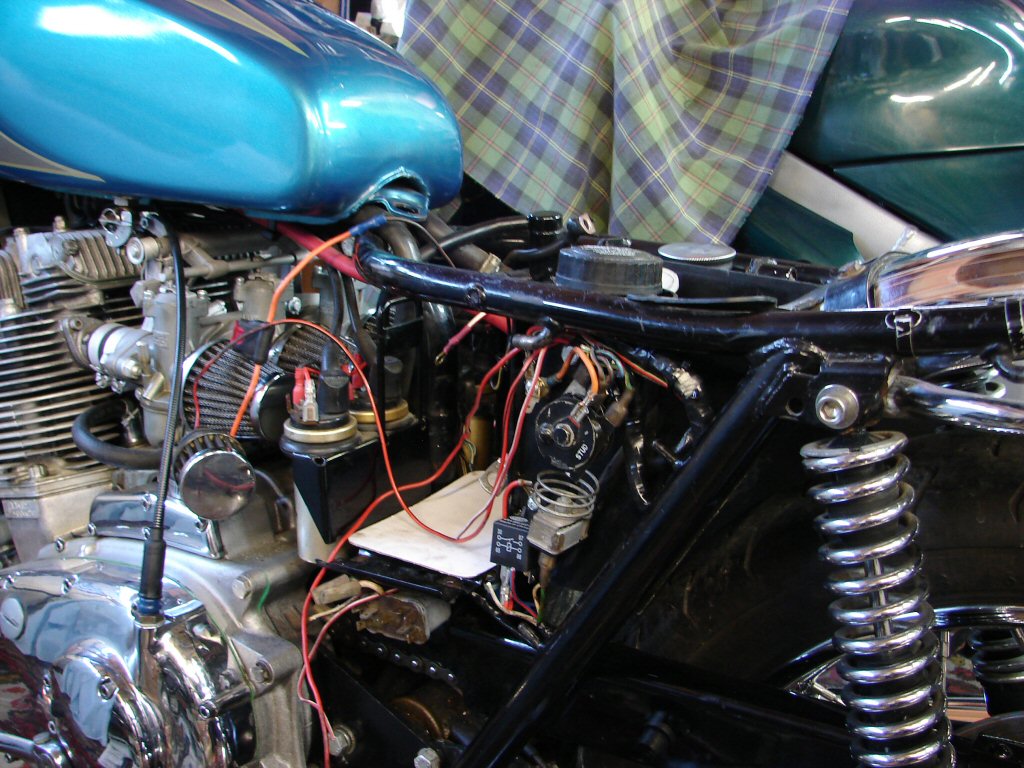
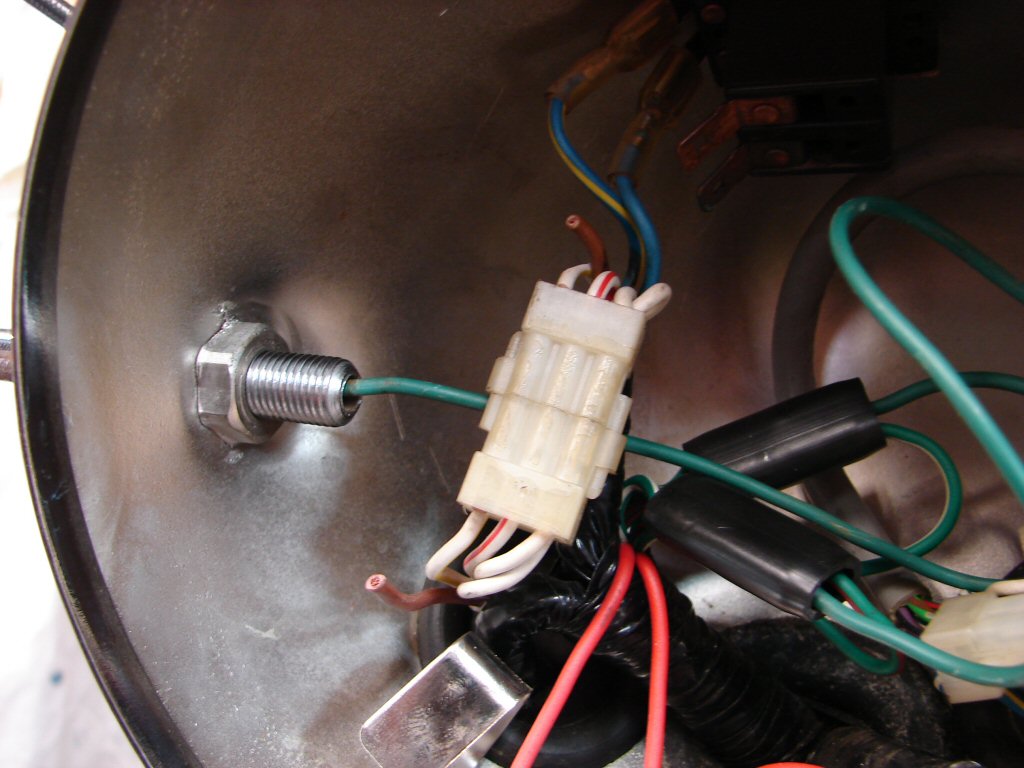
The rear brake was problematic and I soon discovered that the fuel tank was leaking and the front wheel bearings were totally shot. There were some other strange arrangements beneath the seat. The brake reservoir had been located behind the sidecover and the electrical components were now residing where the reservoir should be. This had also resulted in a lot of butchery to the wiring as bits were chopped and added to make it all work. Which it suprisingly did, but it looked doubtful that it would for very long. The pickup wires for the Boyer had no less than 3 different crimp joints in 6 inches, with the wire colouring changing 3 times.
The fluid hose from the reservoir to the rear master cylinder was weeping fluid along its entire length, so that was the priority. I fitted a new hose and returned the reservoir to its correct location, in the process discovering that the master cylinder had been assembled incorrectly to the frame, so after cleaning and refitting everything as it should be I finally managed to achieve a working brake. The wiring would be another matter altogether.

Besides the obvious chroming of the engine cases, the fork sliders had also been plated, something that tends to be a temporary affair in most cases. Although there was a Boyer ignition the points cover was of the type supplied with a Lucas Rita. The plating on that cover was already lifting away with a large bubble beneath it.
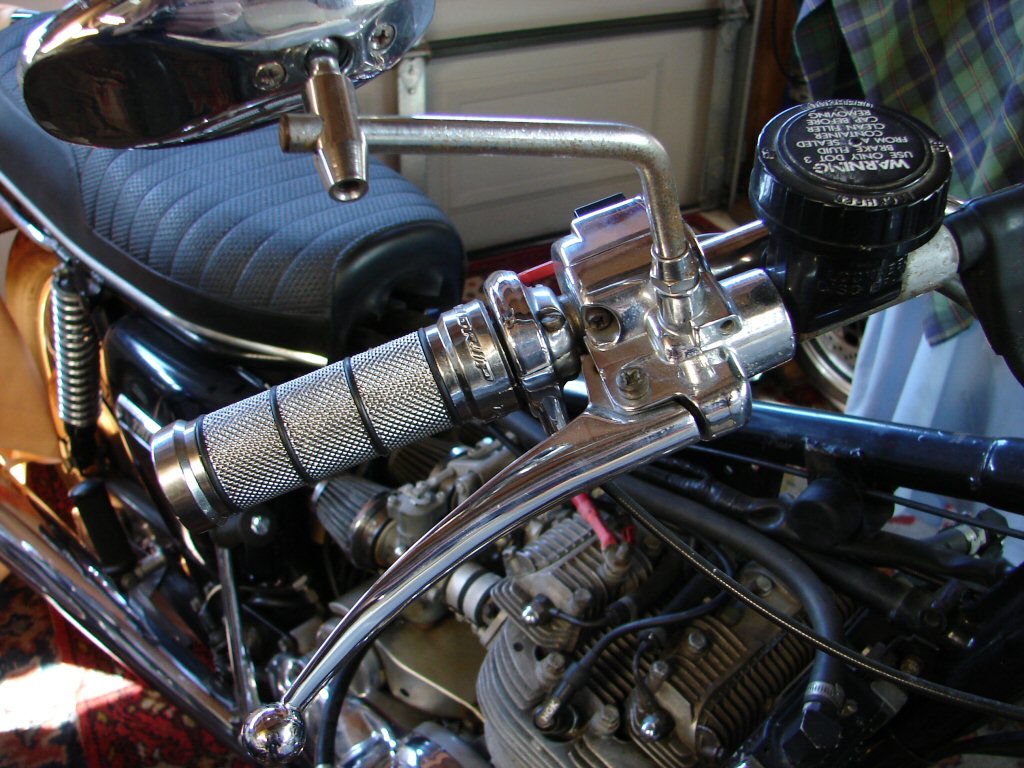
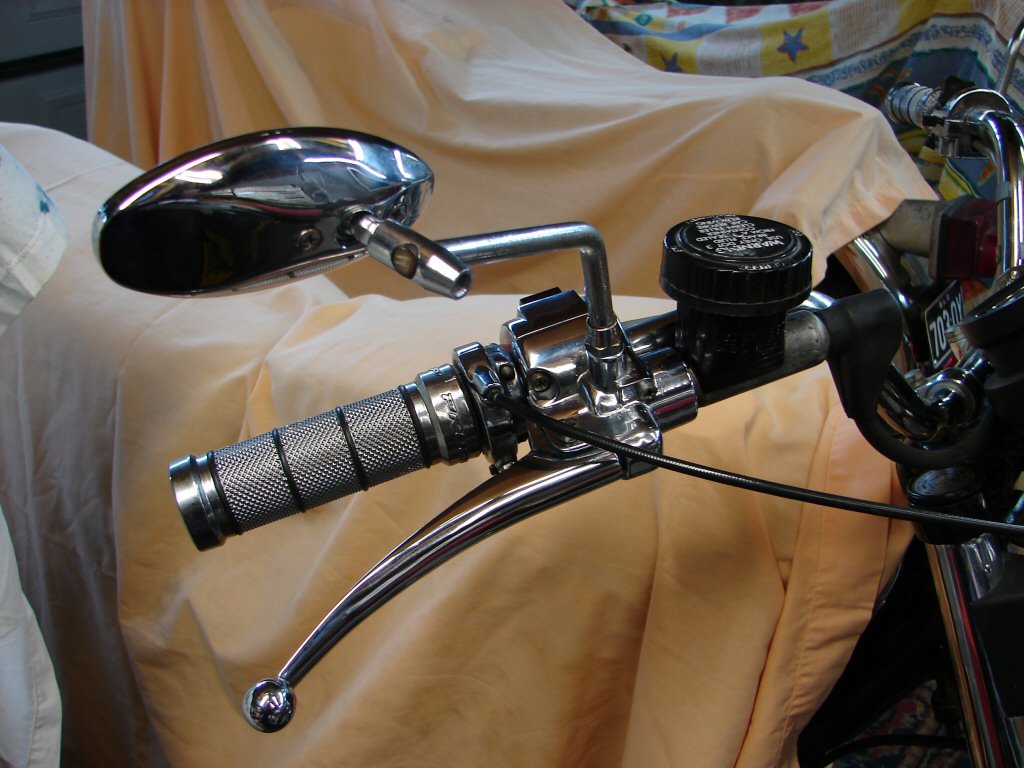
Not satisfied with only that much extra chrome the original builder had also sloshed a bit of it around the controls, and utilised some steel or alloy grips. The overall effect was not too bad but only time will tell how well the chrome was convinced to attach itself to the alloy.
The fuel leak was fortunately restricted to the fuel taps which had been fitted with only a fibre washer apiece, rather than the teflon lined originals and their associated plain washer. They have now been fitted but as the tank is still off the bike it has not been leak tested.
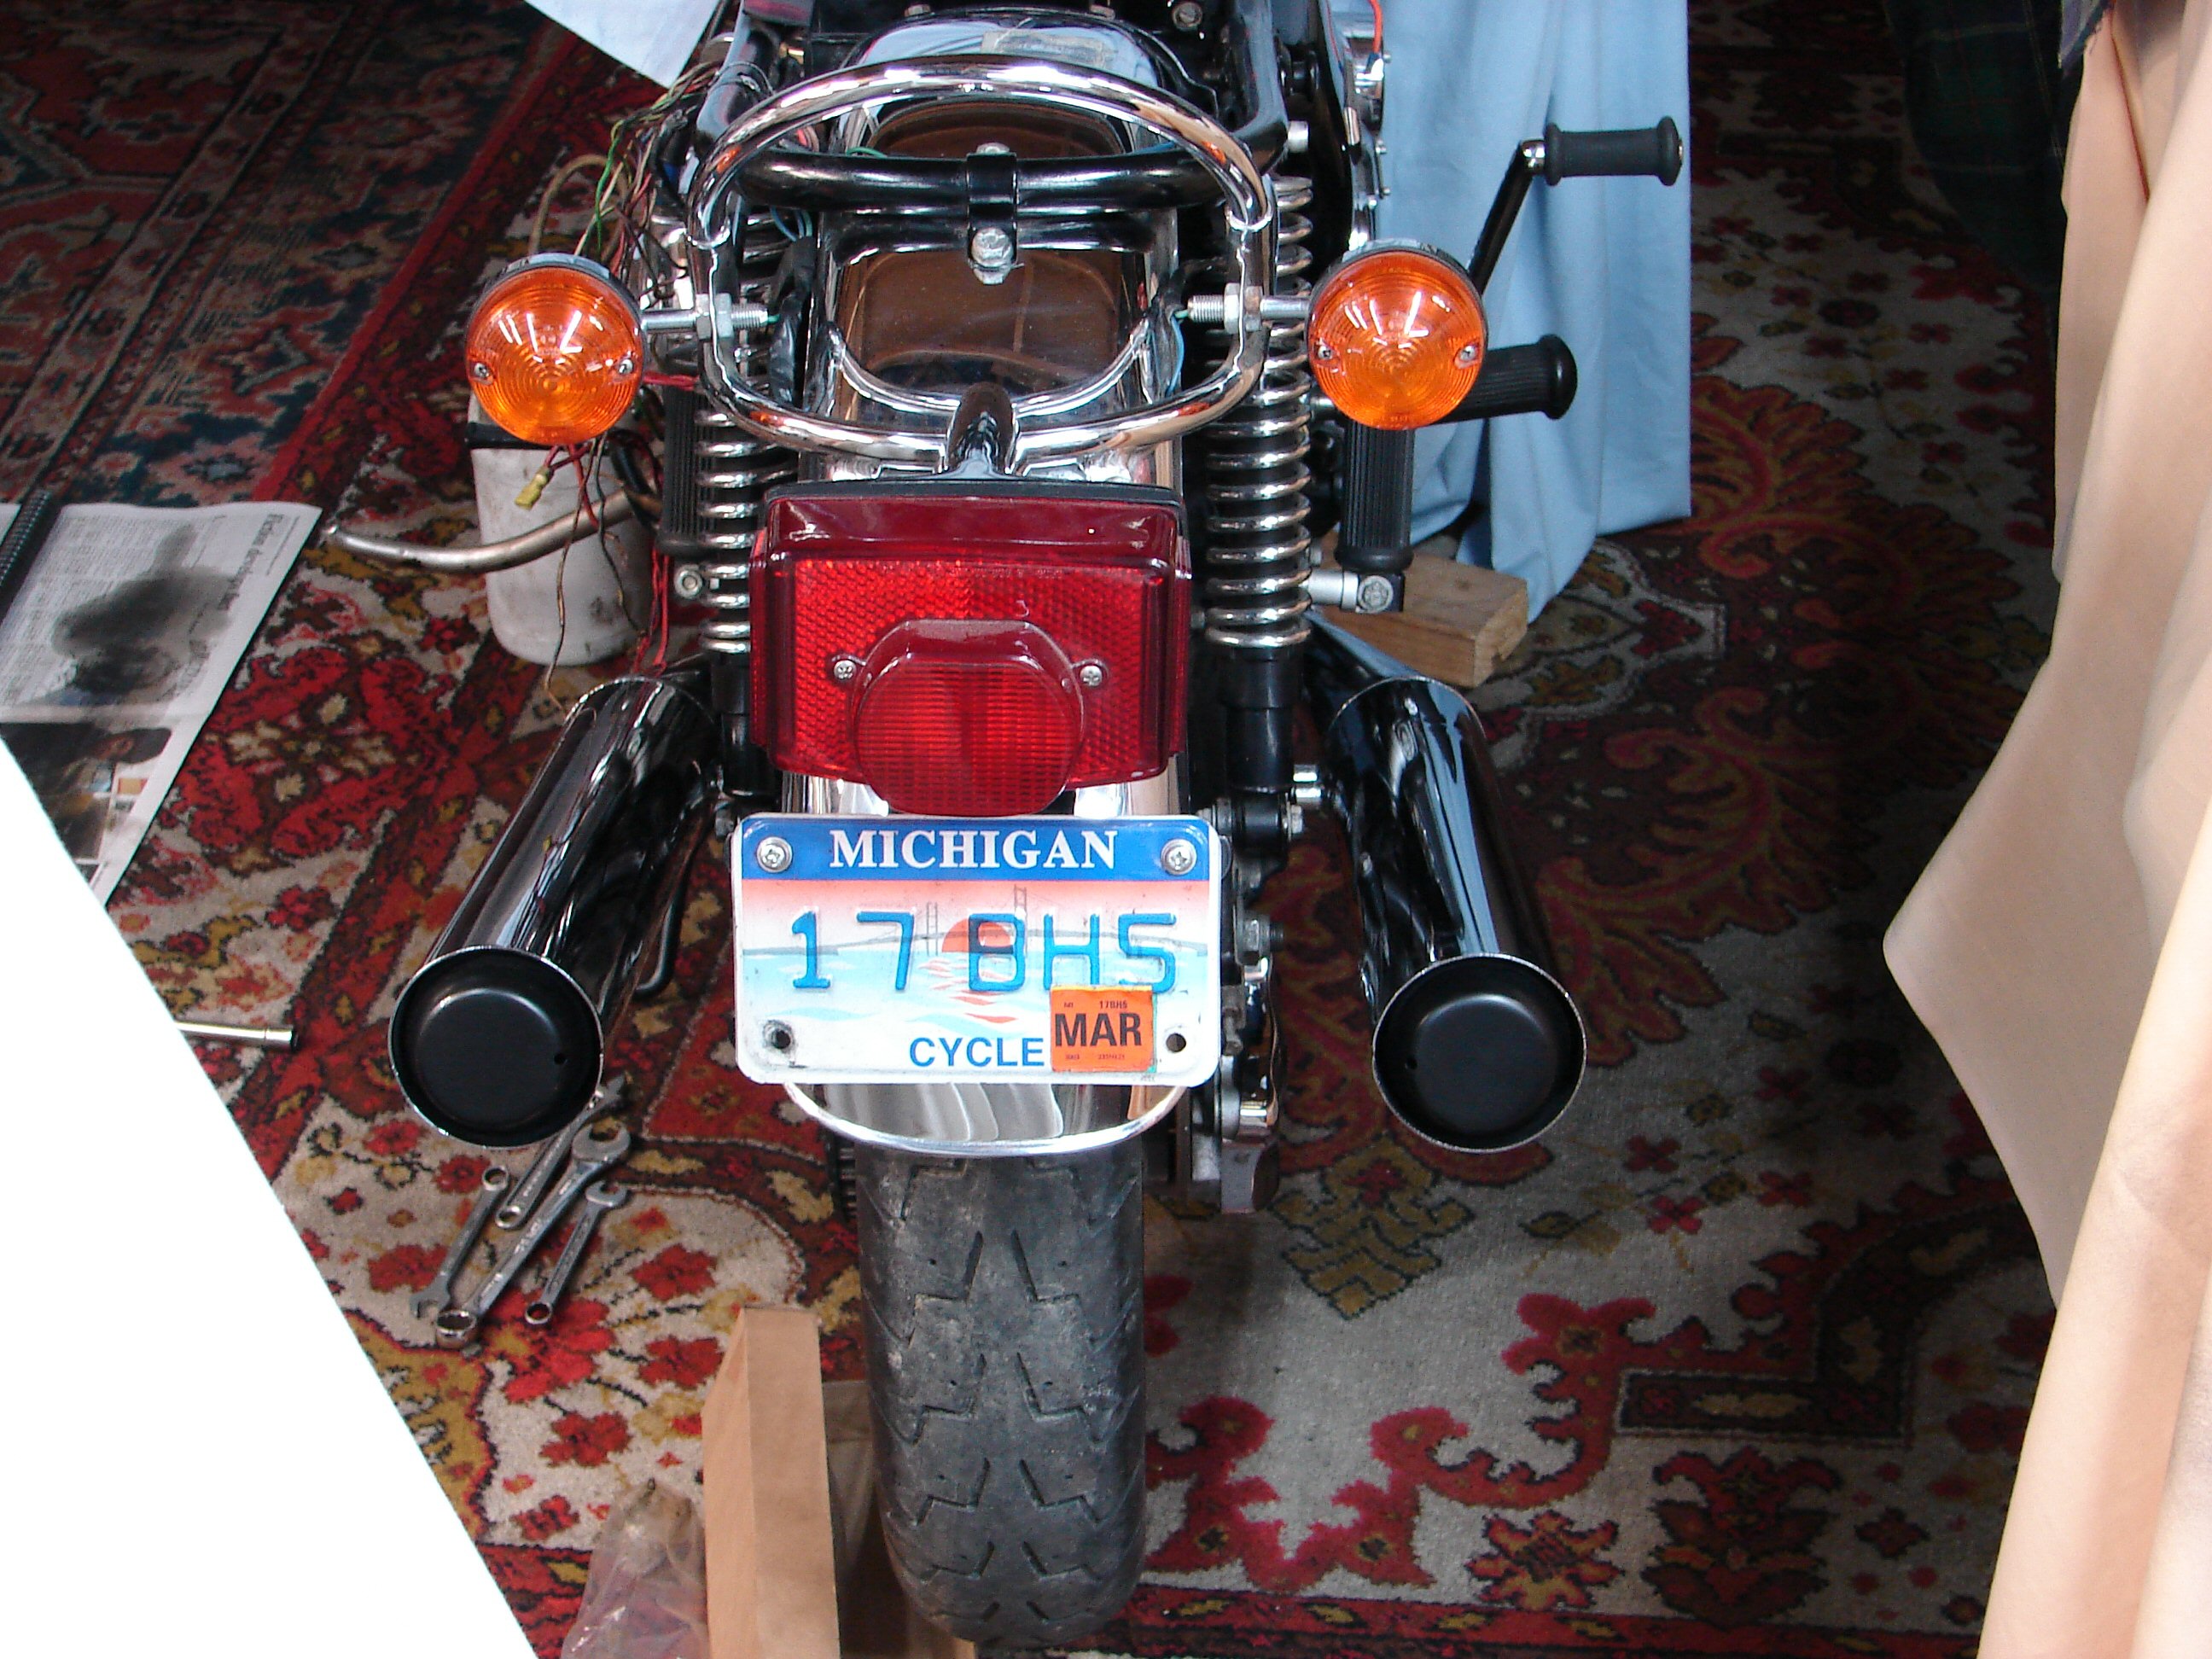
As with the T160 before this, a set of Dunstall lookalike mufflers had been fitted with the same resulting low mounting with extra brackets and an unhappy look. In this case though the bike had been supplied with a pair of replica blackcaps included, so after actually painting the caps black I had a trial run at fitting them. Neither side would raise up to mate with the mounting bracket as the collector was making contact with the underside of the frame rails. I then found that someone had drilled a second set of mounting holes on the right side muffler/footpeg mounting, presumably in order to drop the mounting low enough to allow at least one blackcap to be fitted, but that seemed to be as far as they got. I ended up using the actual mufflers to add slightly more upward set in the collector exits so that the mufflers would now bolt up correctly while still leaving a little clearance between the frame and the collector. Certainly improved the look from the rear at least.
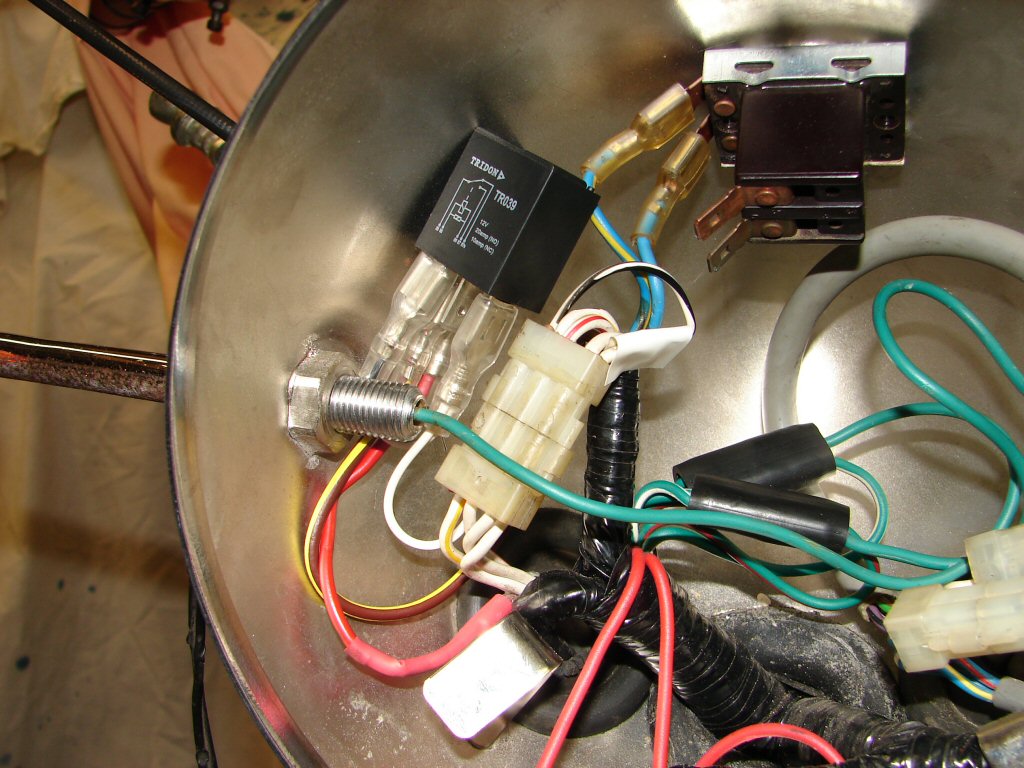
Today I have spent some hours redoing the wiring, having established a new earthing point next to the rectifier, and mounted a relay to supply maximum voltage to the Boyer during electric start conditions. The Boyer did get a set of Lucas gold 4 volt coils somewhere back in time, which does allow for reliable electric starting, but no point in risking a bit of age and corrosion causing that situation to cease when the voltage drops to a level the Boyer cannot operate on.
I had to totally rewire the Boyer to remove all the manky bits while making sure there would be enough room to avoid the loom fouling on the sharp edges of the sidecover. The Japanese type flasher unit was unfortunately using too much space in the tiny confines and I had to resort to an old Lucas rectangular one to sort that problem. Here's hoping it actually flashes.
The wiring was however progressing.
Yes.!
With superhuman effort I completed the wiring, which was very complicated because of previous hacking and current mods. It felt good to have restored everything to its proper location - which makes it easier for anyone who has to maintain it in future to be able to do that easily. Just maintaining the established wiring colour code achieves that, so I make that a high priority.
The battery went back in and I tried everything electrical. The tail light was totally non-operative, but after extracting the bulb and checking that it was ok it began working again. Nice. The indicators did flash - on the right side, but not on the left. The front light came on and stayed on. The rear one was not working. Now - that was exactly the design brief that Lucas was given. The flasher unit had to be smart enough to inform the operator that all was not well, and it just had. I removed the rear bulb, checked it as ok and refitted it. Now it worked and all was well. It is a shame that people who do not understand how things should work, simply condemn things that do not work to their expectation, so that they miss the logic behind what is happening.
This works.

The sidecover fitted up well and it felt like things were reaching a decisive point of overall improvement.
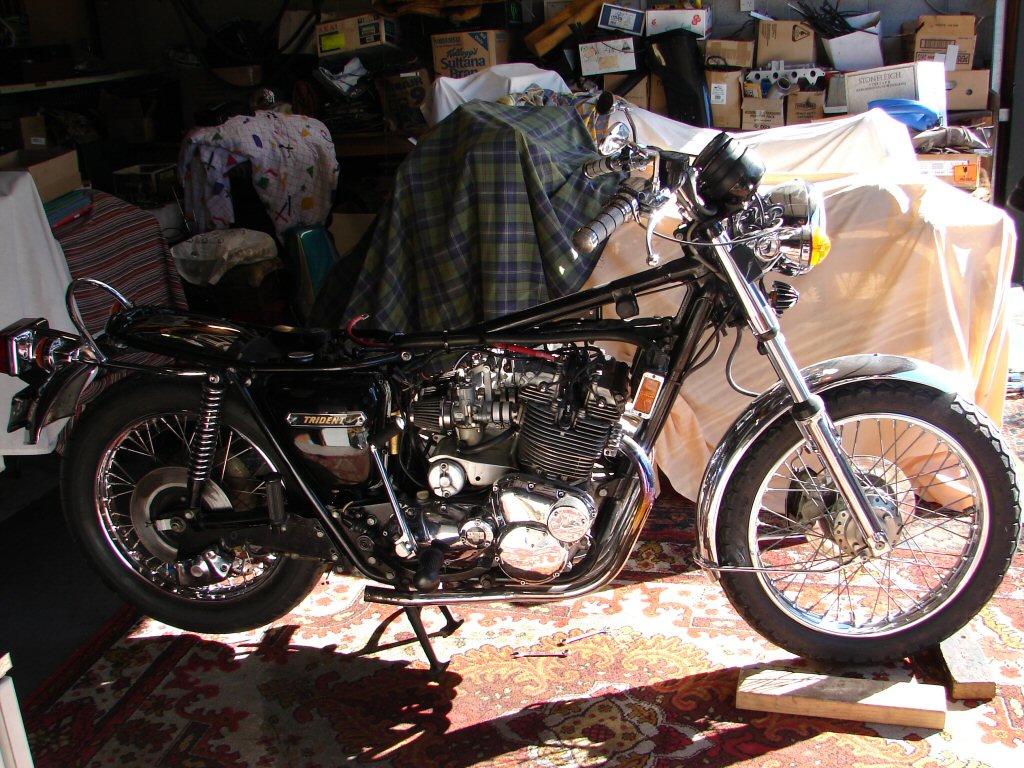
Though the front wheel bearings still needed replacing, this felt like a point at which I could at least check that the bike was happy to run. So I wheeled it outside and gave it a healthy serving of fresh fuel from the fuel taps that were no longer leaking. It was reluctant to light up, and has no chokes with which to encourage cold starting, so I just kept flooding the carbs until I could hear it trying to fire. At that point I resorted to kickstarting and it lit up very quickly. It has been sitting for a long time so it would be fair to consider that the battery may have lost its edge - and it is a small battery.
I am happy to report that the bike ran happily although displayed signs of being a tad lean, which may have had a direct bearing on the new mufflers. A degree of fine tuning may be required once all work is completed.

A number of other issues had come to light during the process so far. While the front wheel bearings made such a noise that they were obviously in desperate need of replacement, it had been less obvious that the front disc caliper was liberally coated in fork oil from a fork seal that had given up the fight long ago.
Less critical was the fact that the non-standard headlight mounting brackets were unhappily coping with T160 spacers where these brackets were not intended to accommodate them. This had lead to the indicator stems sitting at a 45 degree rearward angle and some fracturing of the brackets at the stem mounting area. This was addressed by using spacers of half the size and putting the plain washers on the outside where they were intended. Much tidier.
When the seat was refitted it displayed some reluctance to close correctly. It soon became apparent that this was because there were no rubber buffers fitted underneath it. New seats do not come with the rubber mounts, and whoever fitted this seat was not aware they were necessary.
While taking photos of the bike from the front it was obvious that the handlebars were quite bent. The right hand side was bent just outside the p clamp to the extent that the right handgrip was much lower than the left. This could have been caused by the fitment of tiedowns during shipping. As the bars were also rather loose on their mountings - usually a sign that the anti-vibration mountings have been assembled incorrectly - I decided I would look at this after replacing the fork seals, as that process requires removal of the handlebars completely in order to access the top of the fork legs.
That got us to here.

The usual amount of mud needed cleaning out of the sliders, and an extremely long screwdriver helps when a rag is twisted around the far end. My cleaner of choice is CRC CO Contact Cleaner, which is quite aggressive but evaporates off leaving zero residue. Most bits were fit for another round except the seals, the dust covers, and the damper o rings plus oil. With all of those in place it went together happily enough, the only reluctance being caused by the chrome plating which meant that the new fork seals had to be pressed into a recess which had reduced in size by a few thou, and that makes things unhappy.
But I won - so we were now here.
The dust covers were also reluctant to fit, maybe also to do with extra thickness caused by generous chrome plating, so a heat gun was used to convince them to play ball.
With the bike reunited with it's front wheel it was rather evident that the right bar end was somewhat lower than the left, and the bend was evident so I knew it was the right side down rather than left up. I put the bike outside the lip of the shed concrete floor, leaning away from me on it's sidestand. Getting my shoulder under the end of the throttle grip I was able to exert enough force to bend the bars back up to a point I was happy with.
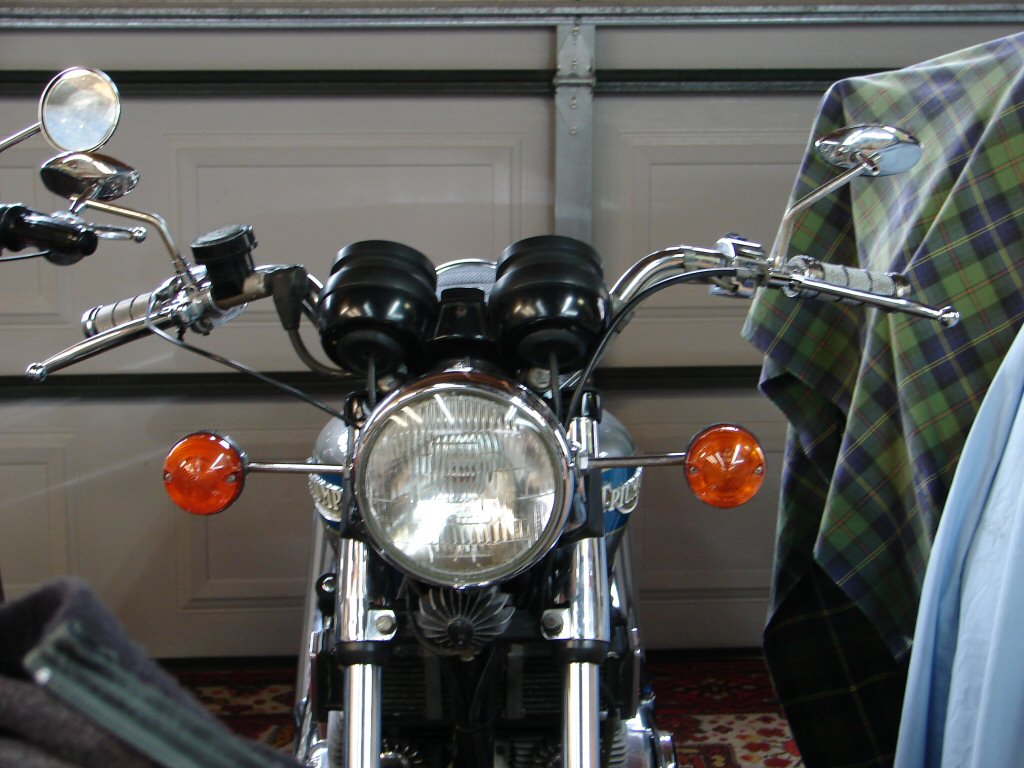
So now it doesn't look like that.
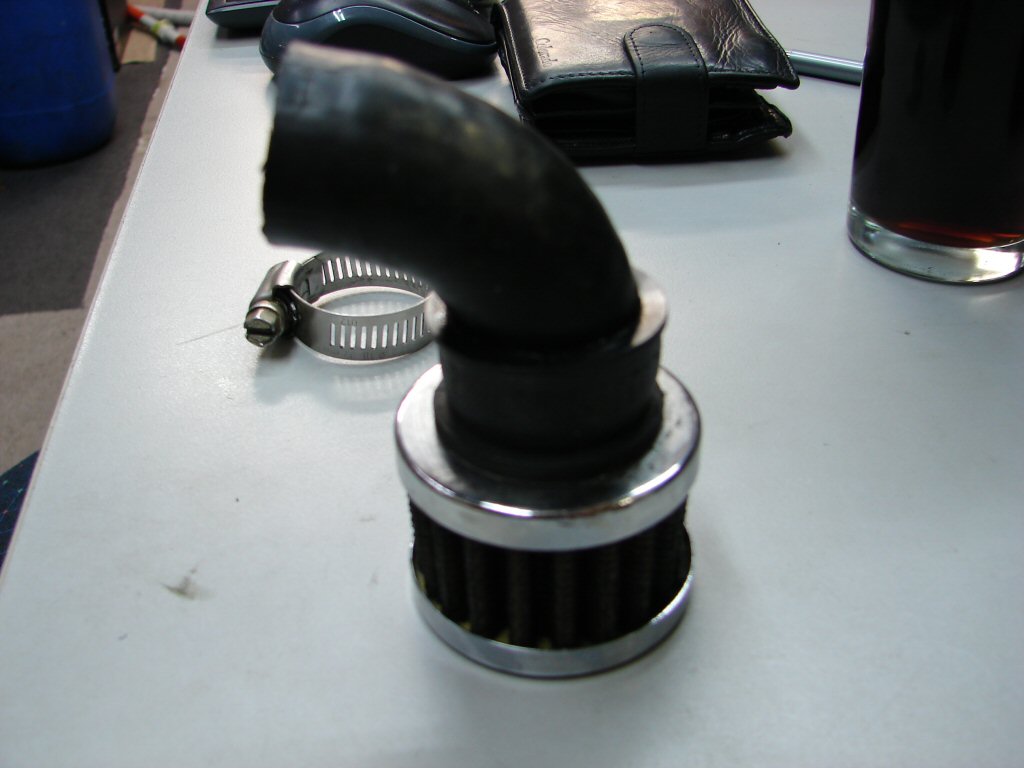
A couple of times while working around the bike the crankcase breather pod had fallen off. I put it back but obviously the arrangement was not very sound. Checking it out I found that the jubilee clip which retained it was attempting to tighten on just a rubber hose, so of course it did not.
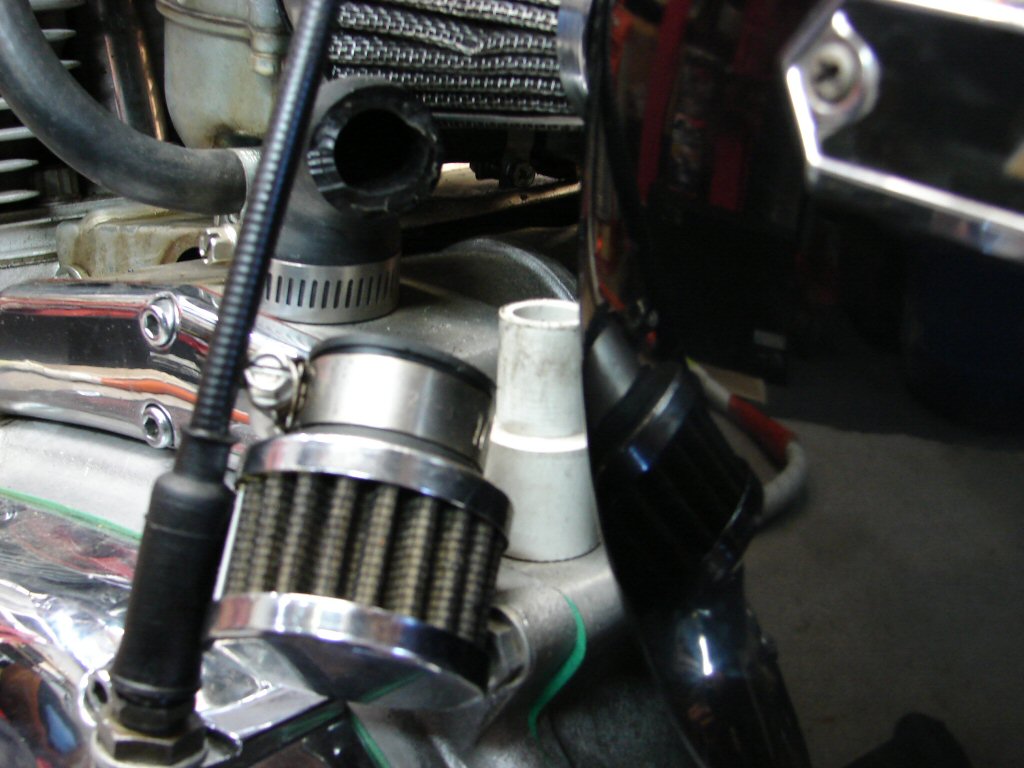
I found a pvc adaptor which was the right size, hacksawed the bit I wanted off and pressed it inside the hose. This would give the jubilee clip something to tighten against. I then decided that having two jubilee clips in close proximity was a bit over the top, so I glued the pod to the now reinforced hose so that one clip could be dispensed with.
Play halted while silicone rtv cures..
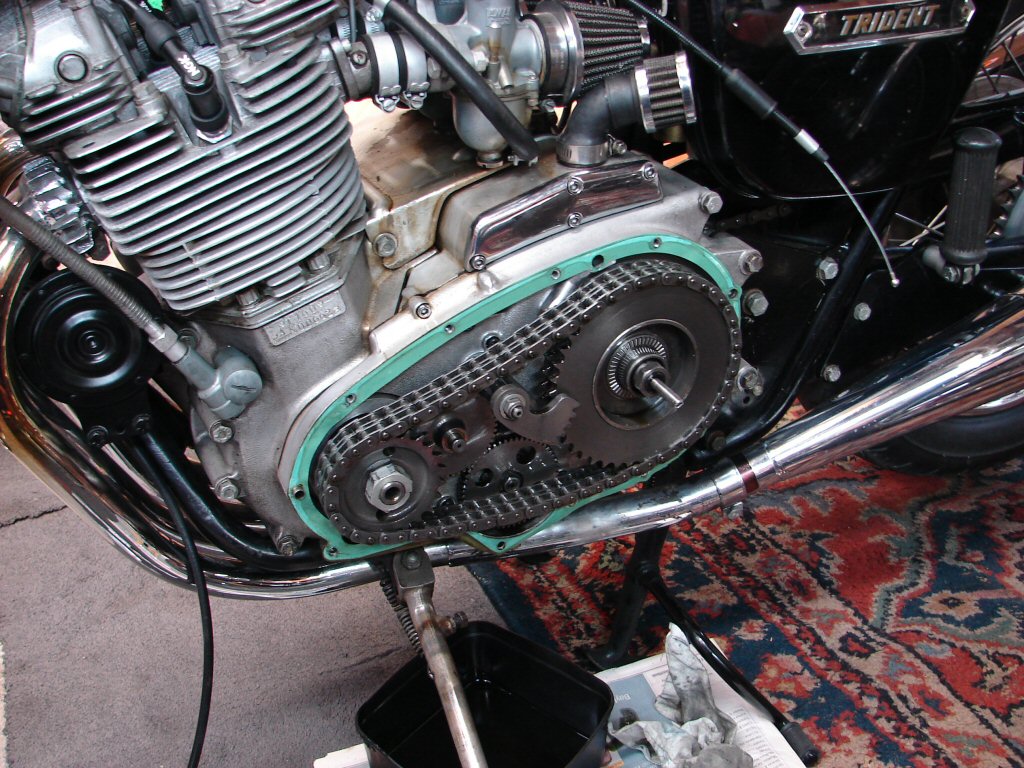
That worked well so it got refitted and we moved on to the next problem area. There had been some serious oil leaks from the primary drive dept. They look even worse on chrome where alloy used to be. I found what appeared to be 2 culprits. The clutch cable abutment looked to be the most prolific, but there was also quite a leak from the gearlever shaft, so the oil seal was under stress. I found that the clutch cable was a very loose fit in the abutment, and as that was also kinda rusty I decided to fit a modified type which extends further into the outer cover and thus makes it harder for oil to make its way up there.
I fitted a piece of heatshrink sleeving over the clutch cable ferrule to make it bigger. The new type cable abutment is smaller than the original, so I drilled it out a tiny amount which results in a nice firm fit between the two. Not wishing to take any chances I would also apply some silicone sealant there during final assembly.
Joyfully the inside of the primary drive was very clean and functional, with no drama exposed to cause grief. The leaking oil seal was another matter. It was extremely difficult to remove, and it seemed likely that it had been damaged during assembly. Once again the chrome plating had changed the nature of all the interference fit, and when I attempted to fit a new seal I destroyed it in the process. Hmmm. Measuring the location revealed that it had lost more than a millimetre in size and the original seal simply could not fit any longer. I went to my seal guys and found that they had a metric seal which was smaller on the outside while still fitting the shaft size. This seal fitted perfectly and we had solved a gritty issue.
Another discovery had taken place during the dismantling. The gasket beneath the clutch adjuster cover came out in 3 pieces, so in fact there had been 3 seperate leaks. It all went back together in a much better state than it came apart - that being the intention. A final touch was to replace the badly worn footpeg rubber. Very tidy now.

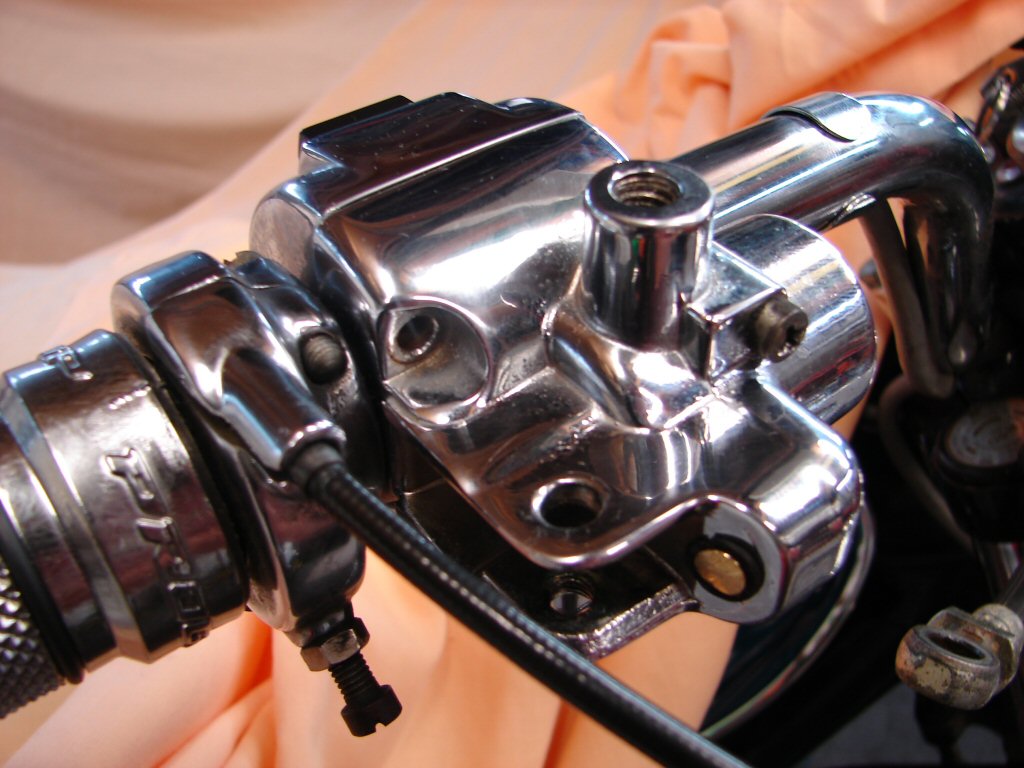
One of the final items needing attention was that the front brake light switch was not working. Although such an issue may be glossed over during a normal warrant of fitness by stating that such a switch was "not fitted", during a compliance test this would not cut it. If it was there to begin with it also had to be there now. And if it was there, it had to function. I removed the brake lever to see how the switch might appear. Two things were revealed. The master cylinder was obviously in trouble and the switch was totally absent.
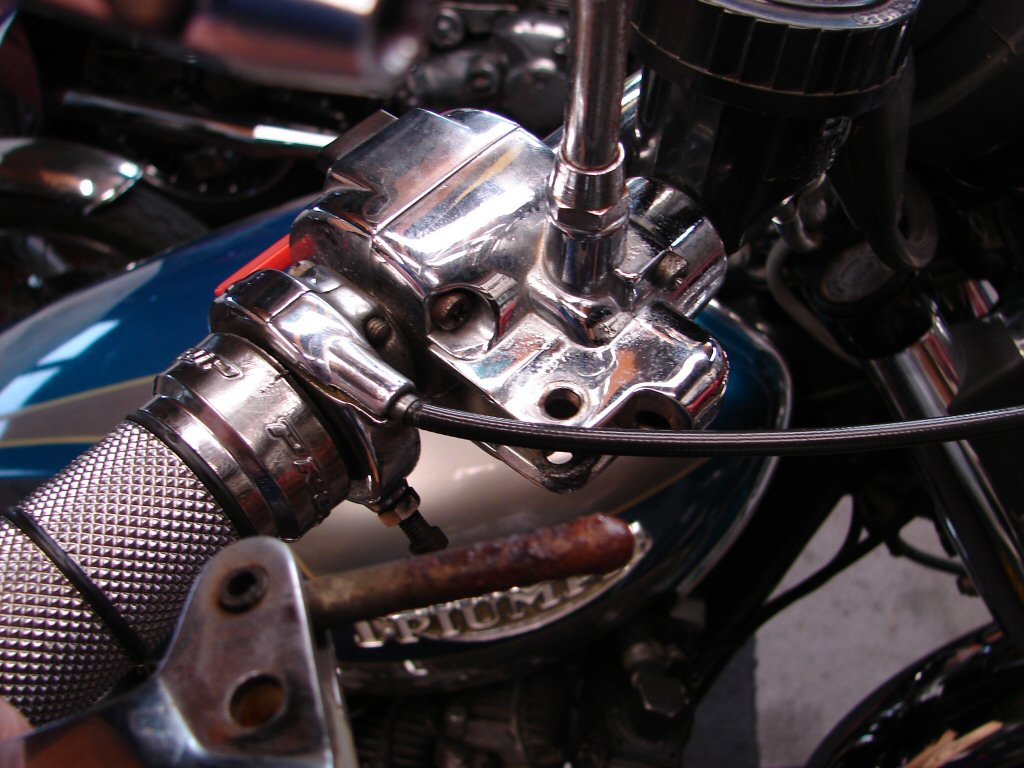
To be honest, the original brake light switch was hardly Lucas' finest hour. It was a flimsy whimsical thing that could sometimes be persuaded to operate in a fairly reliable fashion, which owed more to the skill displayed in setting it up than it did to the design. It appeared that at the time of the chrome plating the entire thing had been thrown away, as the threaded hole that once retained it was full of plating dross and all traces of it were gone. The only offering today which would replace it involved re-plumbing the brake fluid pipes to accept a hydraulic switch of the type that was used during later production of the Triumph Twins. This did not seem like an elegant solution to me.
Inspecting the insides of the switch cluster revealed that the brown wire that headed away to the brake light circuit was folded up and stashed inside, so that meant we had one wire to the inside of the headlight that was available for use.
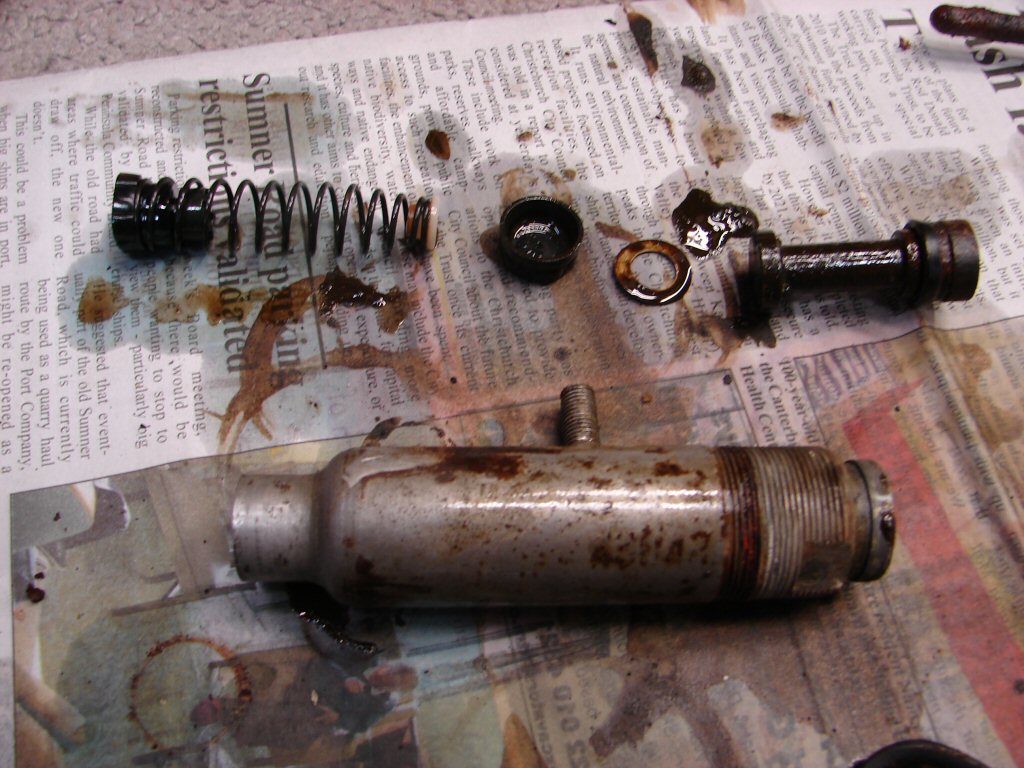
The brake cylinder was hideous. The whole thing was full of rusty mush and it was surprising that it had functioned at all. I had noticed that it did not return to full extent when released, and that was because the cylinder had so much internal rust that it just could not do so.
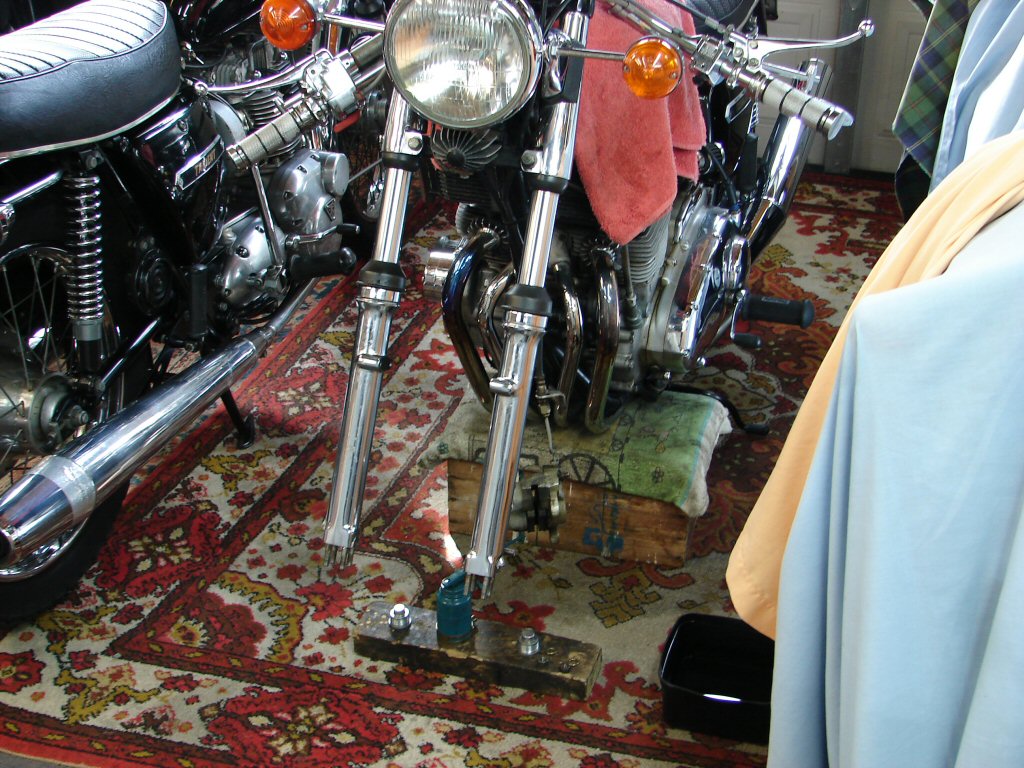
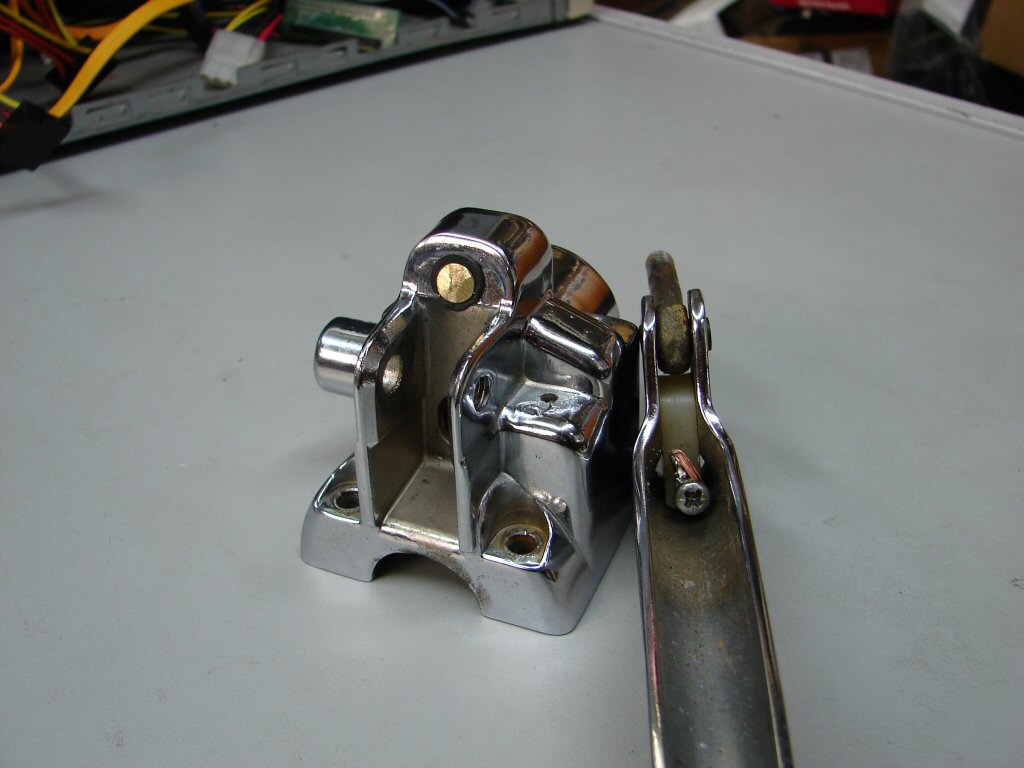
Laying the bits down on paper began to display the current state of play.

To be expected, the two parts of the assembly were not at all interested in coming apart, even though I had managed to extract the vital grubscrew that locks them together.
My plan of attack at this stage is to fasten the entire thing to a substantial block of wood, pour boiling water over it, and attempt to unscrew it using the least destructive tools I can manage.
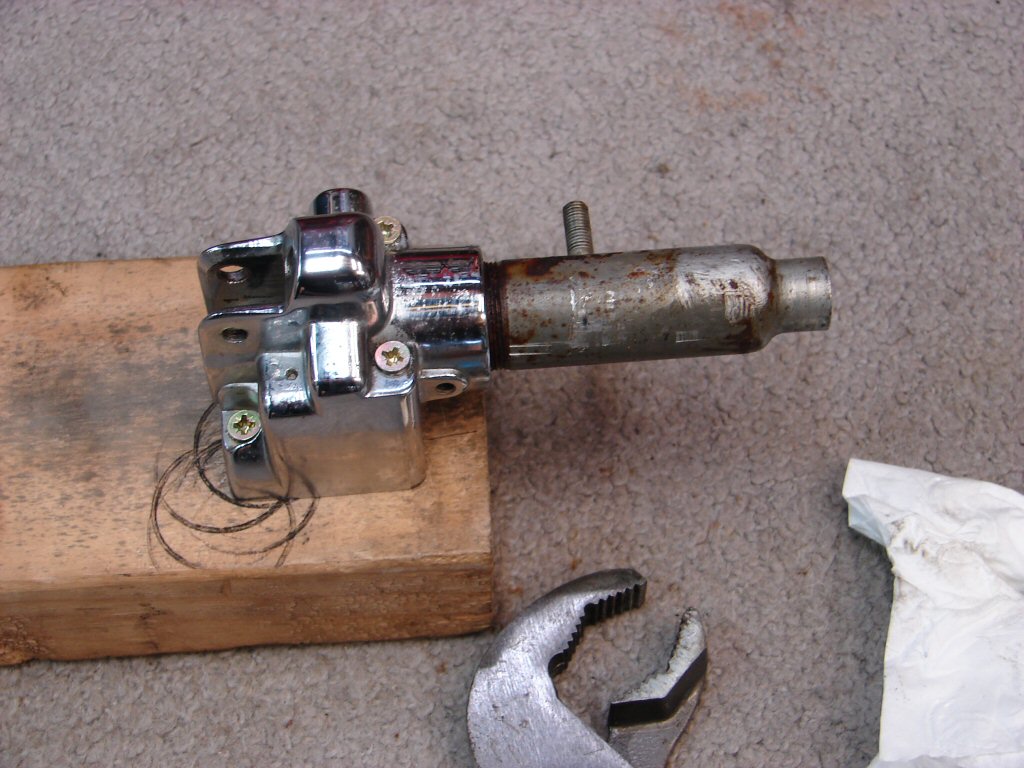
This is usually a large pair of slipjaws, and so it was, and it worked. I was then presented with a lovely artifact..
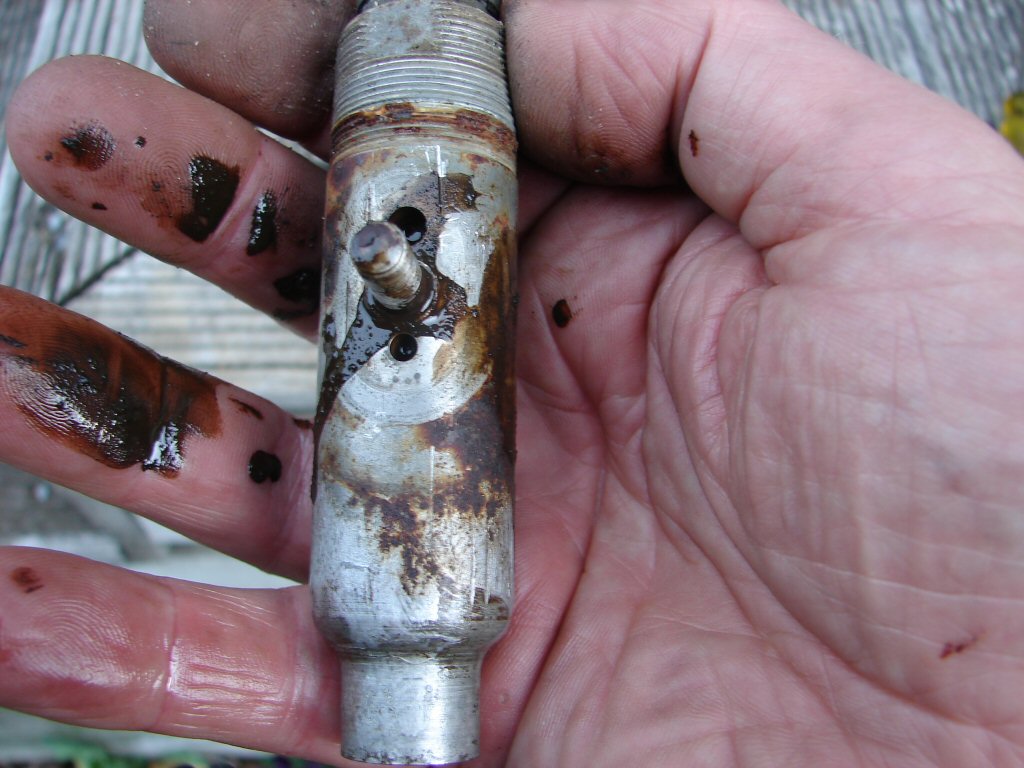
The question at this point is always - is it recoverable or total loss? Hopefully you can actually get it apart and find out. This one took some convincing but it did eventually give up its internals for a visual inspection.
Rust jam anyone..?
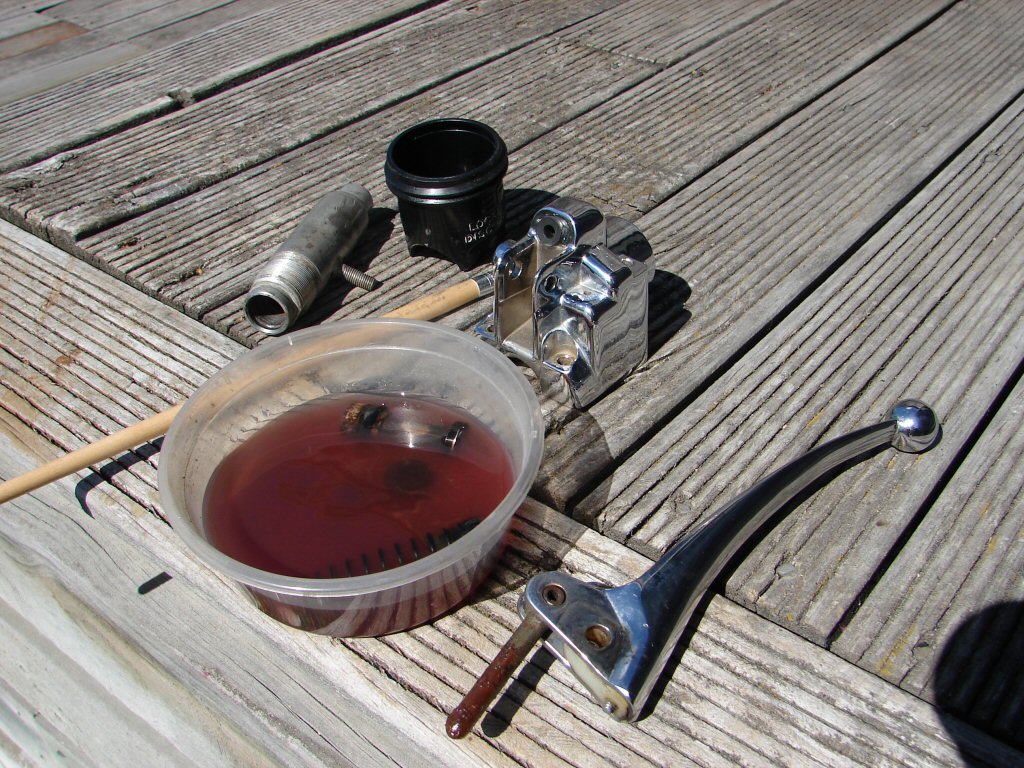
I use methylated spirits to clean brake cylinder internals as they handle meths well and dry off without leaving annoying residues that require even further cleaning. This stuff gets things to a state where they can be wire brushed, poked and prodded and/or sanded as required.
It starts out being purple.
I got it all cleaned, and I dressed the inside of the cylinder with varying grades of sandpaper until I was happy that it might be possible to press it back into service. Unfortunately I did not have a rebuild kit on hand, so I promptly ordered a couple and set all the bits to one side.
Assuming I could get it to work again, what could I do about the missing brake light switch?
Adopting a classic "Baldrick" pose I came up with a cunning plan.
It would involve these few items. A rubber grommet, a 3/16" brass screw and nut, and a micro relay.
... and a degree of animal cunning.
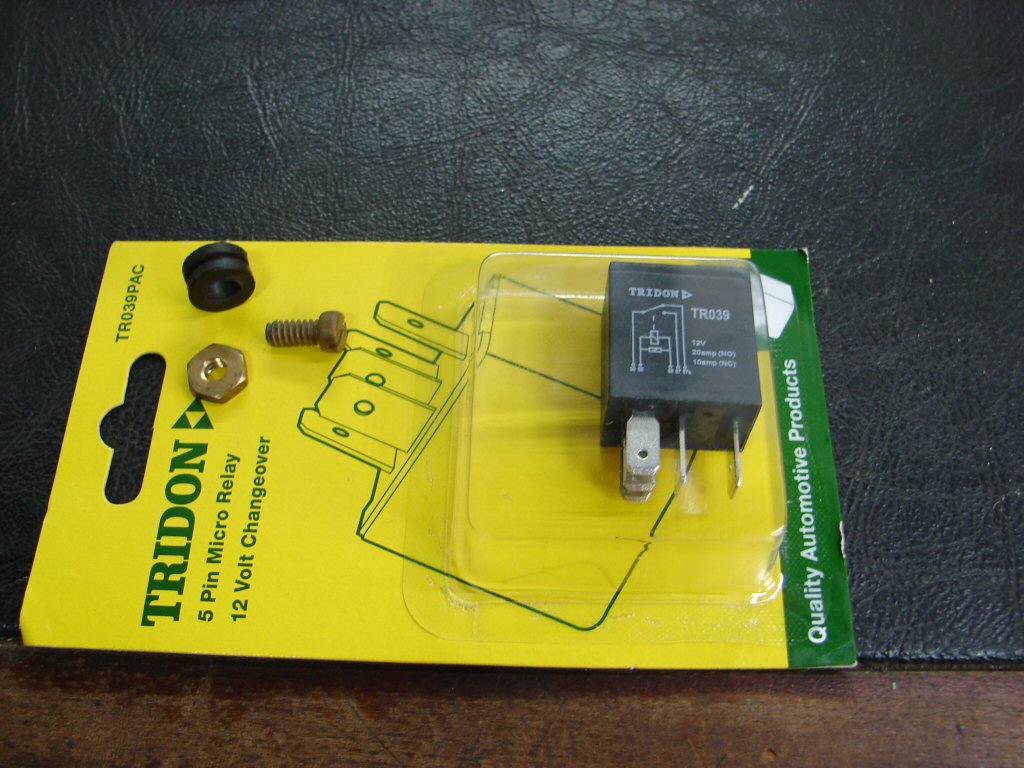
As I had only 1 wire to the headlight I figured I could only use it as an earthing circuit, so that would necessitate a relay being housed inside the headlight. It would also mean that the relay would be energised all the time except when the brake was in use, and this initially put me off the idea. Then I realised that all the ignition relays I commonly fit to improve power delivery to whatever flavour electronic ignition may be in use do exactly the same. They are on all the time the key is on. And I have never yet had one fail. Modern cars are lousy with relays, so there seems to be very little risk of any reliability issue. Good oh. Press on then.
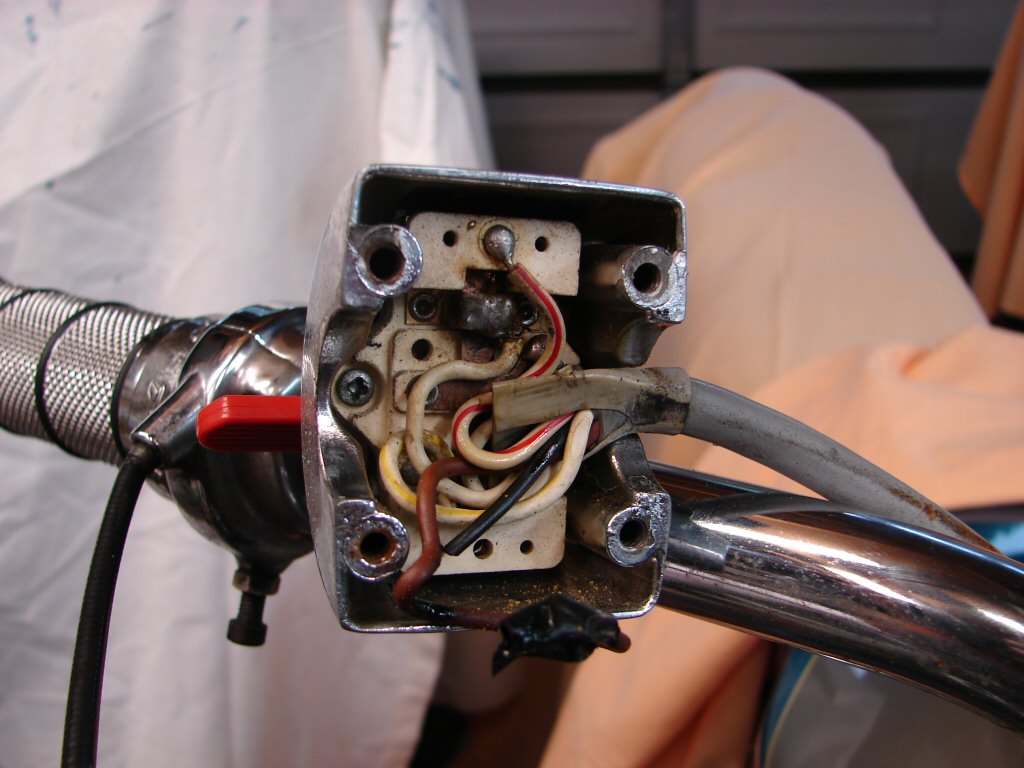
The rubber grommet was fitted to the alloy housing. You can see I was trialling it in a previous photo. The fact that the housing was chromed made life more difficult for the grommet, but it did acquiesce. I then used a sharp blade to trim its outer side in order to reduce its profile a bit, as that would interfere with the rest position of the lever.
I ground the head off the brass screw until it was the thinnest surface I could easily manage. This was going to make contact with the adjuster screw inside the lever just as the original switch had done, so it would still be adjustable. However, the screw was handily insulated by the fact that it was inside a nylon block, so it was necessaary to add a soldered piece of copper stranded wire whose free ends were jammed between the nylon block and the inside of the lever, thus making the whole thing an "earthing" switch.
The existing brown wire inside the left switch cluster was now soldered to the brass nut. It took several tries to make a tidy job of it as the nut was rather substantial compared to the fine wire strands which kept melting away, but I finally got it done. Not my best work but it is unlikely to be disturbed.
Final job in here was to turn the flat head of the screw with pointy pliers to tighten the whole plot together. Which I did. I thought of using glue to retain it, but the friction offered by the grommet made me think it was unneccesary. Time will tell. The nut cannot turn because the wire anchors it.
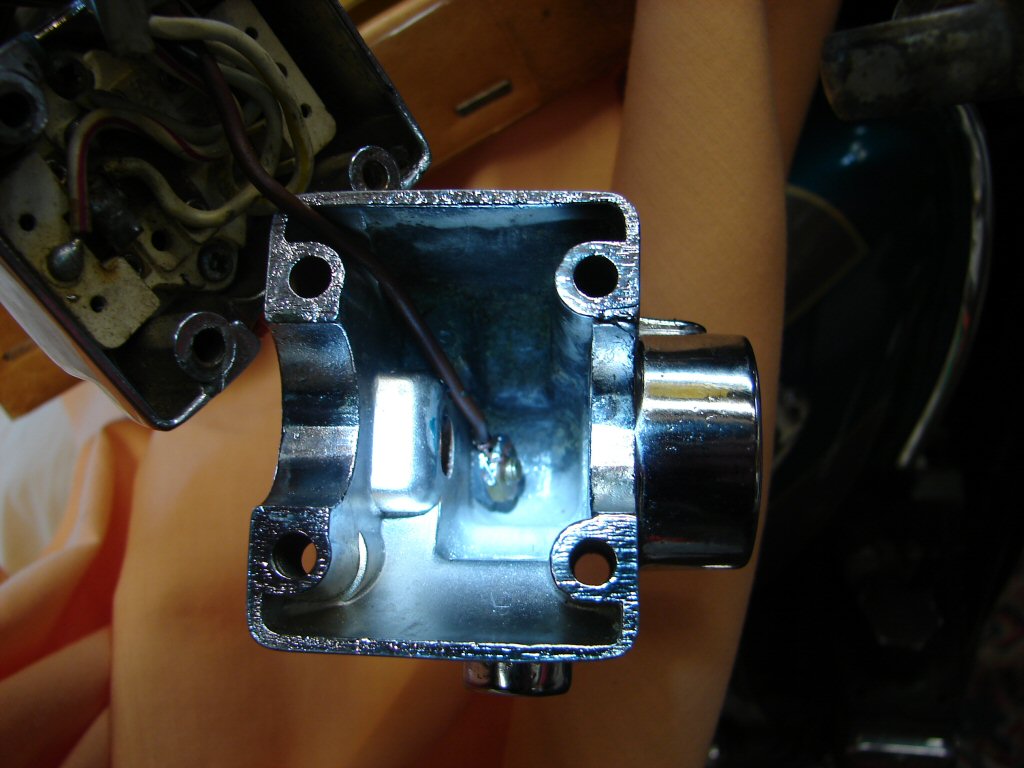
This completes all that is needed out at this end so I mounted it temporarily to keep everything happily stress free.
Inside the headlight the brown wire is easily located entering and leaving the multi-pin connector that attaches the cluster to the wiring loom. The top brown wire heads away to the rear brake light switch and from there to the actual brake light. The lower brown wire now heads to our newly invented earthing switch.
As they now need to be controlled by a nearby relay they have to be snipped off their respective connections to the pins inside the plug.
They now will need to be extended, and as the lower one is now acting as an "earth" I chose to change its colour to red. The top one will be connected to the new relay which will operate the brake light, and I had no brown wire so used brown/yellow to distinguish it. This is not a colour that occurs in the original wiring loom so that will make it stand out to any future tinkerers. Other than me.
In a similar move I used black/white wire rather than plain white to supply the power feed to the relay. I tapped it off one of two white wires which feed the first two pins on the top of the connector. Although it is not very clear, this power feed goes to two terminals on the relay - to one of the coil wires that operate the relay, and the common terminal to the changeover contacts. The other operating wire for the relay coil goes to our new earthing switch, and the original brown brake light wire goes to the normally closed contact. This means that when the relay is "on", which is all the time the ignition is on, the brake light will be off. As soon as the lever is operated the relay drops out, and the normally closed contact now sends power to the brake light.
Final touch was to add a few small cable ties to keep everything in place and the headlight went back together with no clearance issues at all. I fitted the brake lever, albeit in the absence of the master cylinder which is still awaiting parts, and tried the operation.
Most gratifying. An audible click as soon as the lever is depressed and instant operation of the brake light. I had considered using the white/yellow wire from the killswitch as a feed as this would have resulted in the brake light operating if the killswitch was used. I figured that might be a safety feature because obviously the bike would be slowing or stopped if the killswitch had been activated, but that may have sent someone into a frenzy of faultfinding one day in the future so I didn't do it.
Also I had pondered whether the brake light might flick on briefly when the key was first turned on in the time it took the relay to operate, but the relay is so instantaneous that the filament in the lamp does not have time to get a glow on.
I feel most confident that this bike will have no trouble in passing its compliance test now, and I have a brake light switch with virtually no moving parts except a relay that is fit for many thousands of operations. Every chance it will outlive all the old Lucas switches...
Master cylinder kit arrived today so that was reassembled, refitted to the bike and bled up without issues. Lever now feels progressive and the brake has stopped binding. The cylinder piston now returns the lever to rest position promptly and the light switch works entirely as hoped.
I think that was the final manoeuvre unless something shows up during the test ride.
Now awaiting a matching break in work and weather.
Fired the bike up for it's inaugural test ride. It started but ran very badly then stopped as if the key had been turned off. No further signs of life.
Thanks to the ignition relay I could tell by the lack of "click" that there was no power getting as far as the relay. As I could still hear the front brake light relay working we still had power through the ignition switch, so maybe the killswitch was the culprit. I opened the headlight to check for power at the multi-pin plug, but the moment I touched it with the meter lead I heard the ignition relay clicking in and out. The killswitch output had a bad connection through the plug. Pulled it apart, cleaned with contact cleaner and cable tied it back together, as it's original steel retaining clip was absent. All good this time and it ran happily.
I rode it around the nearest block in case it had to be pushed home, but it seemed happy enough and I gathered enough confidence to head off on my normal test route down to the south end of the beach and back with a few zig-zags thrown in. Front brake a tad weak so that got some heat added, but otherwise all good and a steady idle at rest. Looking good.
When processing the previous bike through it's compliance test I had presented the paperwork for this one to see what the problem would be. There is always a problem. That is why you are doing the compliance - nobody else was able to yet. Sure enough we had only a photocopy of the original USA title. Photocopies do not cut it. The NZ customs clearance document was also a photocopy, but when the numbers were entered into the system up came all the details for the bike, so everything was in order at the NZ end. I attempted to locate the original title from two owners back but it was long lost and probably in Australia where the bike was initially imported to, so no go there. Returned to VINZ to see if we now had to apply to the LTA for alternative documentation, which would mean more money, more time, and likely loss of more documents. Fortunately it would be possible to make declarations on the two copies and get them notarised by a Justice of the Peace seeing as how everything else was in order. I would also have to register the bike in my name as I had made the declarations, but that was ok with the bike's owner. Phew.!
Compliance test now booked for tomorrow afternoon.
Passed with flying colours and in record quick time, so that was most welcome. The real revelation was - it's a joy to ride. I was not expecting to like the high bars, but the way in which it answers every command without any tuning niggles makes you love it. Brakes much improved too.
I guess it will be leaving.