June 2019
1975 Triumph T160 Trident 750
This bike was imported to NZ after being stored in a damp location for 15 years. The UK qualifies as a damp location.
The carbs were leaking from numerous places and appeared to have been run on chip oil.
While the carbs were off I inspected the inlet tracts. They have been opened out to some degree but there does not seem to be any other modification. All the inlet valves were well coated in oil meaning it is coming down the valve guides and will no doubt be consuming a bit. To check the oil pressure I kicked it over and found that even turning only 1 compression the light went out for some time which was a very healthy sign. I did discover that it felt to have differing compressions on different cylinders though.
I decided to give it a compression test, seeing as it is easy when you have an electric start to do the cranking. No.1 managed 110psi. No.2 zero. What? Tried several times but still got nothing, so I tried No.3 and albeit reluctantly got another 110psi. My gauge was therefore not faulty.! I cranked the engine with my finger stuck in the centre spark plug hole. Not the slightest pressure and then suddenly there was and my finger was promptly ejected from the hole. Using the gauge now showed 95psi, so we had a sticky valve which was now behaving again, although a little down compared to the others. I suspect there may be some cylinder head work needed in the not-too-distant, but a bit of use would be wise to see what shows up as it settles down. 15 years is a long layup after all.
I had noticed that the bike had some odd Girling rear shocks of a type I have not previously seen. I also noticed pretty quickly that it was a pig to get onto the mainstand, so I measured the length of the shocks. They are 1" shorter than they should be, so that explains the effort required to lift the thing. Easy fix in due course.
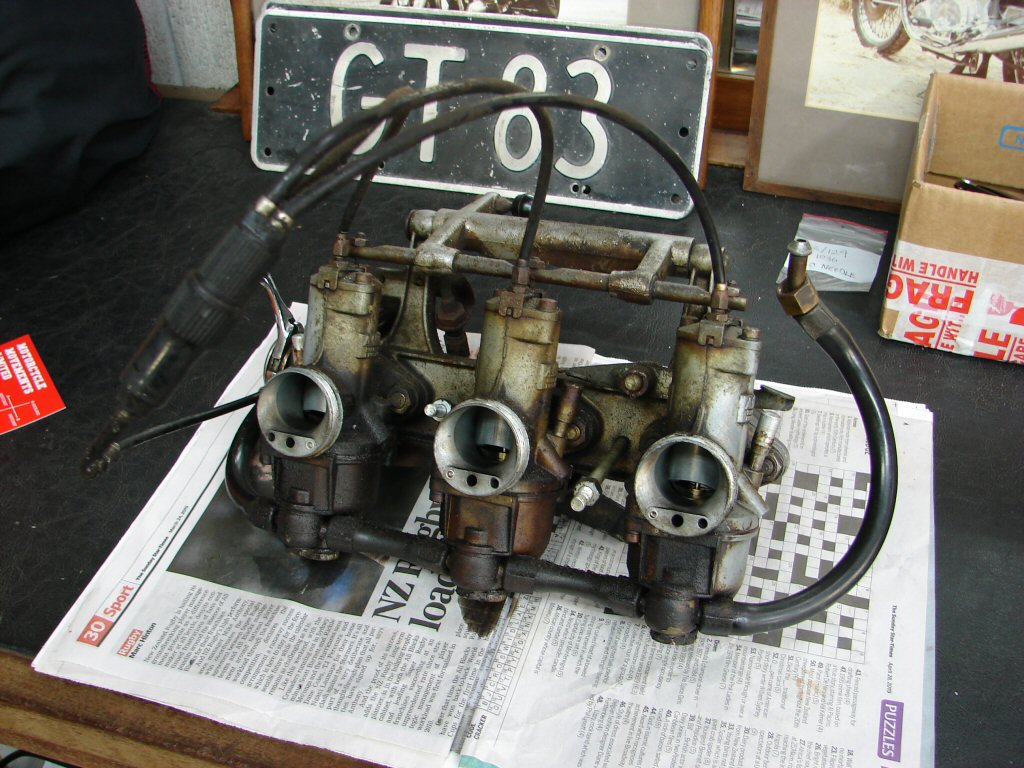
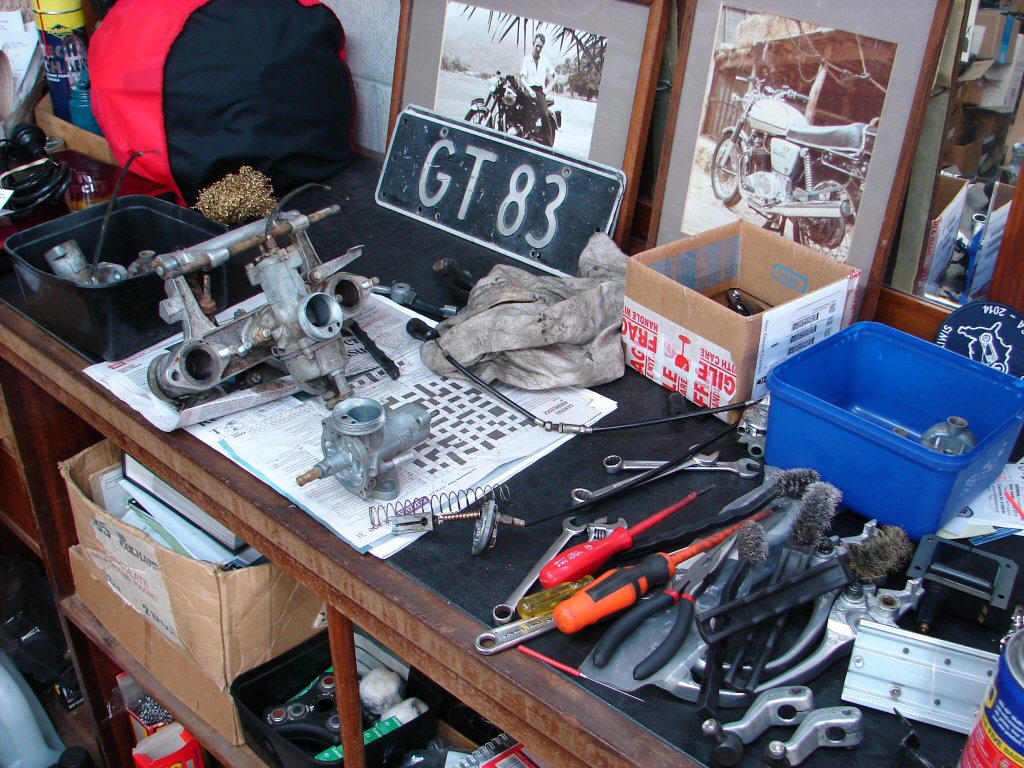
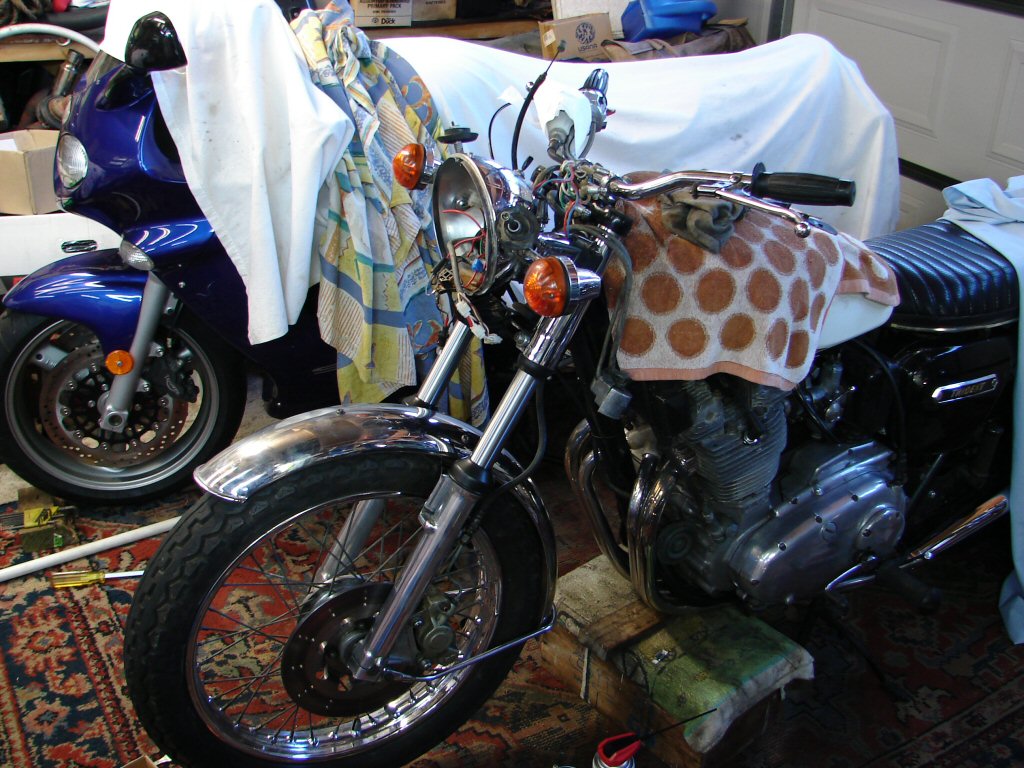
An entire day was spent recovering the carbs and linkages, and establishing a good start point for carb balance and tuning. The adaptor and remaining centre carb had already received 3 applications of degreaser before this shot was taken. It all came up well with an elaborate amount of wire brushing and exhibited only a small amount of wear, which was pleasing.
All the carb internals were stock T160, so they were set up as by the book in the hope that it would start and run happily enough for me to fine tune it. While the airfilter was stock the mufflers were not, and they might have an effect on the tuning.
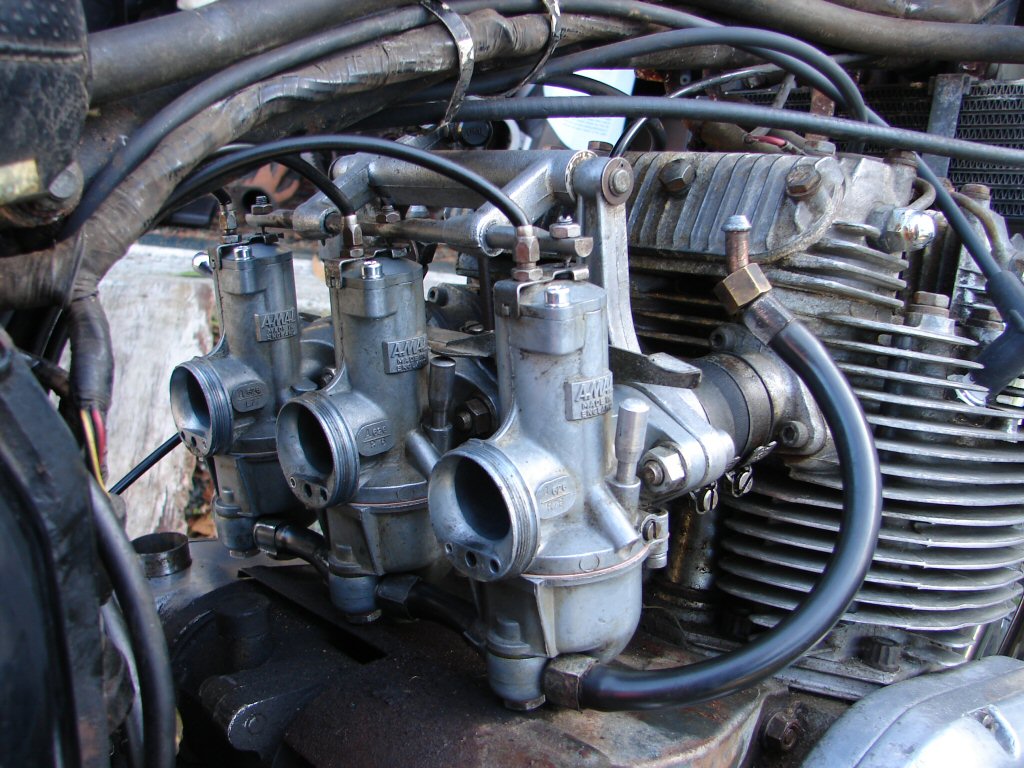
Finally complete the carb assembly went back on the bike. The airfilter joined them after I had straightened its lower edge which was preventing it fitting together properly. The filter element was a bit weird being at least an inch too narrow so a good amount of air could pass straight around the ends of it.
Wiring had received recent attention of the Boyer kind, and one of the complaints was that the bike would not fire up reliably on the electric start. I figured these two things would be related.
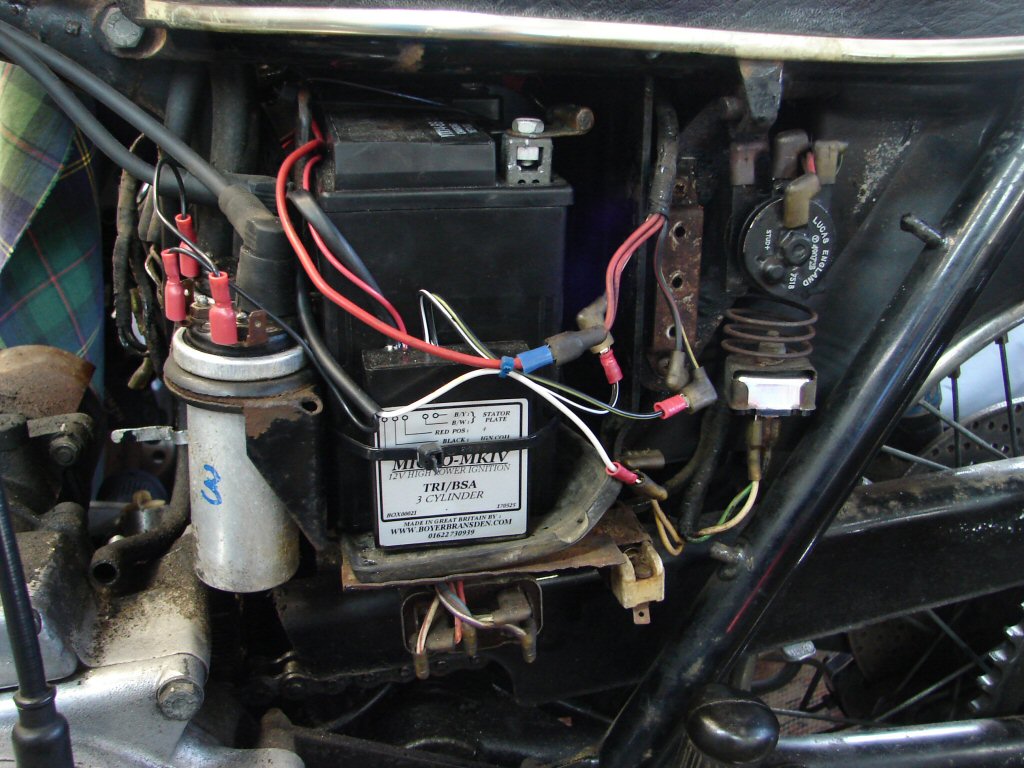
The Boyer simply does not operate below about 9.5 volts. I checked the battery which showed 12.5 volts. I checked the Boyer just with the key on and found it was getting 10.5 volts. With the starter operating the Boyer got a meagre 8.8 volts. No go there then. Main power loss was the wiring and switches.
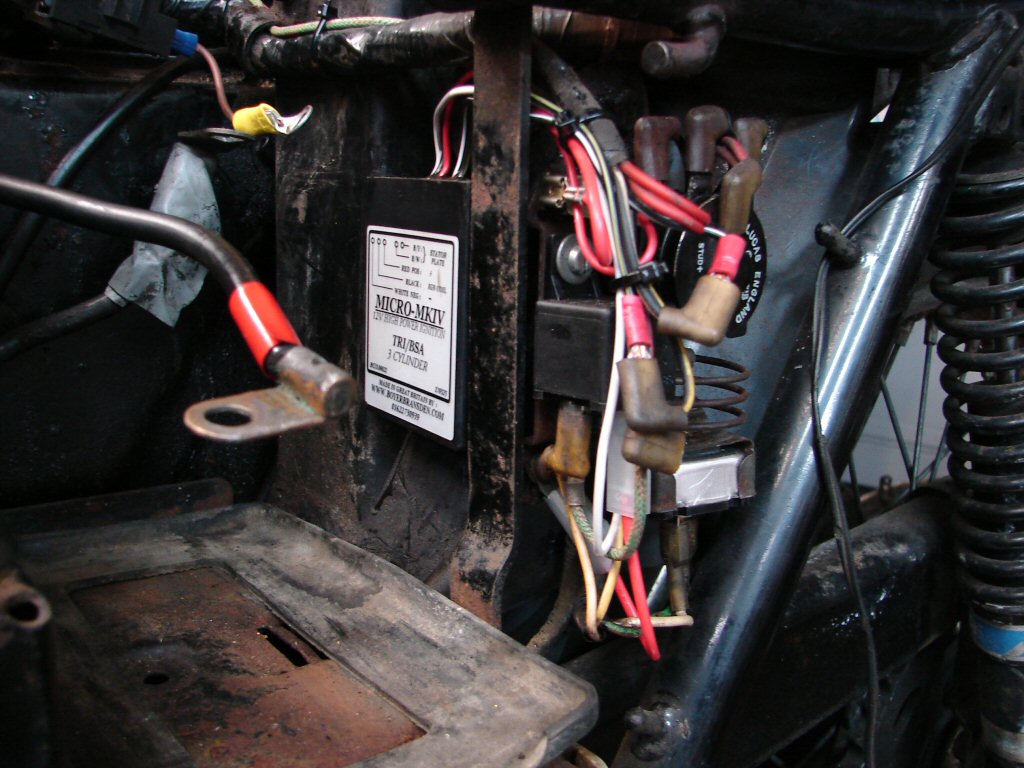
Quick, cheap and effective remedy is to fit a relay. I put it here and found a new site for the black box to keep things tidy. The relay switches full battery voltage to the black box, so making best use of whatever the battery can muster. The only current now flowing up to the ignition and killswitches and back is just a few milliamps to operate the coil in the relay. The audible 'click' made by the relay when you turn the key on is also a reassuring check that all is happy. Cranking voltage to the Boyer now 11.5 volts. Nifty.
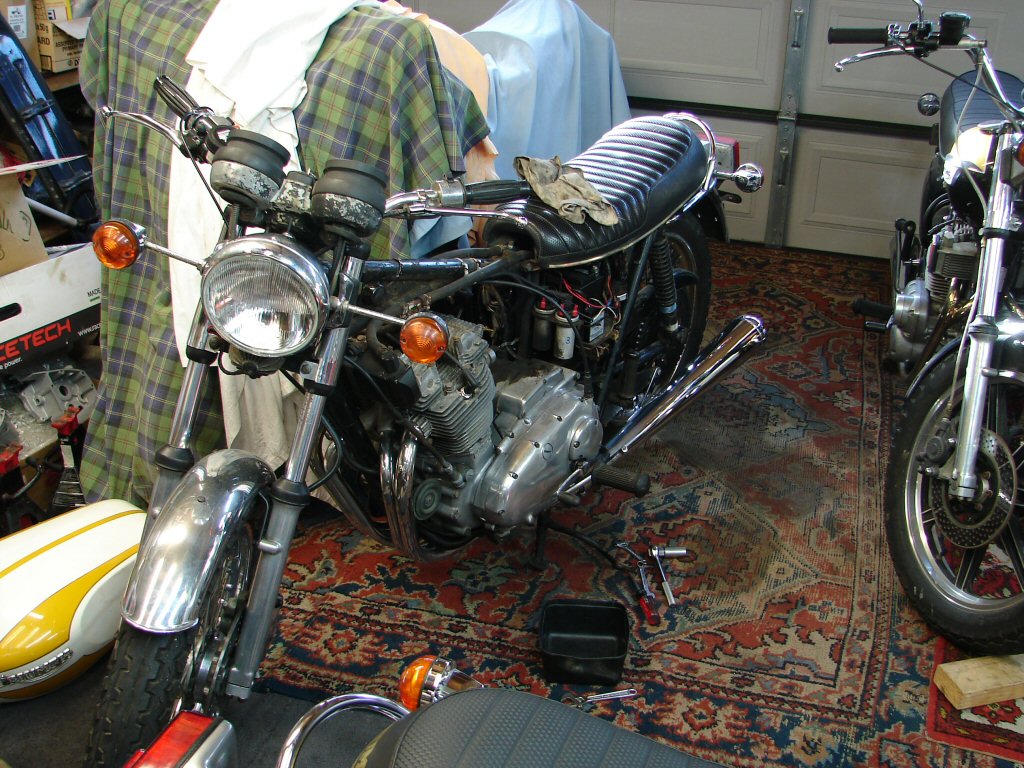
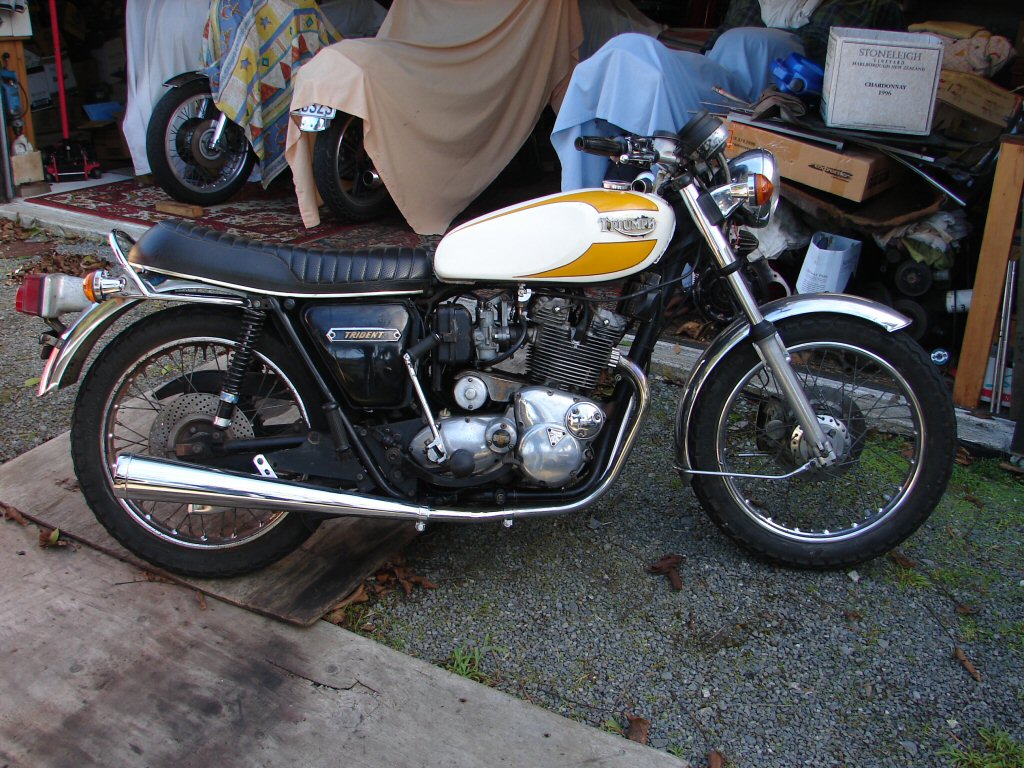
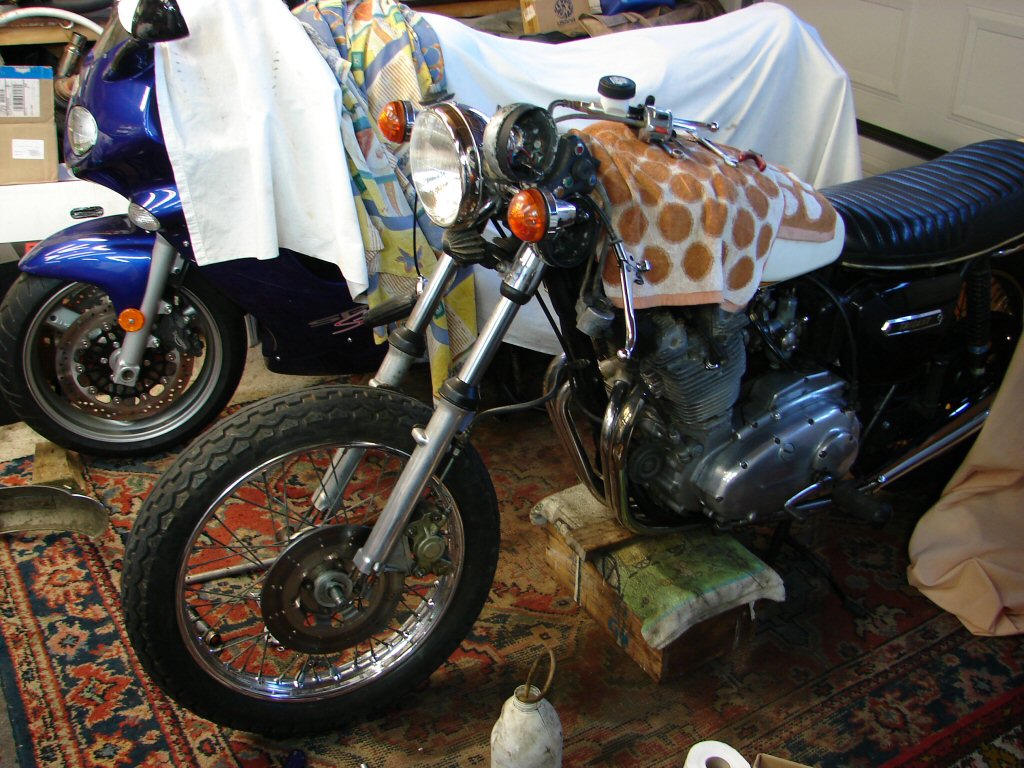
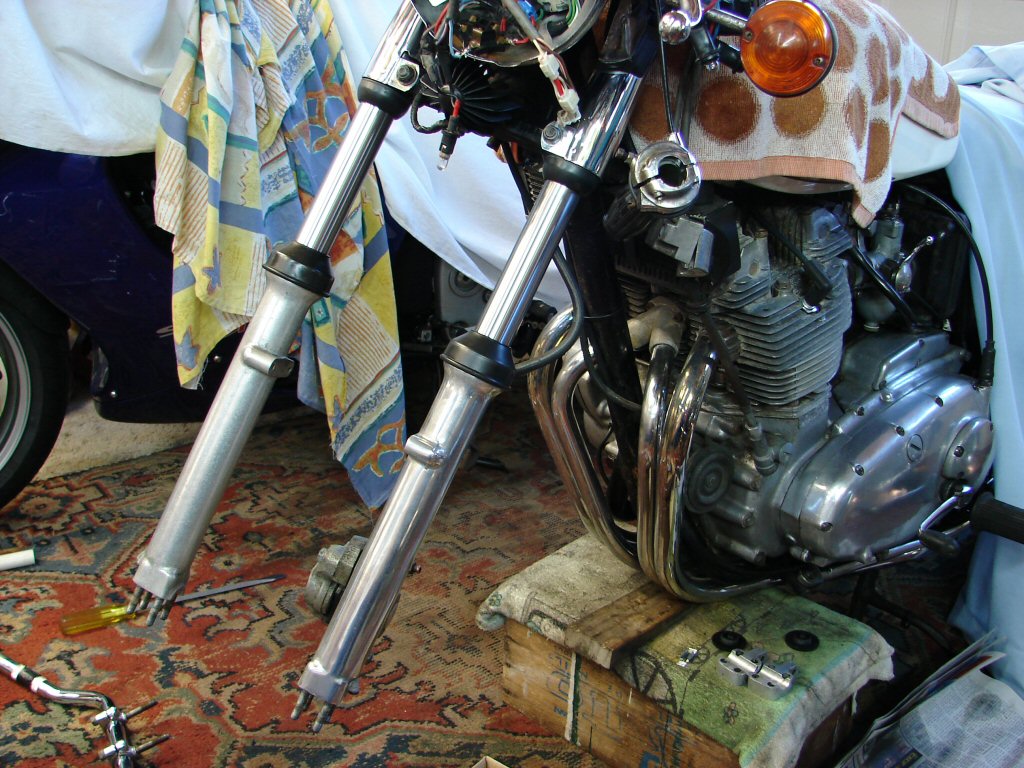
A pair of Dunstall type replacement mufflers had recently been fitted and were sited a tad low for my liking. It would seem there had been a rather tall pillion by the altered location of the rear footrests.

This photo was taken after the carbs had been completed and refitted, but show the bike pretty much as it arrived otherwise.
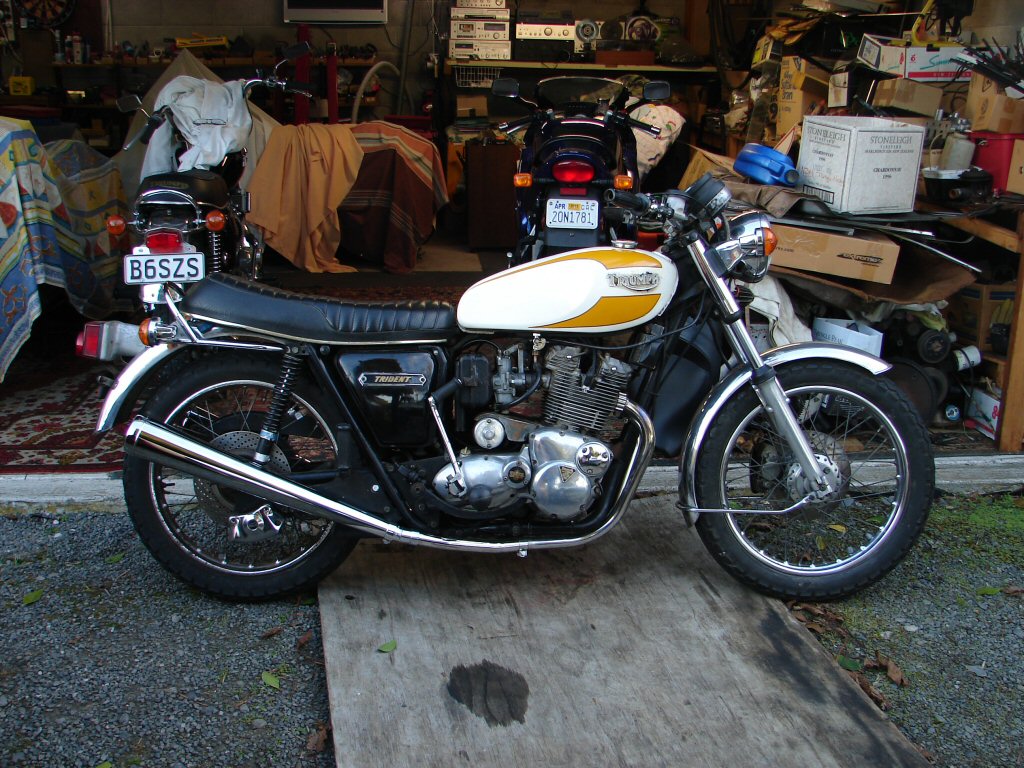
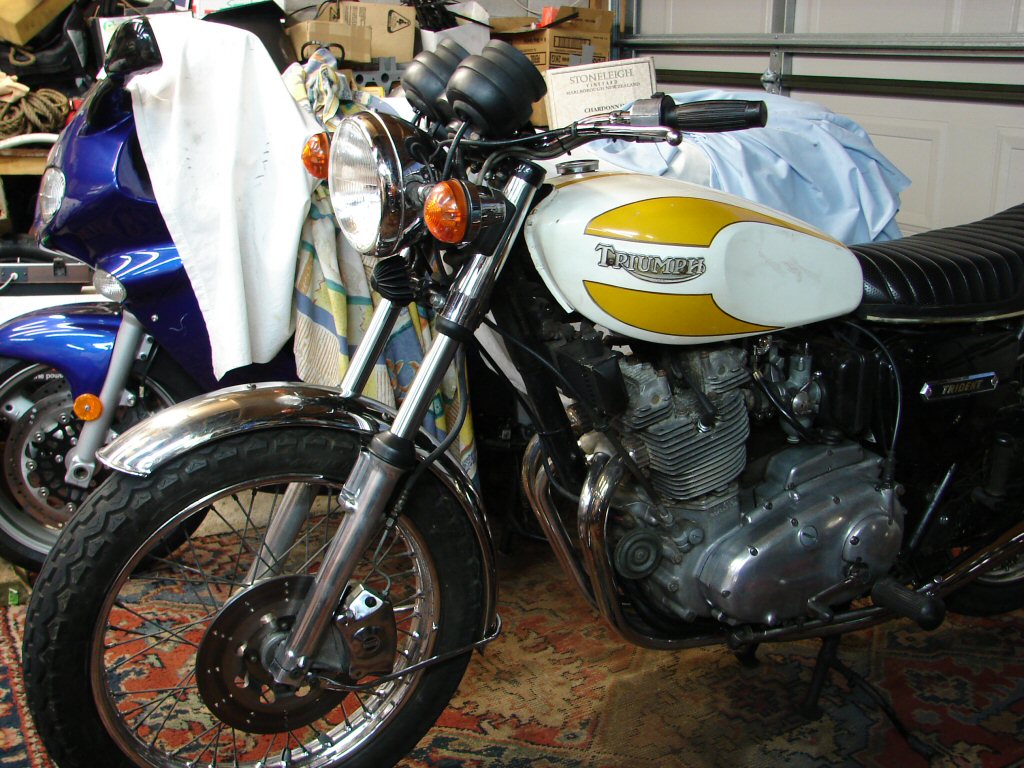
Because I had an unused pair of muffler adaptors for fitting rayguns to T160s I could not help but try them on this bike to see how it looked. I think it is much improved and has restored the original lines of the bike. I think moving the rear pegs back to their proper location also helps with the overall look and avoids the riders boot interacting badly with the pillion peg when kickstarting.
With some serious flooding of the carbs and full choke it lit up on the starter. Seemed a tad lean even though it was cold, and I soon found that it wanted the pilot air screws to be fully in, meaning we had a pretty lean situation. Whether this is down to the mufflers is not known yet. I got it to idle in a reasonable fashion and took it out on the road. It behaved very well although the front brake was almost non-existent having had new pads just fitted. I rode half a mile with the front brake applied quite firmly, then let it cool after which it got a second go. After this we now had a functional brake. Other than that it made a rather nice noise, changed gears nicely and even selected neutral with no great effort. Very good first run.
Time to return it to its owner for the next step which will be the NZ compliance process.
Amend that. Owner would like me to pursue a couple of other matters and undertake the compliance process, so it stays here meantime.
First thing was to reposition a few exhaust clamps to make the system look more streamlined and sweet. I do such things to satisfy my own aesthetic preference, but usually find that it meets approval with the owner even if they are not sure what I have done. They just know it looks better.
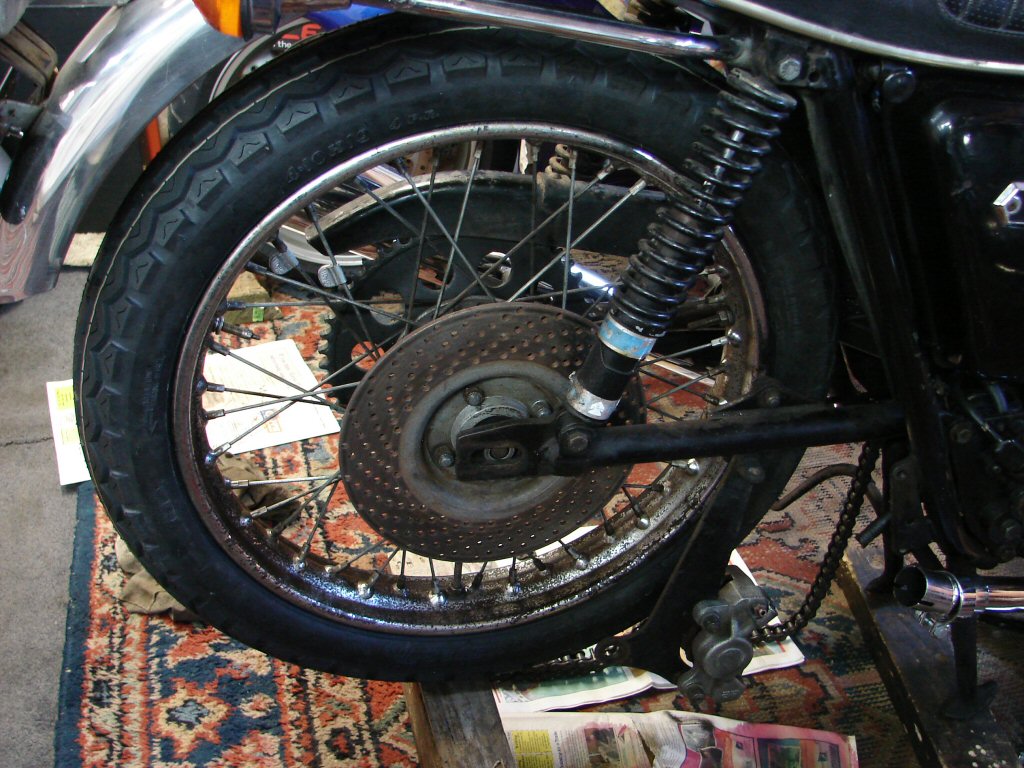
Next task would be to find why the rear brake was sticking on a bit. I found that bleeding pressure off allowed it to wheel freely again, and releasing the fluid line showed that the cylinder itself was the culprit. Dang. This is about the worst ecological area on a T160, let alone one that has been stored a long time in a damp situation. Began the strip and discovered that the rear tyre would not pass compliance, so removed the wheel as well. Wheel then loosely refitted while brake cylinder was being convinced to come apart.
While I managed to get the allen screw out of the alloy housing after soakings in penetrating oil, the cylinder would not budge from the housing. I filed small flats either side of the threaded end where the walls are thickest, stuck it in the vice and poured boiling water over it. With a couple of levers it finally came free and came apart without damage. I cleaned the cylinder to see if it looked worthy of rebuilding, and as it had no apparent leaks externally I decided to press on.
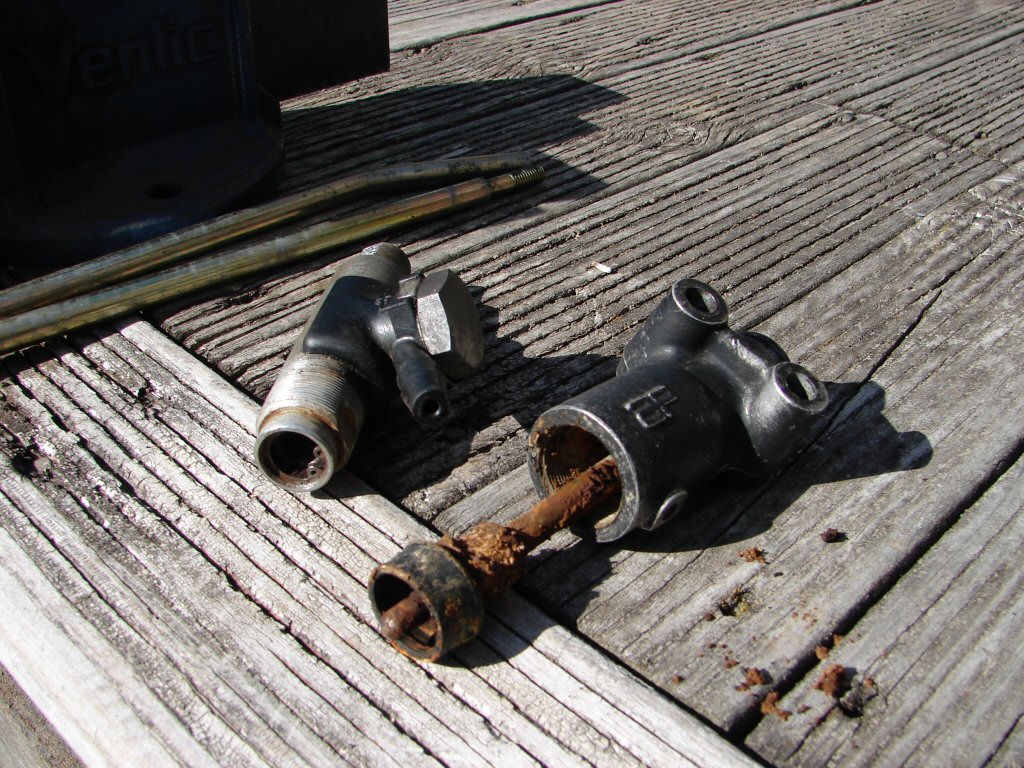
Every part of this assembly was in a hideous state, all credit that its only real issue was being internally blocked. Copious bleedings of new fluid had failed to elicit any improvement and once I opened it up it was easy to see why. Old brake fluid tends to decay into something like mud.
While I am always keen to preserve as many parts of an original bike as is possible, owners could hardly appreciate the time that goes into recovering bits in this condition. Mostly I do it because I love the machine, plus I am aware that some replacement parts are not an entirely accurate reproduction and can present problems of their own. Many hours disappear without making it to the final tally of time spent.
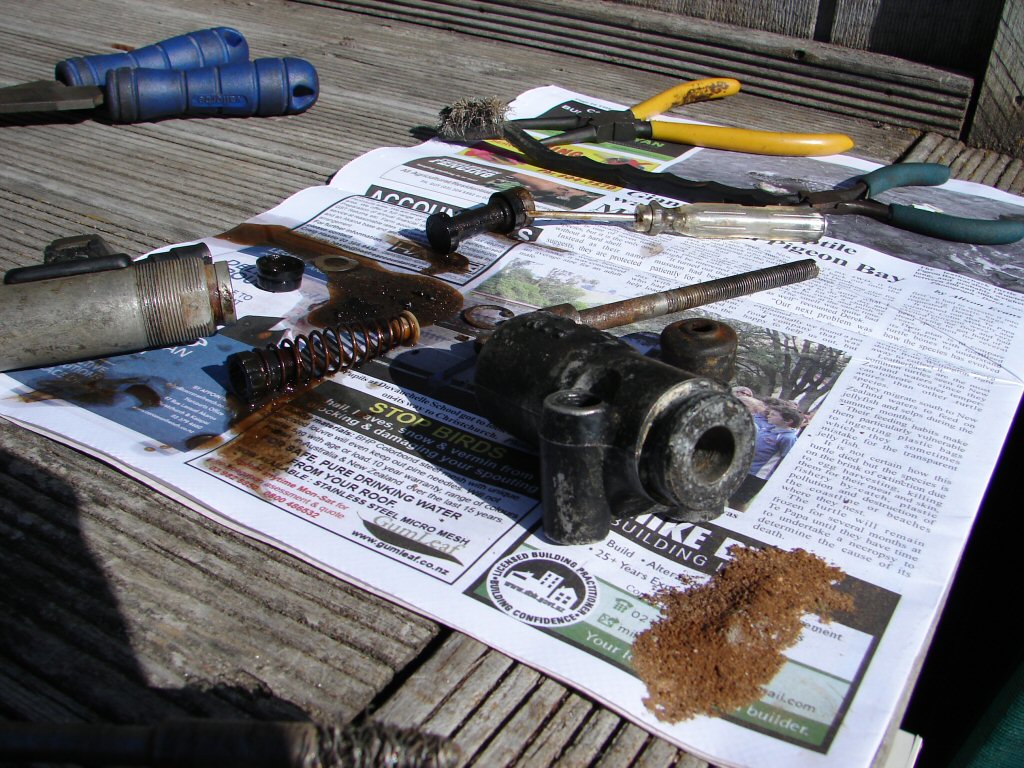
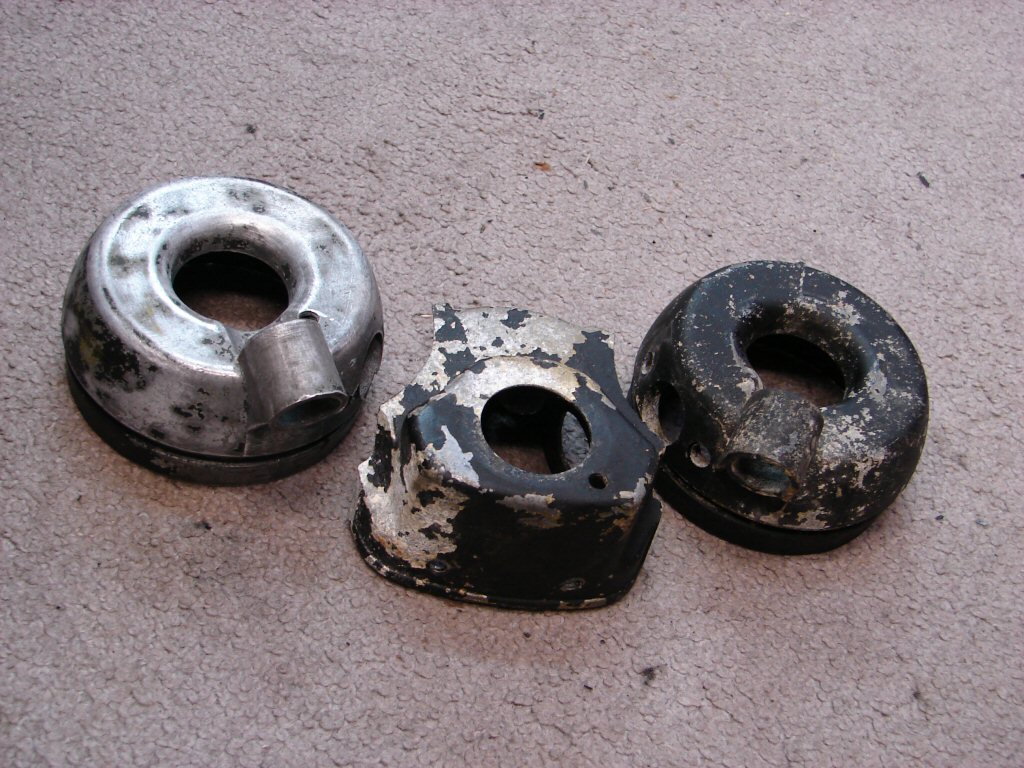
All that powdery grubbage came out of the alloy housing, which then got wire brushed and given a new coat of paint, which will perform the task of keeping future corrosion at bay, as it is hardly on display where it lives. All the innards got soaked and brushed in Meths including the cylinder bore, which I am hoping to simply rekit with new seals. I may give it a very light polish with fine emery paper but am tempted to just leave it alone. A strong light may reveal otherwise.
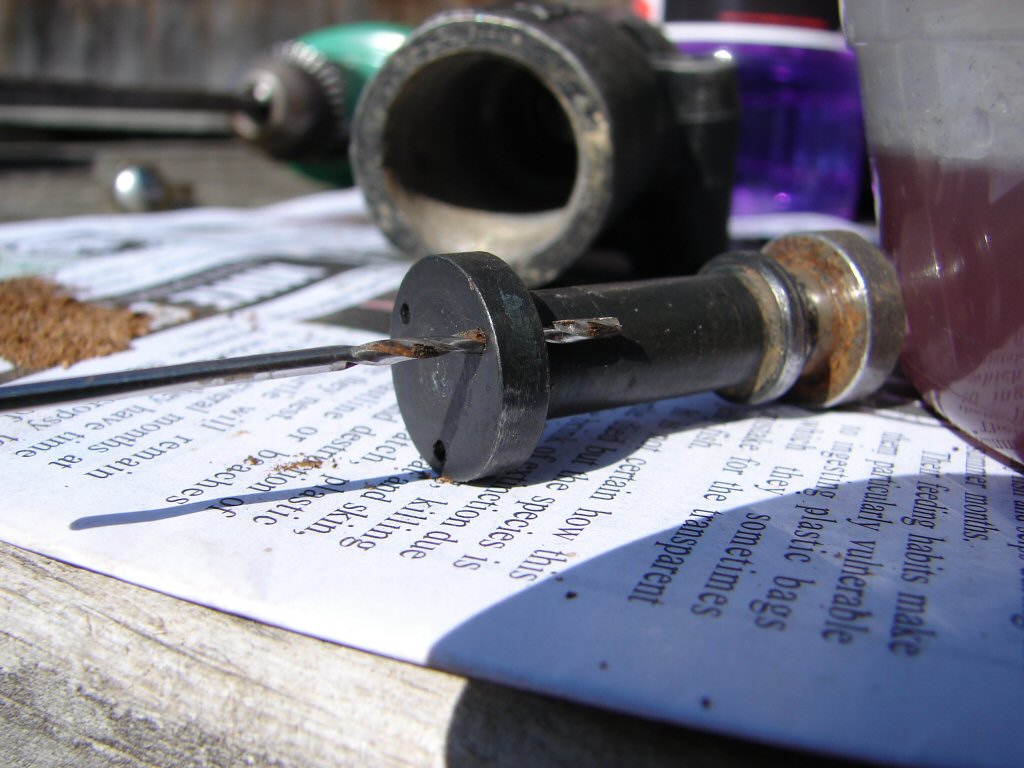
And this is where the pressure gets stuck. These holes had mostly become entirely restricted.
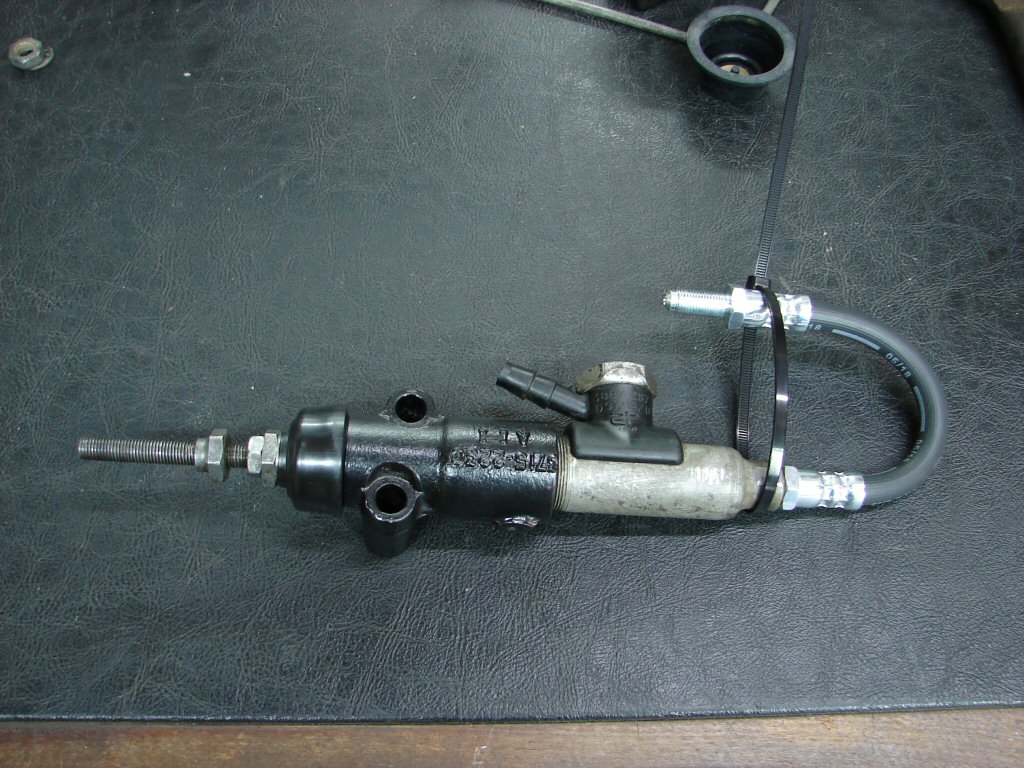
All the internals came up great and the cylinder bore looked fine, so it all went back together with new seals and boots. I had decided the hose was not up to another tour of duty, as while I could blow through it, I could not poke a wire through it, and that could likely become the next problem.
So this was how the assembly looked today before refitting it to the bike.
Everything fitted up happily and also bled up pressure with no hiccups. Brake pedal got adjusted to a suitable position and muffler refitted. That was the end of the work at the rear end so attention was now transferred to the front.
Job here would be to replace the fork stanchions and seals, as the latter were leaking enough to be a compliance issue, and the stanchions were badly rust pitted so would likely destroy the new seals in short time. The owner had already fitted new wheel bearings so that would not be an added complication. I had discovered that the headlight switch was a tad pesky in that a gentle touch was required or one could overshoot the lights on position and they would go off again. This would also be an issue if not addressed.
The handlebars would have to come off in the process, and the fluid hose that mated to the new master cylinder was very rusty at the connection so I would inspect it to make sure it was fit for another tour of duty.
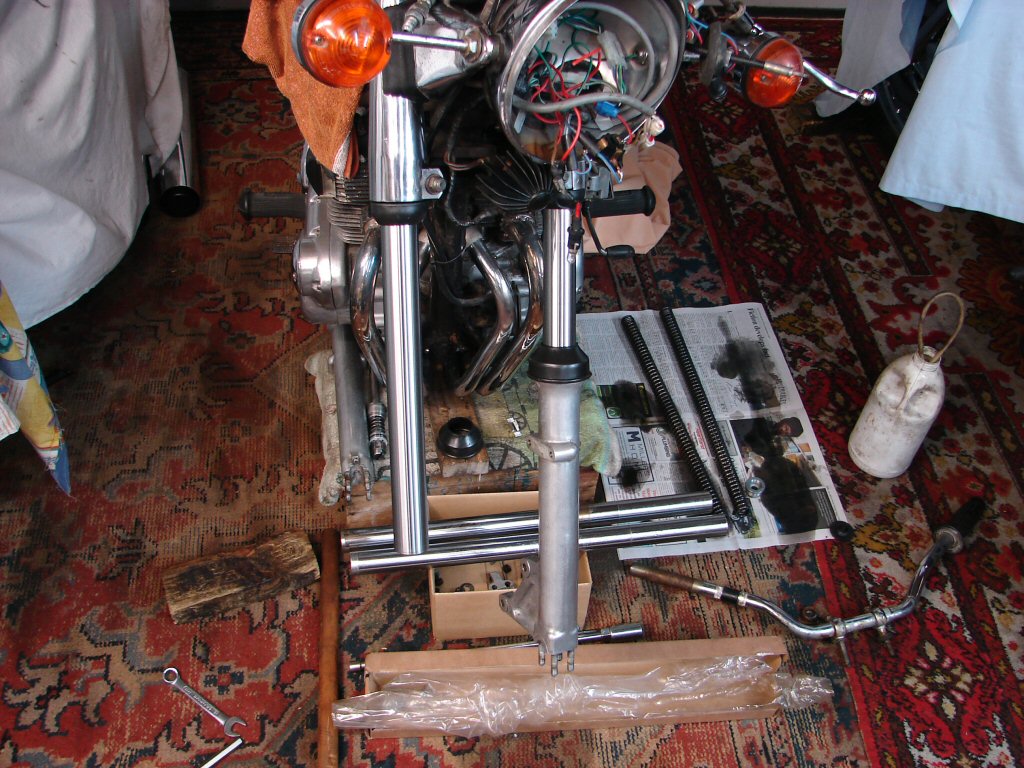
I do not enjoy replacing front ends. It is one area where it is often necessary to apply quite a bit of force - read "bash things" - and I prefer any other option wherever possible. I drained the brake fluid first as the lines would need to be disconnected, and while removing the 'bars the inner sleeve of one bush decided to pull out as it was rusted to the p clamp. There was a lot of obvious rust so I figured the stanchions would be a shit, but nothing for it but to continue.
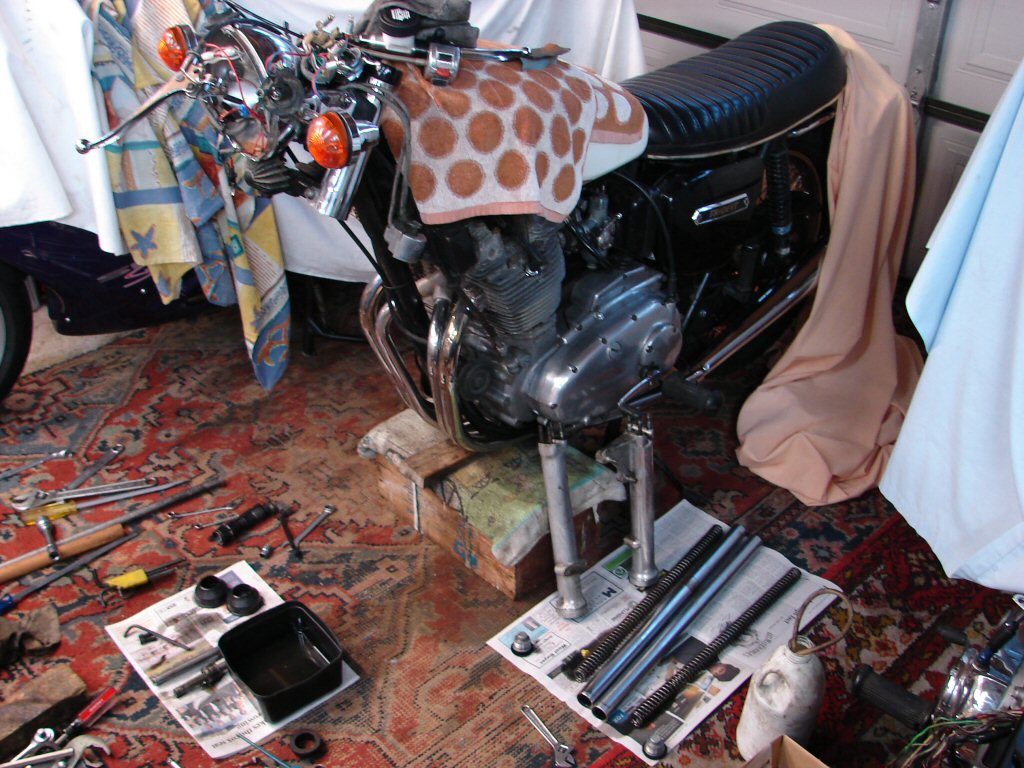
Well, the left one virtually fell out as soon as I released the clamps, so I had to clamp it back up in order to release the damper assembly. Both dampers were extremely difficult to remove and appeared to have some form of sealant applied to their threads on a previous assembly. The right stanchion would not budge a fraction so I resorted to hammering a pair of wedges into the splits where the clamps are located. This spreads the triple clamps a tiny amount and usually aids the removal. Fortunately it did so. It still had to be convinced with some medium blows, but gradually it moved past the step in the tube diameter and then was free. A good deal of sanding inside the triple clamps on that side was then undertaken to remove the rust buildup that had made removal so difficult, and from past experience would make fitting the new one even more so.
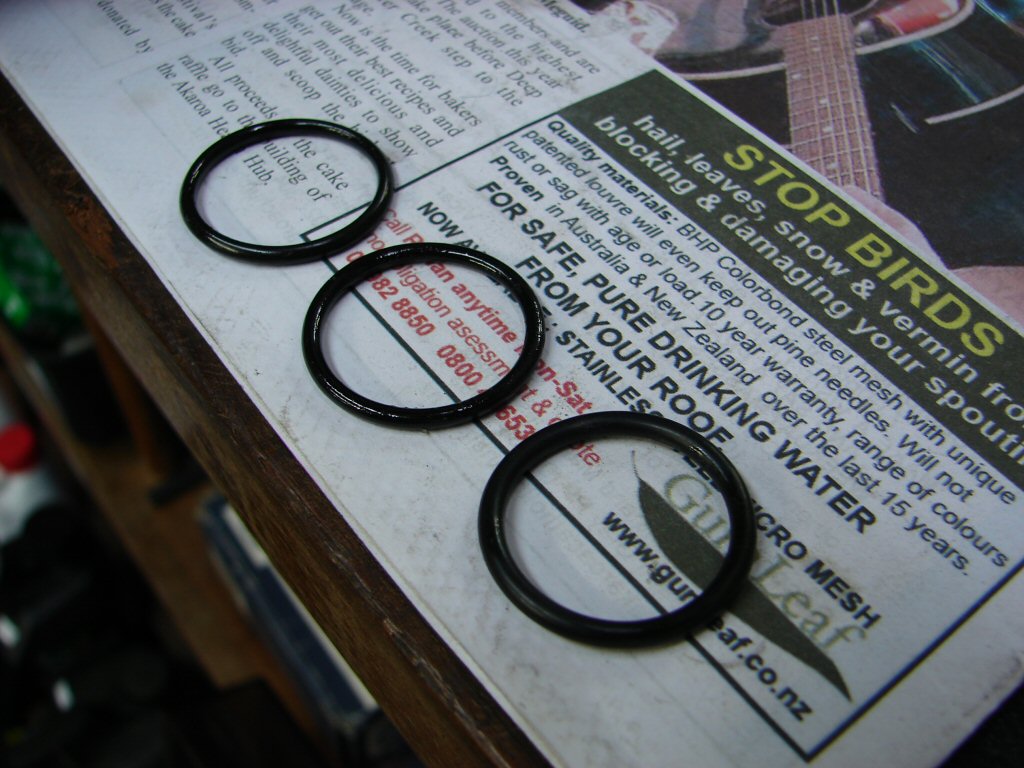
I cleaned the dampers and inspected them. The o rings would be replaced as a matter of course, and one of the threaded ends required a bit of repair where a previous operator had used something like a pipe wrench on it. The top edge of the nut was deformed enough to prevent a good contact with the bottom edge of the stanchion, and this may have been what prompted the use of the sealant. I had already cleaned that stuff off the near unit and it appeared to bear some resemblance to araldite and took a fair bit of moving.

As usual, the cleaning up process would take as long as the rest of the job, but it is a vital part of the equation. There had been an odd extra earth wire run from inside the headlight to one of the lower stanchion clamp bolts, and as I had removed the headlight prior to bashing things I was able to locate why that was so. A later halogen type lamp had been fitted along with a different pilot lamp fitting, and in that process the original earth wiring to the headlight shell had been lost, so rather than find out why, another had been added. The fact that the zener diode is extremely close by and has a generous earth system had been overlooked. I shall reconnect it all as per the original setup.
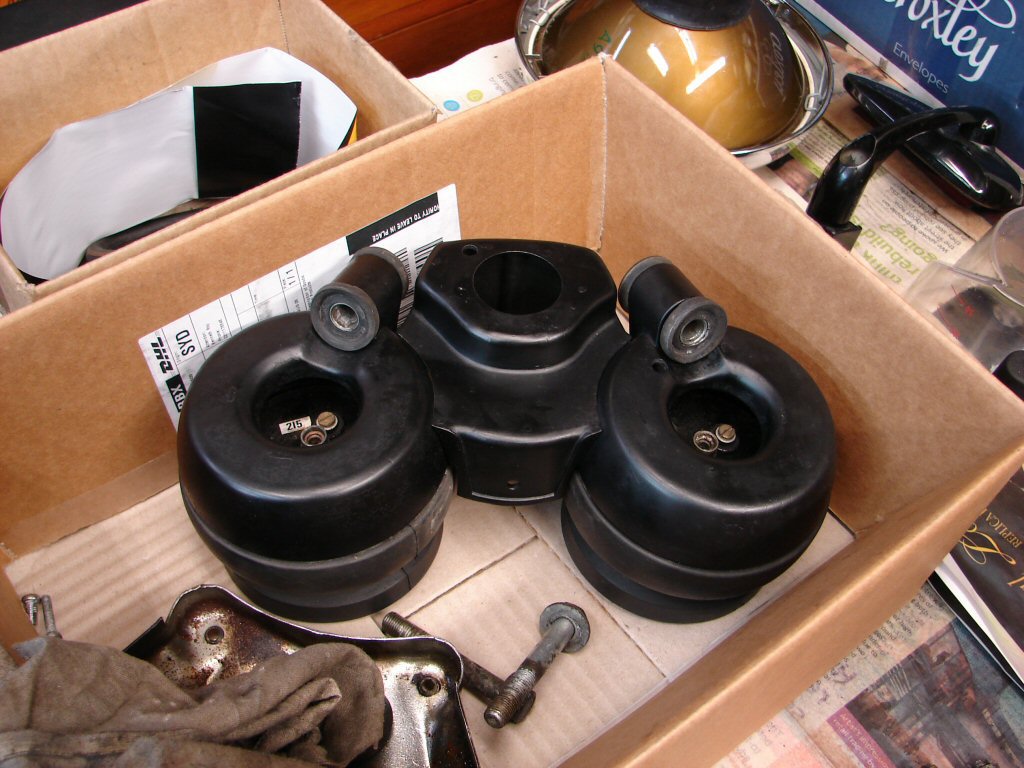
Another thing that I will do should make a big difference overall. The instrument binnacles look to be in a rather distressed state so I will take the opportunity to give them a coat or two of matte black. I may even include the zener heatsink in the process and this should transform the look of the front end. Seeing as how nobody will even notice that the forks have been replaced I figure this will complete the job nicely.
The new stanchions were fitted after a number of attempts at smoothing out the inner clamp surfaces, despite which the right side unit was extremely difficult to fit. I guess I won as they were both eventually in place. That always feels like the major hurdle has been overcome, as the rest of the assembly process is rather gentle and more a matter of quality control.
The dampers are the first additions so the new o rings were fitted, during which process it became obvious that the previous items were thinner than the correct size. Hardly earth-shattering but it would have caused the damping to be less effective than it should.
With dampers installed the sliders were cleaned up and their new fork seals fitted, after which the left slider was refitted and all went well. The right side would not fit at all. The stanchion seemed reluctant to enter the slider and I could find no distortion inside the slider to explain why. As I had another old slider on hand I tried that, and it did reluctantly begin to go on, but then seized at about half travel.
I got the vernier out and did some measuring. Damn. The right stanchion was .003" bigger in diameter than the left. No way would it ever work. What a blow. It did at least explain why the thing was so hard to fit, but now I would have to extract it again. Piss.
I consoled myself by cleaning and sanding the binnacles and the zener heatsink and then applying some paint. Hardly the world's best finish but a million miles better than they arrived so I guess that is as good as it gets.
Zener is now refitted and the instruments and binnacle await their turn which will be after the fork assembly is complete.
The oversize stanchion came out without too much of a fight, although I went to some lengths to open the lower triple clamp first. My supplier had one spare and has despatched it in my direction, so hopefully it will appear tomorrow. I can only assume that the fact he had one would indicate a previous warranty claim had been processed, so perhaps the quality is not the best despite the proudly displayed "made in England" label on the box. Three for scrap then.

Happily the replacement stanchion arrived this morning. I measured it and it looked to be an exact match for the originals. I offered it up to the bike and it willingly claimed its rightful place without any undue force. The damper also fitted nicely and the slider thereafter, so I was most happy with that state of affairs.
I have used a variety of fork oils over the years. I favoured 20 weight but of late had been persuaded to adopt 15W as being a better overall solution. Because I had some doubts around the internal bore of these stanchions and also because I had enjoyed great results on my own bike, I used 20W on this one. Hopefully it will prove to be the best choice.
I could not help but apply some polish to the fork sliders and axle clamps during the reassembly process. It is just what you do when you are taking pride in the bringing back of what is a piece of history that one relates to. Having owned one of these from new I certainly do. It fuels my resolve to do the best I can for them.
When there has been a holdup in the repair of any machine it is always a huge relief when an answer is found and things move on again in the intended fashion. This is the intended result for the rebuild of the front forks. The brakes bled up in a jiffy and I had reversed the position of the fluid reservoir as it had been sloping entirely the wrong way. I still had some toilet paper wrapped around it to ensure that no fluid was leaking out in any way at all.
It wasn't.
And the brake was brilliant. That meant it was time to refit the clocks and all the other stuff.
It seems a bit out of context but I was more than extremely happy to see this state of reassembly complete. Similar holdups have previously stalled me for months. The rest of the machine was light years from where I would ideally want it to be, but as a percentage of its whole, it was now in a far better state than it had been in at least 1.5 decades.
That may mean it was ready to pass its compliance test. Apart from test riding it and appraising myself of its current state that seemed to be the case, but the test ride would still be necessary. Some acquiescence from the weather dept was going to be necessary.
Test ride completed Tuesday 10 September. Bike started and ran very well. Front brake felt ineffective due to the new pads, so I kept some brake pressure applied in order to heat them up and begin the bedding in process. The front forks felt very firm to the point that I wondered if I might need to replace the oil with a 15 weight, but the riding experience was such that I felt it would be smarter to put some miles on it as is. The forks are firm but compliant, and as there are both new seals and new damper o rings it is fair to assume things will soften up a bit with some use. I shall let the owner decide.
Time to begin the compliance process. I have started by copying all the documentation so nothing gets lost.
All paperwork submitted to VINZ Inspector to peruse. He considered it contained all he needed to see, so test date was set for Thursday 3 October at 1400 hrs.
Two nights before the test was due I found brake fluid dripping from the underside of the newly rebuilt rear brake cylinder. Initial dismay that the cylinder bore might be beyond re-use turned to slight relief as I realised the fluid was weeping through the rubber hose leading up to the reservoir. I have seen a number of these fail in the same way, as both current T160 projects have. The hose is under no pressure but the fluid simply begins to weep through it along its entire length. I decided to wipe it clean and get the test done. The hose could be replaced after that.
So here it is - about to fire up and head off to VINZ.

Well, that round trip amounted to 25 miles, which is probably the entire mileage the bike has done in New Zealand, and in the last 15 years. Nothing bad took place, and I bedded the front disc pads in properly on the way. Apart from a few tuning issues which I attended to on my return it was an entirely trouble-free event.
And of course - it passed. So we now have a wof and the papers with which to put an NZ plate on it, so I shall let the owner do that.
I may also order a new rear brake fluid hose - plus a spare...
Job done and the bike was collected by it's owner, who pleasingly rode it the long way home. Fitting conclusion and a good chance we will get to ride together soon.
Excellent.