October 2018
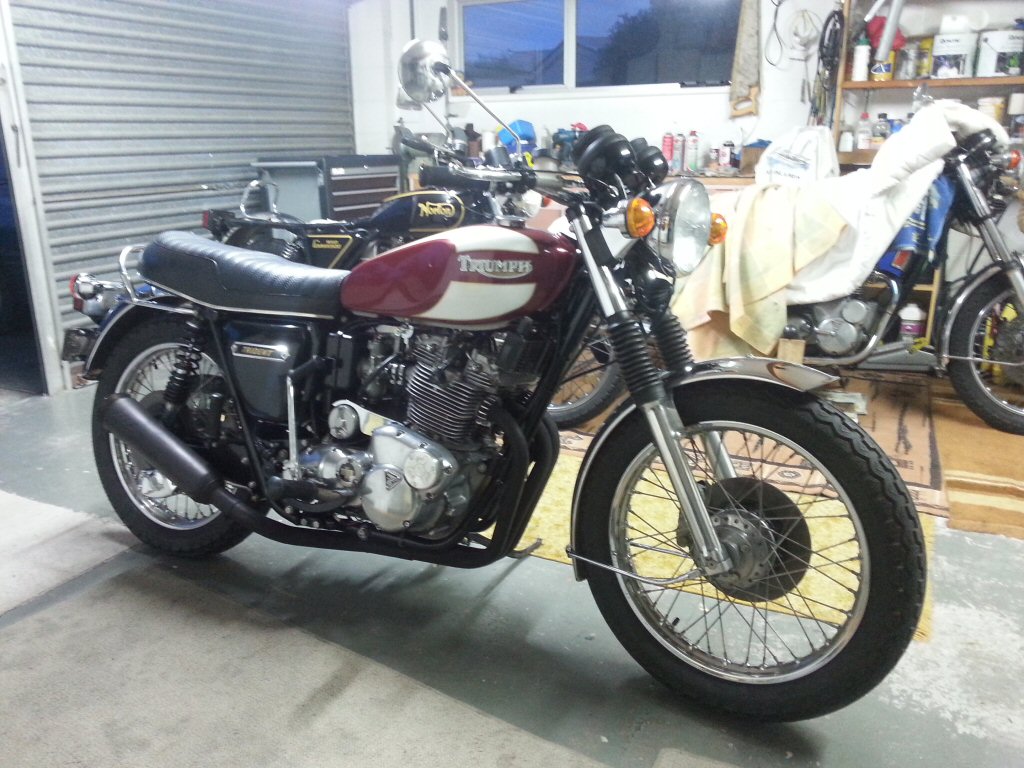
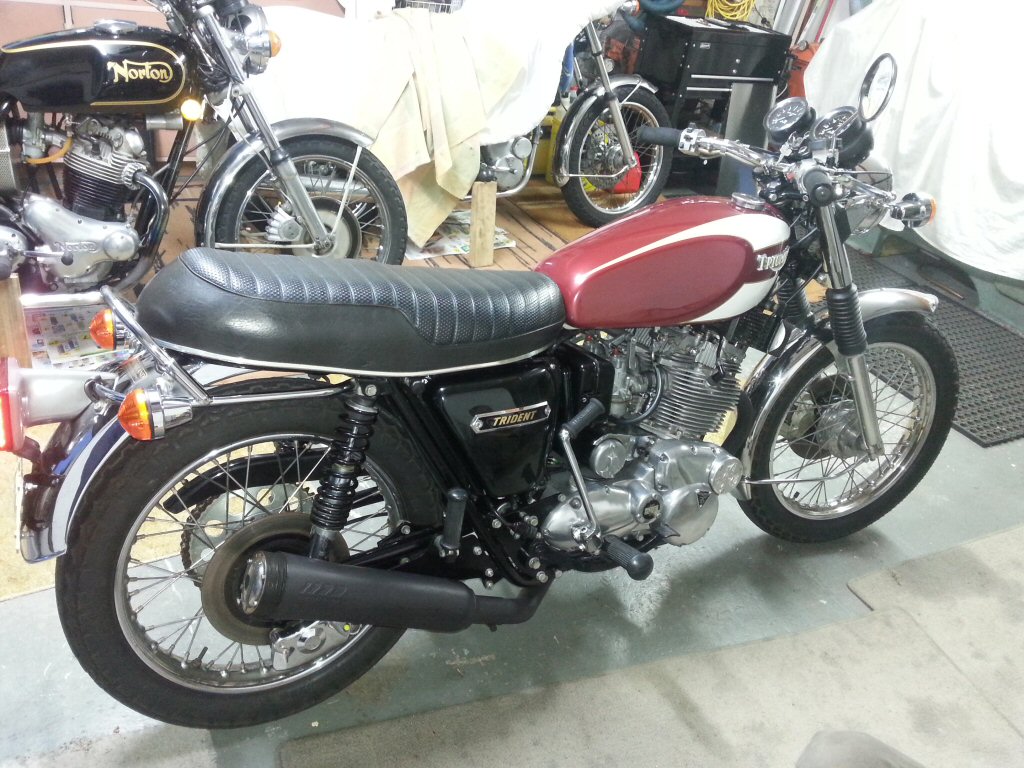
1975 Triumph T160 Trident 750
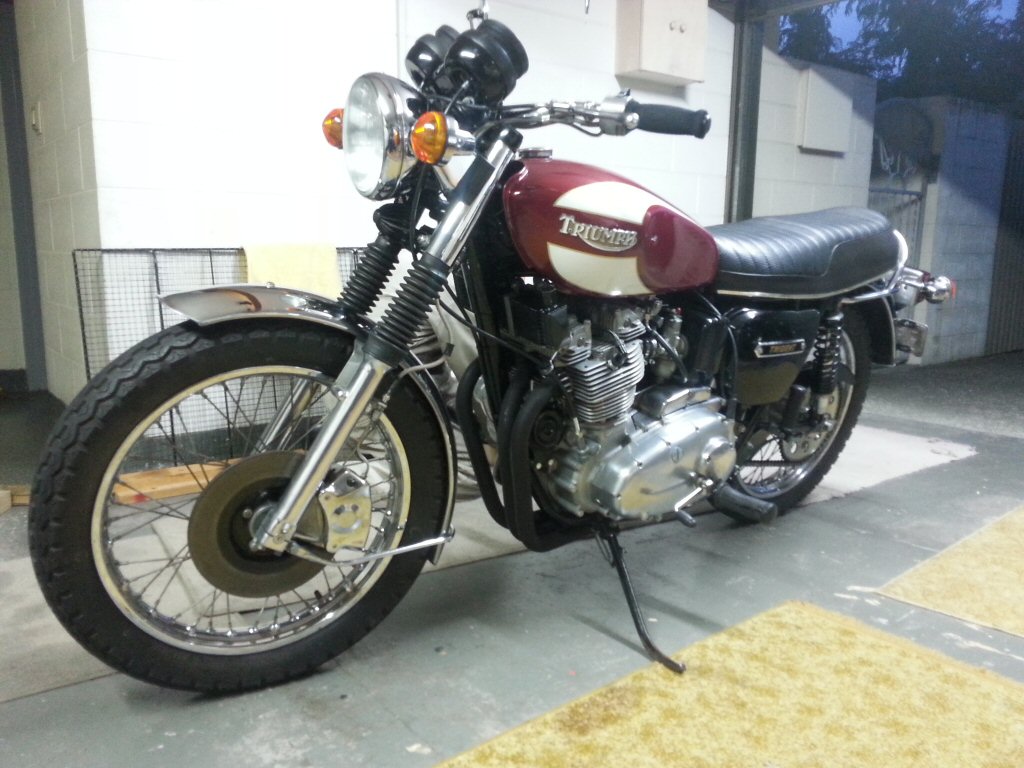
A mate had bought a T160 some years ago, but had not had it on the road. I agreed to help with its rebirth, but as space was limited in my shed we did it at his place instead. One night a week and the occasional Saturday we spent a few hours working on it together - something I can manage with very few people - and it was good fun.
The major issue with the bike that we knew of, was that when he drained all the oil from the engine sump, a few bits of alloy came out too. Then there was a fine silvery soup in some of the oil residue. This had been cause to lay the bike up for some years, but now was time to sort it out.
Firstly we partially refilled the oil tank, attached an oil pressure gauge instead of the oil light switch, then kicked it over to see what happened. What happened was that we were able to get 85psi oil pressure just using the kickstart, so that made us very happy about the condition of the bottom end.
I had a suspicion that I had seen oil with the same silvery look before, and it was after a piston had melted. We decided to pull the head off the bike and see what we could discover. The head seemed ok apart from the fact that it appeared to have the wrong exhaust valves fitted. It should have the later short type which T160's use, but instead it had earlier T150 type which had clearance issues but had only recently been fitted. There was quite a lot of play in the piston to bore area, so we plucked the barrels off too. Removing the pistons from the rods revealed that the centre piston had been very recently replaced, so it had indeed melted a piston and been repaired using a new piston in a rather worn bore. Presumably our bits of alloy had originated from the disintegrating piston crown.
Some measuring up of the .040" oversize cylinder bores made it rather clear that it was all over for these pistons, which might also mean the end of the barrels unless new liners were to be fitted, as .040" was the max oversize offered by Triumph. I had an idea that I had once seen .060" pistons advertised, so I put the word out to see if anyone might have a bead on some. Indeed, a good fellow from LA who builds a lot of triple engines offered me a set of NOS Hepolite items that he had bought about 30 years ago, and as he had not yet used them he probably was not going to. Even better news was that they had their rings with them, and these featured the 3 piece oil rings which are one of the few versions I would trust to do a good job, and with the bores being larger than ever intended we would be unwise to leave anything to chance.
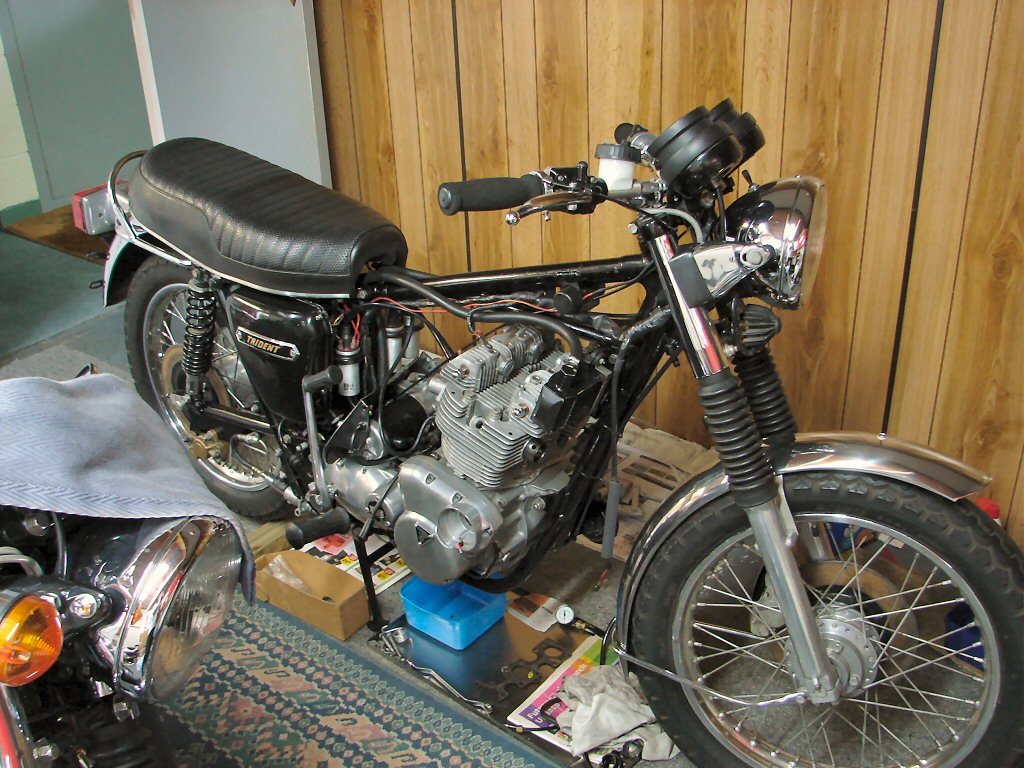
Not many photos were taken during the process, which has spanned quite a few months, but this is where we pulled it down.
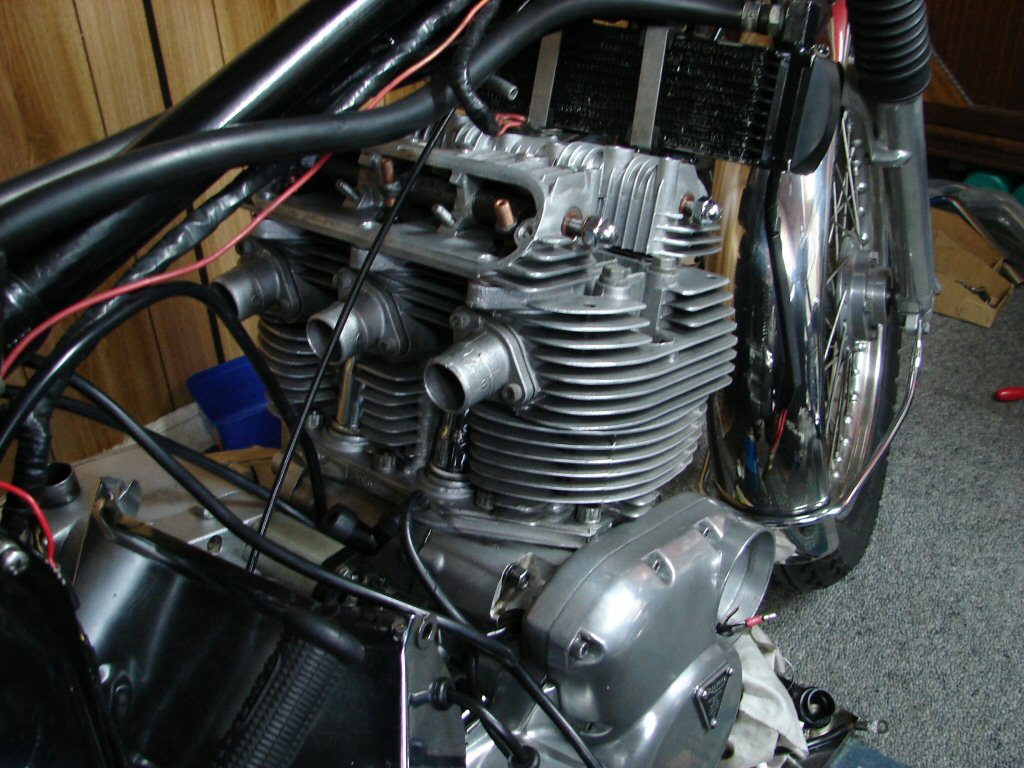
The cylinder head went off for new inlet guides and exhaust valves. The guides were actually ok but I prefer to use the original type rather than those using seals, as the latter tend to restrict the oiling of the valve stems to the point that they wear prematurely. There were a number of threads to be helicoiled and the surface got a very light skim. Barrels were bored to match the new pistons and it all began going back together as soon as the head had been reassembled. There were no unexpected issues and the only other necessities were a few gaskets and a new set of valve adjusters. The head and rockerboxes got copper gaskets which were annealed by the engine reconditioner at the same time he did the head. The photo above was taken just after the head and barrels had gone back on.
Just to reassure ourselves we also removed the timing cover and checked the cam timing. I was wanting to ensure that the inlet cam timing had been adjusted from standard, and indeed it had been. Someone had been through this engine fairly carefully at least once before. We also removed the primary chaincase for a look and were happy with what we found there. So far so good.
I stripped the carbs to find that they were virtually brand new, although the gantry and linkages were well worn, so most of the attention went there. Used a stainless operating bar, which I had found was available when I rebuilt a set of similar carbs for my own T160. With a set of new bushes it certainly provided an excellent result. Another job was to reinstall the pickup for the Boyer ignition and resurrect the wiring to it, and that was complete for this photo.
There were a few wiring issues involving things that didn't work. A broken wire for the indicators was found within the loom near the steering head, and was repaired. Gradually everything was convinced to behave and the bike was 100% electrically, although the electric starter seemed to want to disengage itself while cranking, so that is scheduled for further investigation.
It had been noticed that the fork seals were leaking, so we decided to tackle that before attempting to start the bike. While the sliders were being prepared I decided to clean the inside of the stanchions. Looking down the inside I was somewhat amused to find that both stanchions were bent backwards far enough for it to be quite apparent to the naked eye. Amusing but rather annoying too, as we then had to remove the stanchions as well. Better luck was that they were able to be straightened in a hydraulic press, and all went back together happily.
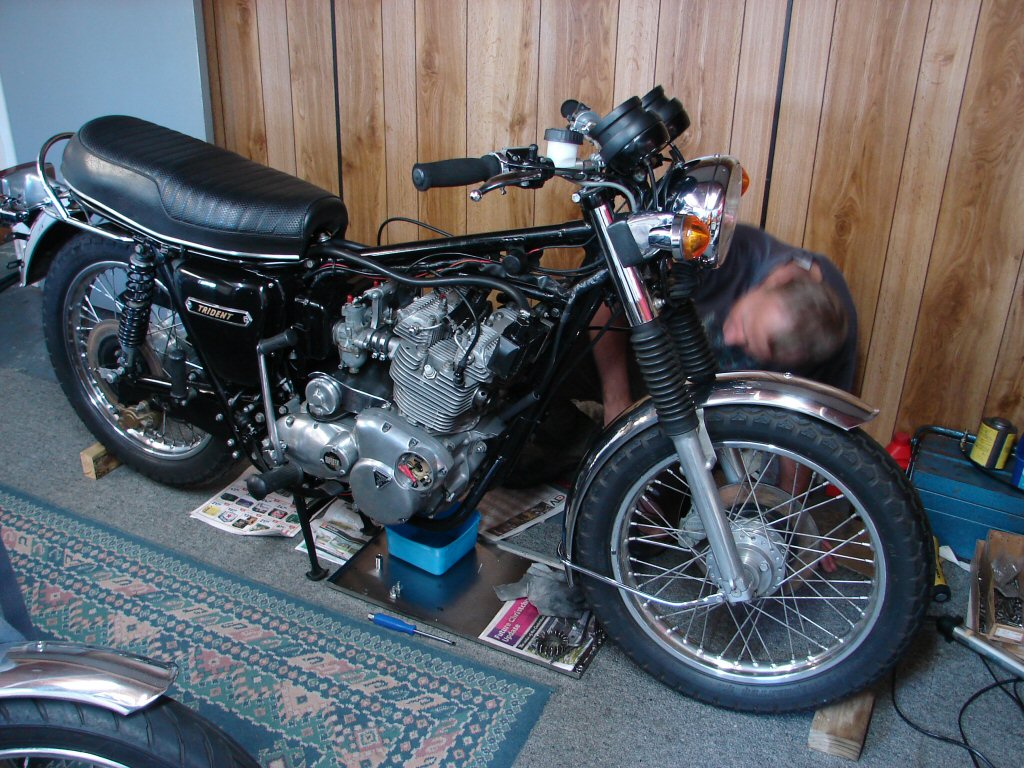
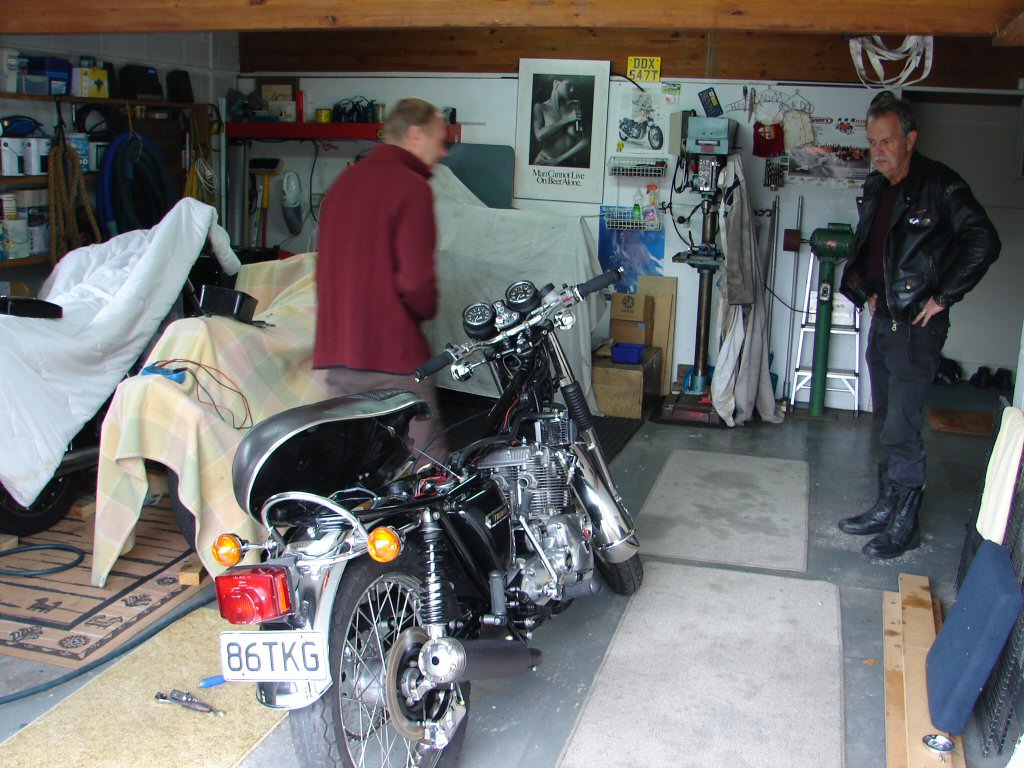
That got us to here and the first start.
Despite a great number of well aimed kicks, the bike would not start. It fired quite a lot but did not seem interested in actually running. We checked the ignition timing and that we had sparks, although we knew we must have as it was firing and on occasion rewarded us with a loud backfire. As it was getting a bit late we decided to leave it until daylight on the weekend for a consolidated effort with an extra mind joining us for the fun.
That took place, and between three of us we kicked it over enough to run it in, but it would not start. We tried a few alternative ignition parts as the visible spark looked to be pretty feeble, but they all do when it won't go. As a final effort we pushed it along the street whereupon it seemed we may have a slight gear selection issue, but no signs of life. We resolved to give it another go on the next Tuesday night, as that had been our scheduled evening for working on it.
I decided that I would take the entire carb setup away and tune it up on my bike so we could at least eliminate that as being the problem.
Standing down.
My bike fired up immediately with these carbs fitted, and all I had to do was fine tune the pilot air screws and the idle speed, so it seemed hardly likely that this had been our problem.
Tuesday night we resolved to swap as many ignition bits as we could muster, which involved both the black box and the pickup unit, but none of this elicited any change. After yet another detailed check of the timing we suddenly noticed that the two pickup wires were reversed where they joined to the wiring loom. Now that is more like a problem.!
The bike started before the kickstart lever was halfway through its swing, and it all sounded very sweet. Mechanically very quiet which was a good sign, and the throttle response was just as you would want it. Brilliant. You just have to check every single thing. We decided to leave it to cool so the head could be retightened and valves adjusted if necessary. I would also bring my timing light so we could make sure it was on the mark rather than risk causing it any grief.
A much happier close of play this time.
Next visit the bike fired up easily, but did not sound as smooth or responsive. Before we could get it warm enough to use the timing light it lost power and stopped. Attempting to restart it had us right back to square one, so now we had a real mystery. We tried swapping the black box but that made no difference. We checked the timing for the umpteenth time and it had moved.! Damn. The rotor had slipped on its taper. Removing it revealed that it was not fitting into the camshaft taper properly, nor had it ever been by the marks on it, and the retaining bolt was only managing a couple of turns before running out of length. As we had another rotor we tried that, and it fitted far better and had a longer bolt, so we used both and timed it all up again from scratch. Now it fired up as happily as it had the first time, and we had a happy engine again.
We both took a brief ride, and although a few things would need adjusting it all worked well. The rear tyre proved to be very slippery in use and we hoped it might improve with a few miles. The carbs seemed to be pretty rich in use but only a longer ride would give us enough data to decide how much that might be.
He called in on the bike the following weekend. Had been out for a longer ride but got rained on and turned back, whereupon the bike began to misfire and play up a bit. He did at least make it here, so we plucked the spark plugs for a look see. They were as sooty as a sooty thing, and had obviously begun to foul and misfire. I cleaned them up to get him home and we agreed that he would pull the carbs off and bring them over. I had a suspicion that I knew what was wrong.
Stripping the carbs showed that it had all the correct bits and they were all new. Recently I had two triples which were newly set up and running so rich that they could not be prevented from fouling plugs. Fitting one size smaller needle jets resulted in bikes that were too lean to run much at all, so that was not the cure. For some reason the new needle jets were passing too much fuel around new needles, so I adopted a method of opening up the side drillings to allow a bit more air to mix with the fuel and that fixed it. This bike appeared to have the exact same issue, so I did the same. When they were fitted back on the bike it behaved much better at all throttle settings, although the spark plugs continued to look a bit sooty. As the rings would not have had time to bed in yet we decided to leave it for a few more miles before deciding whether to go further.