November 2025
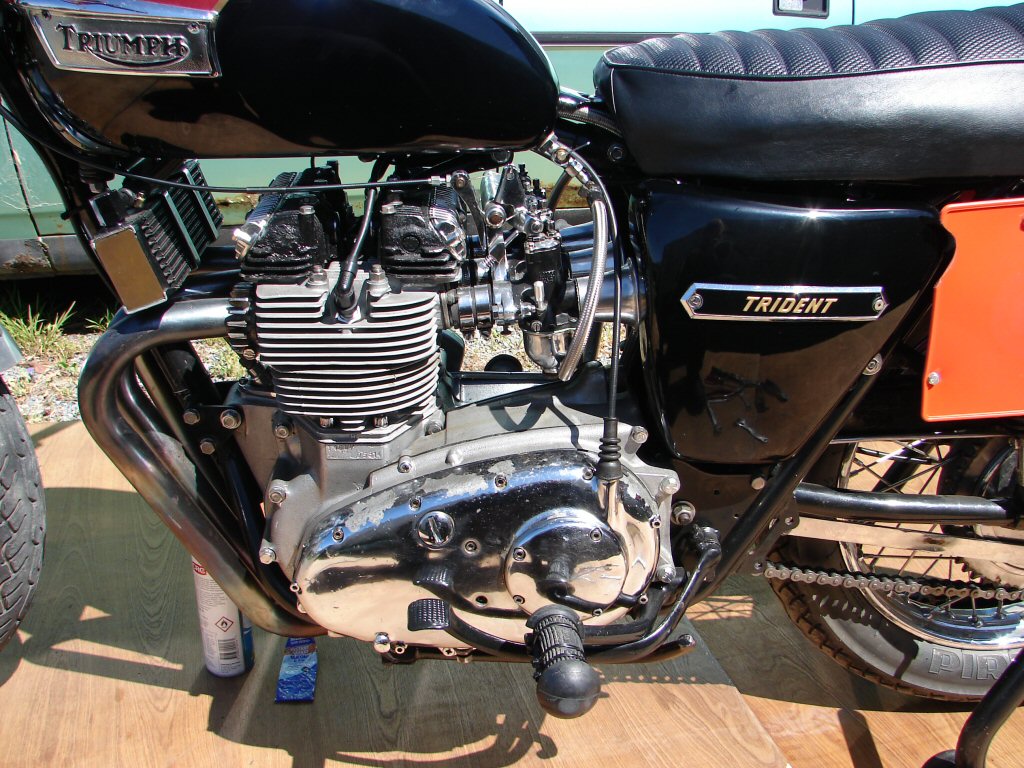
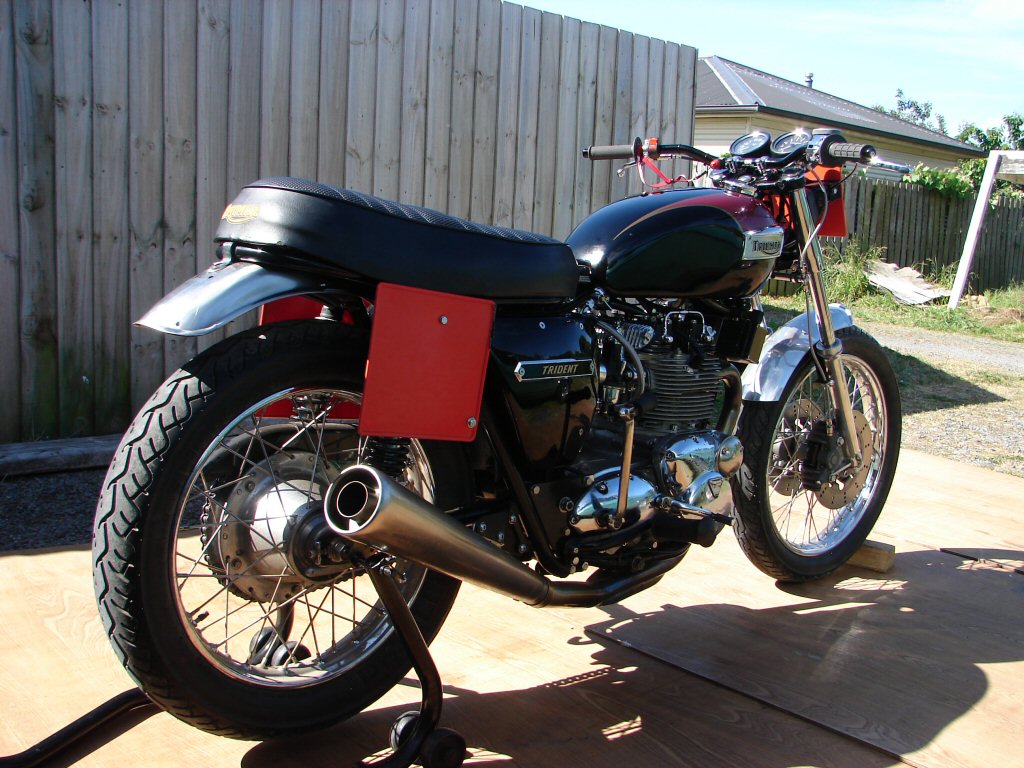
1973 Triumph T150 Trident 750
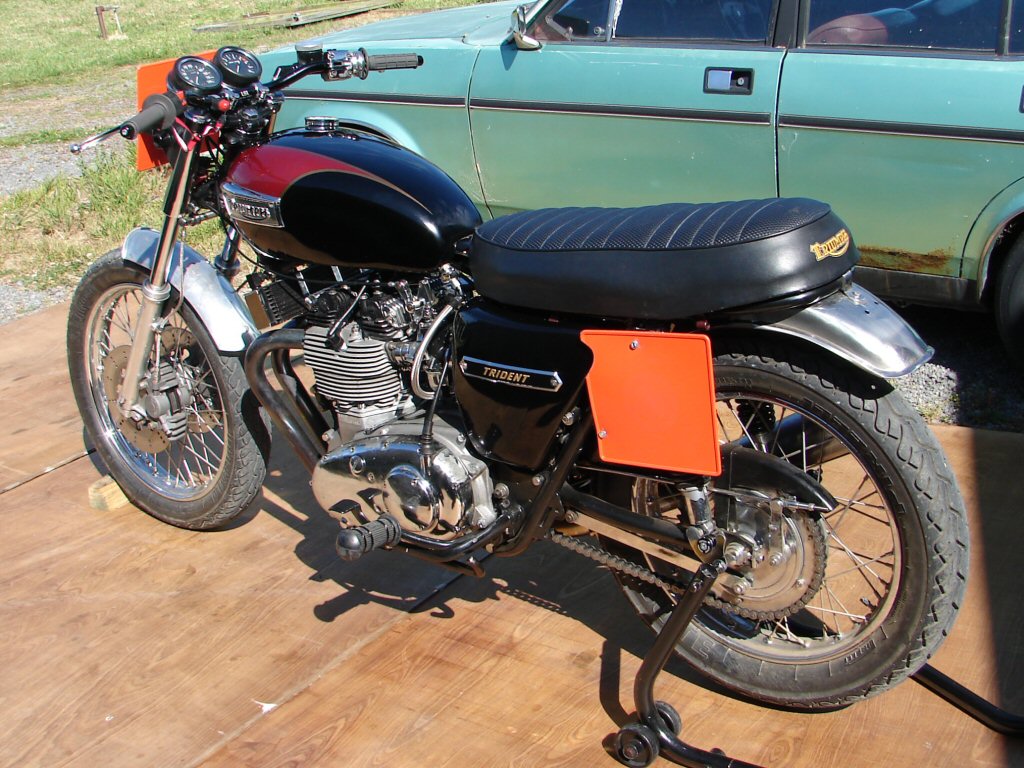
This bike was built as an entry level classic race bike, but as yet has not fired a shot in anger. Mostly that was because it was not finished in time to make last year's season, but now we are fast approaching the new seasons events and it needs to be ready to roll.
During a few clandestine road tests a problem showed up with the steering head bearings, plus an annoying oil leak which might risk a scrutineering fail, so it came for what would hopefully be a day job only, and the weather was going to enable me to do the work outdoors - unless the whole front end had to come out of course, but I suspected it wouldn't.
Sure enough there was a massive amount of play at the top bearing, and it had not responded to max adjustment of the stem nut. So I tentatively began pulling bits apart.
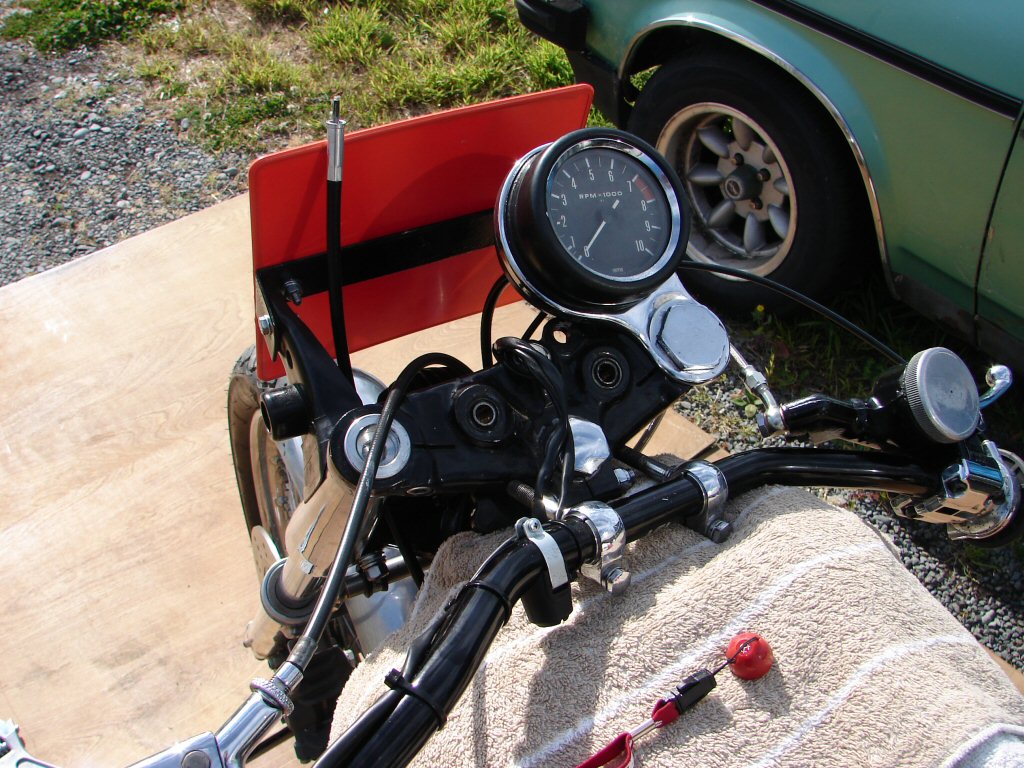
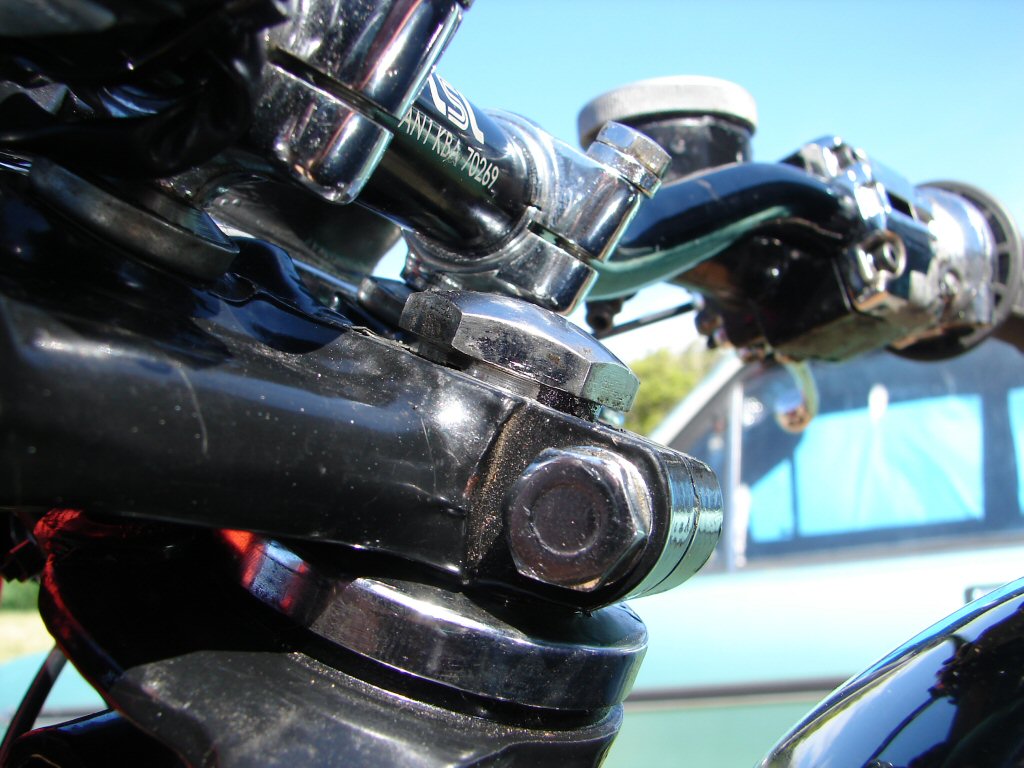
For unknown reasons the left fork stanchion had come up through the triple clamp far enough to be fouling the underside of the handlebars, but after backing off the pinchbolts in both clamps I was able to drive it back down easily using a block of wood between mallet and the cap nut, which had previously been set to just sit above the top of the triple clamp, so it was easy to tighten the large nuts that hold the clock mounting brackets.
I then tried every possible combination of adjusting the stem nut, none of which made any difference, so that led to removing both clocks and the triple clamp in order to inspect the top bearing. Pleasingly I found that it had already been converted to taper roller type bearings, but of a type I had never encountered before. A pair of new taper rollers had come with the bike, but they were a much smaller O.D. and would never fit this frame.
On close inspection the fitted top bearing was in perfect shape, and from the amount of grease I would say that it had done very little mileage since being fitted, which would have been before the current owner bought the bike as an unfinished project.
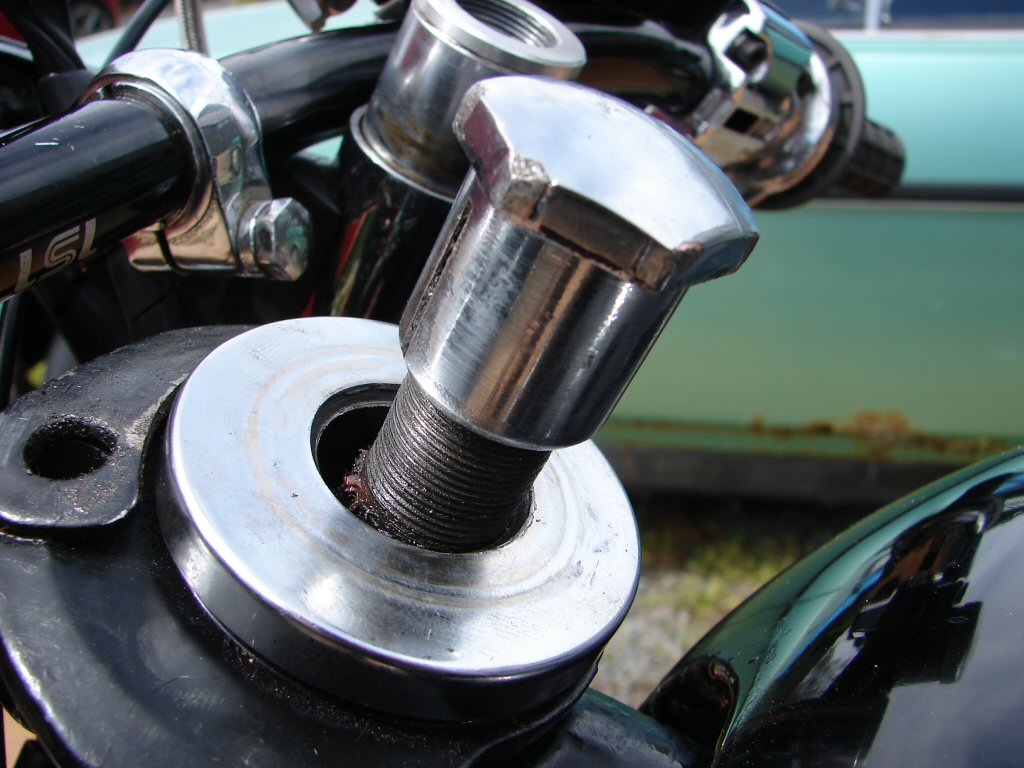
The real puzzle was the reason for all the free play. The steering stem was a far smaller O.D. than the I.D. of the fitted bearing, and I could only imagine that there was something missing that should have been there. I was also wondering why such unusual bearings were in place, and on this top bearing the inner part of the bearing was attached to the underside of what I first though was a dust cover - which it was - but it was an integral part of the bearing as well.
That got me looking at parts manuals, and I immediately spotted the elephant in the room. This bike started its life with a conical hub drum brake and had been converted to a disc front end. I imagine the bearings were probably part of some kit to change from drum to disc, but I figured the change might also involve using triple clamps from a disc model. If so, how was the assembly designed to centre the stem inside this large bearing.
With the triple clamp on the bench it was soon obvious that the stem nut has a taper on its lower outer edge, and the bearing has a taper leading inot it, so the stem nut does the centring at the same time as it applies the small amount of preload it probably needs.
Problem was, the stem nut was too short to reach the taper even when it was as far down in the triple clamp as it could go. This arrangement of parts could simply never work together.
I had a vague recollection of there being two versions of the stem nut on triples, so perhaps the drum brake triple clamps were thinner to allow this short nut to work properly. I went and measured the stem nut on one of my T160's and sure enough it was about 3/16" longer, so I whipped it out of the T160 and tried it here. Immediate success, so the whole problem was just a mismatch of parts, and we were the first people to have ridden it and find out.
I left my nut in there and reassembled the front end to my satisfaction. I gave some extra attention to the pinch bolts in case there was a reason that the stanchion had moved, but everything tightened up as you would want it to, so maybe it just wasn't tight enough at some stage of the initial test riding.
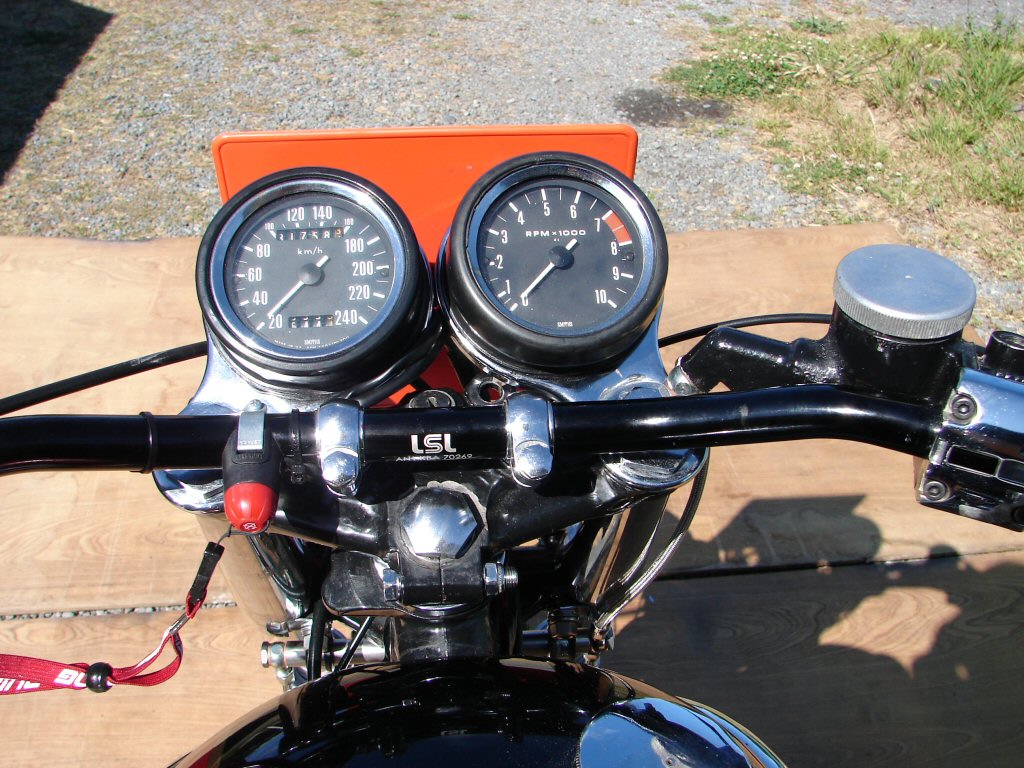
In its final form there was now a small amount of free space between the top of the triple clamp and the bottom of the flats at the top of the nut, as I am used to seeing on disc brake models, and the adjustment was totally straightforward, so it now all looks and behaves as it should.
Still took a couple of hours from start to finish, but we have a result and with no need to change any bearings which would have involved more stripping.
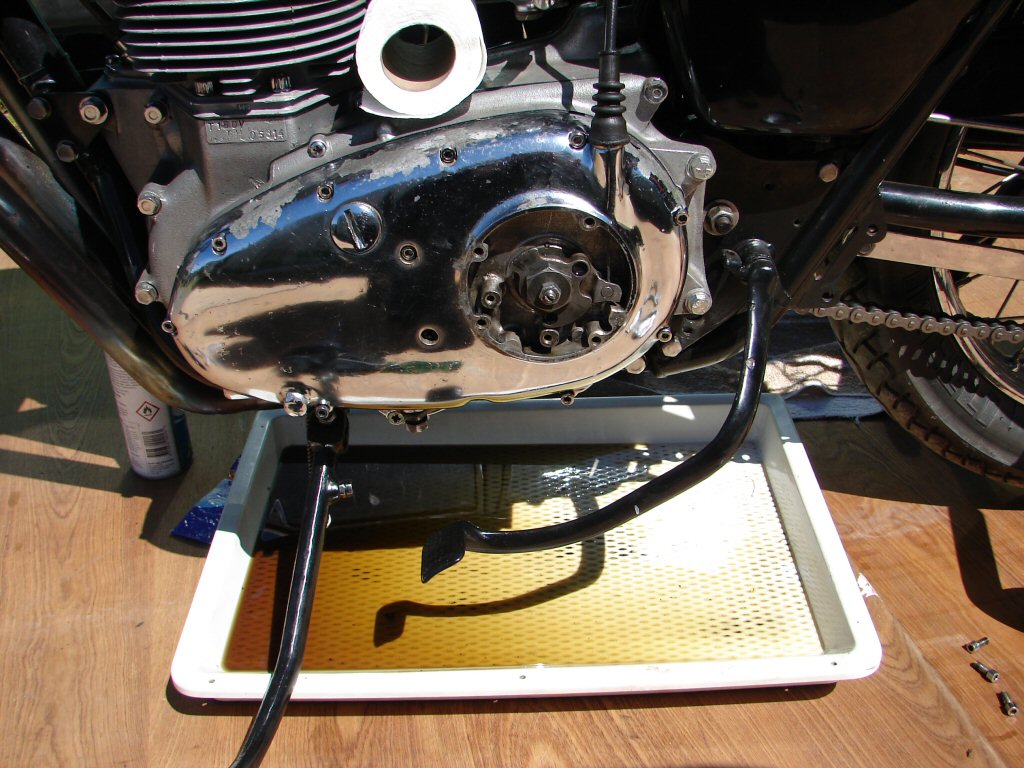
The other problem was an oil leak from the outer primary cover. When putting this engine together I had found a nasty gark at the front edge of the primary where some previous numpty appeared to have driven a screwdriver between the joint in a couple of places to presumably remove the cover. I would hazard a guess that they forgot to remove the two centre screws which the early primaries had, as they usually come apart quite easily unless glued to hell.
When I fitted the cover during the rebuild I siliconed the gasket to the outer cover, as that was the worst damaged of the mating faces, but perhaps due to some serious wet sumping oil had managed to find its way out between the gasket and the inner case, so I would now add some silicone there as well.
As I had only used grease on the gasket inner surface when assembling it the cover came away easily with the gasket perfectly intact and still firmly attached to the outer. The owner had drained the primary before bringing the bike over, but there was enough oil still inside to suggest that the crankcase was probably still wet sumping rather enthusiastically.
During the disassembly I found that oil had also been leaking from the clutch cable abutment and leaking from under the rubber boot, so that got cleaned up and siliconed during the reassembly process. The final move was to add 350ml of GTX after having given the sealant suitable time to cure a bit first.
So buttoning that back up was a well behaved task, but I had a good poke around inside first to make sure everything was happy in the primary chain dept as well as the oil pump drive gear assembly. All was as you would want it.
Disturbing the primary involves losing the clutch adjustment and starting again from scratch as it goes back together, but once you have a technique it doesn't slow you down much. As this bike is going to be making a lot of gearchanges on our small NZ circuits I left the two fingers which retain the operating arm off, as it does remove some extra friction and makes the clutch operation about as light as you can make it on a triple.
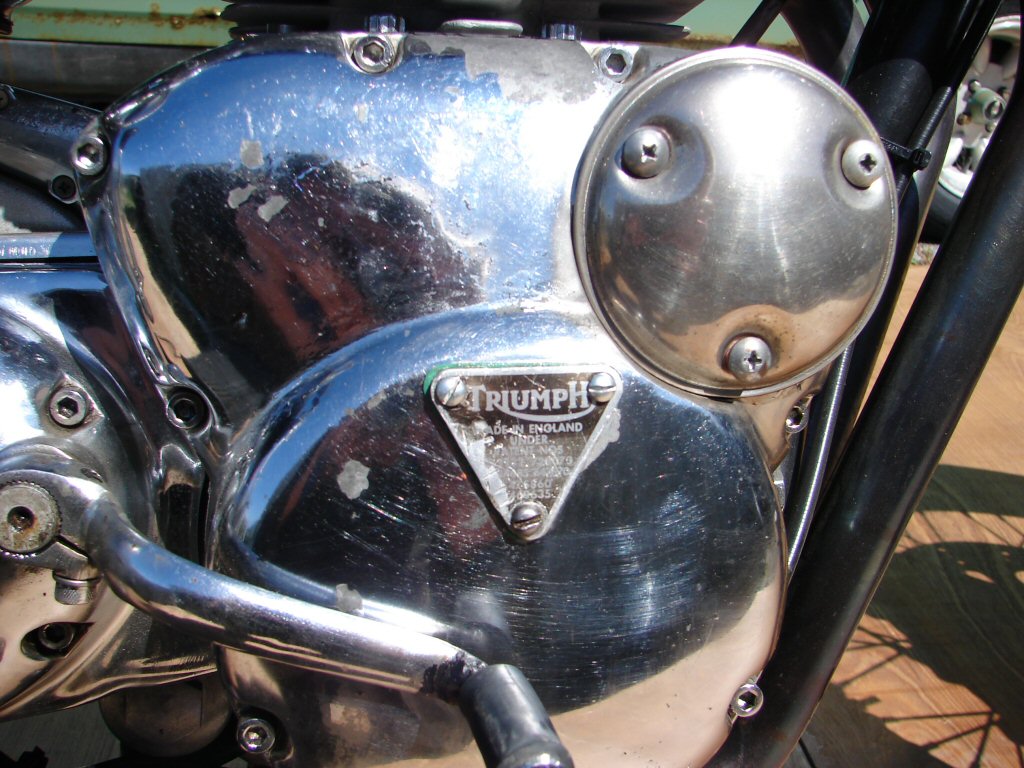
While looking around the bike I found that there had been a third oil leak from the bottom of the patent plate on the timing cover. While it is only from splash inside the cover it had managed to make its way right down and under the case, so certainly worth addressing.
I usually silicone these covers after I am finished with the strobe light for ignition timing, and as these cases have been chromed in the past and now the chrome is leaving town and leaving irregular surfaces I felt sure I would have.
Turns out I had, but the oil was finding its way out around the bottom screw, which was a "well used" screw - I guess would be a polite way of saying it - so I degreased the screw and treated it to its own special share of silicone while I redid the gasket as well.
We are hoping for an oiltight plot overall.
I fired the bike up for a brief test and to return some of the wet sumped oil to the tank. It lit up on the first kick which is a very good sign, and purred away happily until I turned it off again.
It will be nice to see it in action as soon as that happens, and I have no doubt that it will be the best sounding bike circulating to my ears at least.
So it got collected in the afternoon and went off home a bit happier than it arrived.
Should be more fun than a box of frogs I reckon...