August 2025
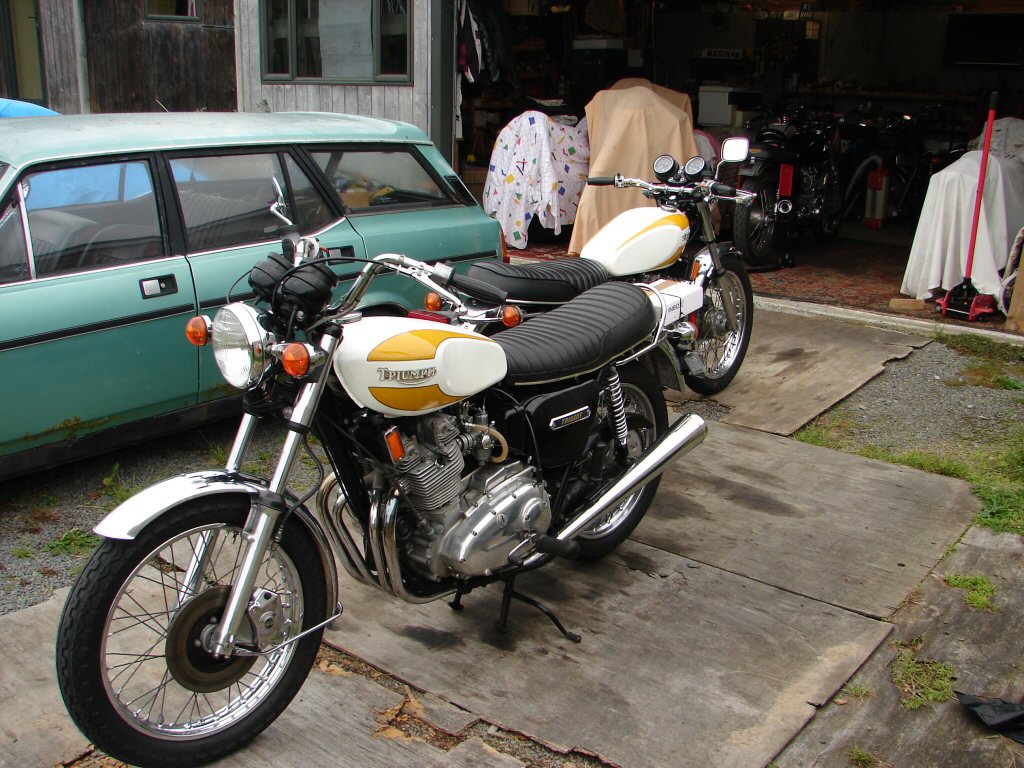
1975 Triumph T160 Trident 750
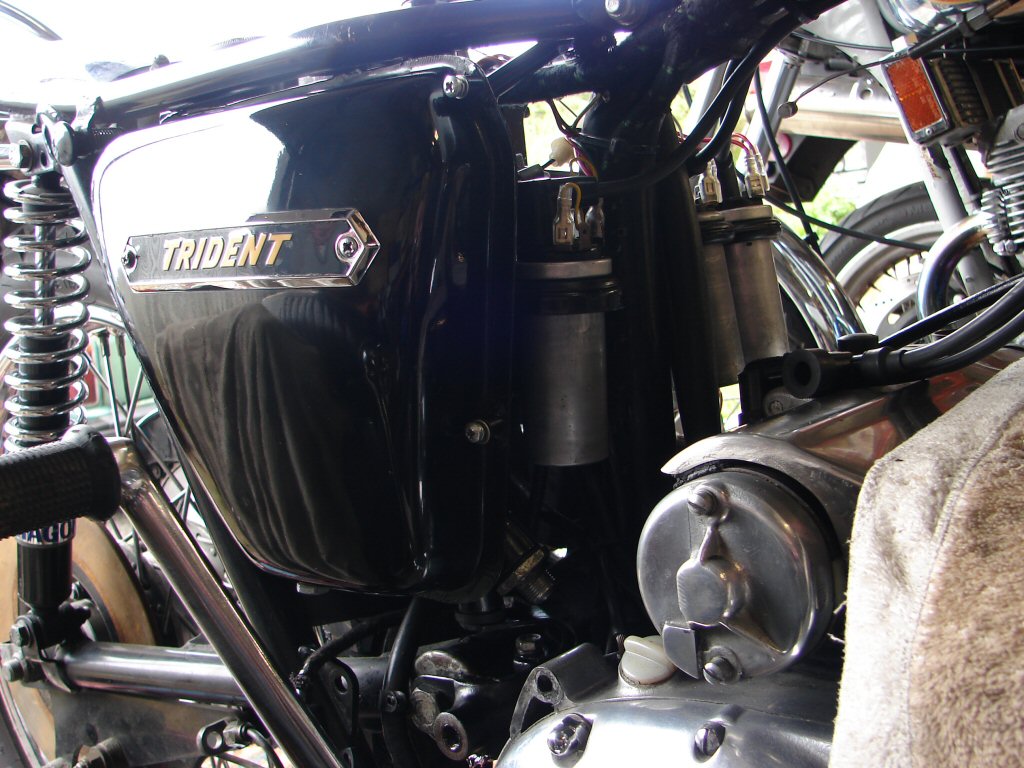
This bike left here in April after sorting a few tasks including fitting a Trispark ignition and replacing some failed rocker box base gaskets. It had been running fine since from all reports, but recently while travelling at town speeds it suddenly lost power and there was at least some evidence of exhaust smoke.
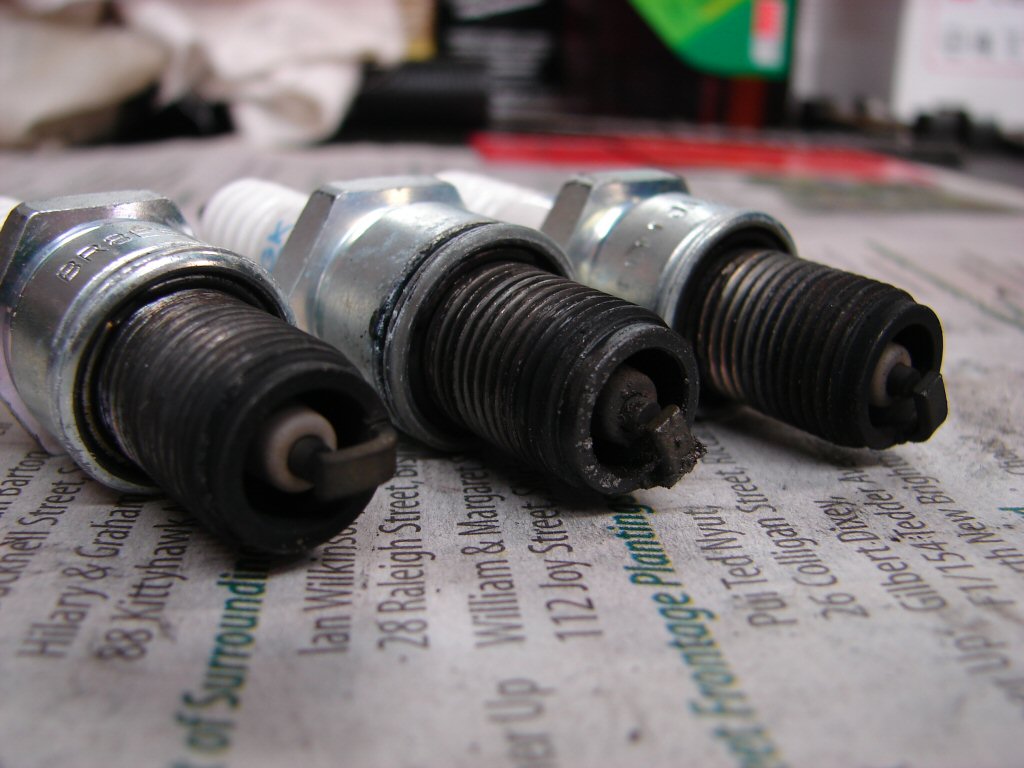
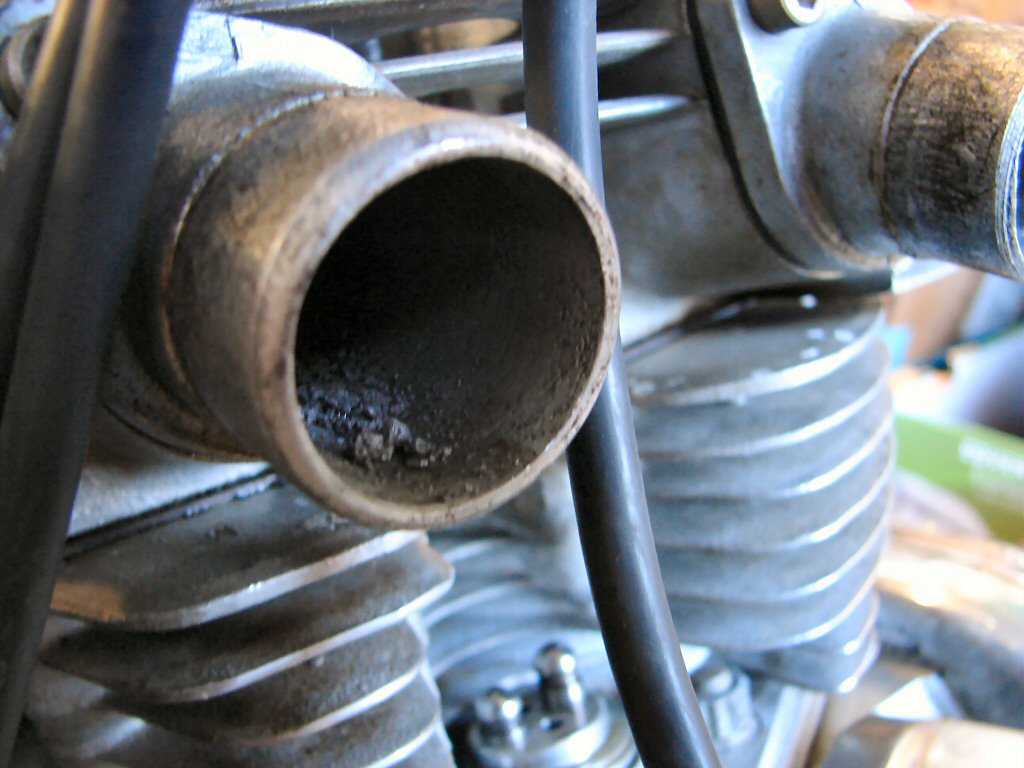
It arrived back here yesterday and all I have done since is to remove the spark plugs for a look. I was happy with their recent fuel burning habits, but there was some foreign material stuck to the earth electrode on the middle plug, which I only really noticed when using the macro setting on the camera to take this picture.
That led to me running a compression test just to see if anything was at odds with anything else.
Sure was.
The middle compression was absolutely zero, and with the aid of a small torch looking down the spark plug hole I could see a hole in the crown of the piston which looked about the size of a 20 cent piece. In fact, I could see right through the hole to the top of the conrod and the gudgeon pin, which is a pretty huge event to have taken place so quietly.
There are no signs of heat trauma indicating lean mixture, no colouring of exhaust headers, and the Trispark would tend to ensure that all cylinders are timed to the same degree, so the only thing that currently makes sense is that the piston was in some way compromised. The fun shall begin.
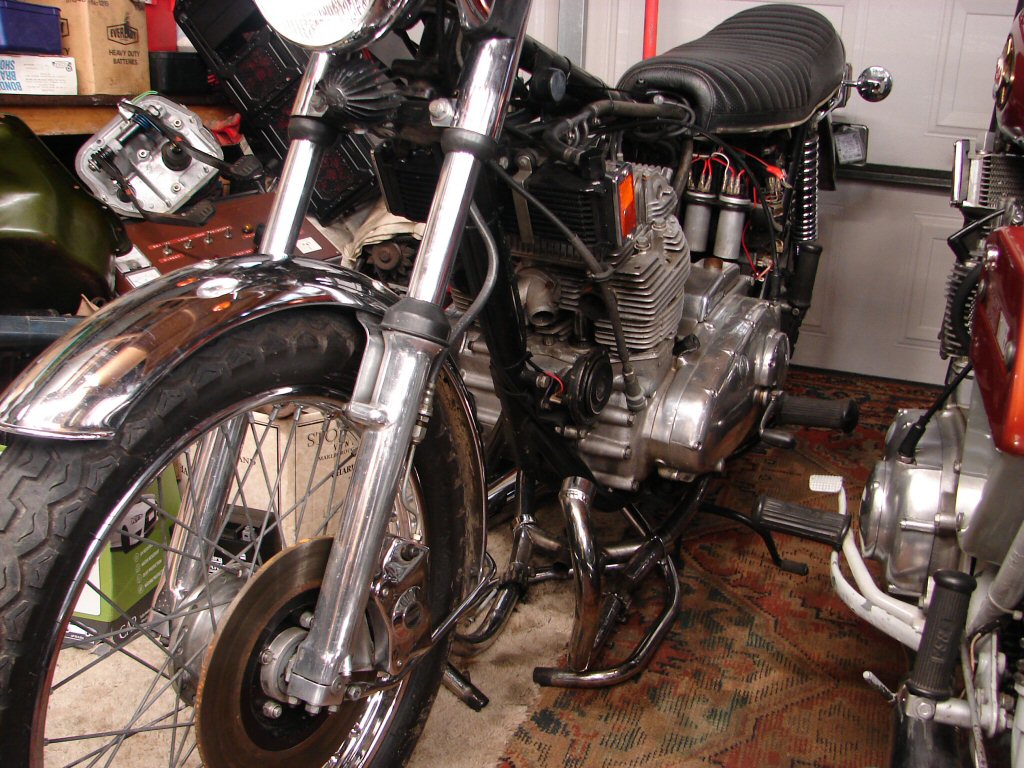
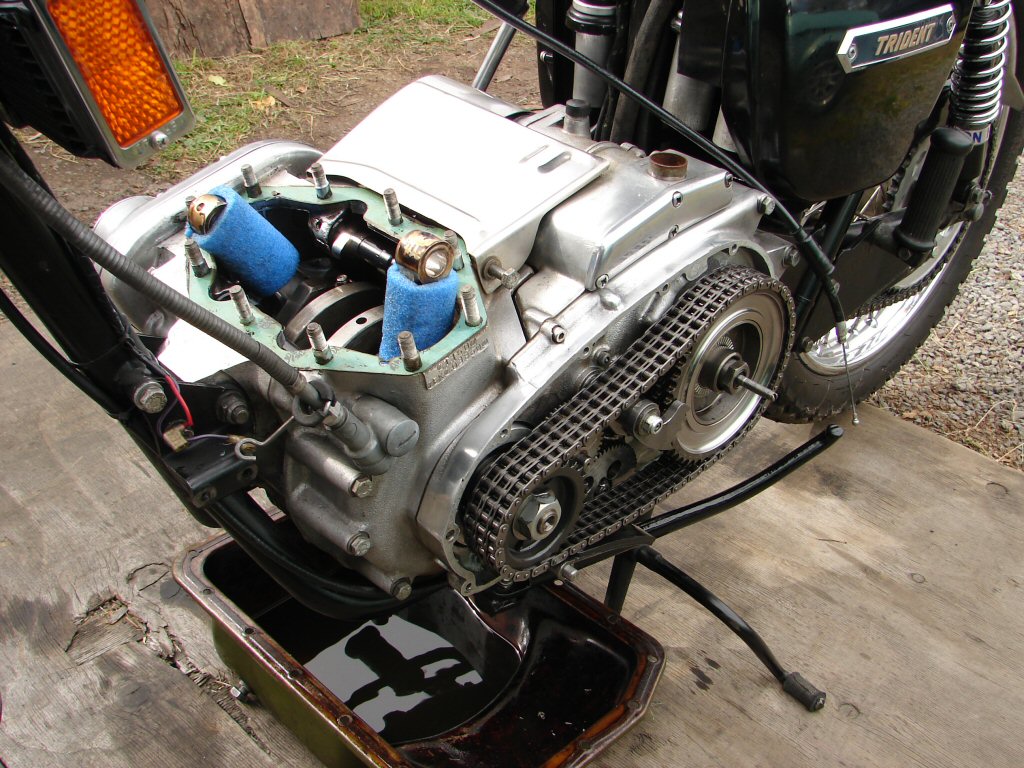
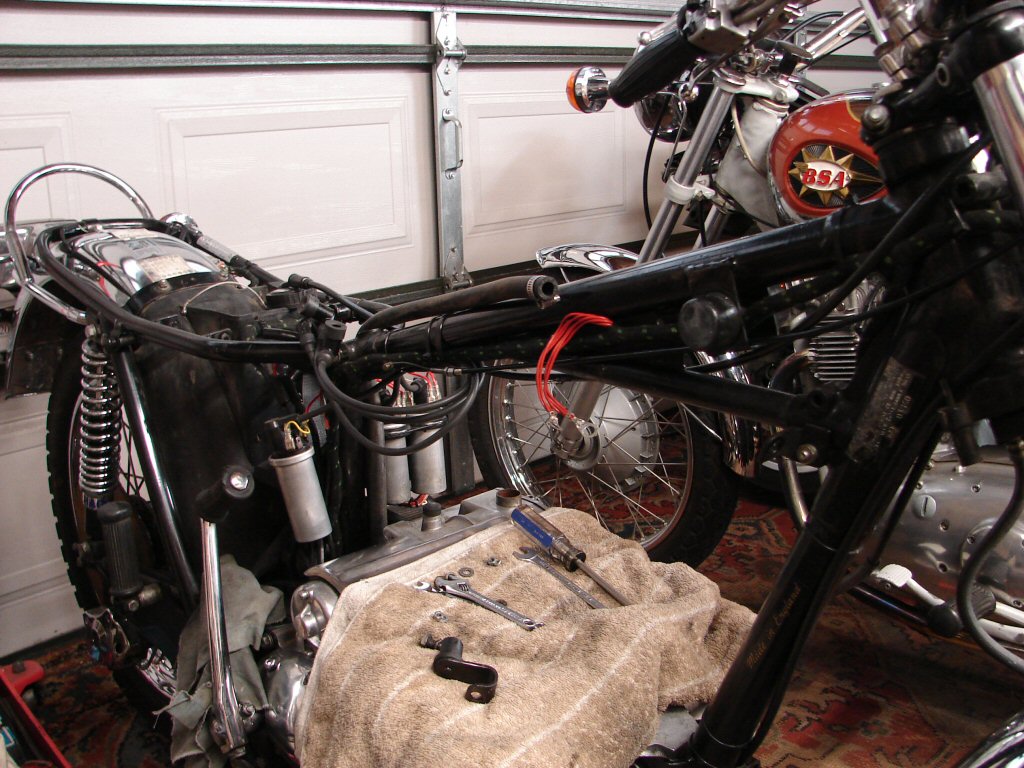
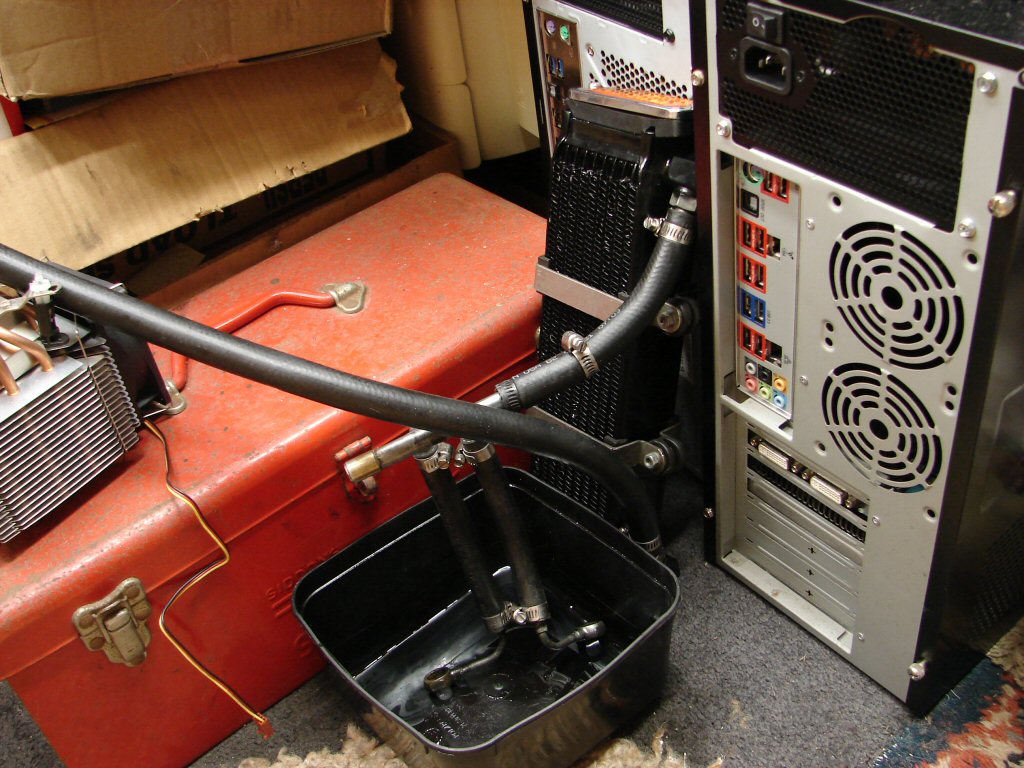
And it all begins to come apart. Tank, exhaust, carbs and filter, blah blah. And yes - it is taking place in that amount of space right now. This bike is potentially going to take root while awaiting any form of machining, so it gets to be at the far side.
Happily the beautiful blue Commando is leaving in the morning so things will get a reshuffle. On fine days I push several bikes outside, so it is not normal to work in a micro-space like this, but I am keen to make progress and to find out all there is to know.
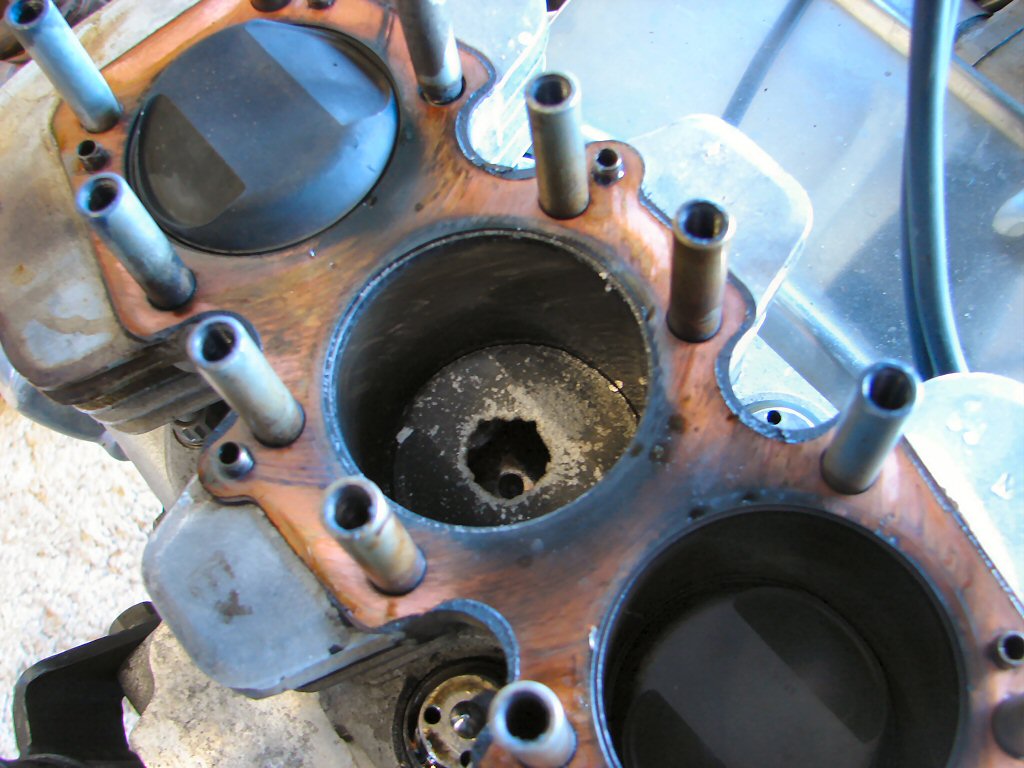
I am of course hopeful that this will only be a top end intervention, in which case the engine stays put in the frame, but it will require a very comprehensive internal cleanup. For example I found alloy crumbs inside the middle inlet manifold, as the valve overlap causes a certain amount of combustion gases to be pushed out the inlet valves before they close, but it is the interior of the crankcases that are of greatest concern. The oil system and tank will get close scrutiny as well.
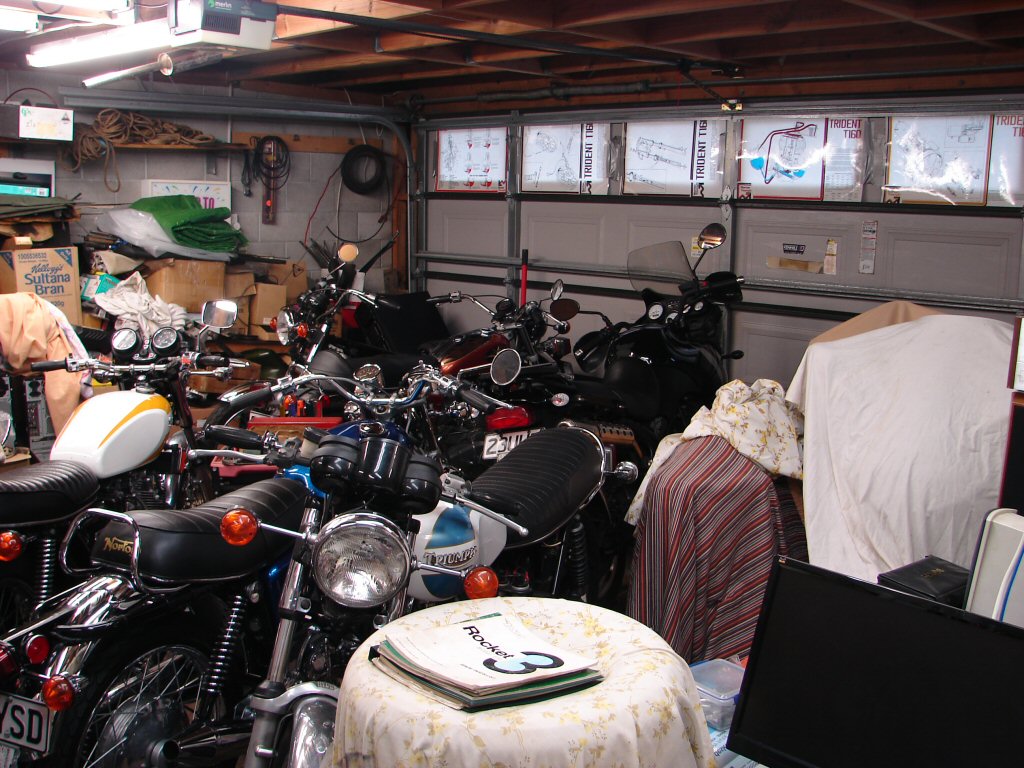
The shed was at maximum capacity several bikes ago...
I figured I should get a pic of the crumbs in the inlet manifold. There are actually a number of quite large fragments sitting in there considering the amount that is missing from the piston.
It will be interesting to see how much visible debris is inside the crankcases, beginning with removing the sump plate. The main concern would be fragments in the main bearings in the outer cases, so they will get the most critical inspection.
I will drain the oil from the primary chaincase and see if any bits have made their way that far. The engine only ran for a short time after the piston failed, so here's hoping the environmental impact is local.
Well, we are definitely going to need a new piston, but apart from that I cannot tell yet. The pistons appear to be standard, so we will measure the bores and see if they are good enough to remain as is. The problem is that we can only buy pistons in sets of three, so if there is any doubt at all about cylinder wear we might as well move to the first oversize.
While not leaking to the outside world, the head gasket appears to have been under stress, although that may have occurred before the rocker box base gaskets were replaced as the head tension was loose at that time. Because there are no signs of lean running on the middle cylinder we are looking for any other factors which may have influenced the death of piston #2.
I was talking to the Norton owner today and remembered the story of a mate who holed two pistons on the same cylinder, one on the way to Beezumph and one on the way home. He finally discovered that the carb on that cylinder had a flaw in the body casting which would open up when it got hot, allowing too much air in and causing this very failure. Nothing can afford to be ruled out at this stage.
I don't think that the head will be too badly effected, as alloy is soft, especially in its molten state, so getting trapped between valve and seat would not likely cause any serious damage. However, all these parts are an unknown quantity, as I have never been inside this engine before. Thinking about it - as you do - I will remove the centre conrod seeing I can undo the big end nuts via the sump plate, and that way I can eyeball the big end bearing shells on at least one journal to ascertain their current state of wear. We might as well find out everything we possibly can for the least disruption.
I would observe that the signs of combustion leakage around the immediate edge of cylinder and gasket can be symptomatic of cylinder liners having dropped in the block. It would not be difficult to surface grind the barrels if so, but as we are looking for some weirdness like air being drawn past the head gasket or something similar we cannot risk missing anything that would cause this happening again.
Rest assured that the fuel delivery system to the centre carb will get a colonoscopy to say the least. They don't like it up 'em...
So I did the fuel bit, drained the float bowls, checked all the banjo filters, slides and needles, removed some grit from the centre carb engine side but the rest was clean as and nothing untoward. I sat the tank on the bench and ran some fuel off, both taps great flow, checked the fuel cap breather holes and both fine. Nothing I could even point a blunt stick at as being slightly suspicious.
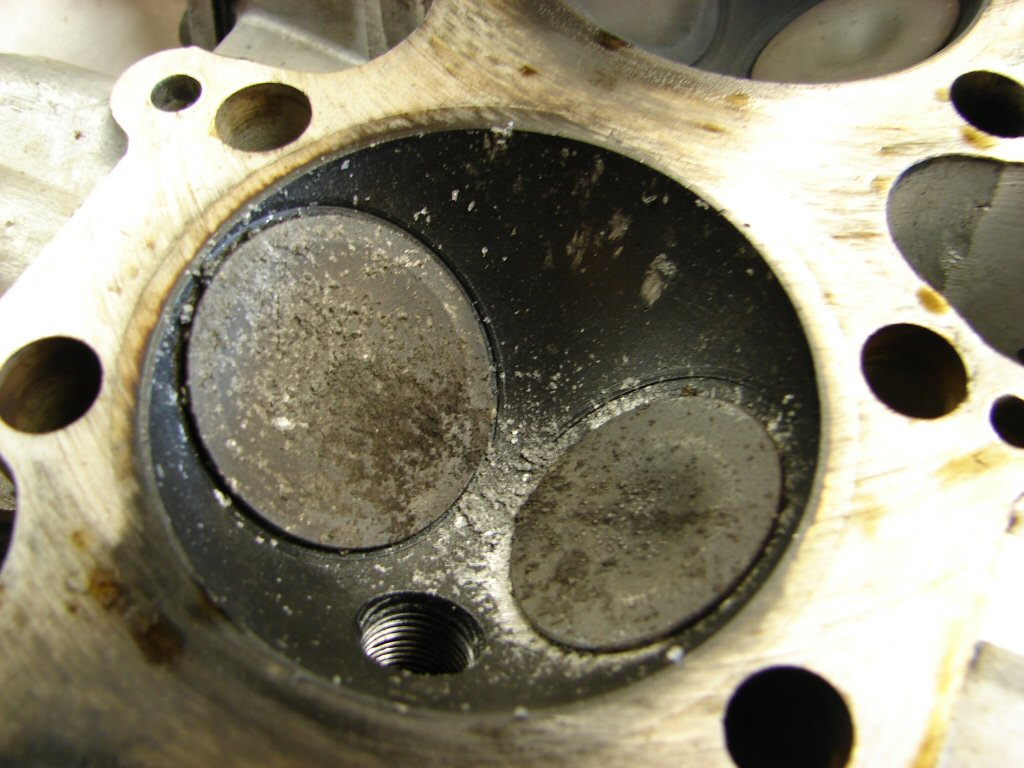
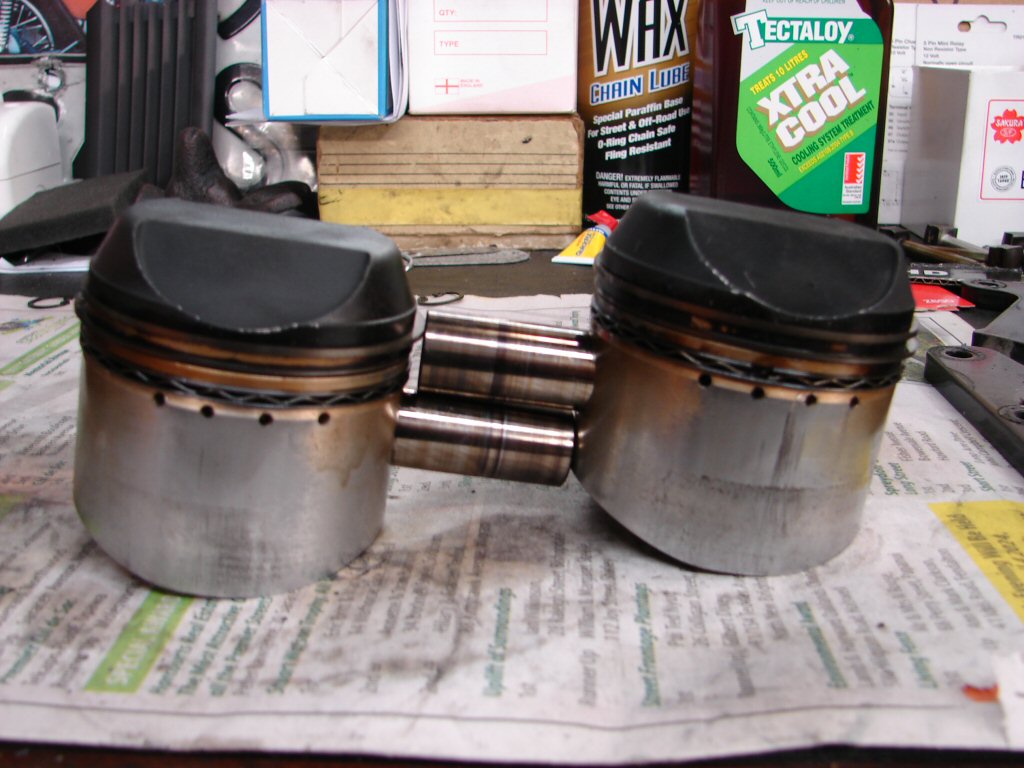
So I ripped the barrels off. The phone rings a lot at times like this, for no apparent reason. A few things of interest were found, notably that the bore of the centre cylinder looked in really good condition, whereas the timing side bore had a number of bad score marks which were deep enough to accommodate a fingernail. The liners while not sitting noticeably above the block surface were neither sitting below it. Perhaps surfaced at an earlier time.
One of the pillar studs had unscrewed itself to some extent, even though the head bolts came out freely, and there is a visible compression leak across the head gasket just to the right of the loose stud. The right cylinder had a slightly lower compression test than the other two cylinders prior to me working on the rocker boxes last time around, so possibly this was a symptom of the loose head when the bike first arrived. The head gasket looked like it had seen a lot more miles than since the last engine intervention before I met the bike.
The pistons have factory part numbers and as such appear to be the original standard ones. Even the rings look like early type, with a very narrow second ring. While the remains of some cross-hatching can be seen in bores #3 and #2, it does not look fresh, and the rings look like they have seen a fair amount of service. I have seen some fairly old bores still showing signs of honing in the past, so its hard to say if any recent work has been done in here.
The gudgeon pin is a bit tight in the centre piston, so I will take the rod out with it still in place so I can heat the piston to make that a friendlier task. I can understand the piston being a bit distorted after its trial by fire, but the conrod needs to be the main concern during this process.
The colour of the base gasket tends to suggest it is a newer type than that used by the factory. Someone has been in here before, and the absence of matching score marks on the other side of #1 piston makes me wonder if it may have been previously replaced.
The inside of the crankcase looks remarkably clean from the top, so I will be keen to see what the sump filter looks like. I have left it draining overnight. Next job will be removing the centre rod and a good look at the inside can happen then.
As we have to buy a whole set of new pistons I doubt I would want to put them in these bores, and I am leaning toward a minimal rebore. A few measurements will throw more light, but I felt that if anything the pistons almost felt a bit too tight in the bores rather than loose when I worked the barrels off.

The minimum oversize pistons available are +.040" and there are not many stocks left. I have no doubt that the bores will clean up at this size so they are ordered and as soon as they arrive they will head off to Glen for the cylinder rebore. The taper at the bottom of the bores will also be smoothed a bit to allow easy fitting of rings into bores. The cast oil rings used these days are very brittle and must be handled with great care.
So all the pillar studs came out, and very easily I might add. Certainly not as tight as I would fit them, and one had unscrewed itself during the strip. The oil drain dowels are also removed and checking with a steel rule does not show any sign of the cylinder surface not being flat. All good news.
The two outer pistons got their tops cleaned and they are both factory originals, so if any were previously replaced it would have been early in the bike's history. I will take everything to Glen and see if he has any ideas as to what the cause could have been. I guess he sees a lot of air-cooled pistons...
While the sump filter was pretty cruddy it cleaned up well, and there was only a small amount of fairy dust that had made its way through the gauze. That gets carried by the return oil back through the cooler to the tank, so I intend to sacrifice a bit of clean oil on the first run by pushing it through the cooler in the reverse direction in order to give it a good flush. The oil tank will get a clean as well.
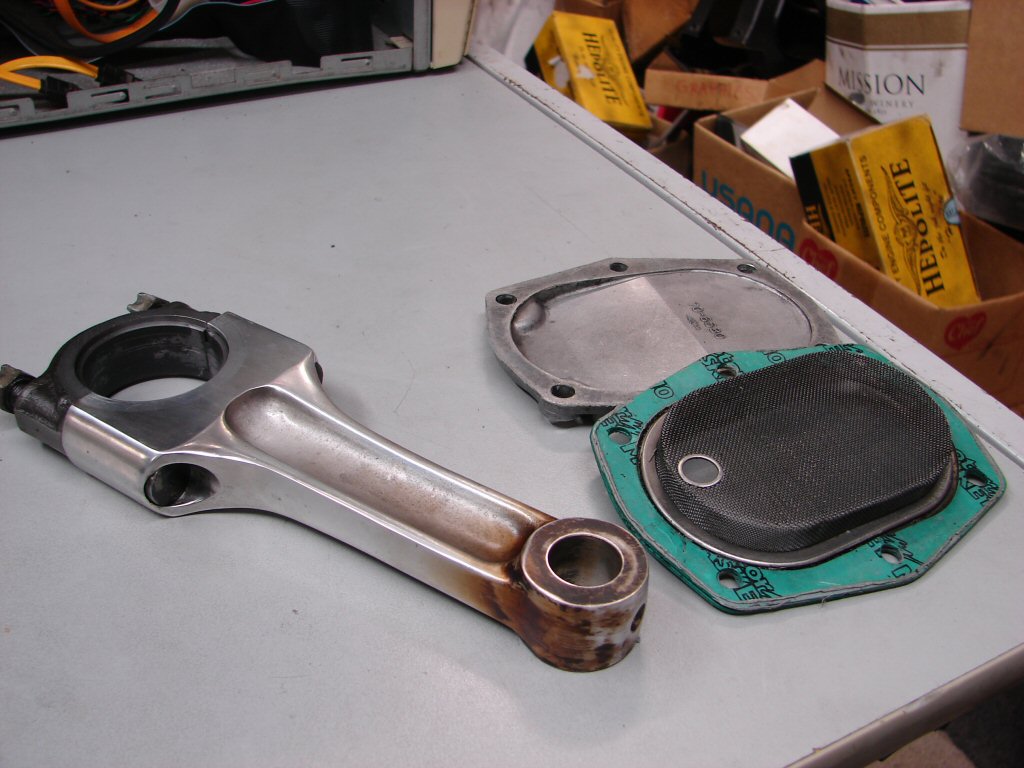
The conrod looks very good considering, and this is after only a mild clean. I will polish it to remove any small scratches before it goes back, but I am happy with it and the little end bush is a perfect fit on the pin. I did have to clean the oil hole on the top which was understandably full of debris, but that was it.
The big end shells are still the factory original copper/lead items, and as such are the best that could be in there. All three rods felt to be a good firm fit on the crank, echoing the oil pressure readings I got during the bike's first visit.
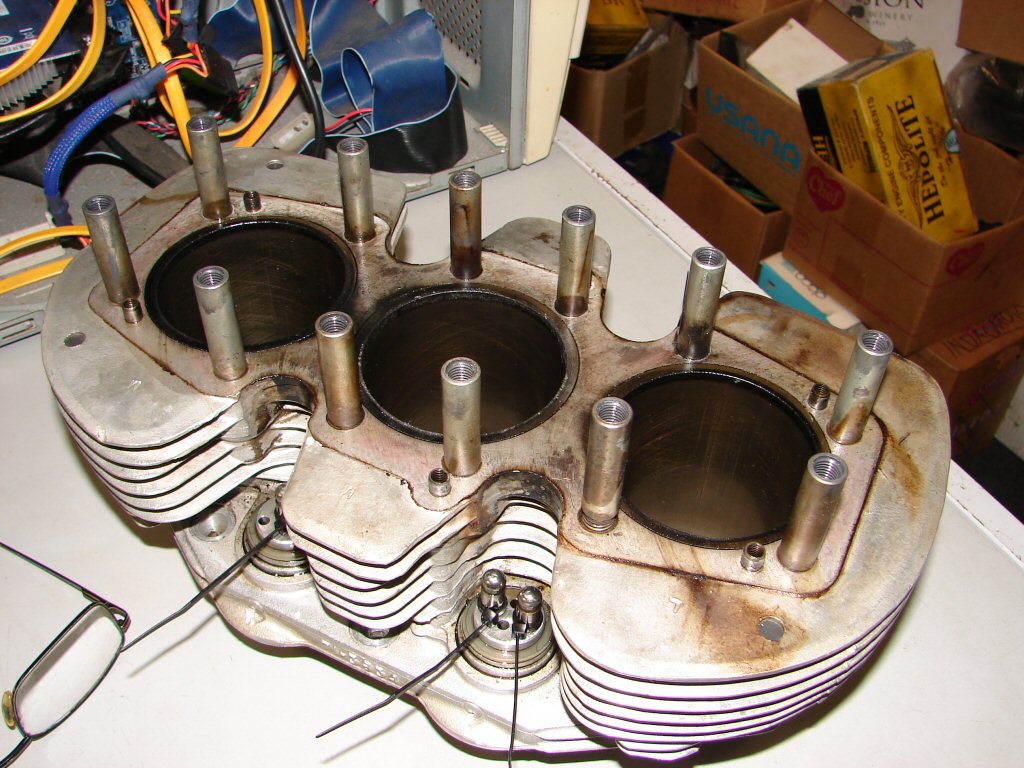
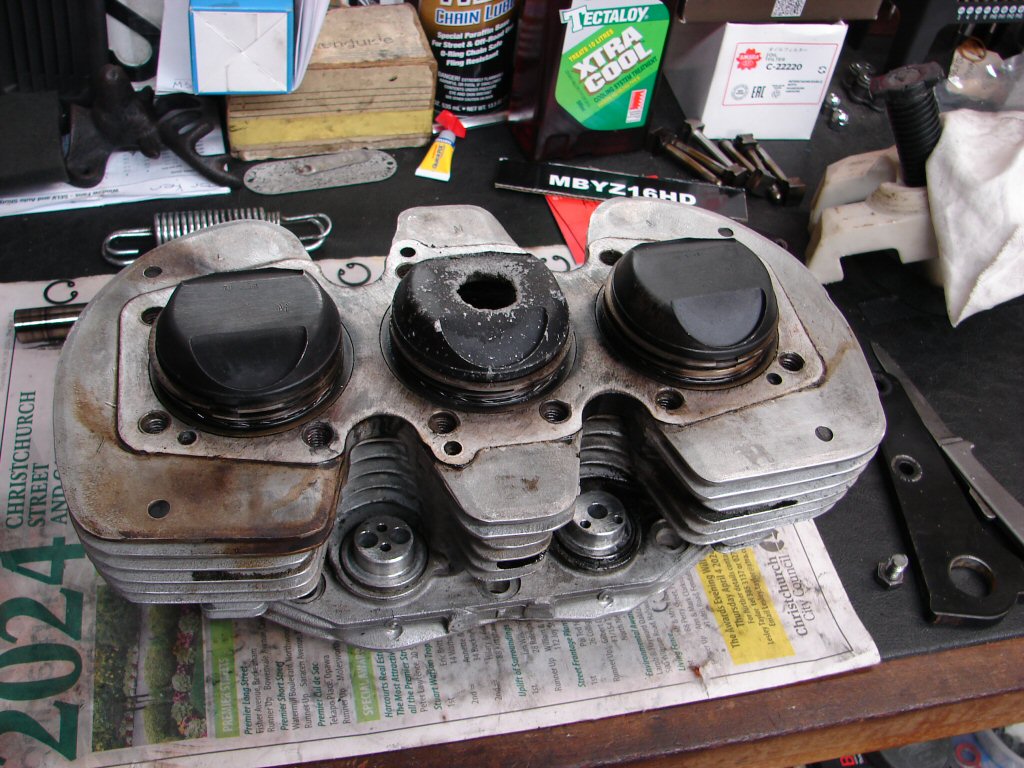
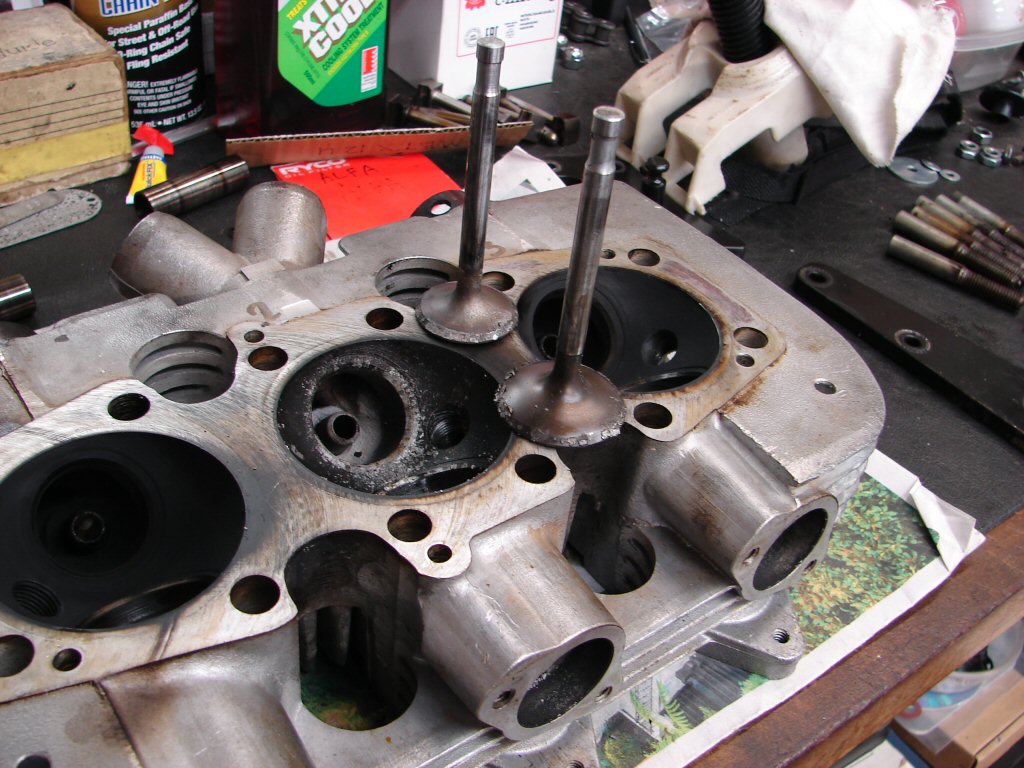
The head will be going for treatment with the cylinders, so the valve gear all came out in preparation. There is a lot of alloy spatter on the valves and seats which will need careful machining, and if necessary the rest of the valves and seats will be lightly reseated also.
As the head will likely go in the engine bath I always remove the inlet stubs in order to preserve the gaskets and thermal insulators. Suddenly we have a potential suspect. The stub allen screws were not very tight. The loosest was in fact the centre one, so could it be possible that there was air getting sucked in here when it got hot. The centre one is going to be the hottest, so it can't be ruled out. Obviously I shall not be giving it a second chance...
Today all the stripped parts went off to Glen along with a new set of pistons. He did not have any other opinions on the cause of the meltdown, but agreed that an air leak at the inlet stub would have a greater effect than one in the carb.
For a change of pace I stripped the carbs themselves when I got back, checking every jet including the removable pilot jets on these premiers. Those fitted are 17 and were all above board. When having trouble tuning this bike back in April I tried fitting the richer pilot jets to see if it helped, but it seemed to make matters worse so these stayed.
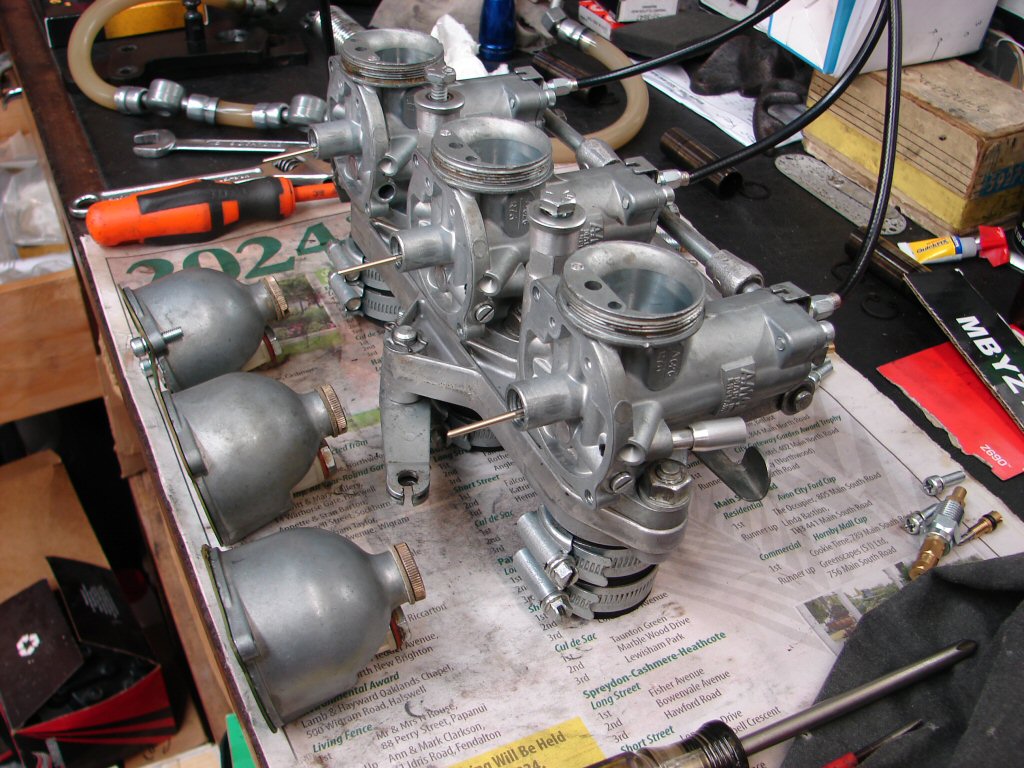
I also loosened the carbs on the adaptor to make sure that the O rings were fitted between each carb and the adaptor, but all were present and correct. The needles were all on the same setting and the needle and main jets all the right size and clear.
But I did find a problem. Three problems really, the same one on each carb.
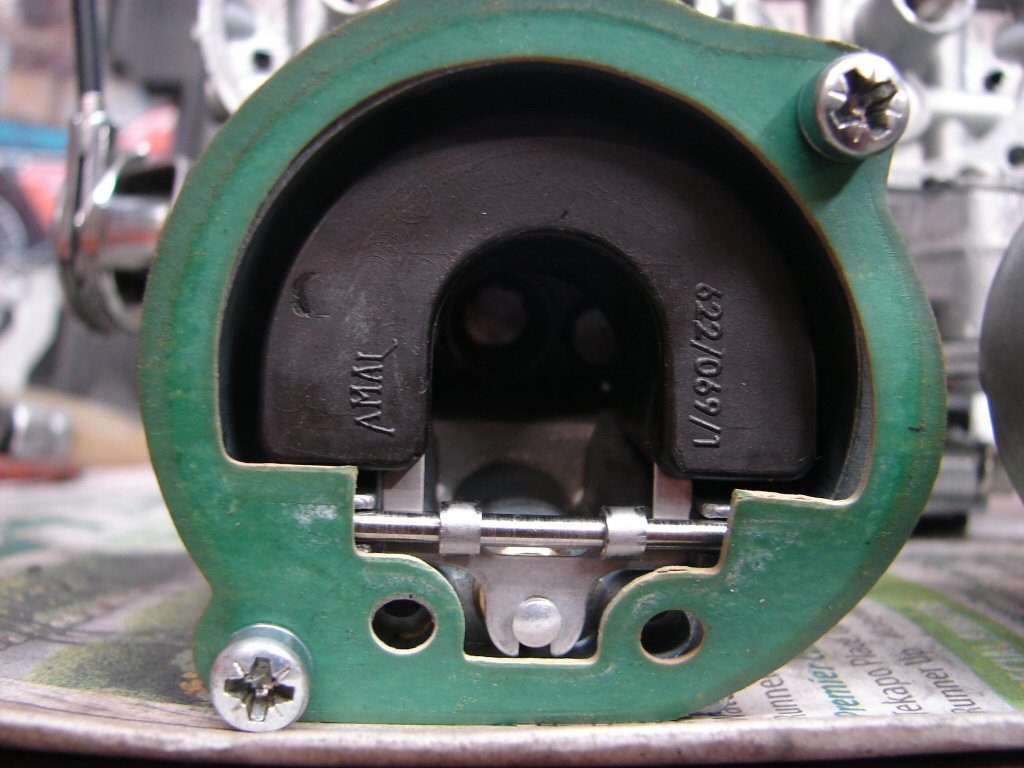
The float bowl gaskets are badly trimmed, such that the two flat edges at the lower sides protrude far enough into the float area that they collide with the lower edges (in this photo..) of the float, preventing it from rising far enough to completely operate the float needle. This would likely cause occasional unexplained flooding, so I can't blame it for melting a piston, but it was certainly problematic. They all got trimmed with a sharp blade.
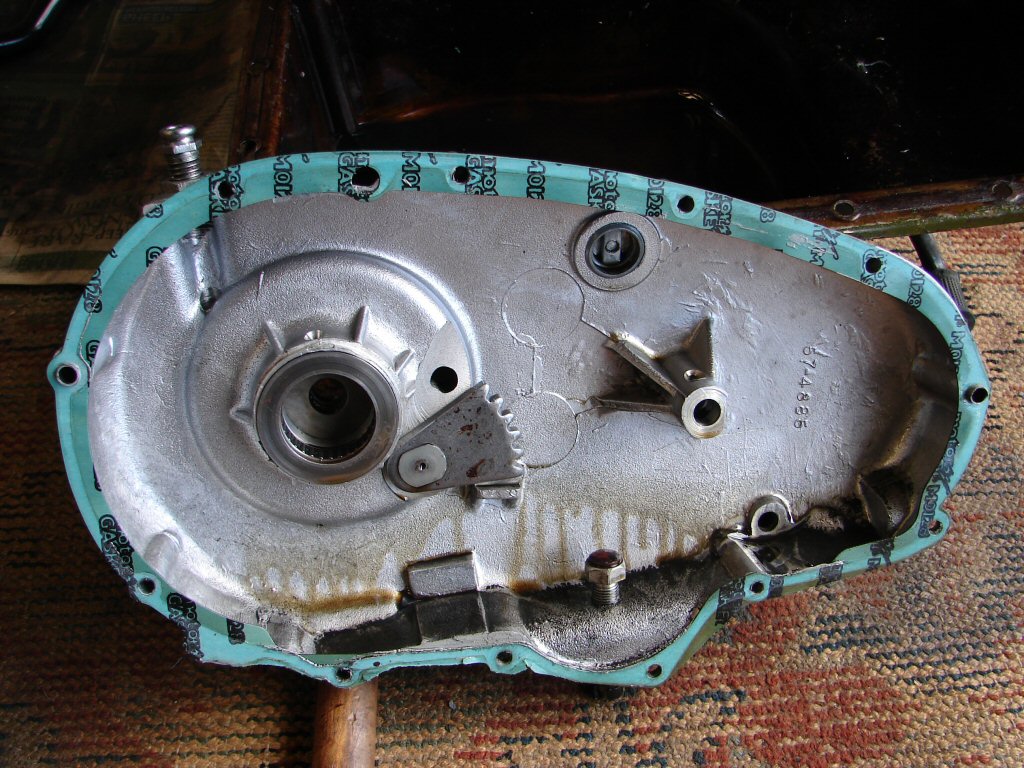
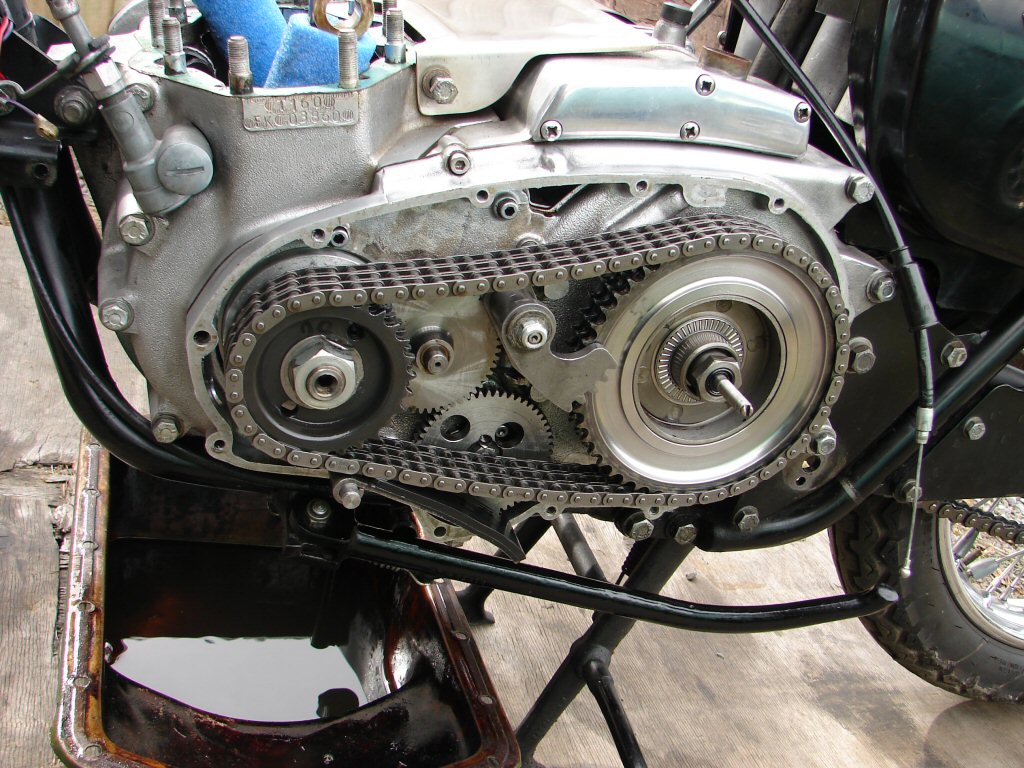
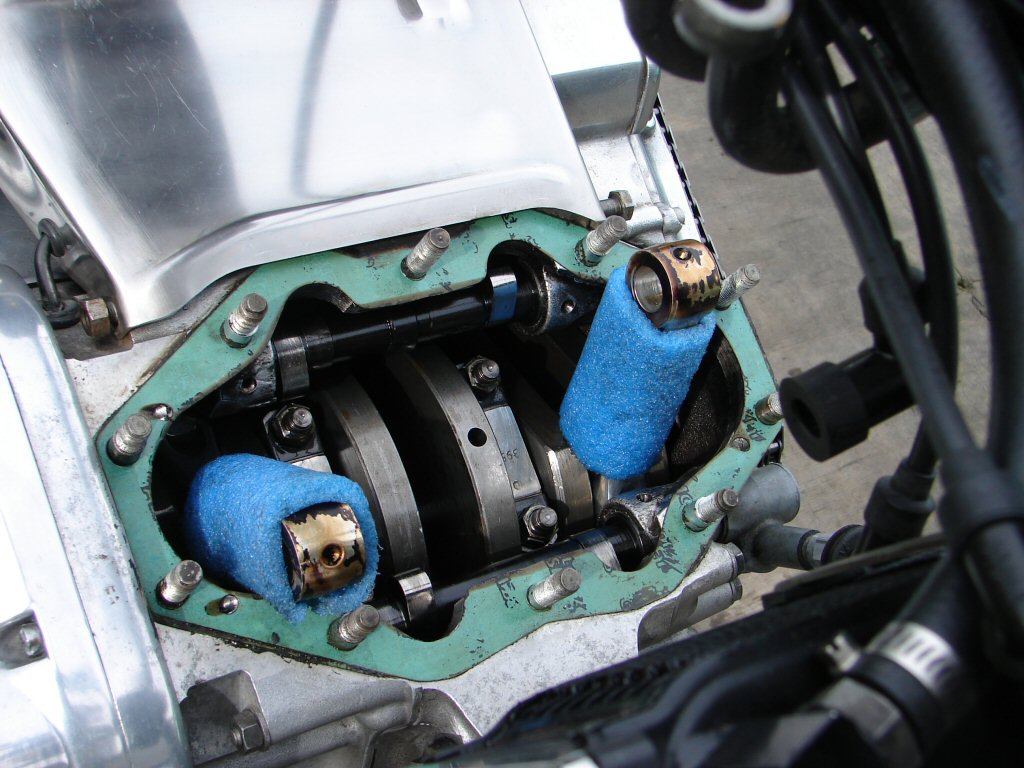
The primary cover was to be removed for several reasons. The clutch had become unadjustable of late, and I wanted to flush WD40 through the main bearing into the crankcase to displace any debris that may have travelled in this direction.
As can be the case, there are often things that come to light and need attending to at the same time, if for no other reason than to shift them to where they really should be so I can work on what I need to. Initially the footpeg retaining bolt was obscured by the speedo cable which should not have been there, and which had also run foul of the drive chain, so that got relocated first, and led to adjusting the drive chain because it needed to be.
I had previously spotted that there were new gaskets fitted to primary cover and clutch adjustment cover, so I figured work had been done there. It was reasonable to assume this might be related to the clutch cable adjustment issues.
Voila.!
The clutch pullrod locknut has fallen off so the clutch has become self-adjusting. Or not. At least this explains one problem and it should be a cinch to reassemble it in a happy and workable fashion. I am using positive words as I wish to deflect the finding of any other nasty variables - like a seized clutch bearing...
Working my way around the primary cover removing the fasteners I was stopped by something not looking right.
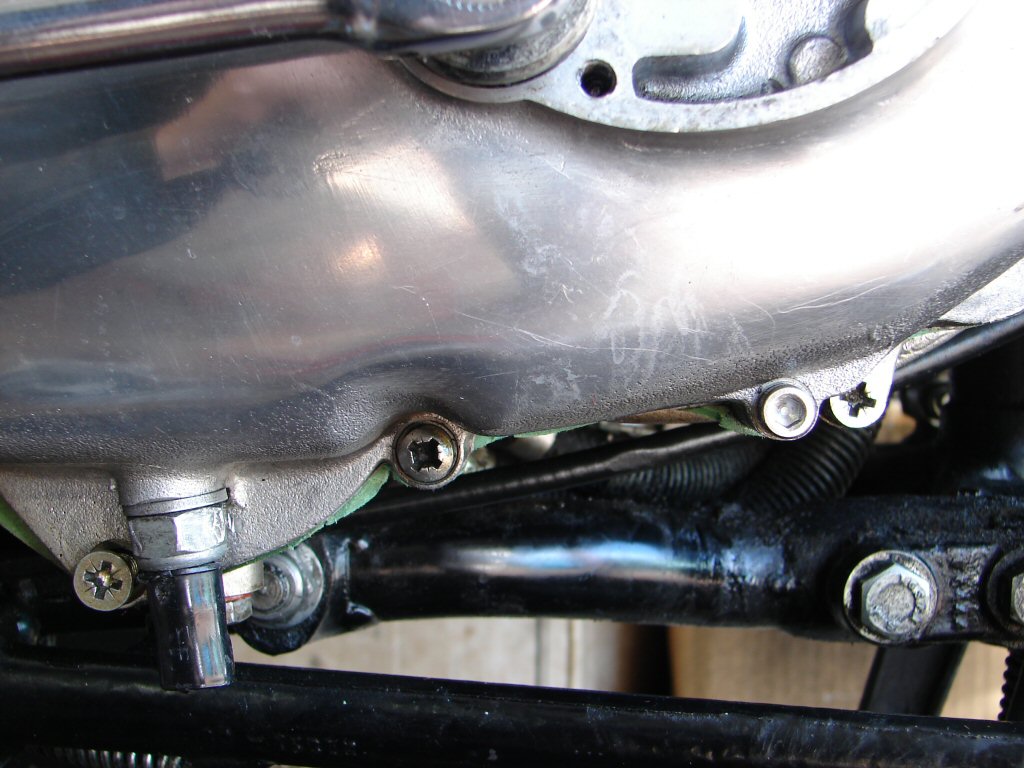
I don't give a toss if folks think I am obsessive, but it is just the visual appearance of things that catch my eye and seem "off". It was quickly identified. The T160 primary cover uses a number of contersunk head screws, and one was not where it should be. Instead there was a conventional screw in its place, which suggested that it may have been swapped for a specific reason, or a mistake. Obviously the answer was that it had been fitted to the inner primary cover instead, a bit further right.
Ok - it is no earth moving error, but attention to detail is what makes these bikes good or bad, and it is hard to think why a countersunk hole would not prefer a countersunk head screw, and vice versa with a conventional threaded hole nearby.
Always makes me wonder how all the locking tabs and big end nuts are assembled...
I was extremely pleased to find a total absence of alloy particles in here, although there was quite a lot of carbon deposit resting in the outer case, presumably from the escaping combustion gases. Would give the impression that the meltdown may have been initially much more gradual and over a longer time period.
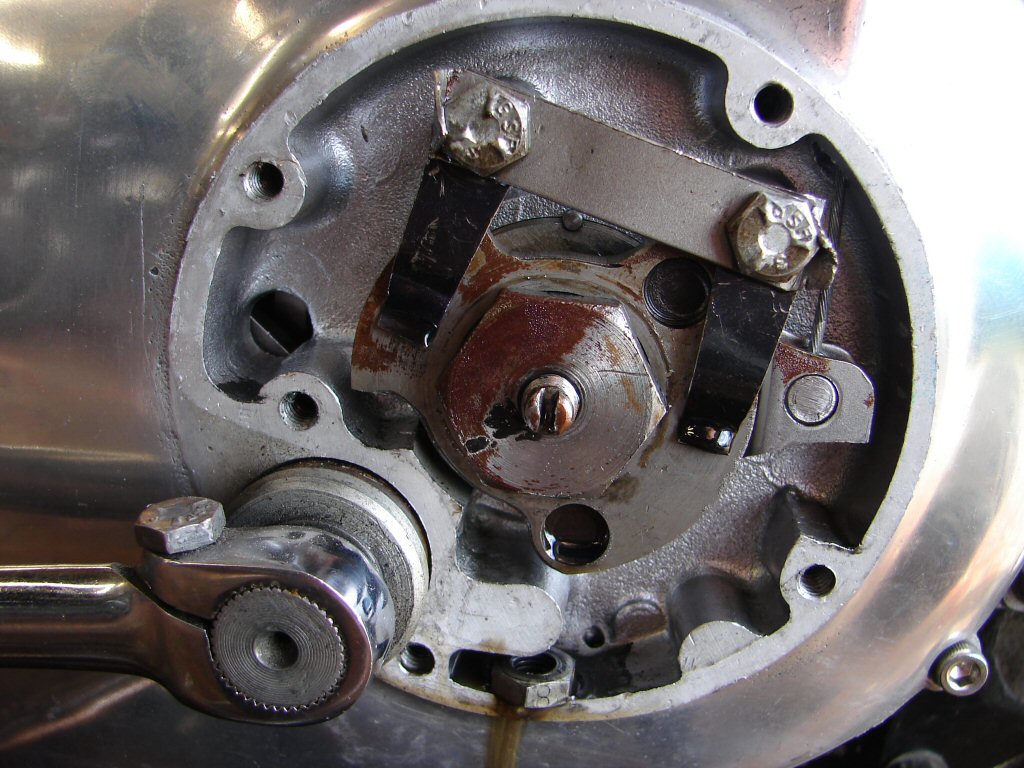
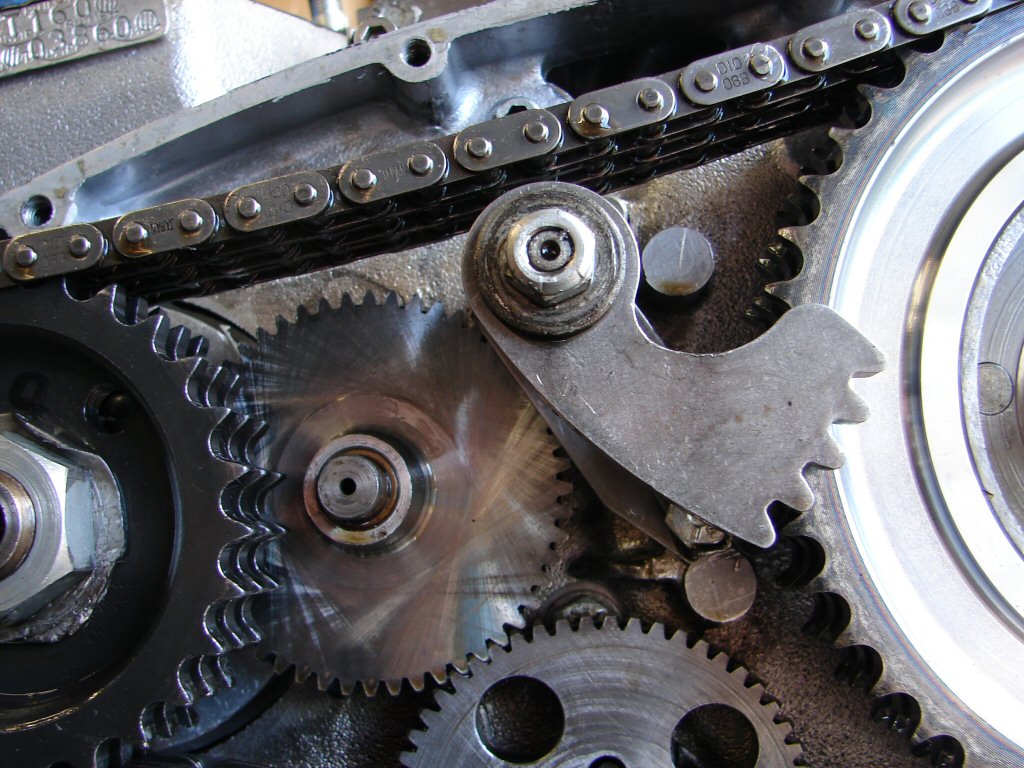
I had been recently told that as a part of the previous work done on the engine, a triplex chain conversion had been fitted. It surely had, and everything looked nicely made and well fitted - except for one thing...
The timing of the cross shaft for the left side gearchange can be a finicky process, and this one is slightly wrong. The first tooth of the quadrant should be positioned above the head of the bolt that can be seen underneath it, so it is one tooth out. I cannot see any part of the triplex setup which would require this to be altered, but the alteration has to be made on a spline at the gearbox end, so it is hard to imagine that it could happen by accident.
I do know that misalignment here can make the gearchange less sublime than it has the ability to be, so if I can't find fault with necessary clearances I shall correct it.
I'm thinking that I will also improve the locking of the crankshaft sprocket nut.
It is the day of the great crankcase cleanout. With a car sump beneath I used two entire aerosols of engine degreaser and doused all and sundry with the stuff. After that I used the airgun to blow whatever was left inside out the bottom, and was very pleased to find very little in the way of alloy scraps got washed out. There had been a small amount around the sump filter when first disturbed, but by far the greatest collection of bits had been what was in the inlet stub.
The overall impression is that the failure took place rather quickly, even though there appears to be no glaring reason as to why it did it at all.
I finished the job off by squirting an entire can of WD40 into the mix, both to collect anything still lurking, but as much to oil everything which had been degreased so it did not get the idea of surface rusting. I will do a bit more by hand around all the cam lobes.
I included the left main bearing in the process, spraying liberal amounts of the degreaser then WD40 through to the inner crankcase. While the bearing still feels totally smooth in use I had found one small particle of alloy in the primary, but it did not look to have made contact with anything during its journey.
As I could not find any trustworthy photos of the gear selector quadrant positioning I decided to sit the primary cover in place with the gearlever foot in its correct position and mark a line on the sprocket. I then used a spare quadrant to mate them up with the cover on the floor and behold, they match perfectly. Perhaps the 50 tooth triplex sprocket is of different diameter to the duplex 43 tooth item, thus giving the impression that something is out of place. I also suspect that moving the spline on the far end only one tooth would probably make too big of a difference, so I will leave it as-is and see how the gearchange feels in use. It may be that any oddness in gearchanging would have been down to the clutch adjuster having done its thing.
A few too many mysteries for me to feel at all complacent right now.
So thats the cleanup as far as I can manage it. Next job will be to complete cleaning the conrod and refitting it, after which I will clean the oil tank filter and the tank as well if it looks like it needs. I intend to get some fresh oil into the engine then circulate it by driving the pump manually. This will flush the oil filter cavity - which was clean when I removed the filter - as well as pumping oil to all the bearings. If I leave the sump plate off meantime I will not risk leaking oil all over the engine from the rocker feed pipes which are hanging in midair.
I am not fond of cleaning shit...
... although I will make exceptions for nice shiny alloy bits.
The rod responded happily and is restored to a thing of great beauty - for those who are involved in the world of triples from a bygone era.
The appearance of the bearing shells is normal for copper lead bearings, fitted from new by the factory but later seceded to white metal which are neither as robust nor forgiving when they wear out, so they are both a valuable asset and a true testament to this bike's low mileage history.
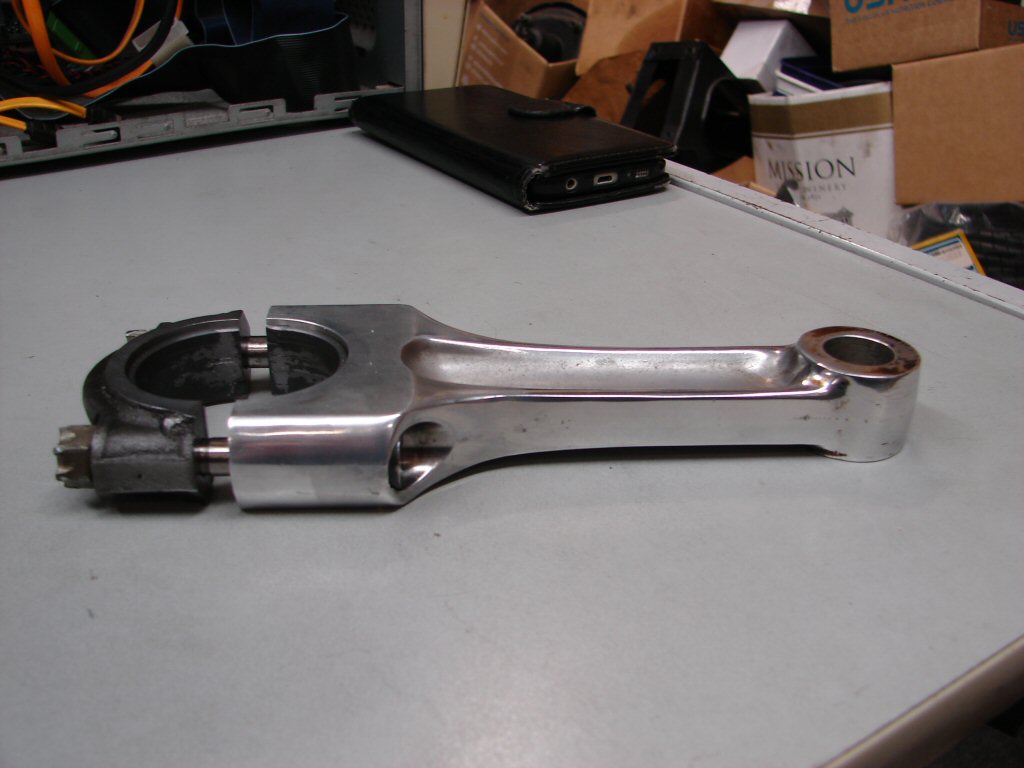
So, not being one to stand on ceremony the rod went straight back in and got torqued up to complete the full set.
While I am hopeful that the missing engine parts will soon return, there will no doubt be a stand down period inbetween now and then, so I shall coninue with the oil tank business and get some oil around the working surfaces.

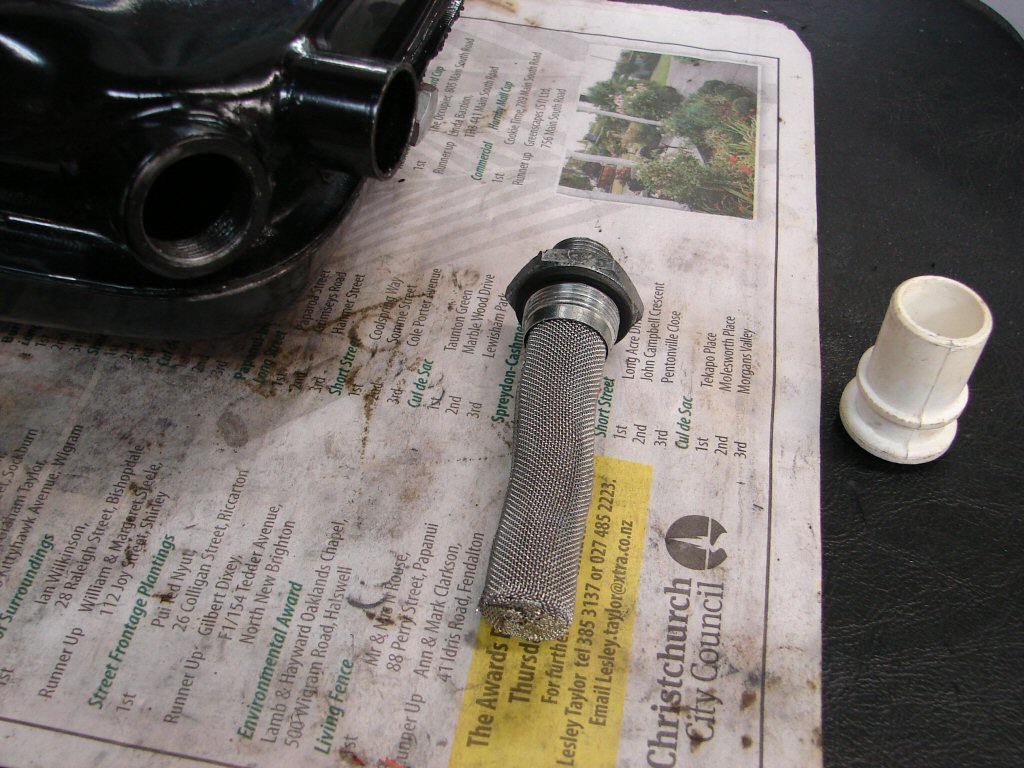
The two oil lines came off the engine and were allowed to drain, although there was no oil from the tank. Looking in from the top there was no sign of oil, so I released the feed line from the tank filter and indeed, the tank had emptied itself while awaiting transport down here.
The lines got flushed with degreaser then WD40 and there were no signs of anything sparkly when examining the runoff. The oil tank needs to come out in order to remove the filter, so it did.
I was expecting it to look a whole lot worse than this...
With the oil tank removed it was looking easier to also remove the oil cooler to clean both it and the attached lines rather than try to do that on the bike. None of these parts put up much of a fight, so the main consideration is which approach is the easiest to control.
Just the absence of these two fairly small items sure make the bike look like a skeleton though, and of course greatly exaggerated by the lack of the barrels and head.
As the oil cooler could now be stood on its end I have left it propped up against a friendly computer while the oil slowly drains back the reverse way from which it arrived. I will later use an airgun to give things a hurry up, but I need it outdoors for such fun.
It will also by then be more conducive to having some degreaser or petrol added to the mix which will help unstick any stubborn mank.
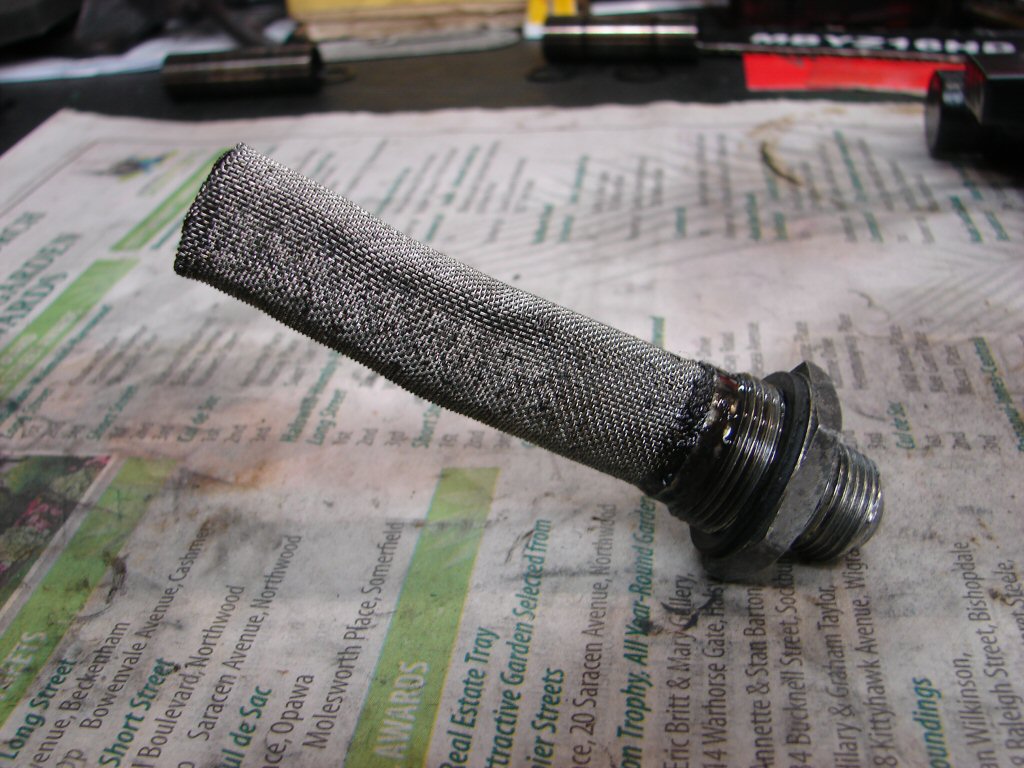
The tank filter cleaned up easily and was virtually free of anything looking like particles of alloy, or anything else for that matter. That reinforces the argument that the entire piston failure happened pretty quickly, but nothing promotes suspicion as to the guilty party. Apart from the slightly loose inlet stubs, the head gasket is the only part so far that looks like it was capable of causing trouble. The loose pillar stud would not have helped, but I am thinking that the gasket was not doing a proper job of sealing against the combustion gases, so maybe that got things started.
Despite giving the oil tank a fair number of rinses with degreaser there are still some gritty feeling tiny bits turning up in the filter threads after draining. I am going to give the tank the petrol treatment as well when the weather allows me to operate outside of the shed.
I found a suitably sized plastic bung that will help block the filter hole during the process.
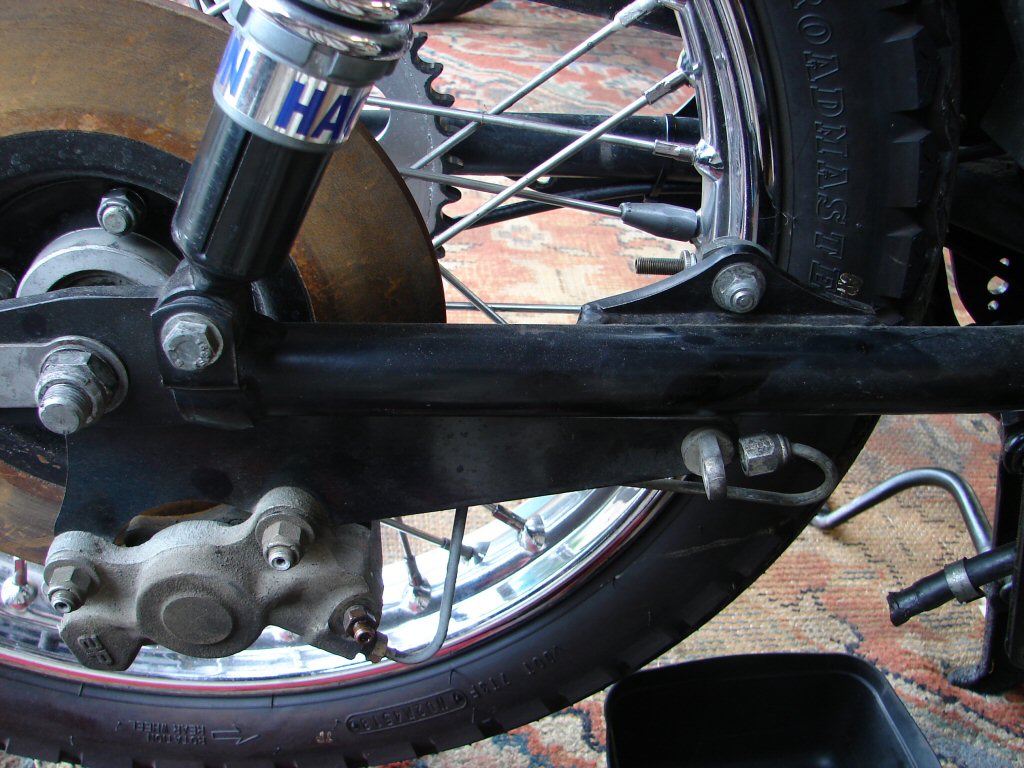
The last time the bike was here I had to address a problem with the rear brake dragging, which was mostly due to the pad retaining pins being wrongly assembled. However, from the moment I heard the delivery guy wheeling the bike down my driveway this time, I could hear the rear brake still complaining. While the oil tank is out the rear brake cylinder is much more accessible, so now is best to look at it before the tank goes back in.
Taking a look underneath it was easy to see maybe three problems at a glance. The obvious fluid leak has nearly drained the reservoir, but the reason for the leak may have been induced by the fact that the cylinder has been mounted wrongly. I have struck this same problem on more T160s than I would like, and it is to do with the fact that there are two spacers used on the mounting bolts. They should actually be under the nuts, as the alloy housing is recessed which makes them hard to get a spanner on. People who did not take care to assemble things in the same order they came apart get the idea that the spacers should be between the cylinder and the frame, so the pushrod is now on an angle which adds side loading on the piston and wears seals quicker. It often also results in the threaded part of the pushrod bending, and although I could not get a good enough look at it in the space where the bike is, it looks as though there could be a bend towards the camera just where the threaded part leaves the rear locknut of the brake lever. The cylinder itself is definitely sitting angled away from the rear footrest plate which mounts it to the frame.
I guess its all going to come off.
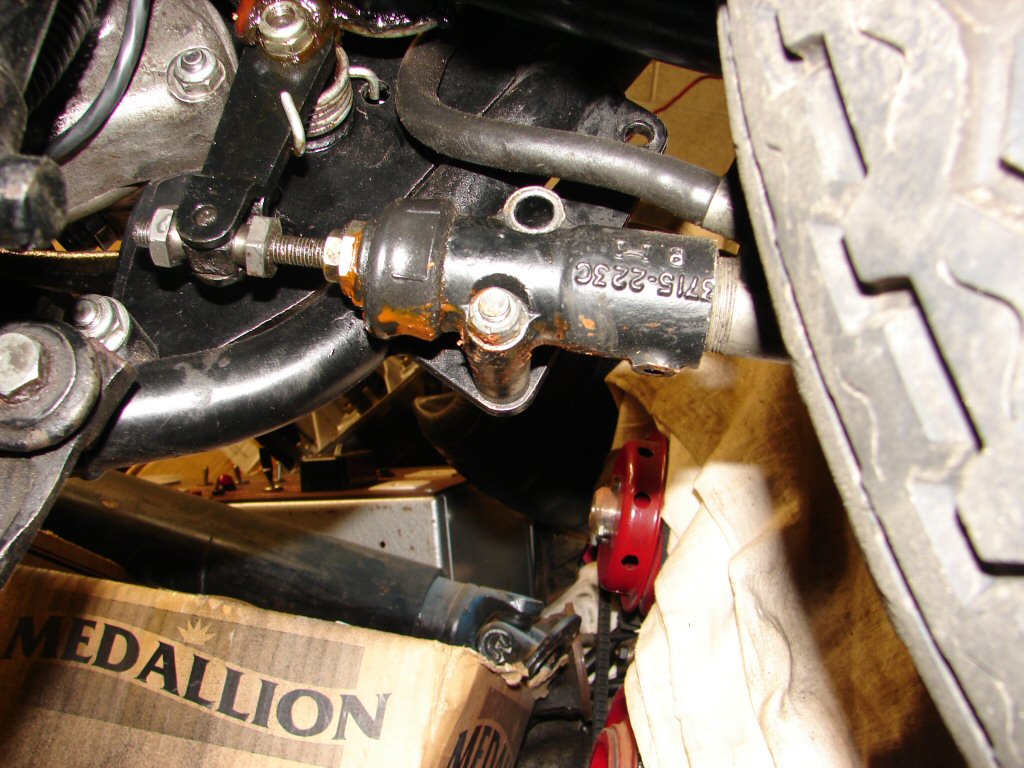
So it did come off, and in so doing it revealed another glaring omission which is perfectly clear in the previous pic, I just was not looking for it. The nut that holds the brake arm onto the footlever on a good day is in fact 3/4 off the thread. So that was also about to become self-adjusting. I figured I might as well pluck the right side engine mount plate off complete with brake lever and footpeg to make things easier on reassembly and to be sure we did not find anything else.
There was some good news. Once I had separated the brake cylinder from the caliper the brakes freed up and the wheel now turns freely, which is a first. No doubt the cylinder has gotten all sludged up and is holding some fluid pressure on rather than allowing it to bleed off. The other good news was that the grubscrew came out of thee alloy housing which holds the brake cylinder, and is often corroded up. Mind you, even though it is out there is no way the two parts will unscrew from each other, so they will need the boiling water treatment on the alloy to make it let go.
'Anything else' showed up when I removed the flexible hose in order to remove the brake cylinder, to find that the swivelling functions of both the hose retainer and its mate which holds the brake anchor plate are seized solid, which means the rear wheel is sorta locked in place and explains why I met a bit of resistance when adjusting the rear chain.
I had tried to bleed all the remaining brake fluid out of the caliper prior to undoing the fluid hose, and what came out was as rusty looking as the brake cylinder stuff, so I am hoping that I will not have to mess with the caliper. The fact that it freed up by itself is a good omen.
My suspicion about the seized bits is that they have been assembled incorrectly, as there are some spacers and springs which allow controlled movement and they will only work when assembled in the right order. Which nothing else about this brake seems to have been...
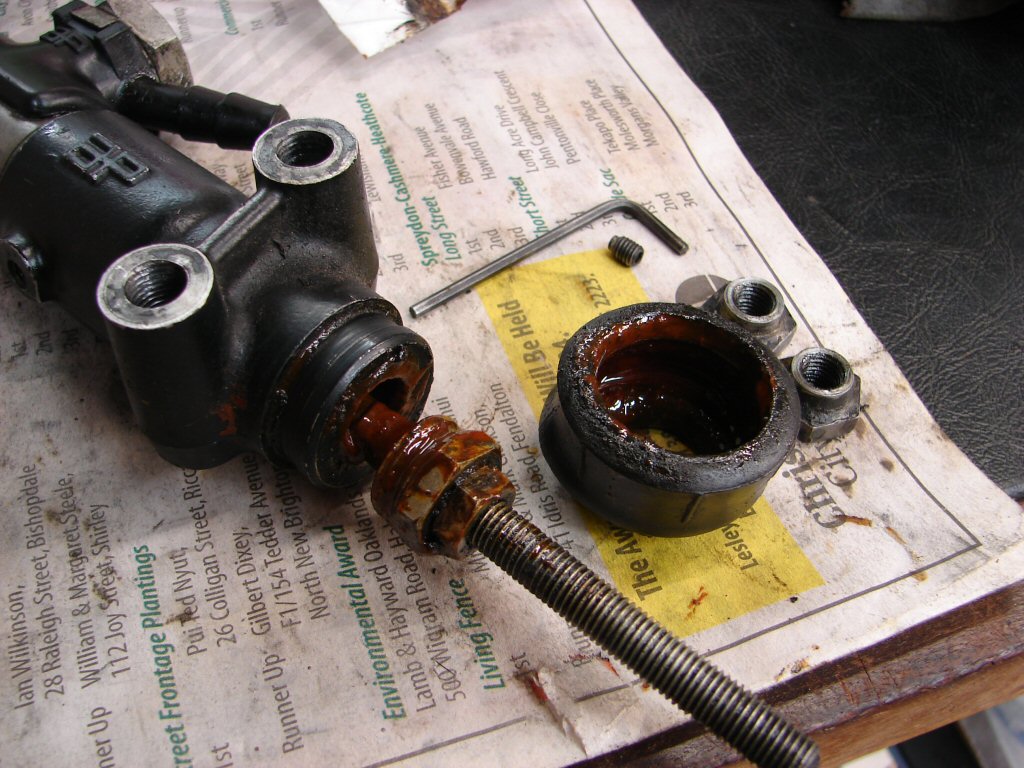
Happily the master cylinder succumbed to the boiling water treatment and the housing unscrewed. I usually describe what lives inside these cylinders as 'tomato soup', and the resemblance is kinda self-evident.
Considering that the orange colouring is in fact rust, it seems rather unlikely that this cylinder will be viable for re-kitting as that rust will have left a few craters.
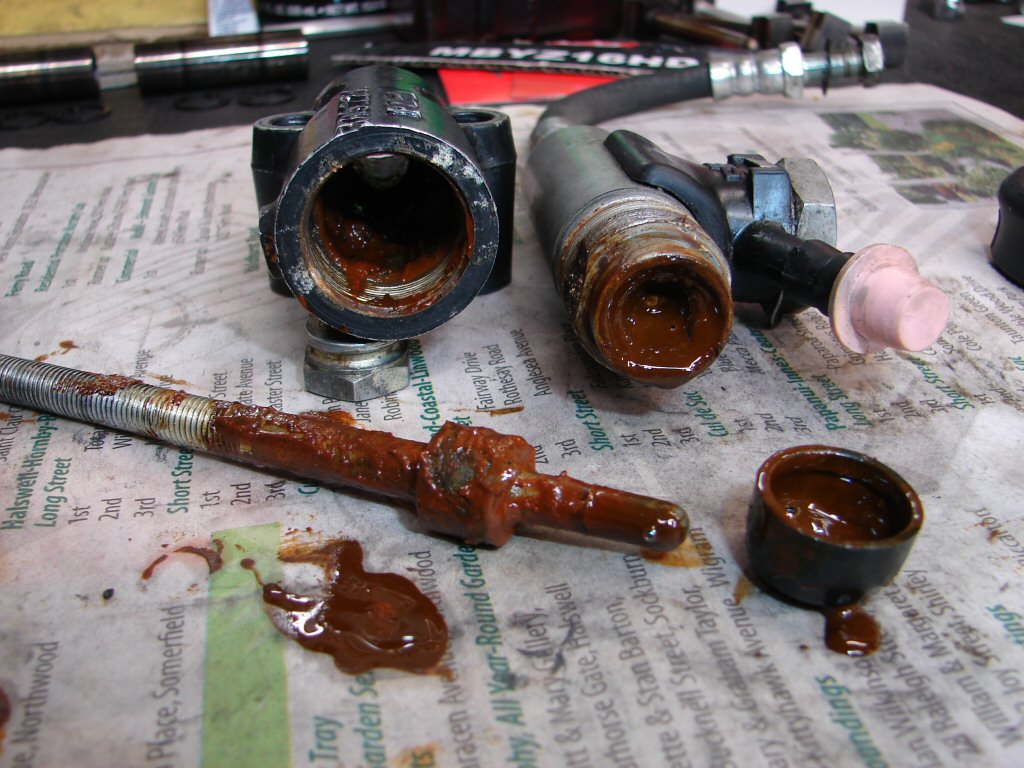
Photos such as this are seldom successful as the light cannot get in while I have the camera stuffed up the gubbings, but the damage is in fact quite visible despite a red herring or three.
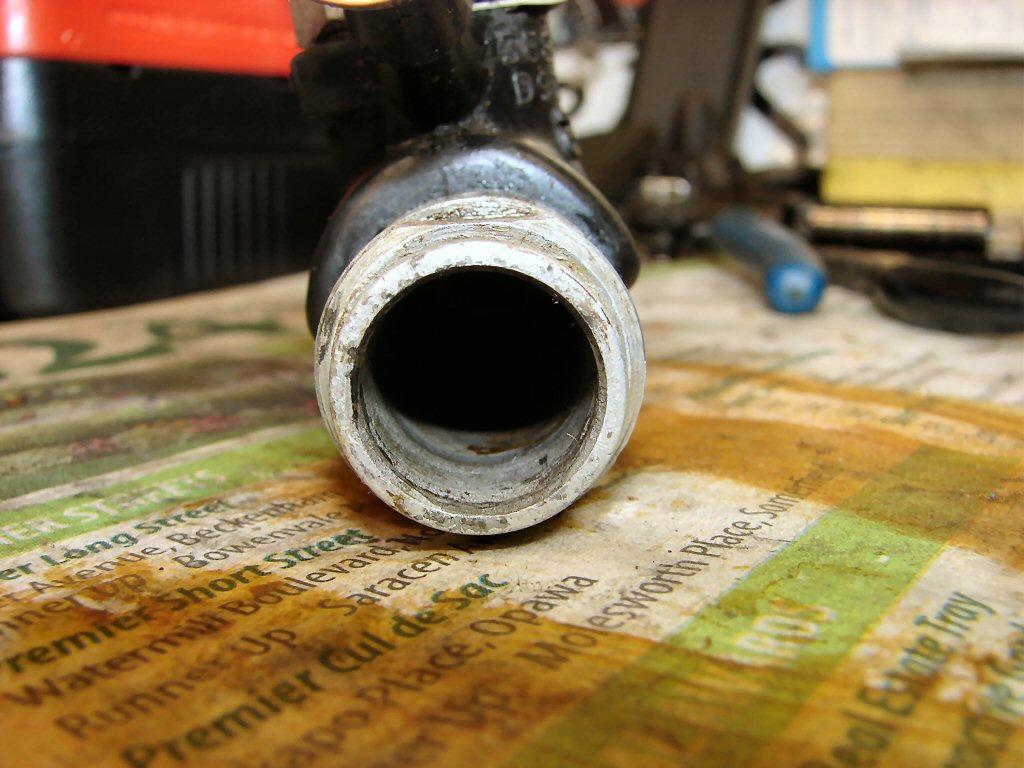
There is a patch of light surface rust disappearing into the gloom back there, but just in front of the rust is a smooth grey 'lake' more than 1mm deep at centre bottom, and this would have to be machined to make the seals work. It is also possible to get the bore of the cylinder stainless sleeved, but considering that the job is about the same cost as a complete new stainless cylinder there is no contest.
We need a new one.!
So we got one.
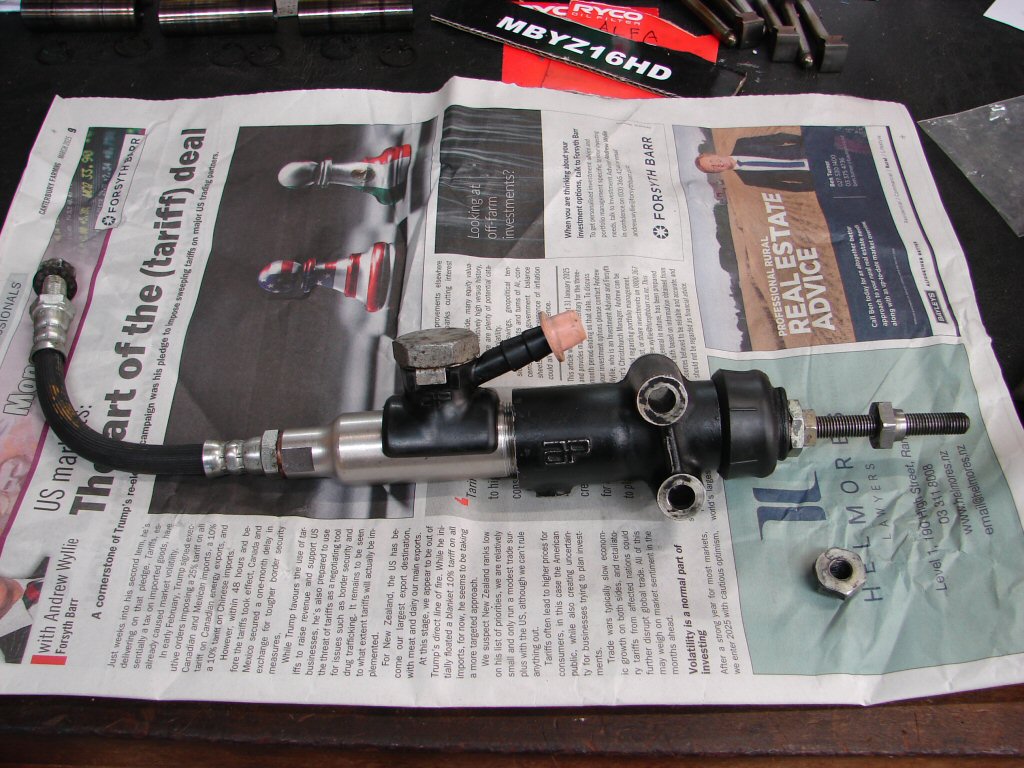
All ancillary bits were cleaned and greased and it went back together a happier unit. When fitting master cylinders to their housings there is a 'timing' process which needs to be observed if you want to be able to bleed the brake successfully, let alone use it. This is done by taking up all the free play between the operating rod and the piston by simply screwing the cylinder in far enough for that to happen. You then screw it in a further full turn, then continue until the grubscrew which locks them together lines up with its slot - you never turn it in the reverse direction at any stage.
For the first time ever this one initially lined up exactly on the mark, so one turn later we got locked up and then had all the swapped over parts fitted. It should not need to see any other maintenance for many a decade.
Before the cylinder can be refitted the oil tank needs to go back, then the engine mount along with footrest and brake lever. The tank fit was a breeze without the engine mount which allows easy access to its lower mount which is otherwise a real pain, and the time saved makes the extra dismantling well worth the effort. It also means everything gets cleaned along the way - not that anyone will see it - which makes the reassembly job far more pleasurable.
The coil went back and got all its wiring, and the oil tank breather and chain oiler hoses went on with no issues. Sometimes they need warming as the hoses get kinda solid with age.
The engine mounting plate comes next, with no less than six mounting bolts, the top front one also anchoring the heavy current battery earth which carries what the starter demands. Leaving this off by mistake usually melts the wiring loom to a certain extent, and while I have seen the results I have been fortunate not to yet repeat them. A few missing washers from the mounting bolts were reinvented during the process.
Before mounting the brake cylinder I decided to strip the seized anchor plate as it is more easily accessible without it. It also means that progress will continue in a logical fashion from front to rear, which makes it more difficult to overlook anything along the way. This will also involve releasing the rear axle, so I shall make an intention that it does not put up a fight, as some can...
Well, there was no fight at all, so it did not take long to assemble the anchor link correctly with its missing oddball double coil spring washer, and everything now works as it should.
Even the new brake cylinder bled up without a murmur of complaint, so all the innards are now immersed in new fluid, which should be a surprise for them. I made a mental note to bleed my own twin front calipers in the next few days, as the years can go by without doing so until things start to bind up and you realise you left it too long. That one is also still the factory original cylinder, so I better not let the rust get to work and kill it.
The next day I checked for any leaks around the cylinder area, and as there were none I put everything else back on that I could. I will press the pistons back inside the caliper and allow them to find their own new rest position, so once the bike is running we will be able to give that disc a real good polish up on the road. I had been simultaneously working on another T160 rear brake which had begun leaking, not long after a new cylinder had been fitted. That one had suffered a failure of the rubber hose leading down from the reservoir, and fluid was oozing out through some splits where it fitted to the cylinder inlet. The new hoses are considerably thicker cross section and it is a bitch threading them through the middle of the bike, and larger clamps are also needed at both ends. This one is in good condition so it stays put.
These reservoir hoses are of a special type of rubber 'EMD', as normal rubber hose will not withstand brake fluid, so there are not many options when replacing other than what can be readily got. Nor are they cheap...
Both bikes were still leak-free after two days so I consider that a win. Yay.