August 2025
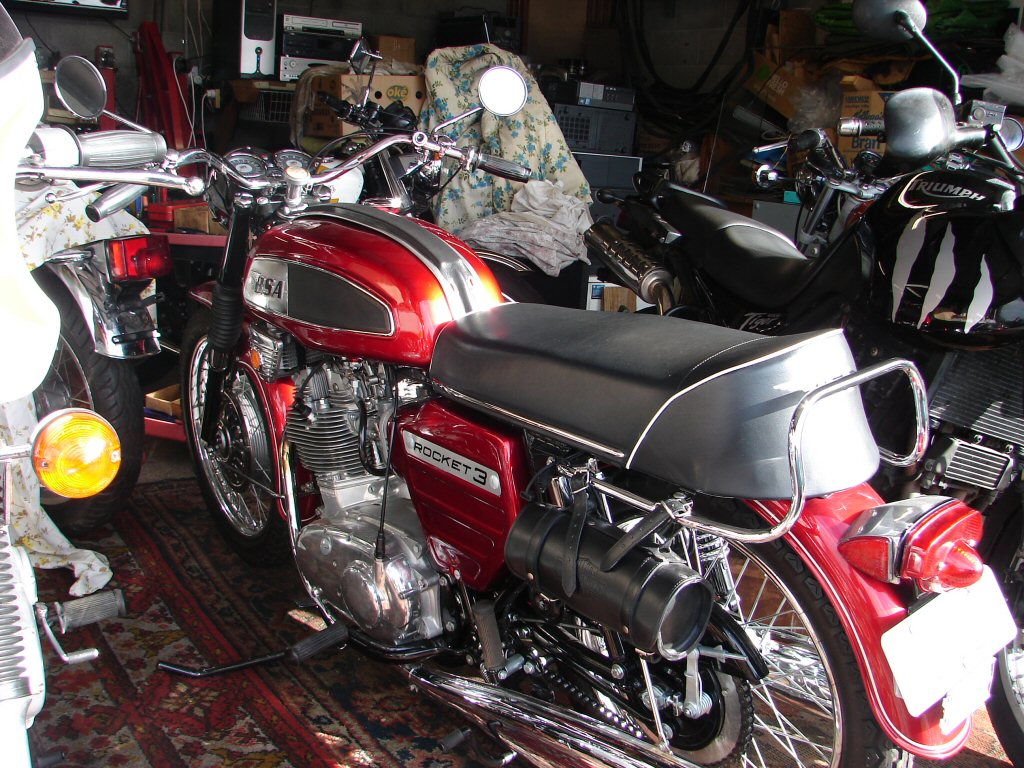
1969 BSA Rocket 3 750
The owner of this bike queried a member of the local BSA owners club regarding having some work done, and wanted to know who to entrust it to. My name came up, having recently performed a few minor surgeries on that man's Rocket 3 as well.
Six or seven months later and having completed the bike rebuild that had taken that long and had now vacated the required workspace, he brought the bike around today. Very pleasingly he rode it here, so I heard it running and have a number of suspicions about the reported ills already.
Aside from that, this bike is in equally fabulous condition to that one, and it makes it a pleasure to assist in making them go as well as they look.
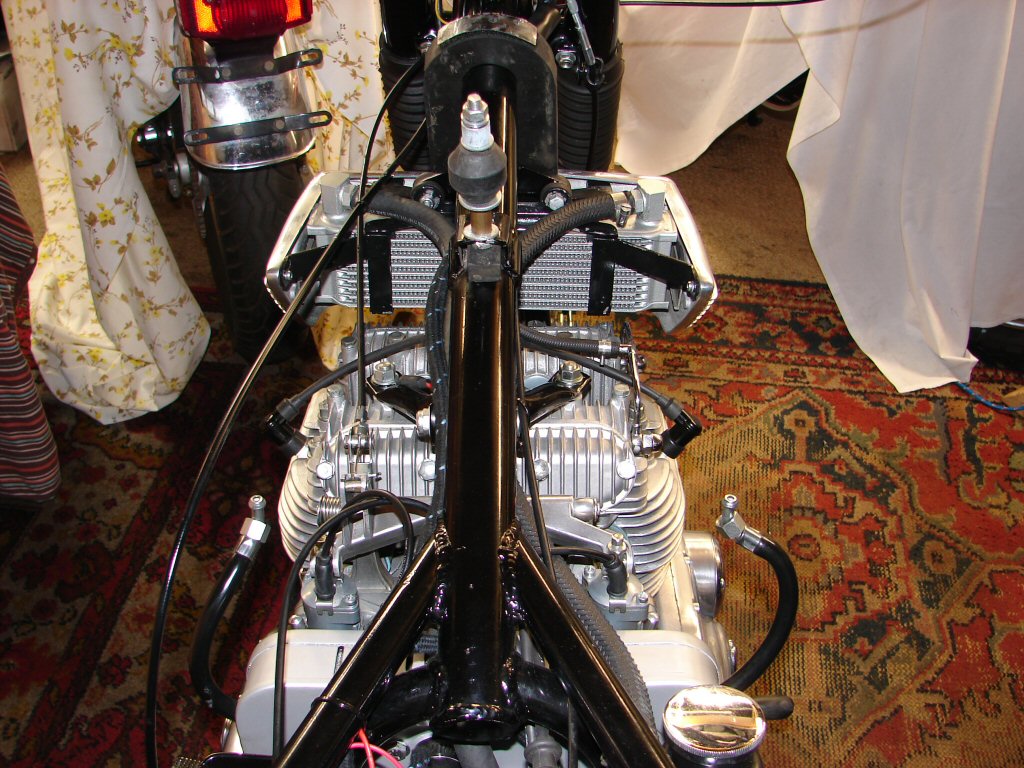
Of course I soon made it look a lot worse.
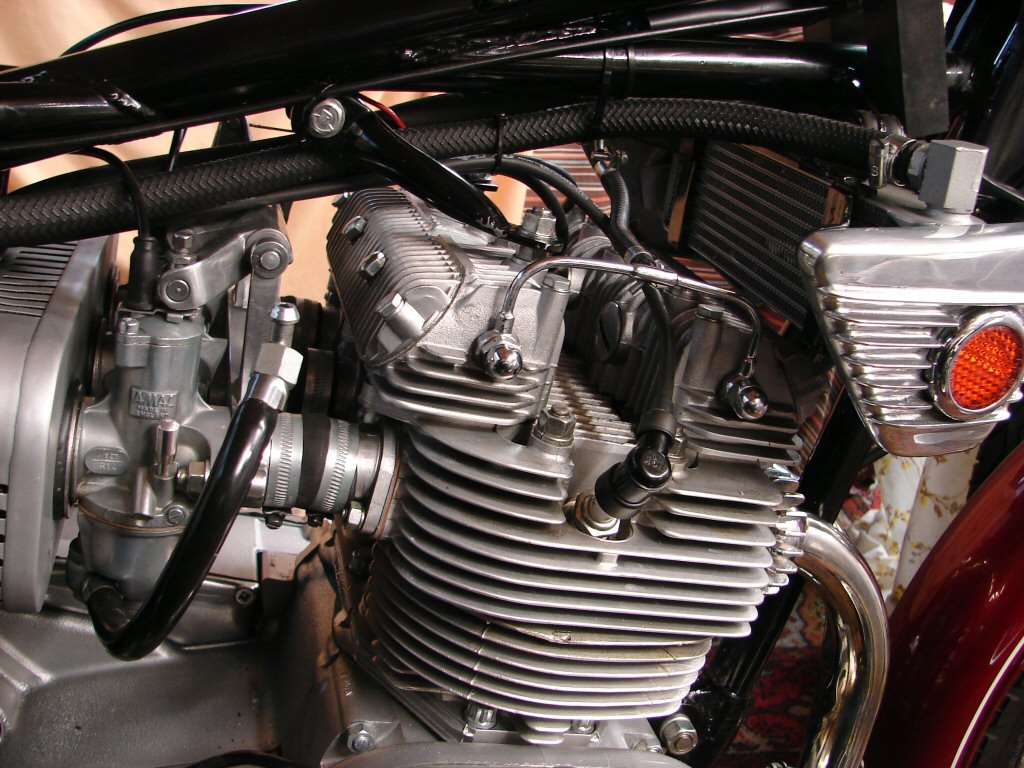
Having given the head and barrels close scrutiny I found a number of loose items, like rocker box screws, which made me think that maybe things had loosened off since the last rebuild. As I was going to check the head bolt tensions I started there. Sure enough, the bolts all tightened singificantly more than I loosened them off, and this is a legacy of non solid rocker box base gaskets. Such are fitted to this engine, but they look quite substantial and have no external signs of deterioration, so may prove to be viable despite the fact.
The spark plugs were all quite sooty, and checking the carb pilot screws showed that they were set somewhat richer than one would expect. As the idle had been off when the bike arrived, it may prove to be mostly solved with a careful tune.
During the course of moving things around to retorque the head, one of the spark plug caps fell off, and as they screw a long way onto the lead I figure it has been loose for a while. Checking the coil end of the leads there was a loose terminal on the top coil, so we have a number of reasons why it might have been off song.
Another issue was the throttle linkage, which was missing a spacer that should reside within the return spring. Removing the spring tension showed that there are no internal springs inside the carbs, so it seemed that I needed a spacer of some sort to improve the throttle action.

I found some small bore fuel line which had the correct dimensions, so that got fitted inside the spring, which also got reshaped at the operating arm end to make it line up in a more agreeable fashion. I had a lighter weight spring, but in the absence of internal springs this stronger version is necessary.
The oil lines and spark plug leads were not happy with each others presence, and also obstructing the choke cables, so I rearranged them all to cohabit happily. It will also assist access to the inlet rocker box to check the valve clearances, which should have closed up a bit due to the extra tightening of the head bolts.
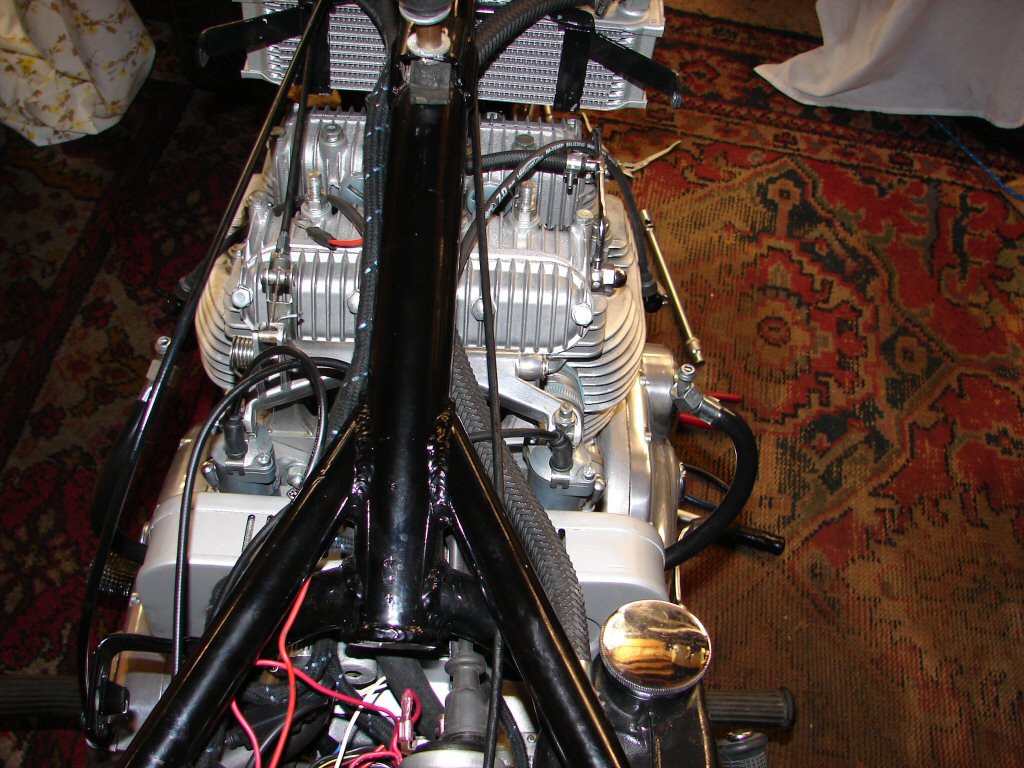
As expected most of the valves required loosening off due to the movement of the head, but the surprise was that both centre valves were very loose, so would have been even more so prior to tensioning. While I am not sure what the symptoms might be, the workshop manual stresses that the valve clearances should be checked before attempting to tune the carbs on these engines, so we have another potential improvement there.
The rocker box cover gaskets were well glued down and one ripped on the way out, so it got one new one. Other than that it all behaved nicely and buttoned up without complaint.
The rocker box oil feed line got shortened as it had a generous loop in its run, and the right side offending spark plug lead also lost a little length so that the cap would have a new match to the lead in case it felt like falling off again.
After that the head steady went back on and the under tank flashy bits after a little realigning of their mounting brackets to make them a happier fit.
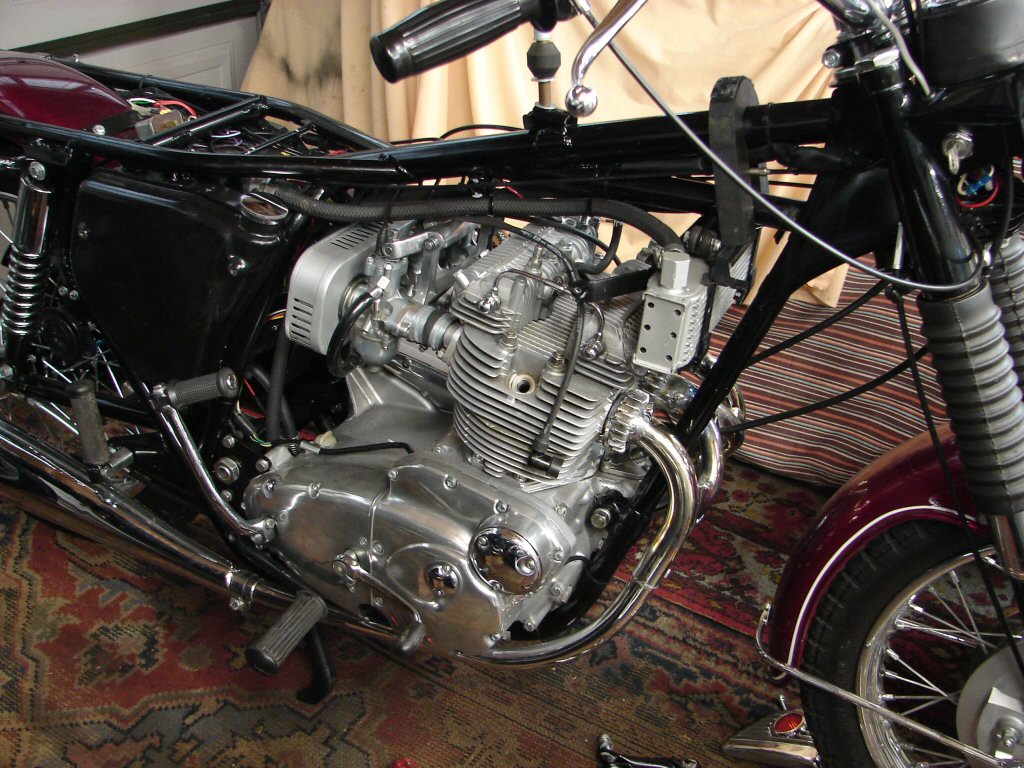
That got us to being ready for the fuel tank to go back in place prior to a test run and some carb tuning. Fabulously shiny engine is a joy to work on and everything otherwise looks like brand new - which I guess it is.
Having reset all the pilot air screws to factory settings the bike started easily and seemed happy on all pots. I gave it a brief warm before getting a bit more serious with the pilot screws, and it appeared that all cylinders were at odds with each other. The idea at this stage is just to get it happy to idle so that the vacuum gauge can be used to equalize the airflow through all carbs, after which the pilots will get their final tweaking.
With the engine warm enough to behave the airfilter came off and the gauge immediately showed that the left cylinder was doing most of the work and the right side the least. It only took a few rounds to have all three contributing the same amount of effort and then the pilot screws got their final check, which resulted in no further alteration which is the desired outcome. After a test ride the engine will be hotter than this, so that then gets the final final checkover.
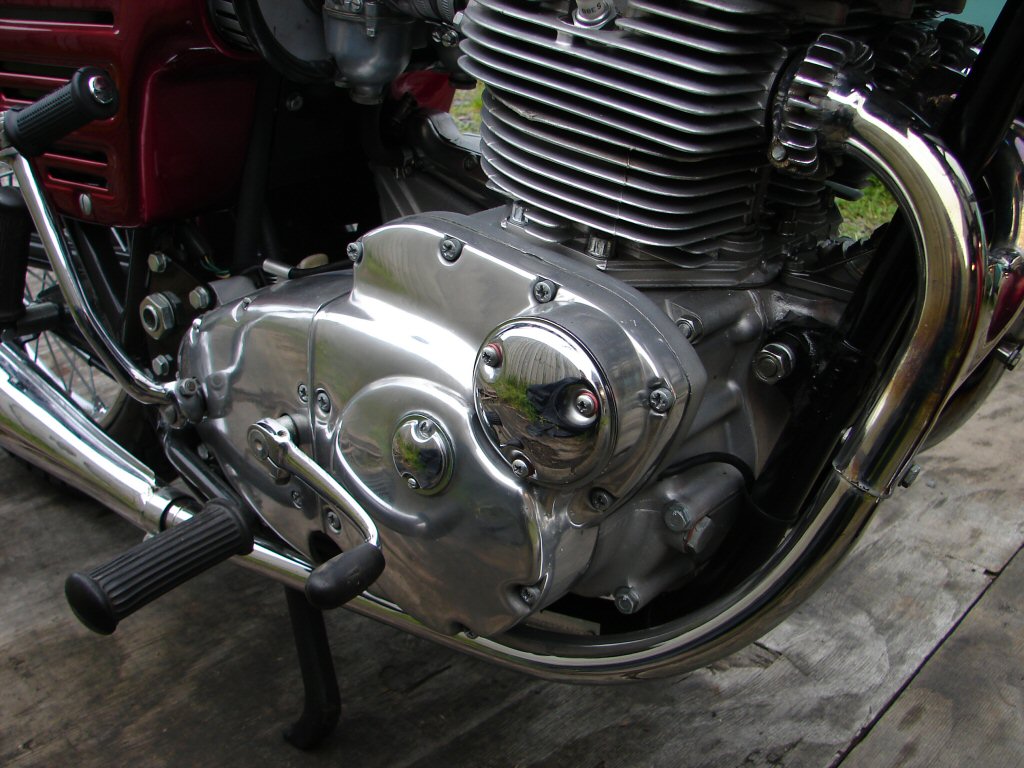
I did a strobe check of the ignition timing and found it to be slightly retarded from optimum, so the points cover came off and adjustnent made. This revealed that there was no gasket fitted beneath the cover nor any fibre washers under the screw heads, so they got included in the refit. The gaskets are bright green so I felt pen their edges black, as it is simply not the done thing old chap.
Although we no longer have three sets of points to worry about in there, it is still good practice to keep moisture out as the Trispark does not enjoy it. But there is another reason why I like this area to be well sealed. As engines wear they produce more crankcase pressure, and if it is easy to expel gases via the points cover, it will, and may pop the camshaft oil seal out in the process. I have come across a number of such events. I know that this is a relatively new engine, so such considerations should not be critical for many thousands of miles yet, but I only have one approach and it applies to all engines in my care.
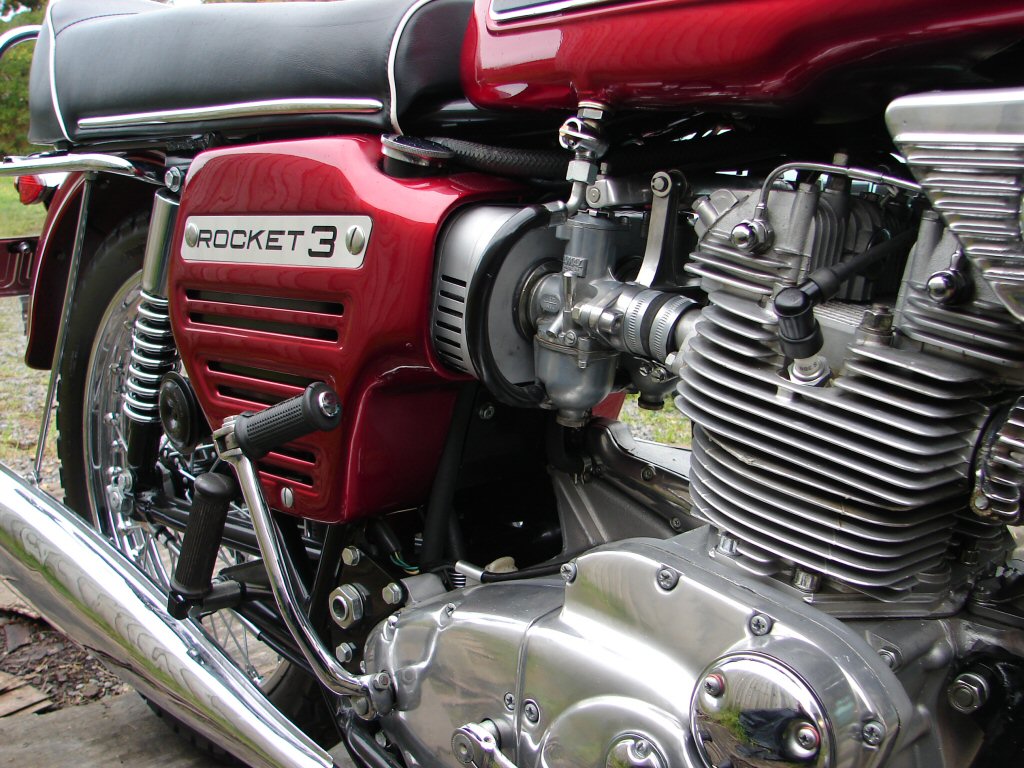
This pic is simply in appreciation of all the work that has gone into the restoration of this bike. I have done very extensive mechanical rebuilds of a number of bikes, but never a complete nut and bolt restoration like this. It is a thing of great beauty to behold.
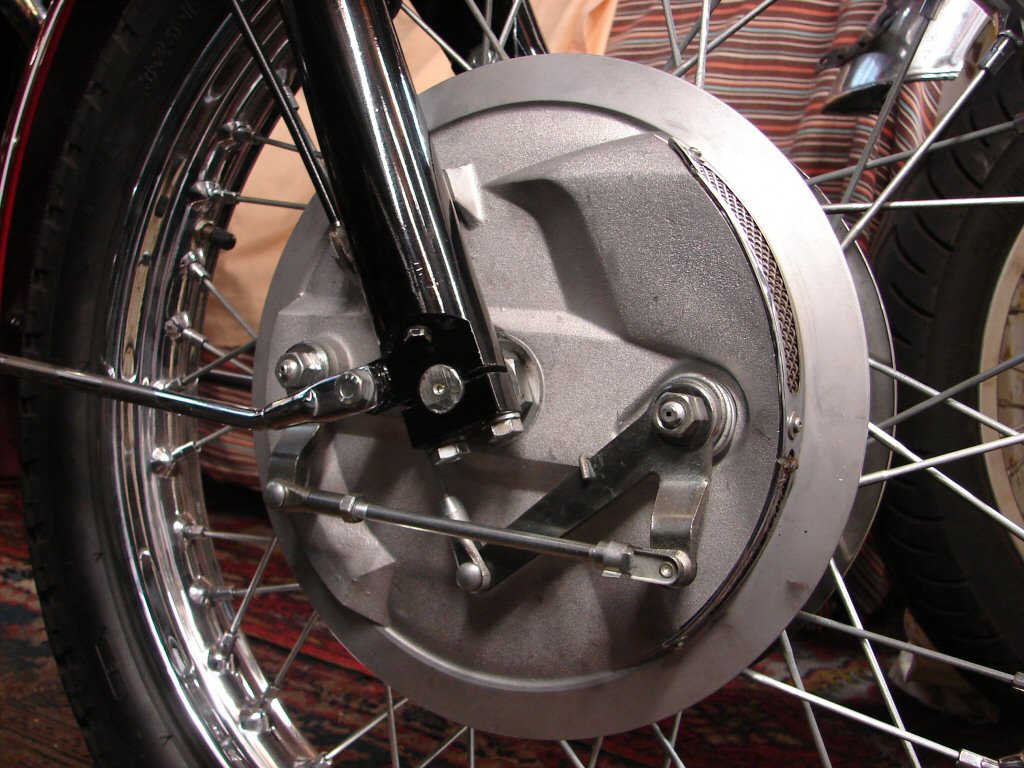
The front brake had been an item of concern, so I removed the wheel and plucked the brake innards out. My initial suspicion was that the brake shoes may have been reversed during assembly, as these twin leaders are usually pretty impressive in use, and even wheeling the bike around you could tell that it was sadly lacking.
Happily they were correctly fitted, and I say that because the workmanship on the bike overall seems to have been of a high standard.
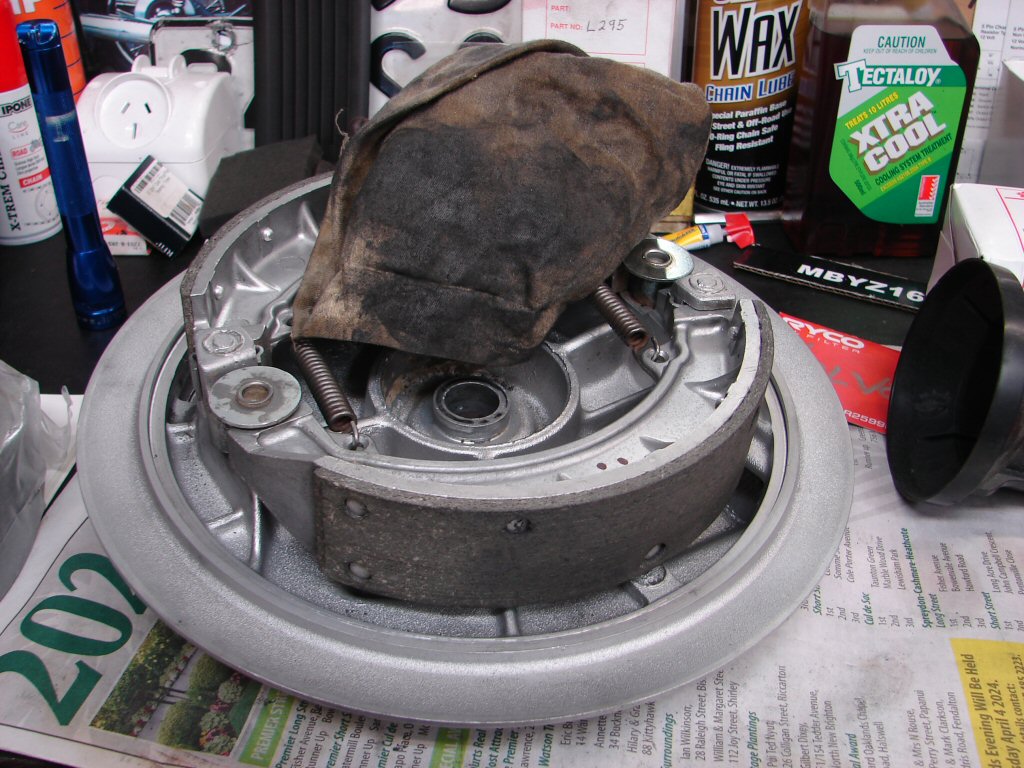
What I did find was rather perplexing. There was a coating of something shiny grey covering the centre surfaces of both shoes, and wiping it off with a cloth I found it to be very much like graphite. So much so that I think it was. Perhaps such was used to lubricate wheel bearings and made its way into the brake drum, as I have no other explanation as to why whatever it was might have ended up in the brakes.
I cleaned the linings as well as I could, then roughed up the surfaces with a coarse file to encourage a new bedding in process to occur. I had to set the cable adjustment to the extent that there is a very slight contact evident when spinning the wheel, but that will soon wear down. It appeared that the drum may have been skimmed recently, so it is possible that the cable will need adjusting up to the max to get the most effective action.
With that all complete and the absence of rain today I started the bike and took a brief ride around the local streets. In order to begin the brake bedding in I ride with a modest amount of brake applied, releasing it every 20 seconds or so then giving it the next go to get things heated up. You can feel the transition taking place gradually, but inevitably it takes many miles until the entire lining surfaces are finally in contact with the drum.
On the other hand, the rear brake feels very capable to the extent that some caution needs to be observed to prevent rear wheel lockup when changing down gears. Nice to have that reassurance though.
A final tweak of carb settings on return and that is about as far as I can go. I had noticed that the left footpeg is bent slightly down and rearwards, and I can straighten it if I can get the footrest rubber off. So far it has resisted much twisting and some hot water treatment.
Footpeg rubber finally agreed to come off, so the peg got straightened. Checking for any fuel leaks I spotted a drip on the left carb banjo, so that got tightened. The side stand comes to rest against the left muffler, so I wrapped some insulation tape around the end of the stand then tightened the mounting bolt so that the stand tends to stay where you fold it to rather than annoy a valuable raygun muffler. They are increasingly hard to come by...
That was the parting shot, so I guess this is where I stop.
I think that the MkI Rocket 3's are probably the most visually striking triple of them all, and it has been a pleasure.