March 2024
Triumph T160 tank and fairing paint project
It would perhaps be more accurate to title this as 'projects', as one thing has led to another in the tank department and I have found a new paint guy, so it is time to test the water.
Both of these tanks require repairs, one to just the paint and one to take out a dent plus attend to the paint. There has not been any desperate need, as both look fine from a respectable distance such as this.
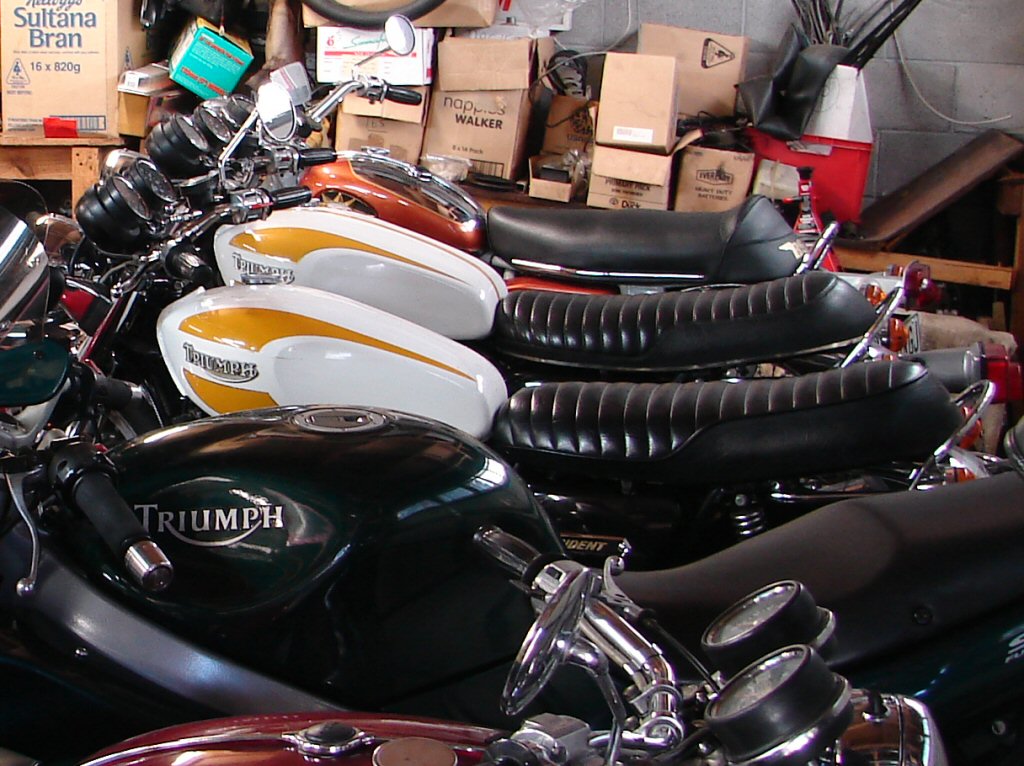
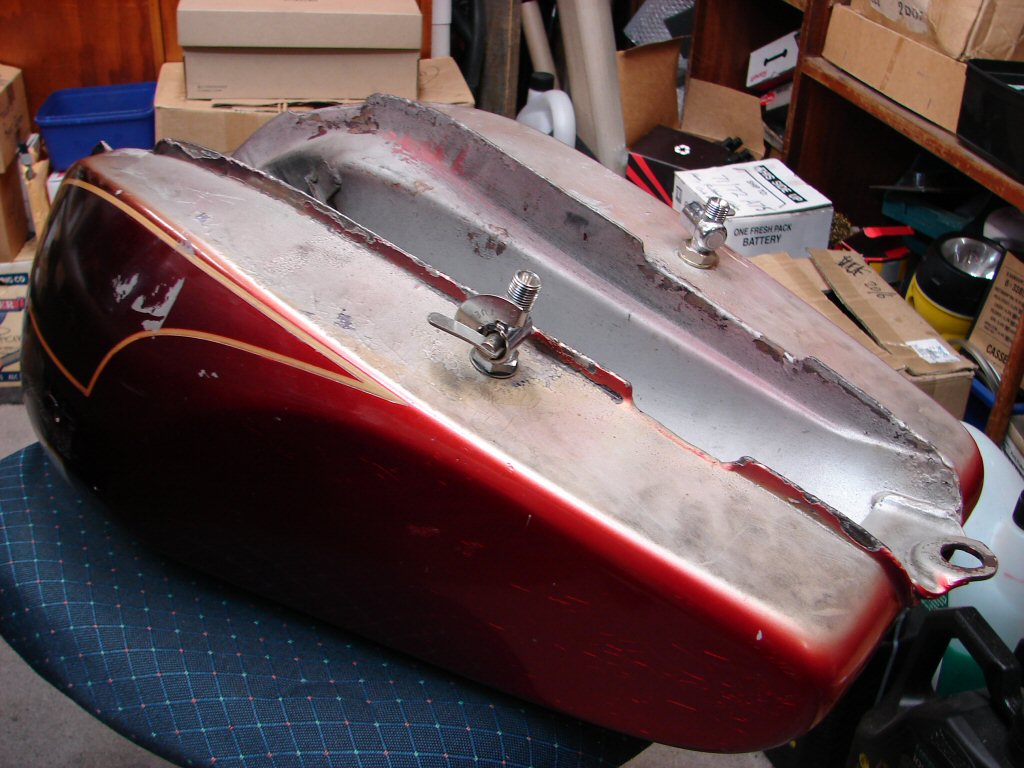
There is also a spare tank of the large size which arrived both with aged non-original paint and recent repair, so it will need paint before gracing any bike someone is proud of.
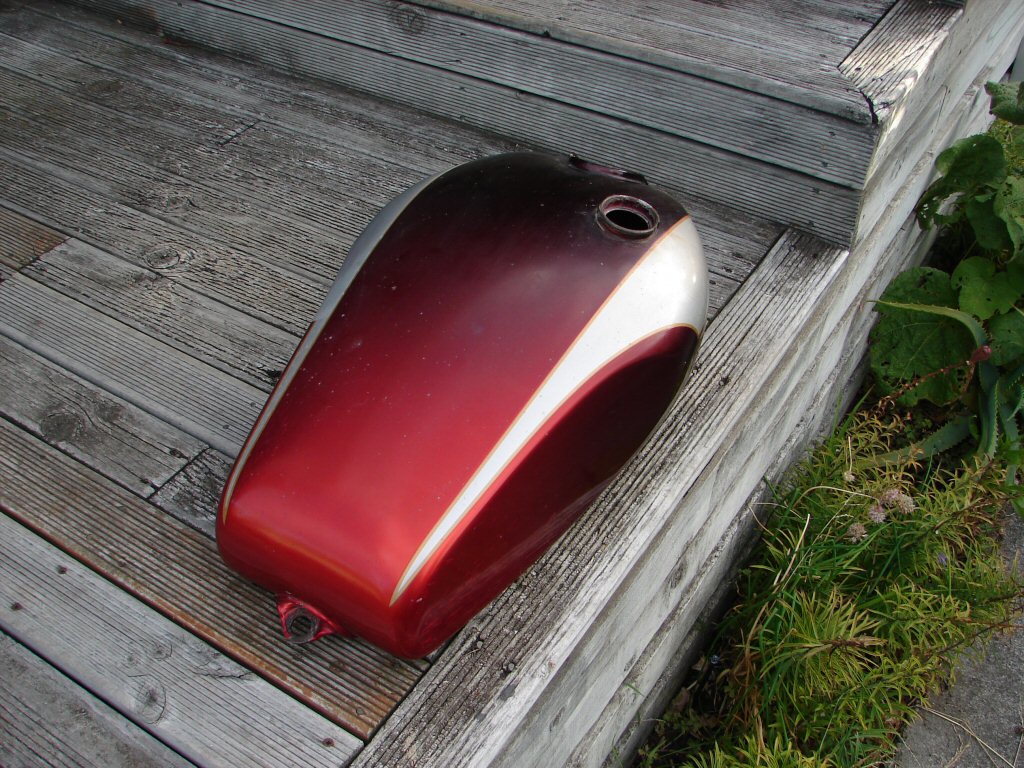
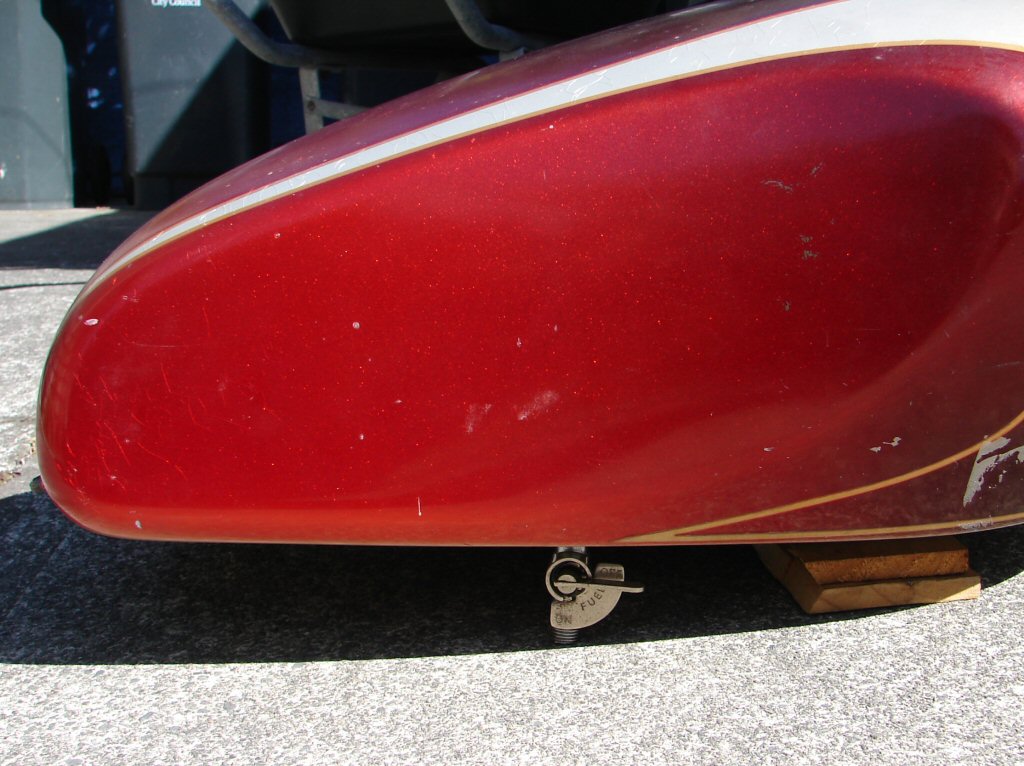
A previous owner went to a good deal of trouble to have it painted like this back when, as the red tint fades from front to back and the silver would have been a good compliment, but age has ruined its looks.
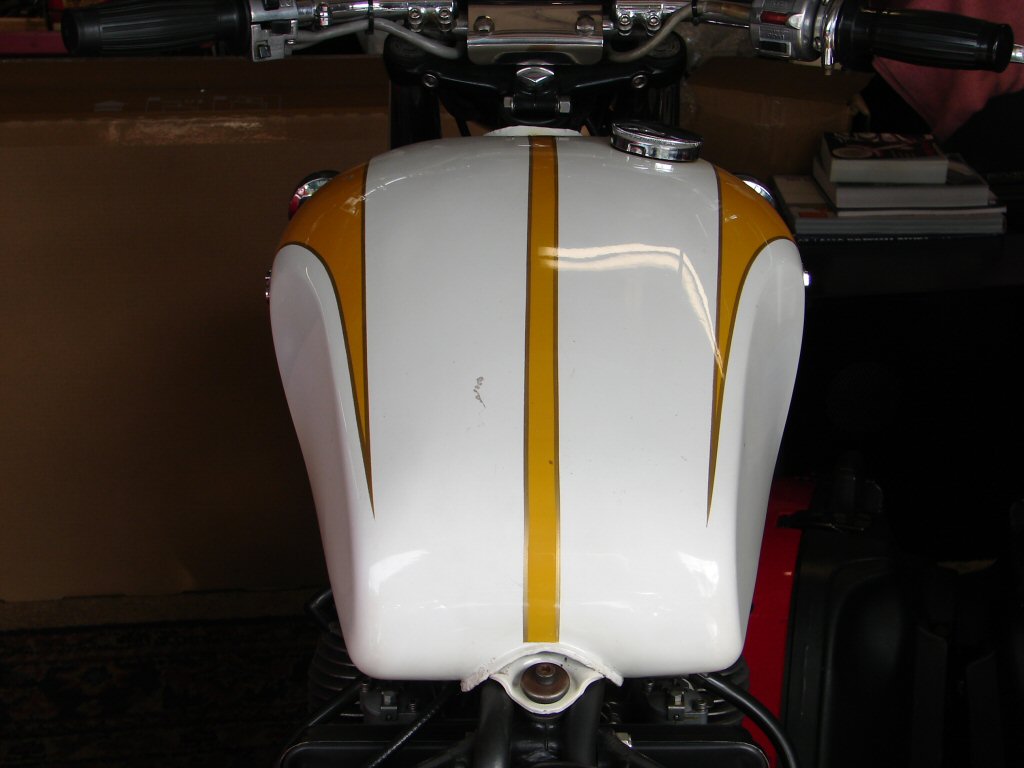
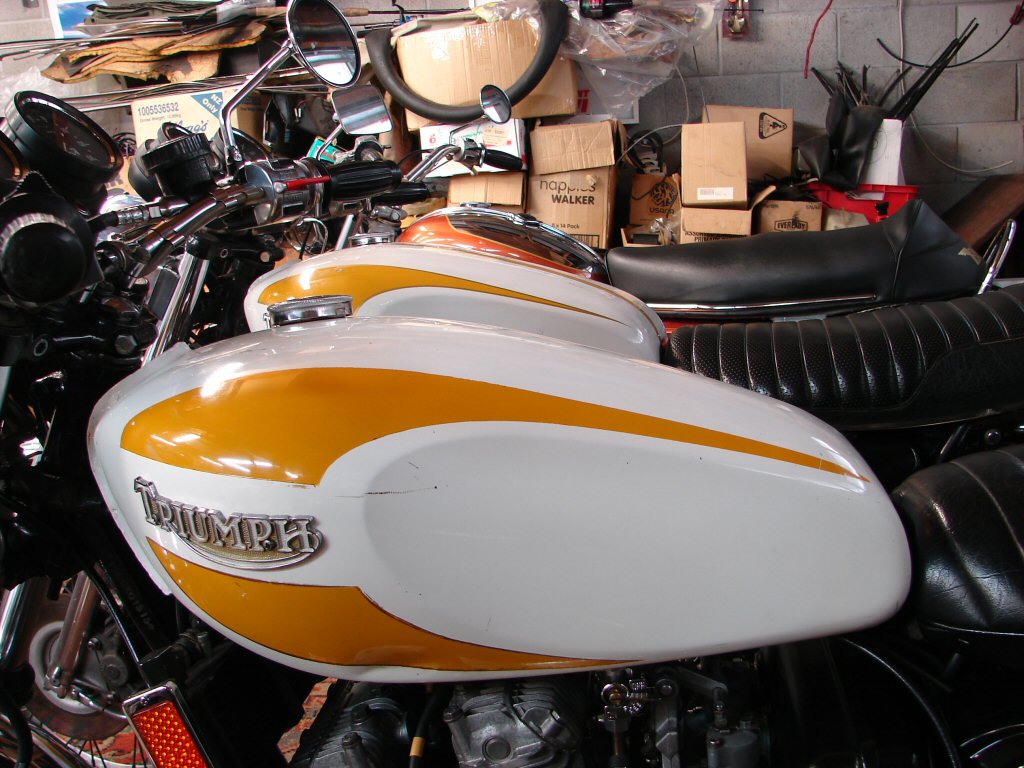
Because this tank has no centre stripe, and because I have become enamoured of trying a slightly wider stripe to reduce the visual effect of sitting astride an aircraft carrier, I am going to experiment with photoshop to see what appeals to the eye, most likely in the white/yellow colour scheme.
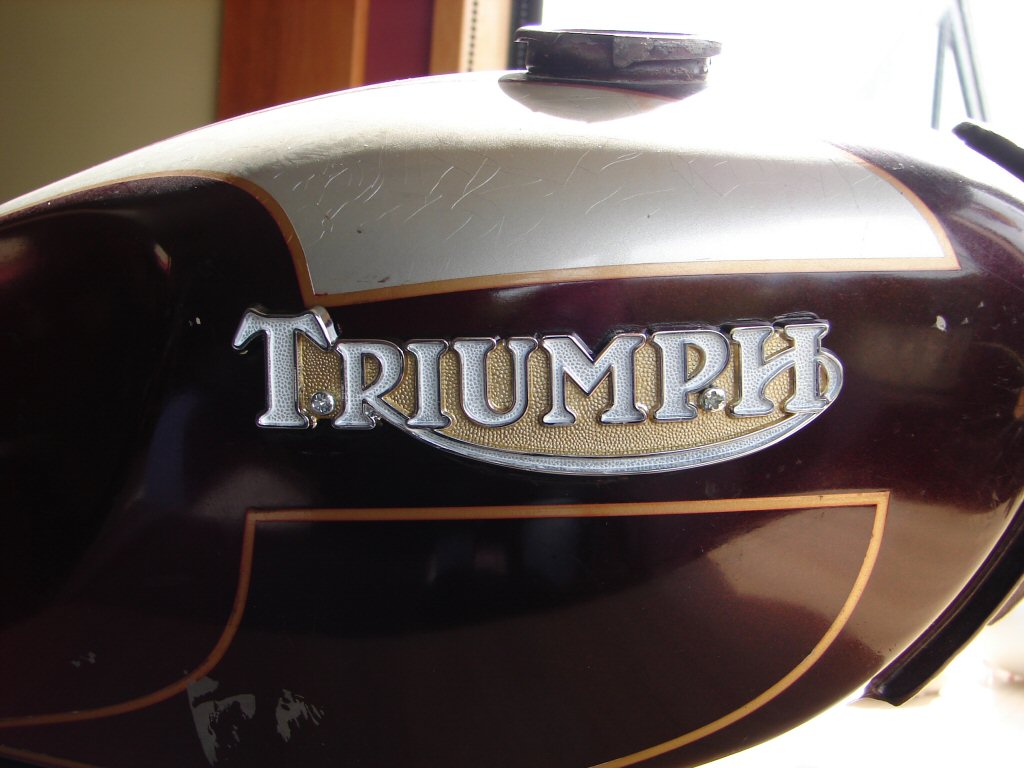
While not exactly to my taste, the tank below is what got me thinking about the centre stripe dimensions. The factory stripe was in fact a decal or transfer of only 20mm width, but these have been unobtainable for some time, and if it is to be painted on I can select any width at all.
It is difficult to imagine the optimum width for the stripe, and one does not intend to paint it twice, so the photoshop trickery would give the most flexible approach to trying a number of options.
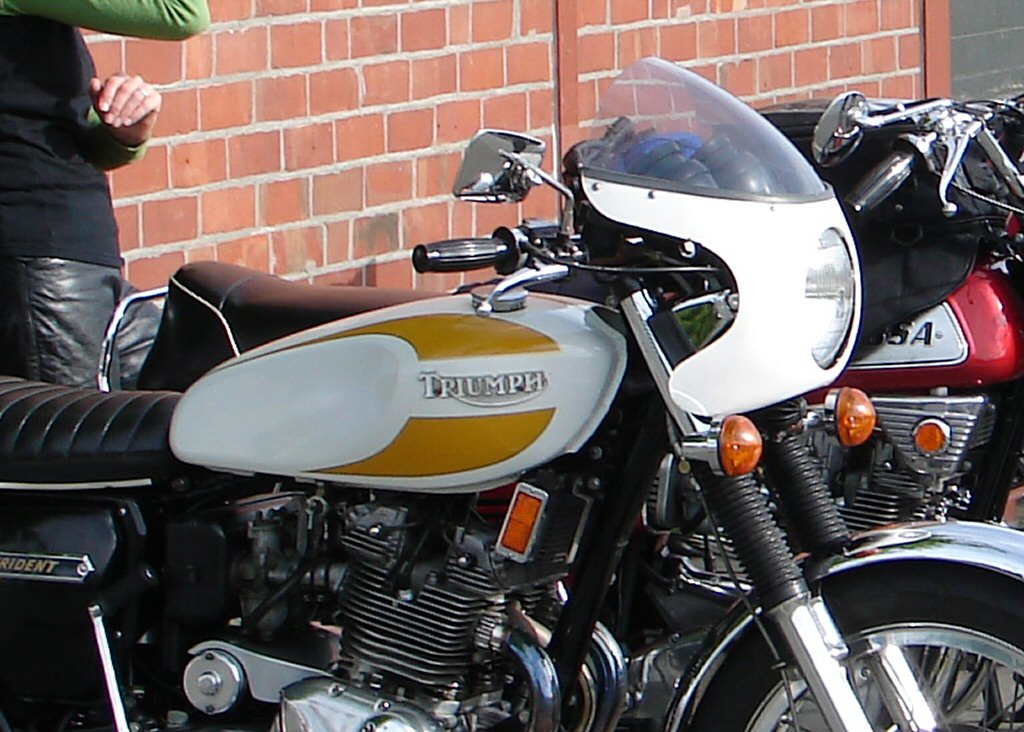
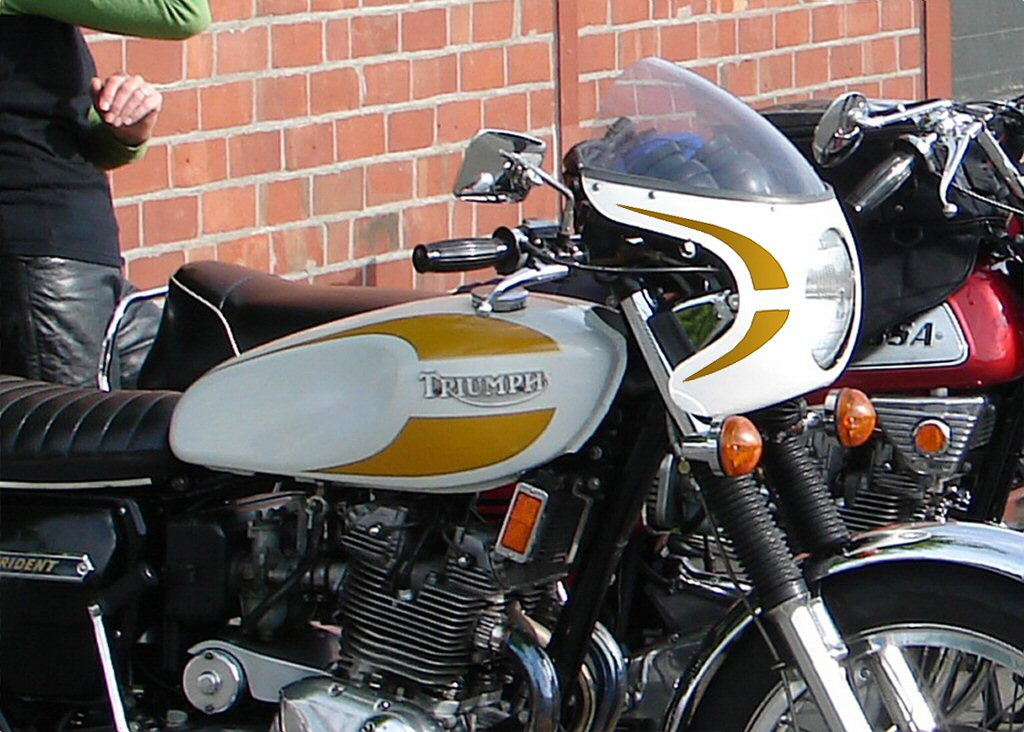
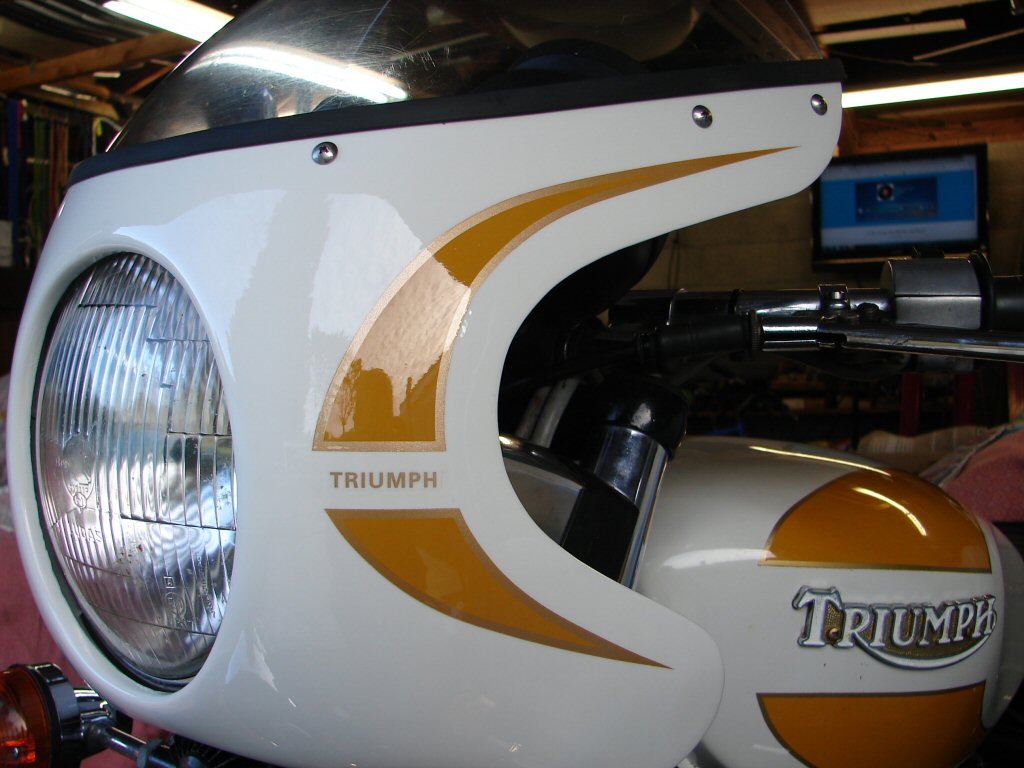
But then - not only but also - I used to run a small period bikini fairing which was removed as paint was required for that too, and I was thinking of adding a yellow flash to mimic the tank, so that will get added to the mix.
The painter did suggest that the white/yellow combo would be the cheapest paint-wise as it would not require the sort of base coat that red/white would. Also, the more pieces that could be painted at the same time would economise on producing the batches of specific colour needed.
Final consideration is whether to use a decal of some sort on the fairing to mimic the tank badge.
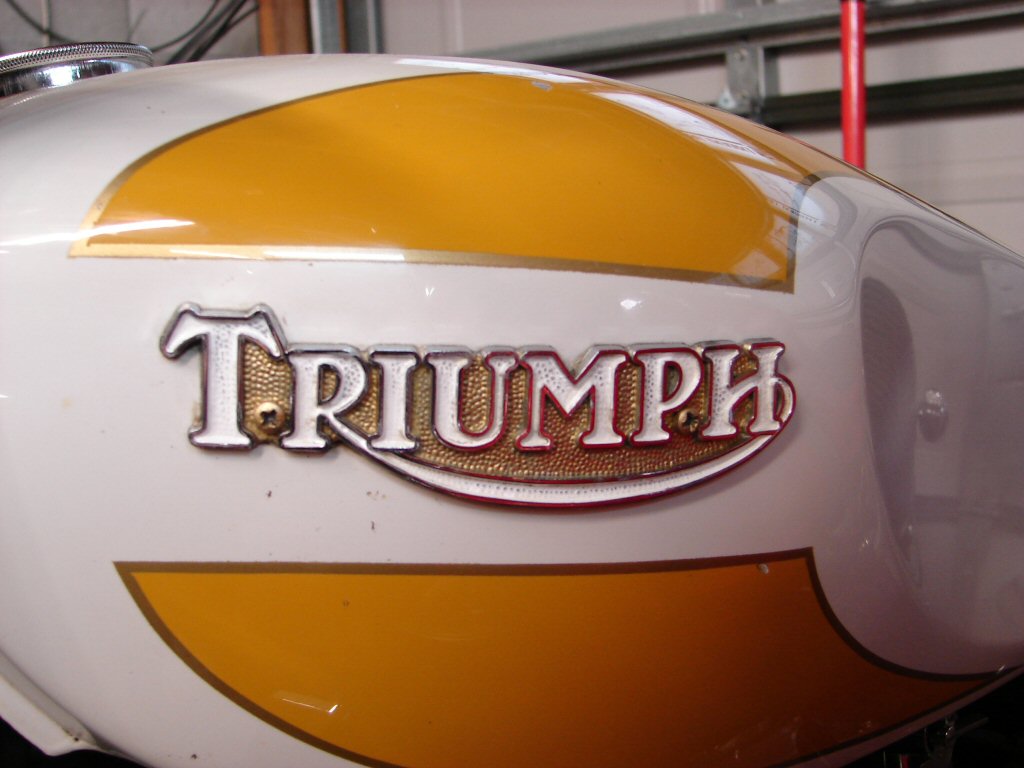
And - speaking of tank badges - the spare tank did not have any, but they are readily available and quite faithful in their reproduction, but arrive unpainted. That gave me an easy window in which to kick this lot off, by painting the badges their original hue.
I have owned my T160 from new and the badges have lasted extremely well, but besides giving me a template to recreate from, I might just give them a touch up as well. Original at top and stages of completion of the new ones.

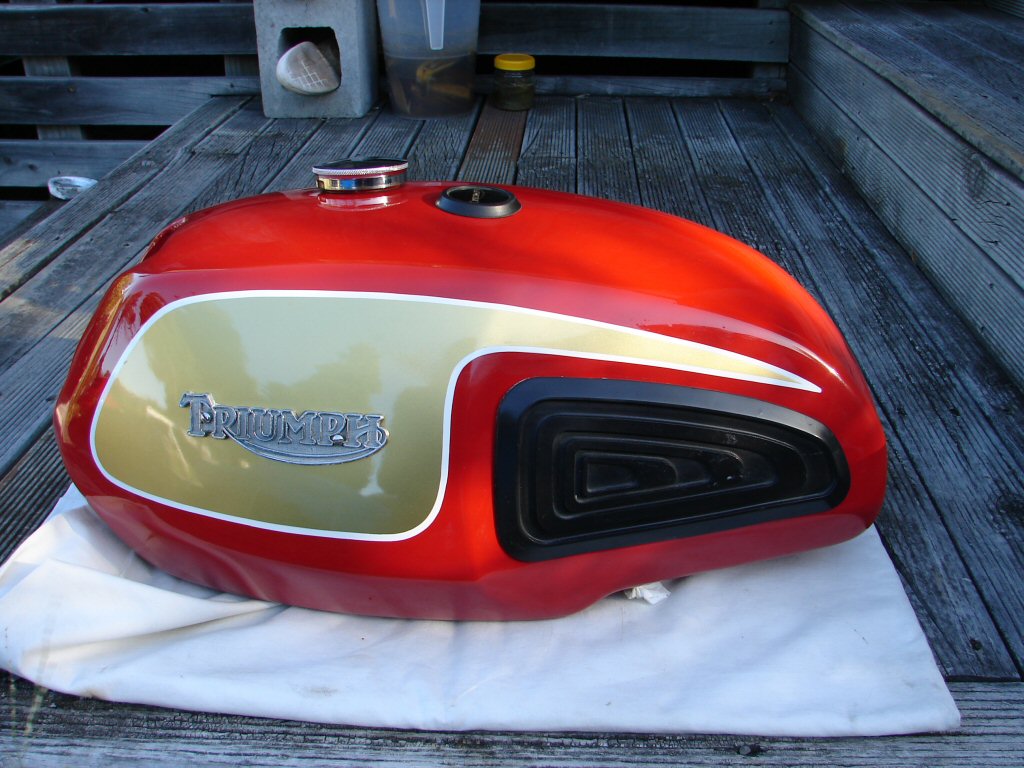
Now here is a graphic (lol) example of why you need to include the badges when you submit a tank for painting. You can see that the previous artist had no reference to align his designs to around the badge area, and thus lost the plot completely. It is possible that some non-standard badge was fitted instead of the original type, but the radii of the upper and lower flashes should be able to join up if you extend their path as the factory intended, and it makes a pleasing symmetry to the eye.
That original T160 flair was one of the reasons I did not turn my bike into a Legend when Les was ready to build mine but could not buy a donor bike in the UK. That plus freight both ways...
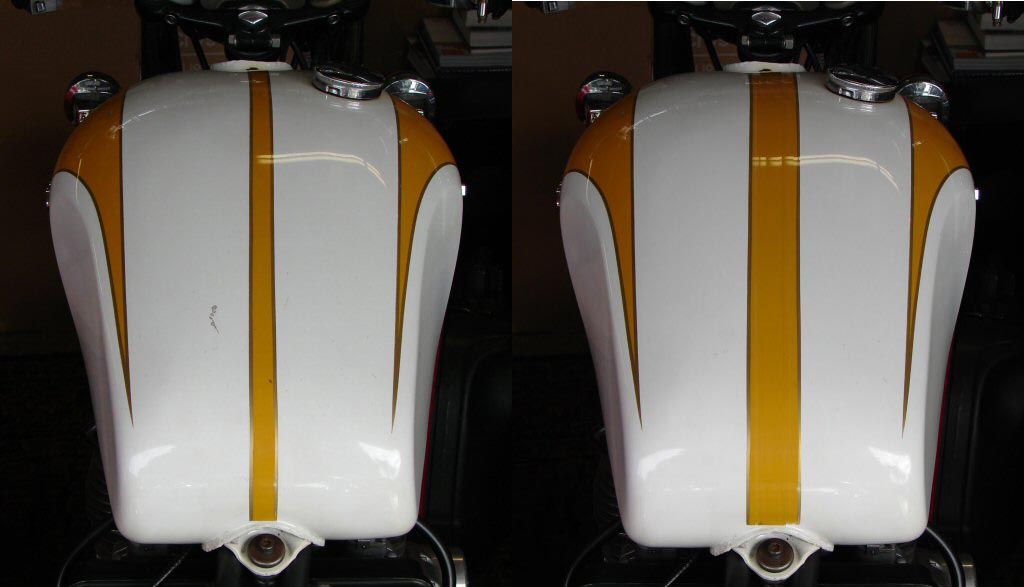
So after some faffing around with printed images and a ruler I came up with what I thought was the best compromise for the stripe. Being of the mindset that 'less is more' I curbed my impulse to turn a stripe into a feature by only doubling its width. This way it is less immediately evident that it has been modded while still reducing the visual impact of the sea of white.
Interesting to note that the original transfer was well off centre to begin with, but it never offended me until photoshop pointed it out, and now I can't unsee it. What a pity it is not this easy to remove a gark in my paint physically. It was the result of another bike's brake lever gouging around during an earthquake because the other bike was only on its sidestand and the shaking flipped it over centre to fall this way...
I have learned to my own expense that it is unwise to ever paint a fuel tank without first making sure it holds fuel successfully. I thus fitted a pair of fuel taps to this tank in preparation for such a test.
Kind of interesting that they painted the bottom of the tank with the silver option, perhaps the red was too expensive.
I put several litres of fuel in, sloshed it to and fro for a bit then left it on the dry concrete to tell me what I would most like to know.
Yup - not only dry as a bone, but I now know I have a pair of viable fuel taps from the reject box. Win.!
Meanwhile the artwork continues on the styling of the new colour flashes. It is tempting to try to copy exactly the same pattern profile used on the tank, but all the curves and edges mean that is hardly going to work.
I did however find a small gold decal that would fit in the gap between upper and lower flashes, so we came up with a suitable compromise. Hopefully our painter will be able to make this happen, although he may also have some useful knowledge of his own that will help decide the master copy.
You can see that the gold background on this side badge has mostly faded away, so today I have been touching up even more badges and giving the tanks a good coat of polish while they are off.
The mounting screws are somewhat aged, but rather than using shiny new ones I decided to try painting the heads gold. It tends to make them disappear rather than becoming a separate feature.
Well thats about enough excitement for one day - better go and have a cuppa and a wee lie down...
Actually, and pleasingly, I do have at least one tank that does not need painting. Unfortunately I don't have a bike to go with it as I swapped it for a Legend exhaust system I was no longer using. I really need to sell it, as it sits around here making the other tanks look bad.
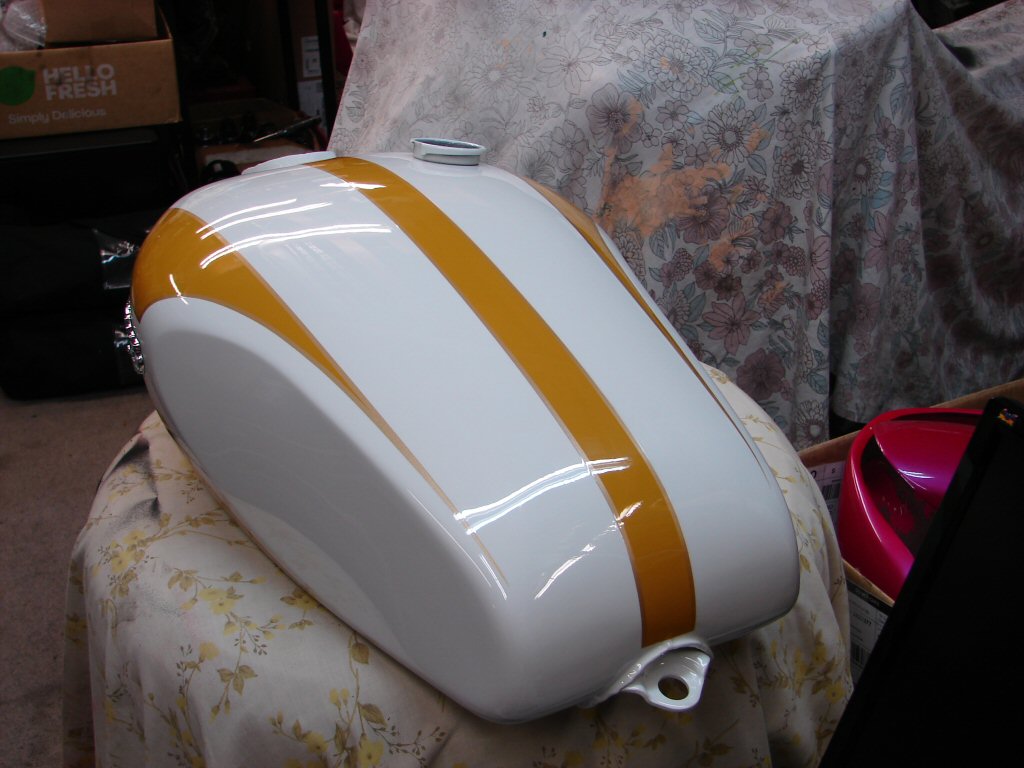
This 3½ gallon T160 tank has an awkward dent as in difficult to get to for repair, plus the paint has been rehashed unsuccessfully and is minus the pinstriping topside, so it will need a full repaint. I intend to give it a centre stripe of the standard dimension as I think it will look fine.
The flashes look to be in the right place as echoed in the 4½ gal behind it and the colour seems good too, so a pity it has suffered otherwise. Guess I will be getting some extra paint mixed in anticipation.
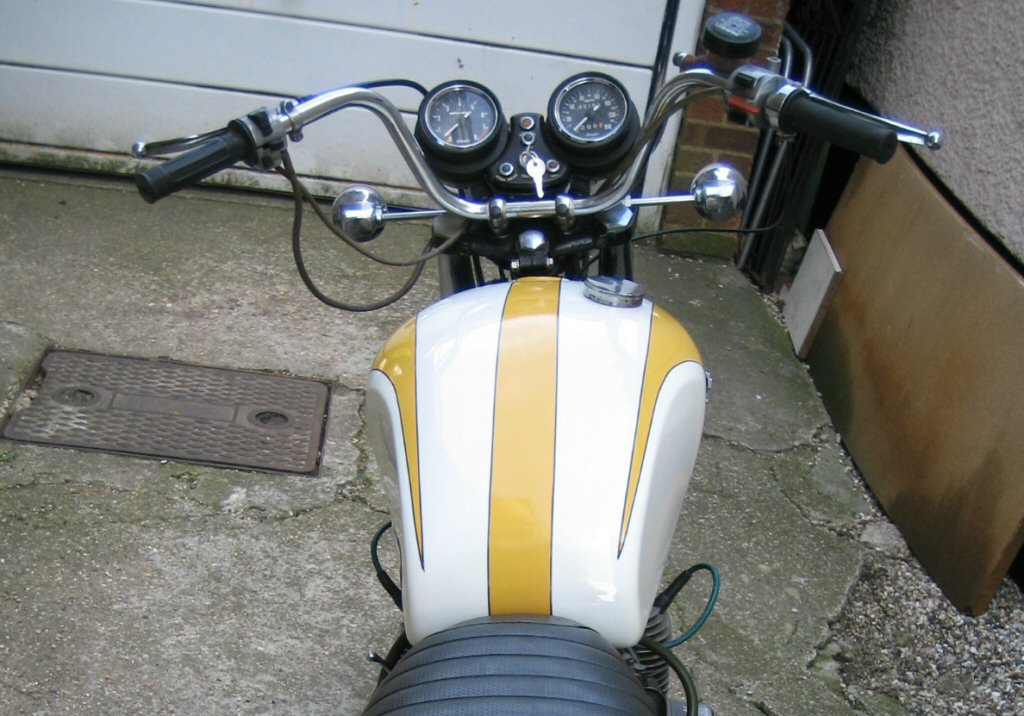
After some weeks I got a call to say that the base coat was done and I should collect the fairing and mask where the transfer was to be placed. I asked if the type of masking tape was critical so as not to risk the paint, but it already had clear coat over the white so no problems there. I completed that task and also put a mask to delineate where the flashes should run around the inner radius - basically the width of my insulation tape...
Another delay ensued while the yellow and pinstriping were applied, but finally the call, so I raced in to town. With our cold atmosphere at this time there had been some problems curing the paint, so the parts had been placed in a small drier box. Unfortunately when the tank came out it had a chip which it suffered going in to the drier it would seem. End result was I brought the fairing home and left the tank there to be sorted.
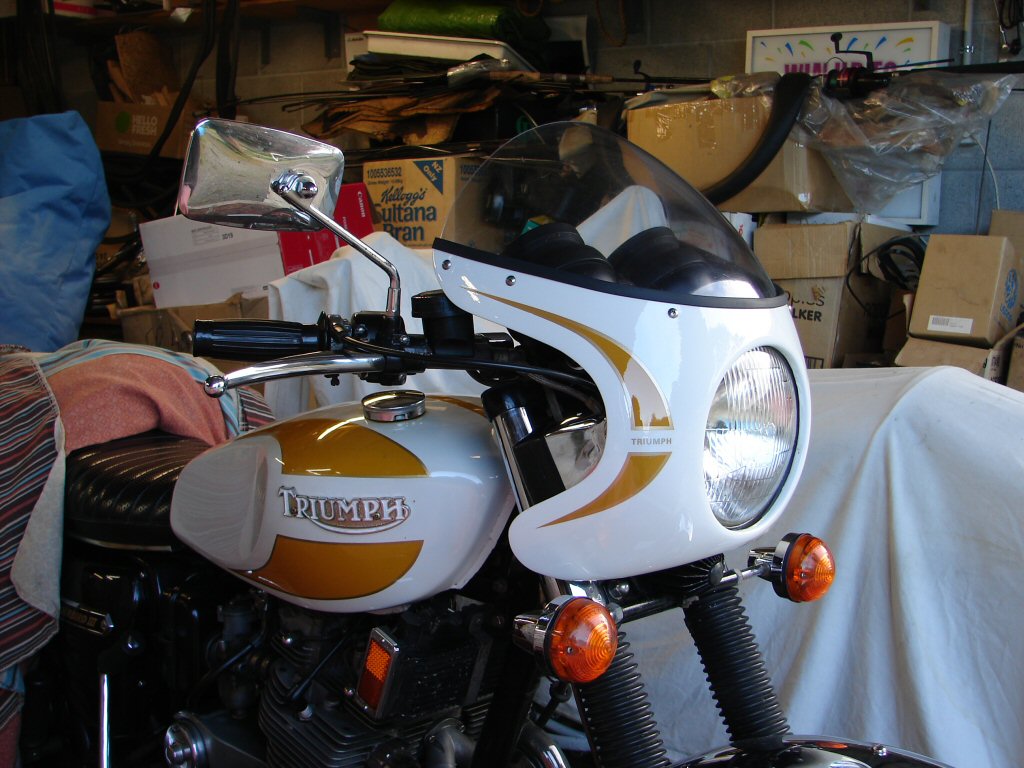
I polished the fairing and reinstalled the screen which also got polished. It has been sitting in the shed since then making a great talking point, but today after taking a ride on the other T160 I felt inspired enough to address a few small problems with the mounting and finally fit it back in its rightful place.
I think it looks just how I wanted it, so that worked. Will get it out in our pale sun to take a decent side-on pic as soon as I can for the full effect.
Sigh...
What sun would that be then..?!
News came that the tank was finished, and when I went to collect it there was another T160 tank next to it which had just been delivered for paint. It was in a dull black and looked to be a new old stock. It was from a local client so I shall be keeping an eye out for another T160 in town.
While the new paint was not 100% a copy of the flashes on mine it was so close and nicely applied that it did not matter.

I tapped the paint out of the badge screw and fuel tap threads and fitted the badges, using a tiny O ring around the screw threads which then got sandwiched behind the badge against the tank. I find that the majority of tanks I remove these type badges from have abrasions and light rust somewhere behind the badge, so I am going to see if this reduces the problem. I think that any larger piece of rubber or pvc behind the badge would trap moisture and probably make matters worse, but the O ring centres the screws in the badge holes while sealing the screw threads against moisture.
This is the first time I have tried this, but I shall copy the process on the remaining two T160 tanks.
I like the look of the wider centre stripe and will definitely copy that when my tank eventually gets redone.
I took another pic with the tanks piggy-backed so that the new look can be appreciated in comparison with the original.
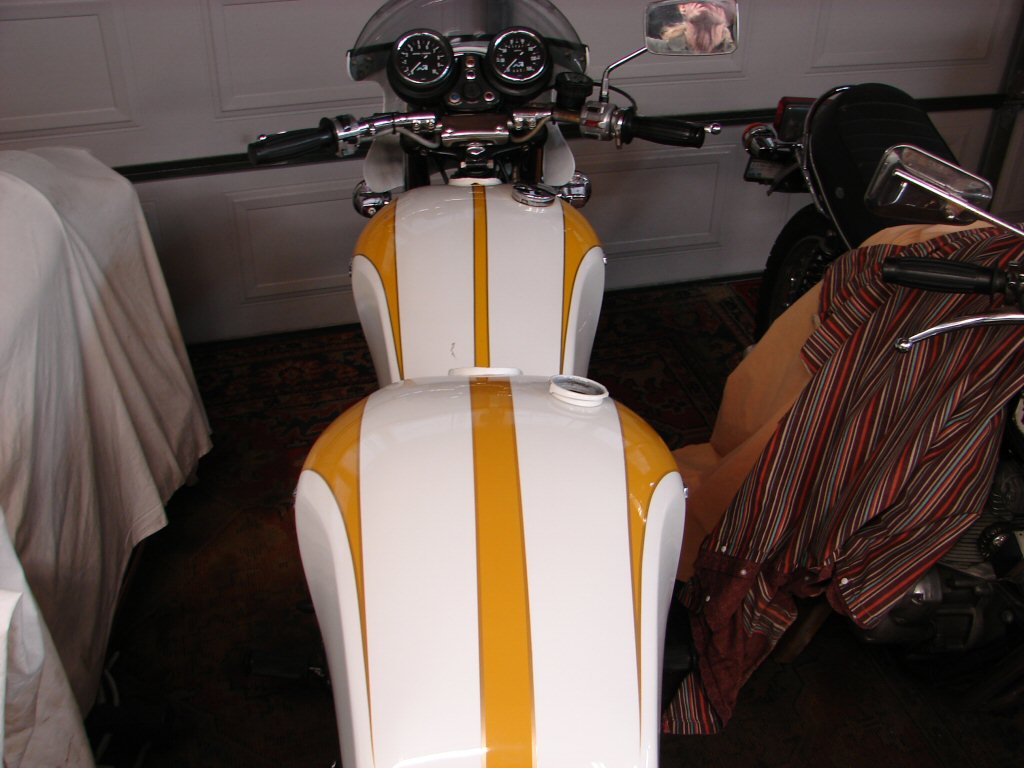
You begin to realise how difficult it is to get an exact replica with paint. The new pinstriping is a lighter gold than the ancient example on mine, but you only see it when two examples are this close together and your eye picks it up.
It will be great to see the finished article adorning a bike and better still, to go riding in its company.

Project complete for now.
Edit.
Sun made an unexpected reappearance so I took the bike for a ride. No noticeable effect on the feel of the steering but a distinct improvement on wind deflection.
I like it..!
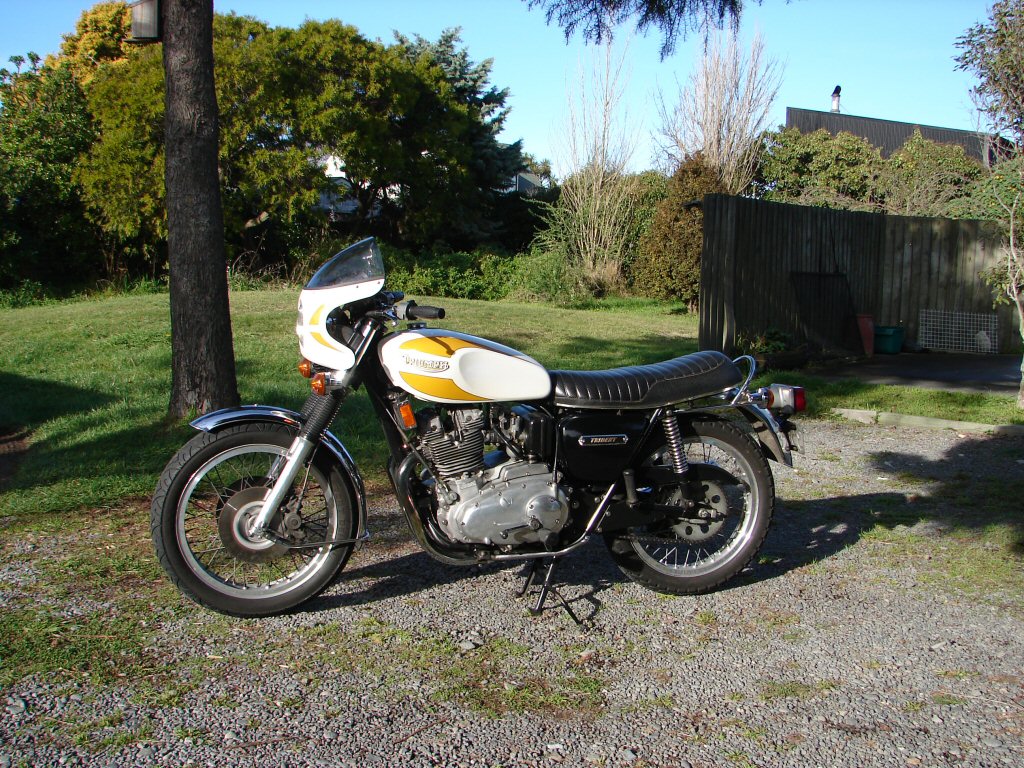
And considering the (lack of..) current fuel quality, I like the colour of my zorst even better...

Its a win.