October 2023
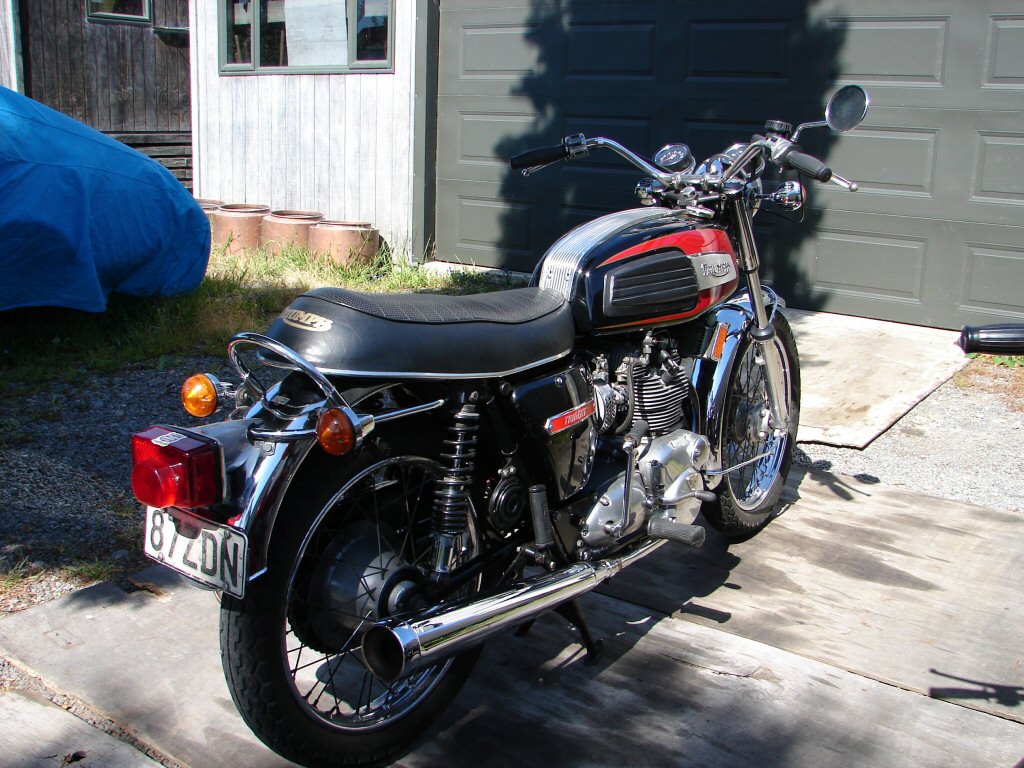
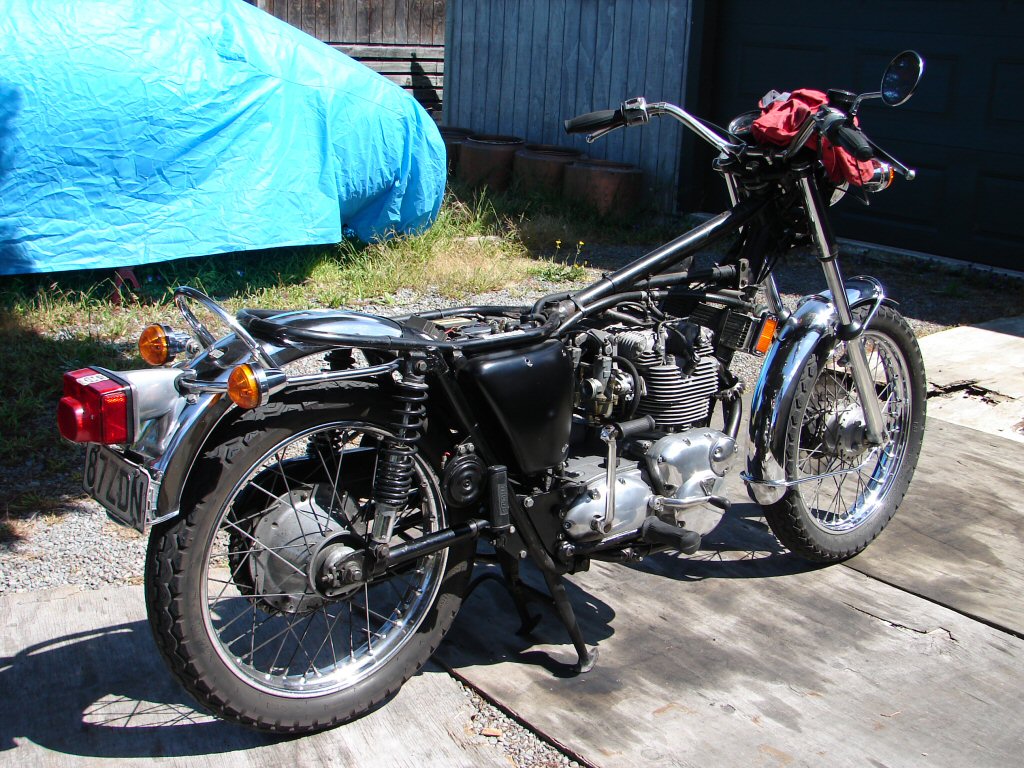
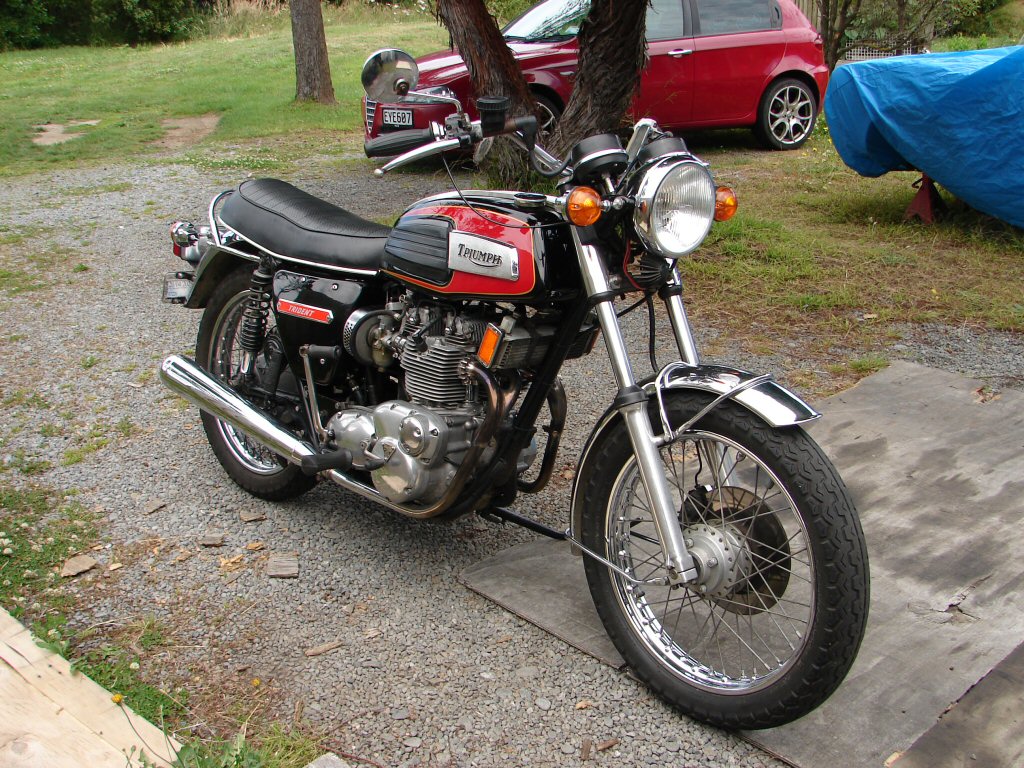
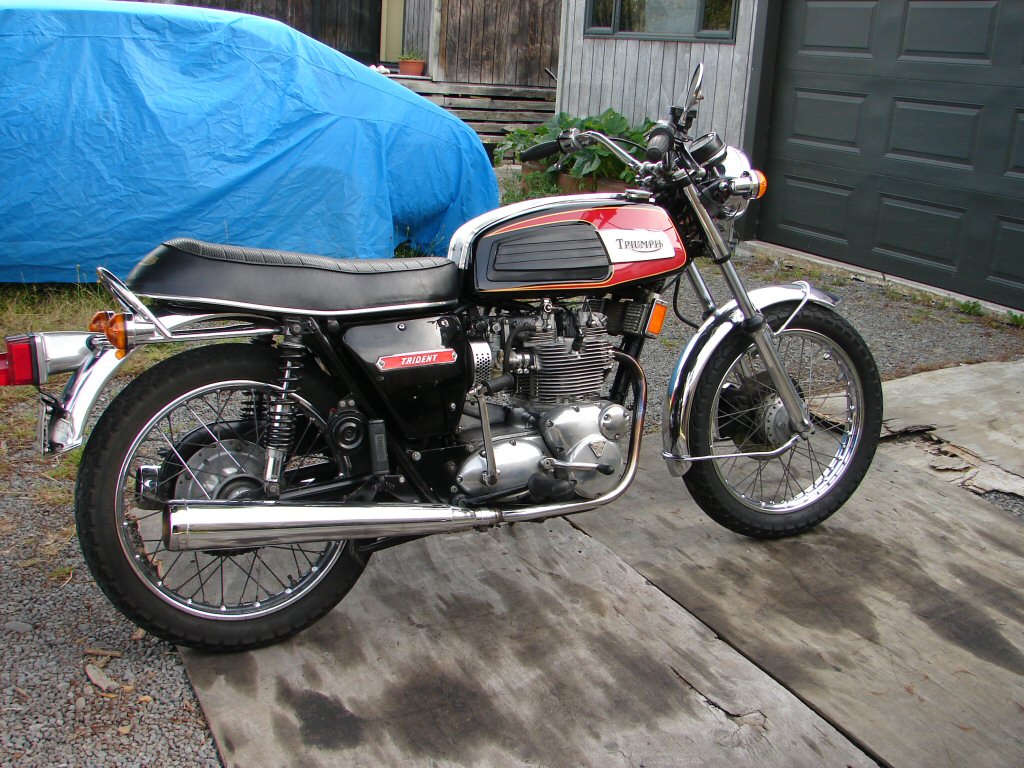
1974 Triumph T150 Trident 750
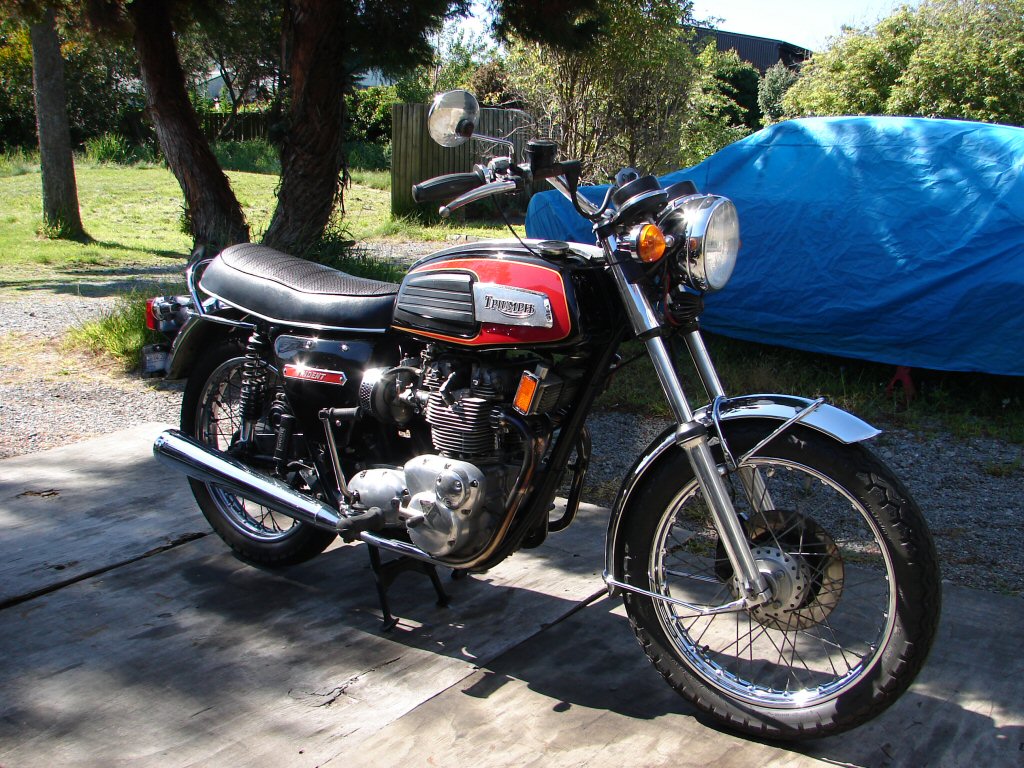
A mate from 'oop north' sent his favourite T150 my way for some treatment. There were a few items on his list, and the parts to achieve them, but as is my modus operandi you simply have to check everything to see what you're dealing with before heading off in the best informed direction.
As it was a runner, I took it for a brief ride around the neighbourhood to see how it behaved. In a word - very well. Ok, two words. The carbs seemed a bit out, so I spent a few minutes tweaking them and equalizing the intake airflows. That made it a happier idler, but also elicited some exhaust smoke. That usually means valves/guides.
Next I did a compression test, as the engine had done well over 30,000 miles since last build. It had not showed any reluctance to get up and go when asked, but the results really surprised me. All compressions were 165psi, which is not only excellent, but they were all the same within a psi. This led to a brief conversation with the owner to see if he wanted the cylinder he sent down fitted if this one was still viable. We shall see what shape everything is in when its apart and can be measured.
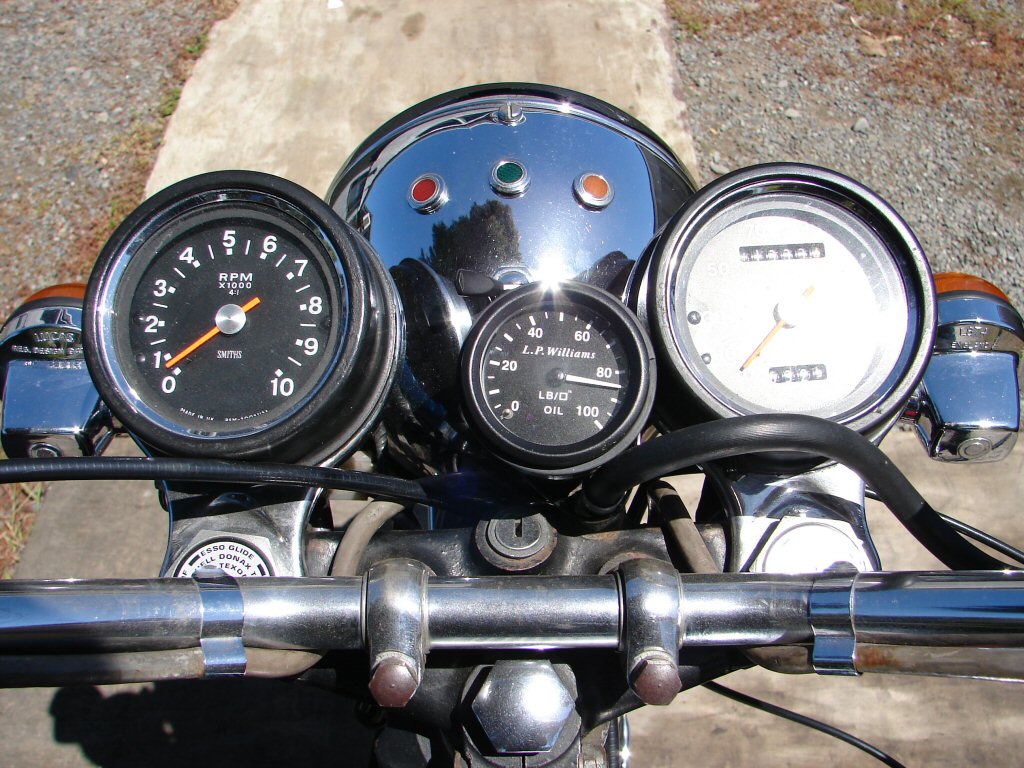
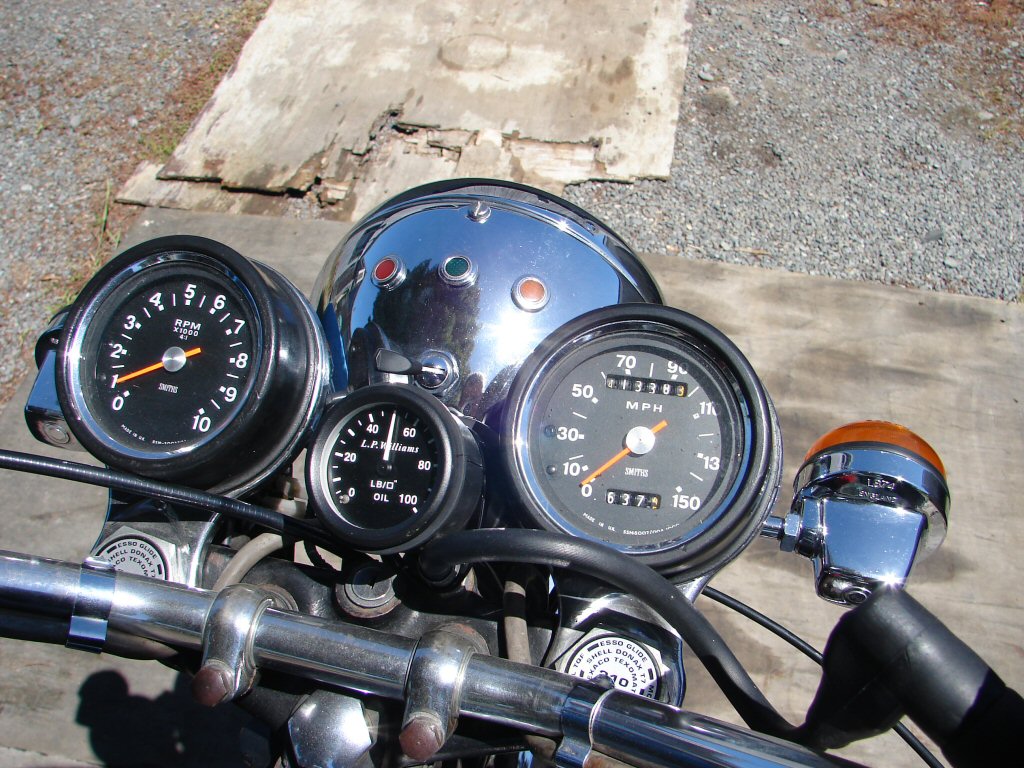
Of course, any top end work loads the bottom end, so next step would be an oil pressure check. The "L P Williams" gauge was attached and the bike wheeled out into todays sunshine. It started easier than the first time, perhaps happy with its new carb settings, and the oil pressure looked as I would have hoped, despite the lowest idle ever at around 500rpm.
The low idle speed also elicited some new symptoms, a rather loud and unpleasant rattle-cum-knock from the primary drive area. A new clutch plate had come with the bike, although I had no complaints about the current one. This sounded more like it was a complaint from the primary drive itself.
With a few revs the noise stopped, so I took a leisurely cruise to warm things up so the oil pressure could be checked in worst case conditions. The pressure remained at 80+ while in use, and the hot idle when we got back was good enough to rule out any need for a bottom end strip.
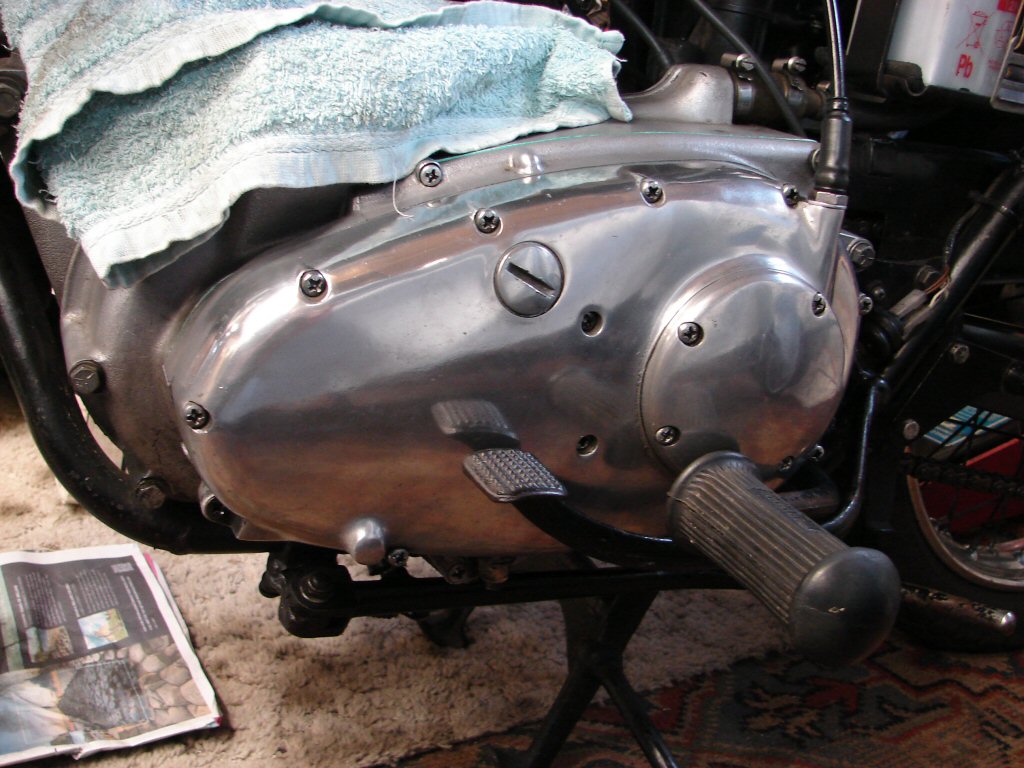
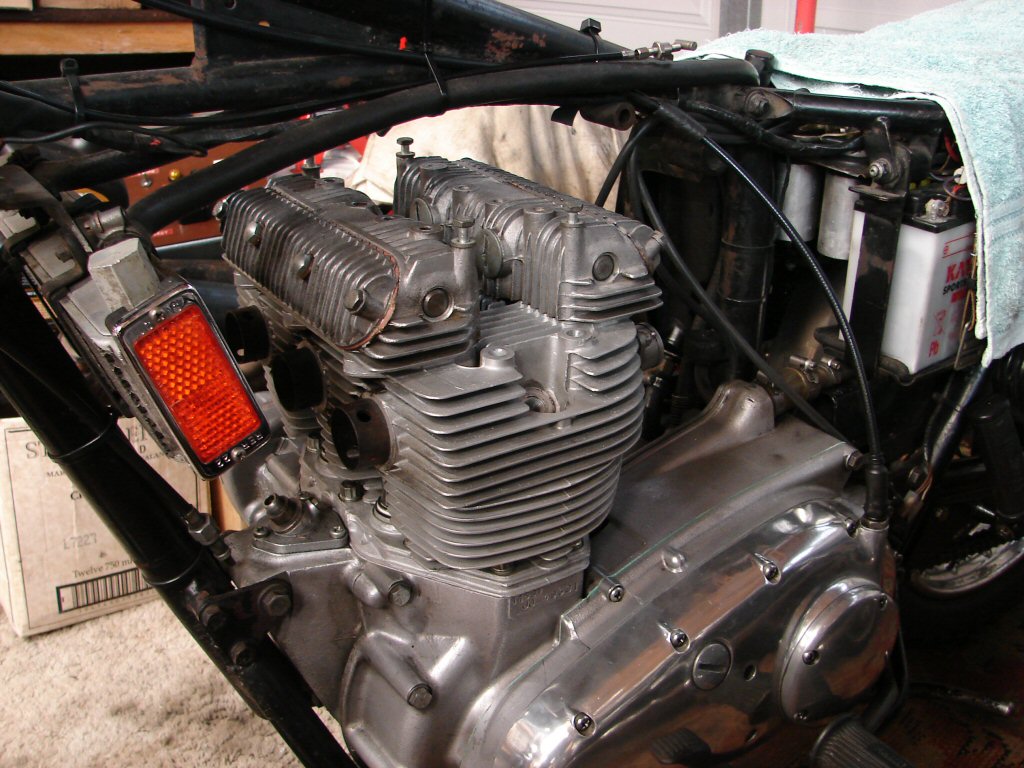
I let it cool down a bit after that, as the exhausts would be the first things to come off, and then, before you could say antidisestablishmentarianism it looked like this.
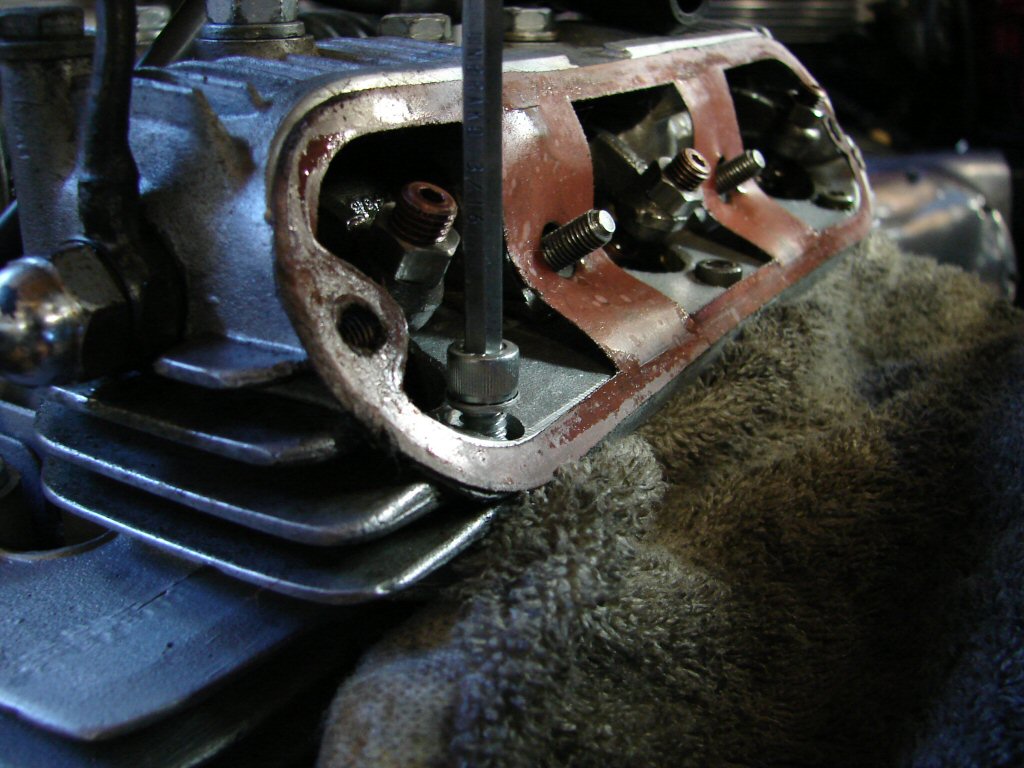
Today lifted the head and barrels. It was a fraught process. The allen screws inside the rocker boxes threatened to snap several allen keys, and rendered one unfit for further use. I suspect loctite was used in the fitting, judging by lots of sealant used in other places, but to overtighten these screws is asking for trouble, as they have less than half an inch of alloy thread to retain them.
I finally gave up on the last one altogether. Fortunately it was in the exhaust rocker box, so I was able to take the head off with the rocker box still attached, and will pass it on to my engine reconditioner for his genius to find a solution.

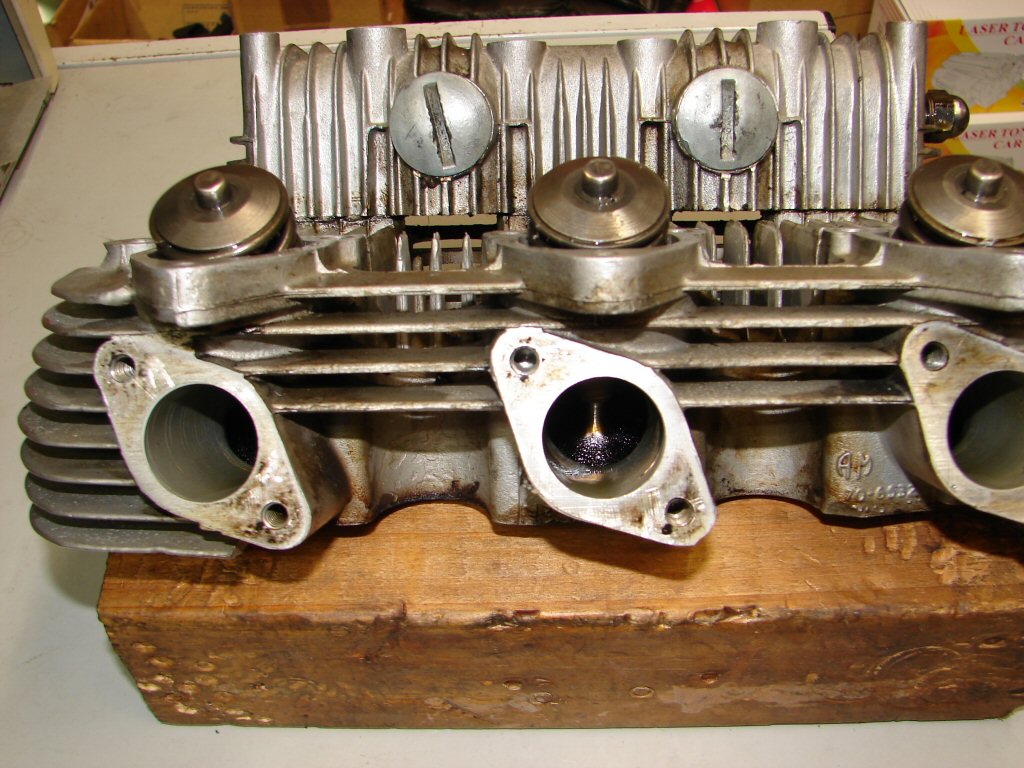
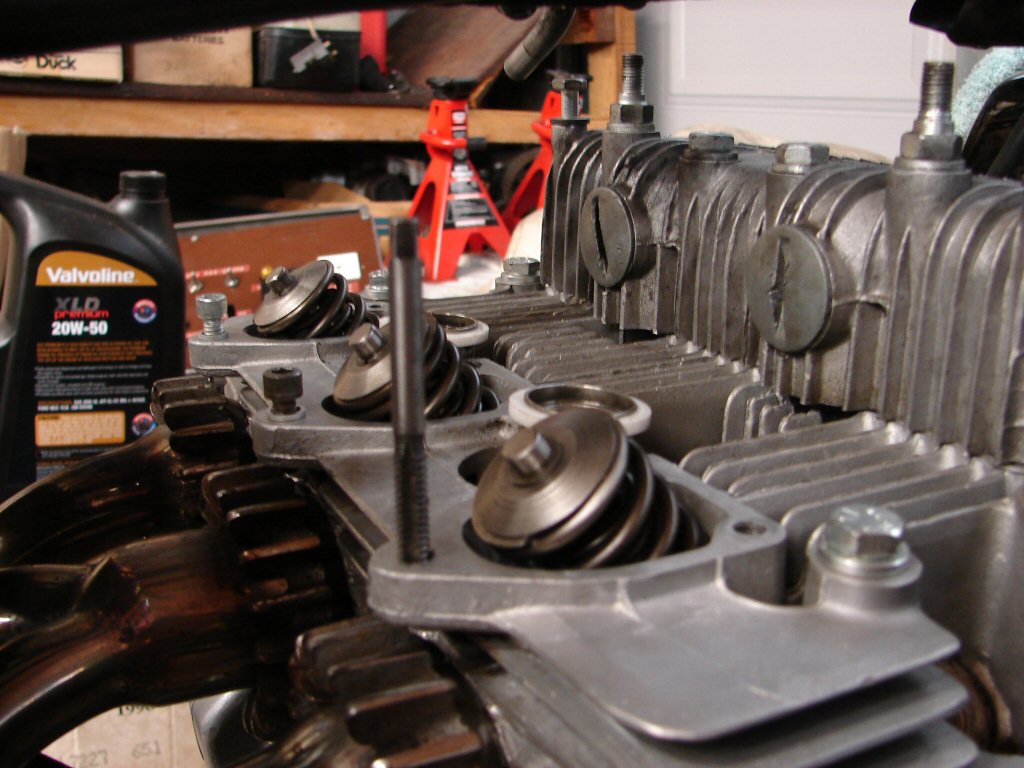
Having removed the inlet stubs I could clearly see that the inlet valves were liberally coated with carbonised oil, so it seems that it has been getting sucked down the guides for some time.
While there did not appear to be undue wear in the cylinders, the pistons slid up and down the bores with very little resistance at all, so at the least a hone and a set of rings would be required to return them to service.
If the bore to piston clearance is reaching max tolerance then new rings will only be a stop-gap measure, so it is looking likely that the new barrels will be going on. A measure up will elicit more data.
Otherwise, rods and camshaft lobes and followers look to be in great shape. More good than bad today.
The head and new barrels went off to the engine reconditioner for his attention. Besides getting the reluctant allen screw out of the rocker box, the head likely needs valves and guides, and we need to see if it needs oversize guides. The barrels are like new, but the tapers at the bottom of the liners need to be increased slightly in order that the new piston rings will easily enter the bores when it goes on. I feed them in by hand rather than use compressors, and the taper dictates whether it is a smooth operation or a risky business. I prefer the former.
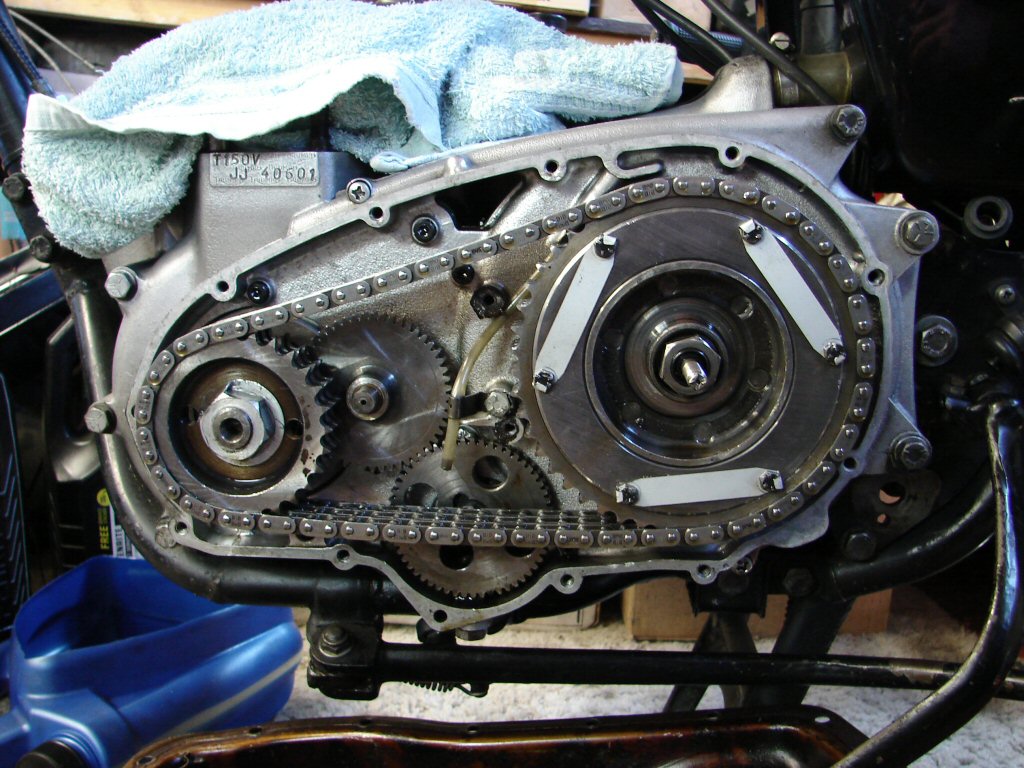
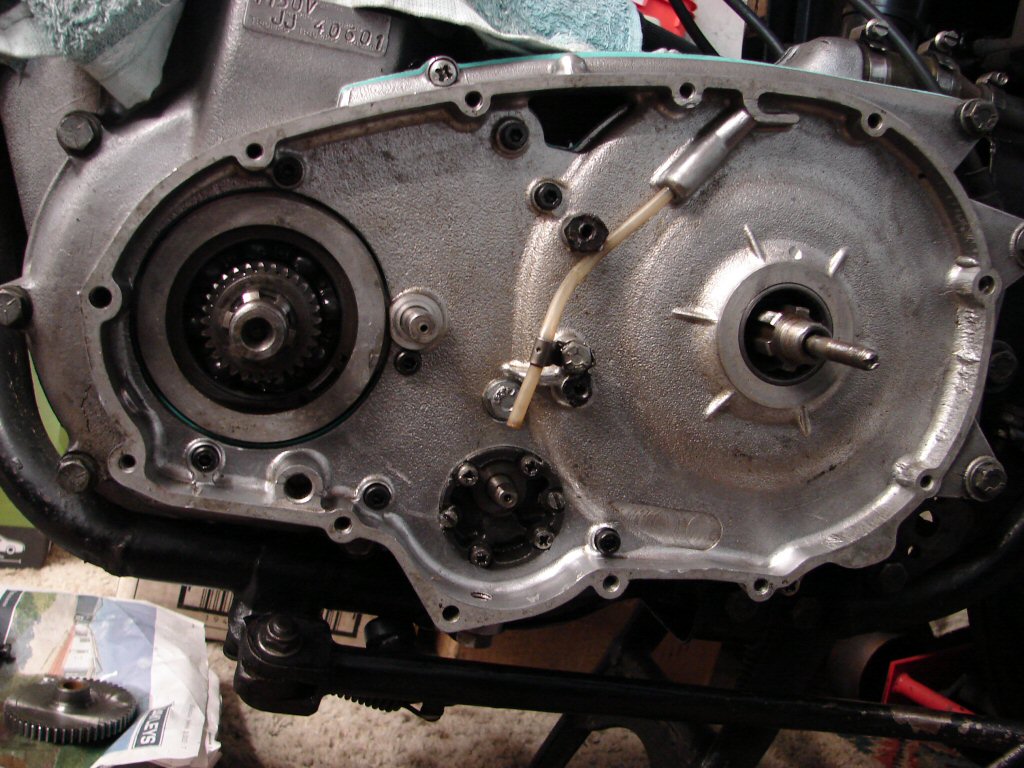
While that all waits for progress to be made by someone else I shall remove the primary drive and see what lurks within.
Later - actually it all looks great, and everything is well tight.
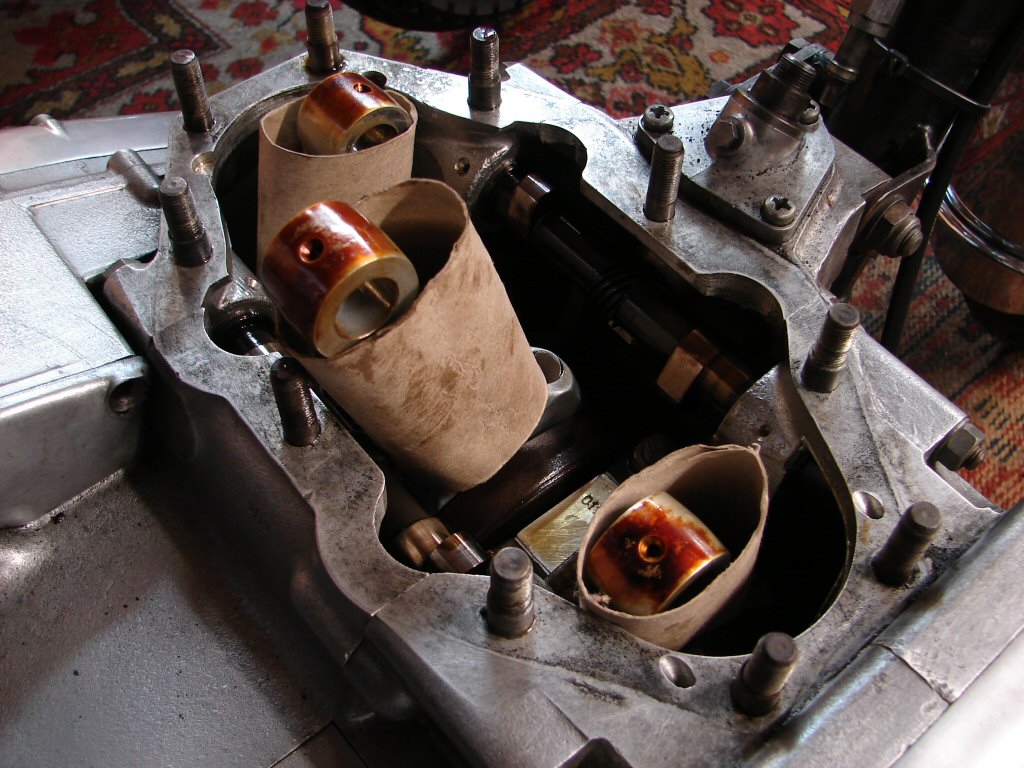
Perhaps I should not have chosen the last words. The crankshaft sprocket nut is tighter than Dean Martin on a Saturday (period joke..), and even my rattle gun failed to make any impression. While awaiting inspiration I inspected the cush drive, and sure enough, I found a small amount of rotational play. Not enough to indicate that the rubbers had turned to mush, and the oil I drained out said much the same.
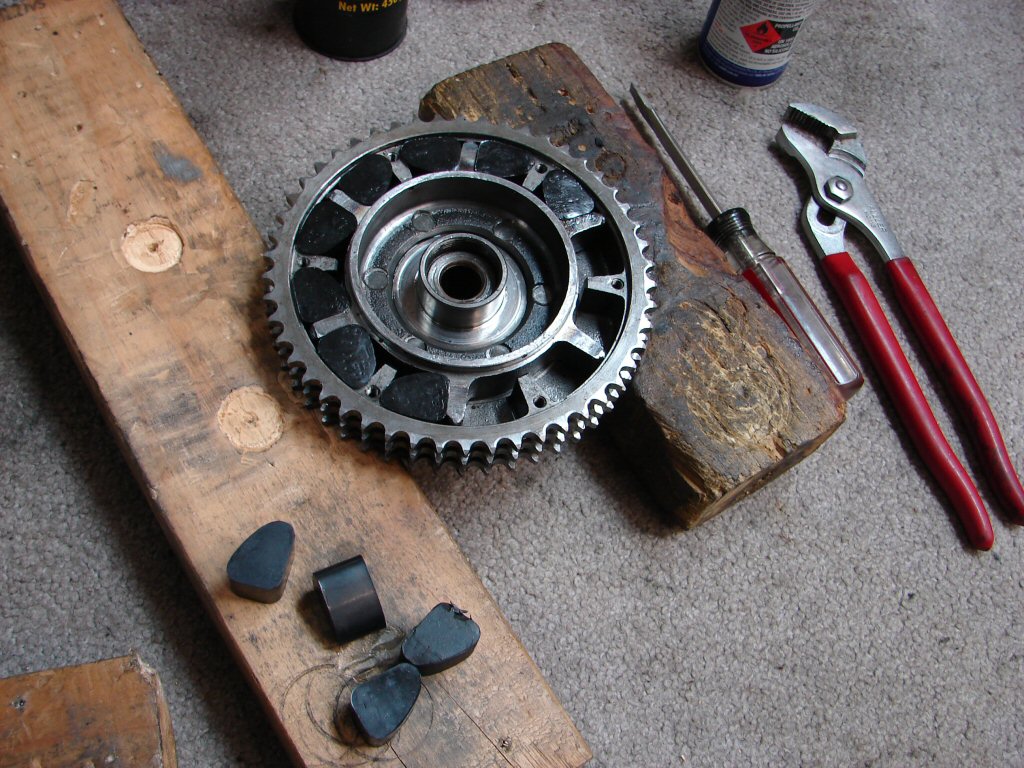
So I opened up the cush drive to find something I had heard of but never seen. Some form of perhaps polyurethane 'rubbers' had been fitted, and they had migrated around the separators rather than the vanes, which appeared to have been built up.
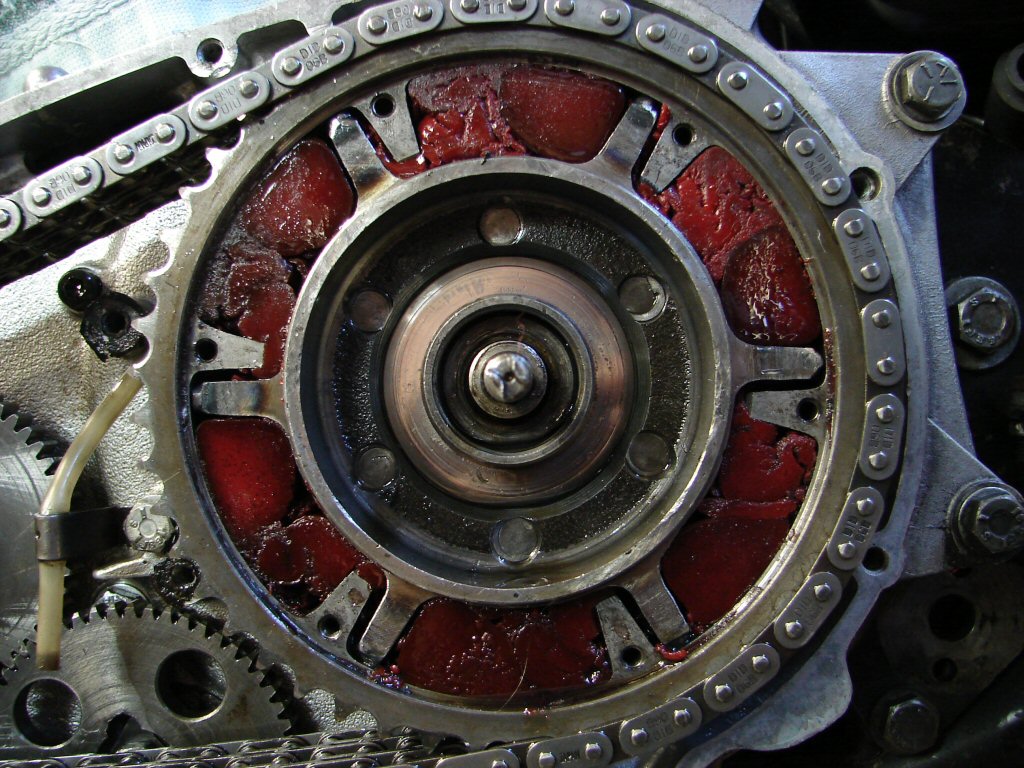
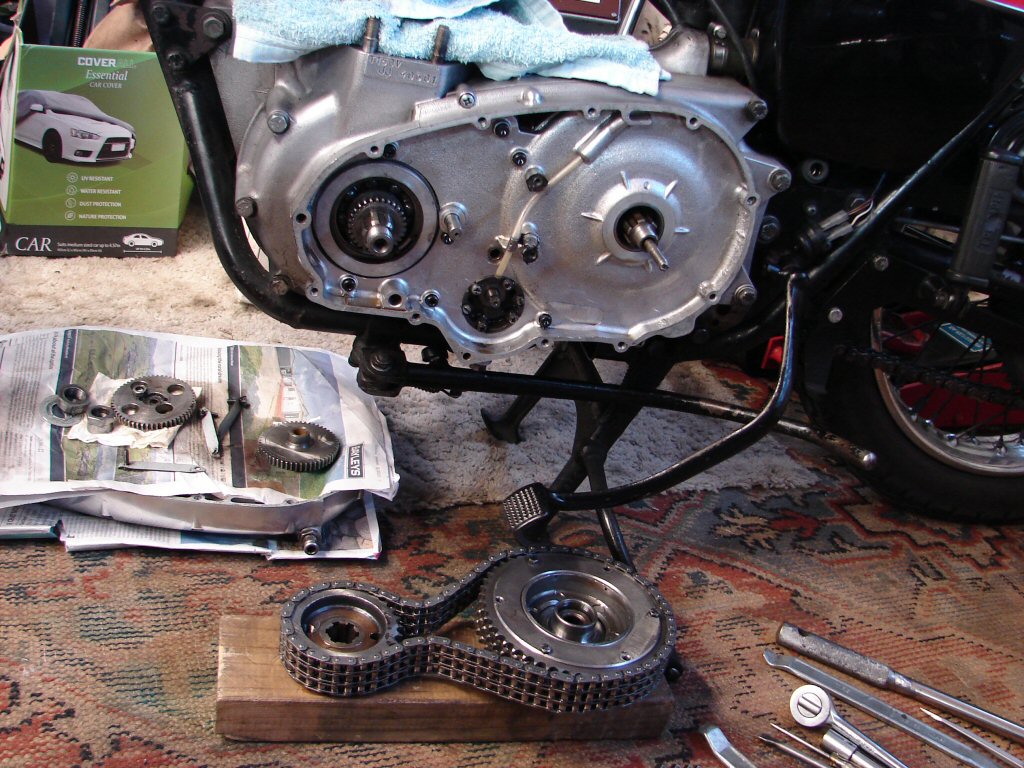
While this explains the knocking noise at slow idle it does not help me remove the crankshaft nut, and I want to inspect the clutch. While I pondered I went and pulled the primary off another Trident, just because I was in the mood.
Having thought about maximising the impact of the rattle gun, I first refitted the cush drive retaining nut, and put a socket with a power bar over the nut while using the rattle gun with my left hand and my knee on the rear brake pedal for good measure. It did not look at all impressed.
Ah. Then I realised that I was using a conventional socket on the rattle gun. Perhaps the 12 point socket would impact the nut less dramatically than a proper impact 6 sided nut. Fortunately I tracked one down, and first go it came whizzing off. Marvellous.
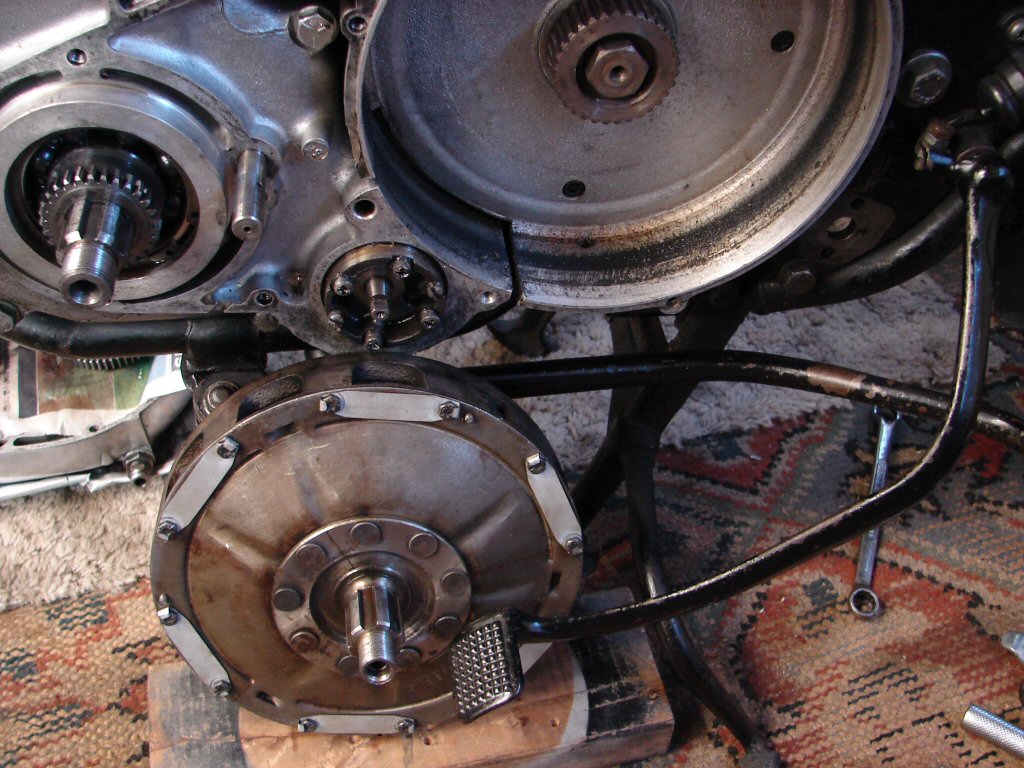
The inner primary cover came off next, and the clutch followed suit. The spline in the clutch plate was quite a loose fit on the hub, so the clutch assembly could be rocked side to side some amount, which may have also contributed to the knocking noises.
It all looked to be in good condition, though the line of oily deposit around the inside of the clutch housing would indicate that a small amount of oil has been leaking along the pullrod and getting flung out of the assembly, and may have reached the lining material on the plate.
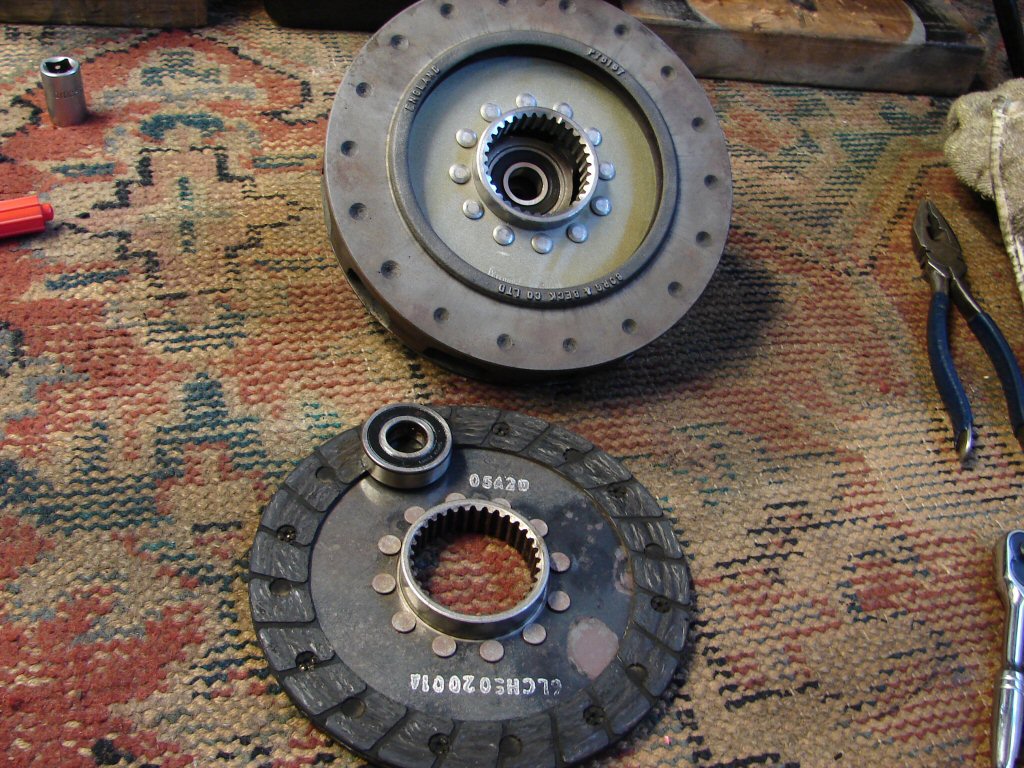
The clutch got stripped immediately, new clutch plate laid in place while I removed the clutch bearing to insert an angular thrust type. As these bearings are similar to a taper type, the centre can be pushed out of the bearing in the opposite direction to its intended thrust. While I doubt that this clutch will ever be apart again in our anticipated lifetimes, should it ever be necessary to get it out, two holes need be drilled through the pressure plate so a small punch can be used to drive the outer race out of its location.
Like so...

The old plate did appear to have an oily surface, so I think we are curing a number of ills in here.
The clutch assembly got all bolted up and is here ready to go back in place, with a light smear of grease on the hub first, and an O ring slid back over the splines to prevent any oil tracking down the spline into the clutch housing in future.
I also dressed the end of the pullrod where the edges of the screwdriver slot had been burred to the point they were interfering with the nuts.
So the inner cover went back on with a new oil seal for the cush drive and a new O ring around the oil pump.
Oh - and a manky green gasket. Why do they make them green on the outside.? Its black on the other side. No sense of aesthetics these people.
Now begins the battle of the cush drive rubbers. The previous set were quite soft and malleable, which is why they migrated so successfully. Must have been a joy to install.
The new ones I just know were British made, because they will never surrender. Hard as a hard thing, and I am going to soak the last ones in hot water to try and make them a tad more pliable. They are putting up one hell of a fight.
Heating the remaining rubbers did help, as did perseverance, so I eventually won. I bolted the cover plate on and off several times to make sure none of the rubber was preventing the cover going completely home. It is certainly a firm fit so bye bye noises in both departments.
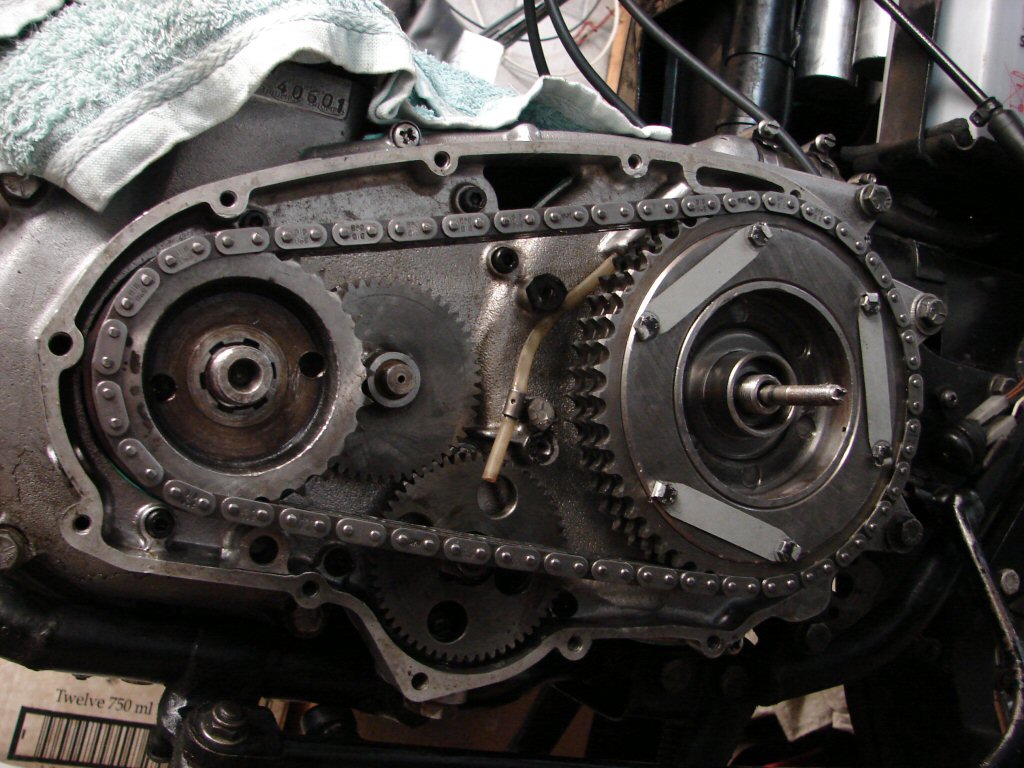
Locking tabs applied and the chain assembly got refitted to the bike, with a bit of rotational trial and error as I found the splines that were the happiest match. I left it here for the time being, and cleaned the two threads which will get a sensible amount of thread lock when the nuts go back on tomorrow.
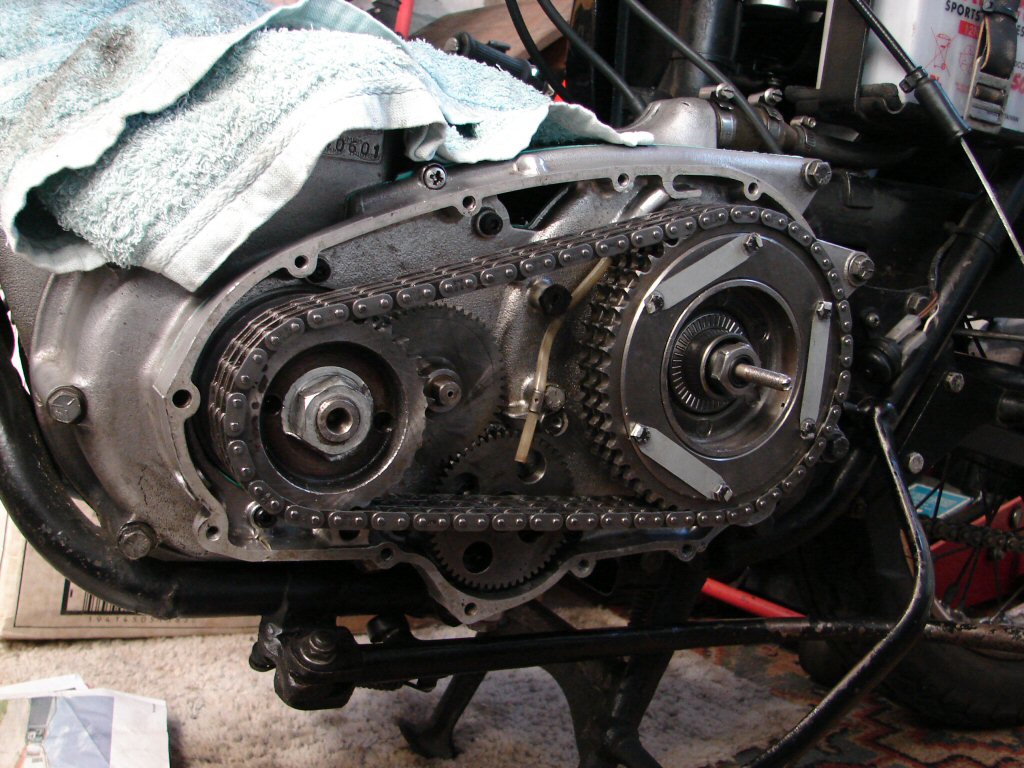
Some tomorrows later I fitted the new oil seal into the cush drive retaining nut, wrapped some insulation tape over the pullrod threads and slid it into place. A bit of thread lock and a long bar were pressed into service as I kneeled on the brake lever and gave it some torque.
The crankshaft sprocket nut got some thread lock and the same tightening treatment, then I had a devil of a job getting the edge of the locking tab to lift so I could fold it properly whereupon the job was done.
With a new gasket in place the outer cover was easily convinced to go home, and the fixing screws got a clean as each one found its place. I don't do any up tight initially, as often the gasket sags a bit somewhere and obscures the hole. Forcing the screw in can then break the gasket, but it can be persuaded back in place while none of the screws are yet tightened fully.
Once it was all complete it got a lick of polish just to keep the motto intact - everything ends up better than when it came apart.
Further progress is now in the hands of the miracle machinist, who I saw today to compare notes. His benches are very full at this time of year, but I gave priority to the barrels, as I can at least move forward if I get those first.
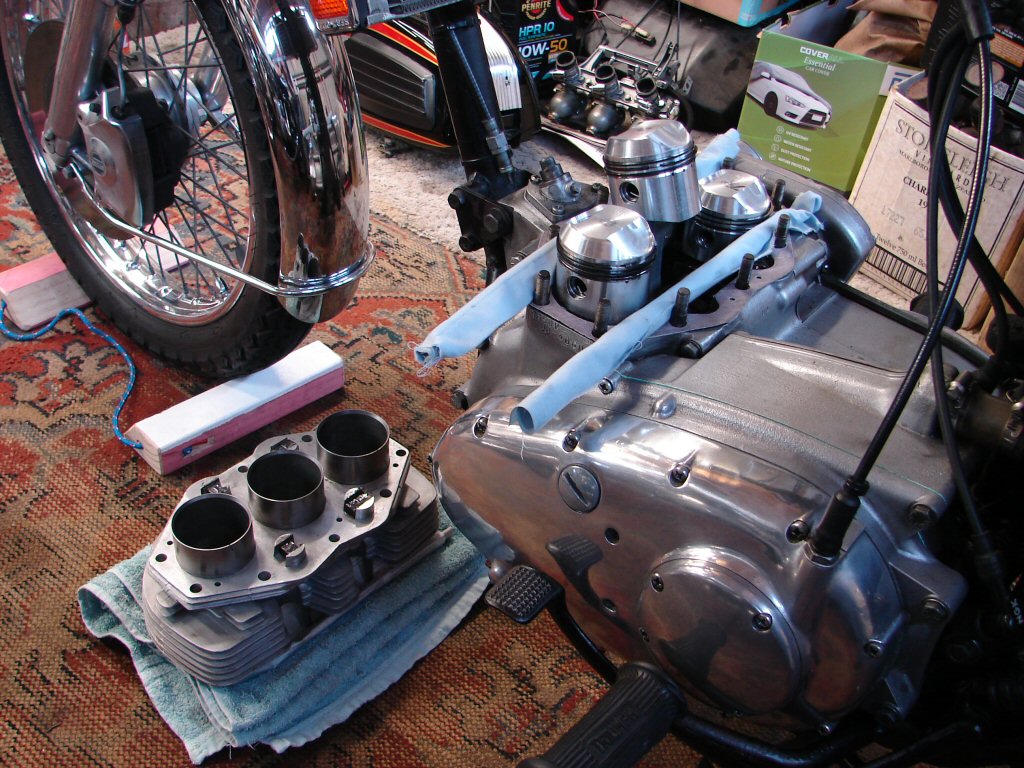
Yes - my man came through, and we have these oh so shiny barrels receiving their cam followers from the old barrels, each follower matching its original cam lobe in the same rotation.
You can see the more generous taper at the bottom of the bores which makes fitting the rings such a less troublesome operation and the risk of a ring breakage most unlikely. Rings have not become any more flexible over the years.!
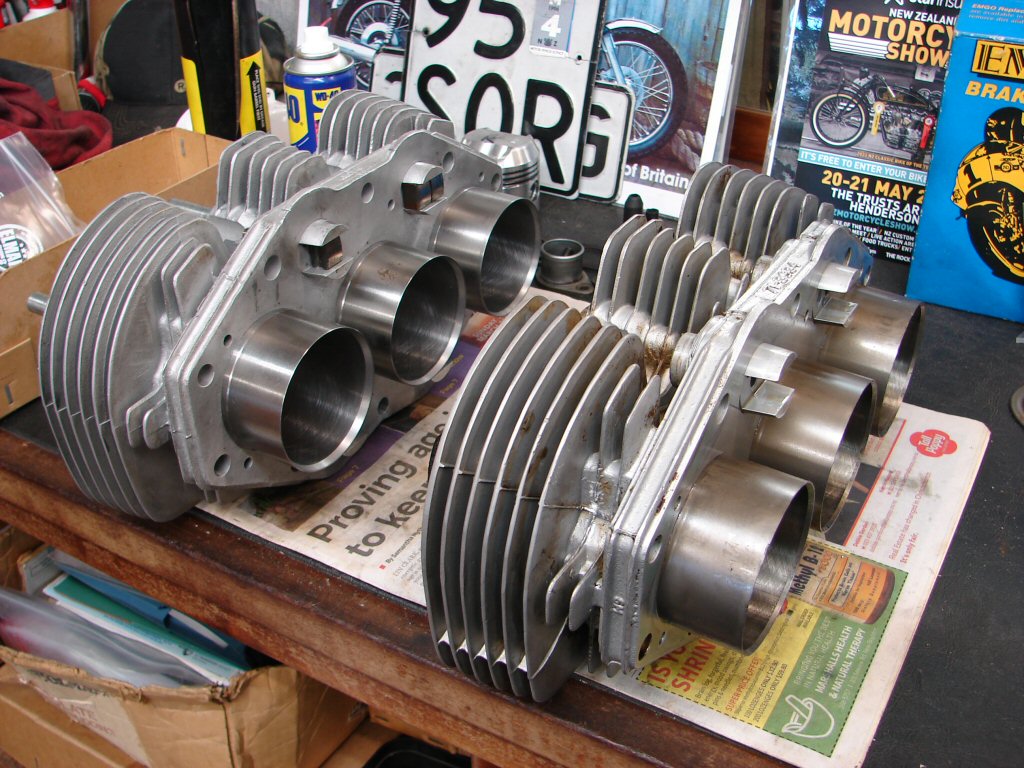
So here we are ready to go, and what a tribute to Barry Lynch they are, you would easily describe them as 'better than new'.
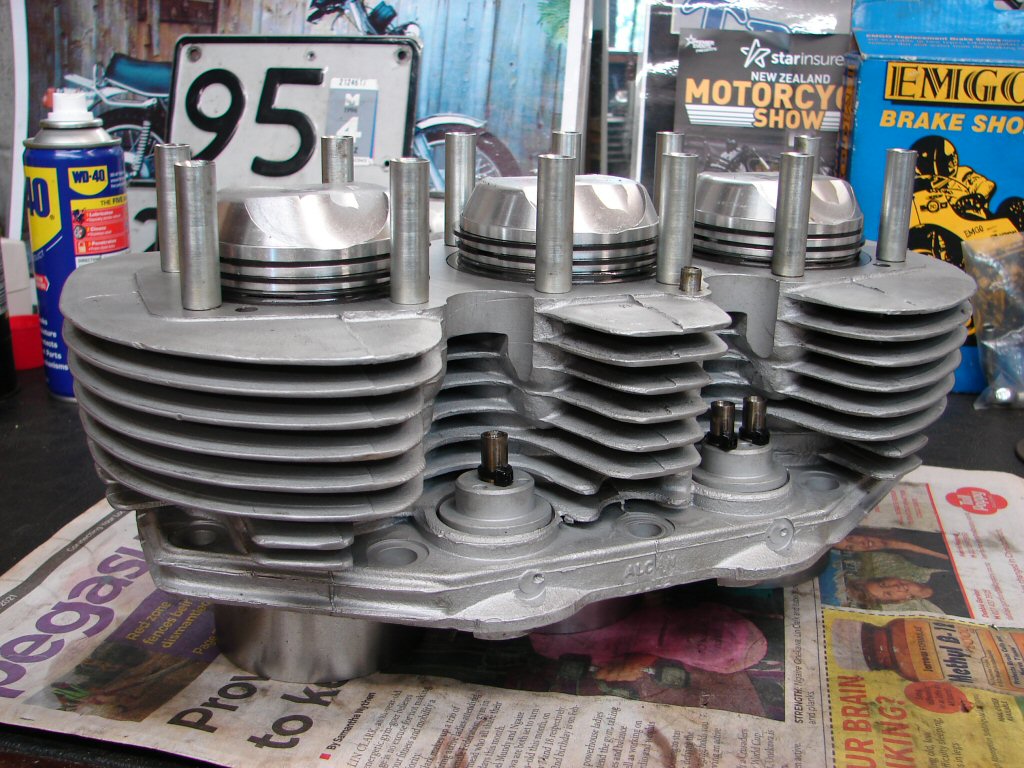
I do take a lot of photos, as they help explain every step of proceedings, but this pic is purely in admiration. This is a thing of great beauty, and soon it will be mostly concealed, never to be appreciated in this intimate detail again.
But they are going to be a great source of pleasure doing what they do...
For no apparent reason the barrels had one of the oil draining dowels fitted, which I then removed. I fit them to the cylinder head, and this allows a good fit to be ensured which discourages oil from running down the outside of the dowel and out the edge of the head gasket joint.
Lawdy.!
By way of xmas miracles, the head was finished a few days later, so I hotfooted to collect it. I am super grateful to Glen (Durie) my engine reconditioner as his shop is full to the gunwales with every kind of engine you can imagine, and at this time of year everyone wants theirs first.
I made a start straight away, which was to repair the threads on all the inlet manifold studs. They always show signs of battle as they can be buggers to get out, but I religiously take them off because the head will go into the cleaning bath, and I have previously found the thermal insulators can disintegrate which makes fine tuning impossible.
If you don't clean these up it will never go together happy.
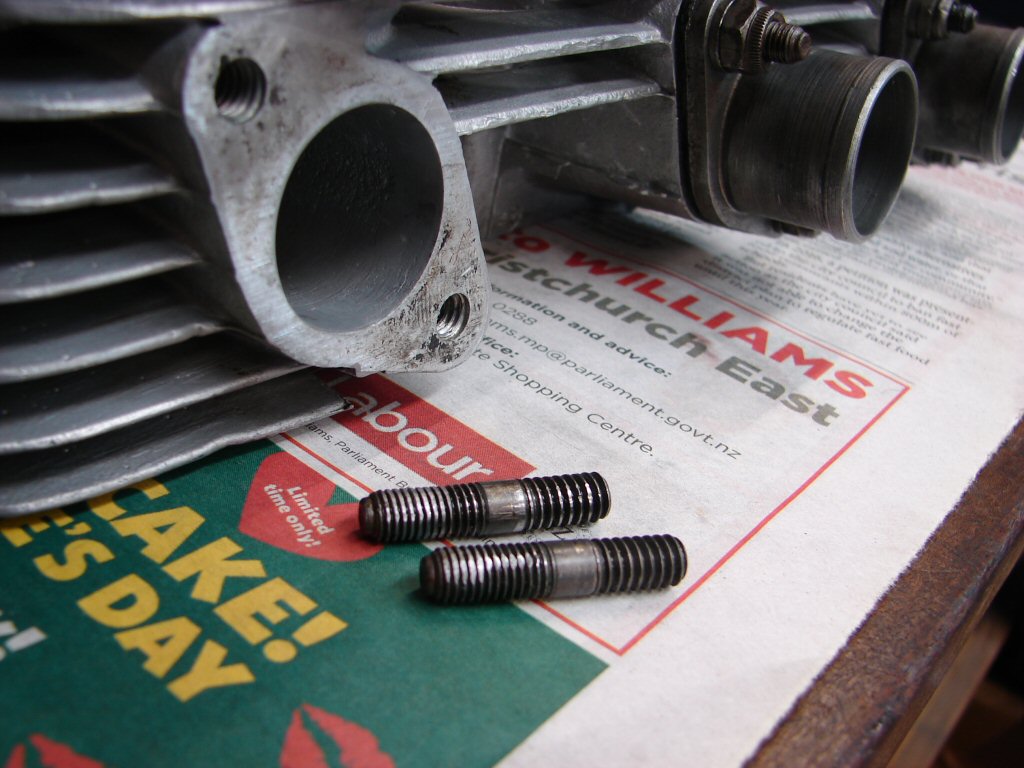
Job done and no complaints anywhere. Aligned the flats on the nuts to encourage the inlet rubbers to go all the way.
Easy to see the nicely polished up valve stems and backs of the heads in there...

We did not surface the head at all, it did not need it, and it is too easy to lose too much, even with the best intentions.
The head got a set of special new guides, made by Kibblewhite from a tougher version of the normal material. A triple owner in Switzerland had a batch specially made, and they are intended to be the only guides you will ever need. The valves were fortunate enough to be fit for a second innings and look great, but they are as low in the seats as you would allow them to be.
Nice job.
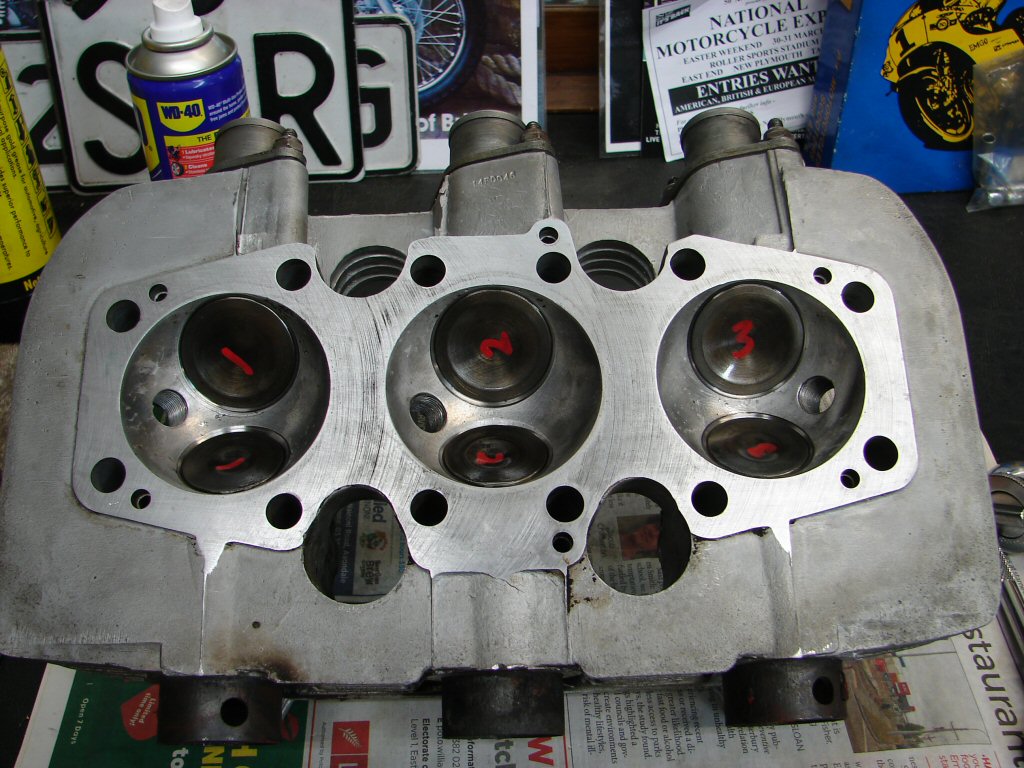
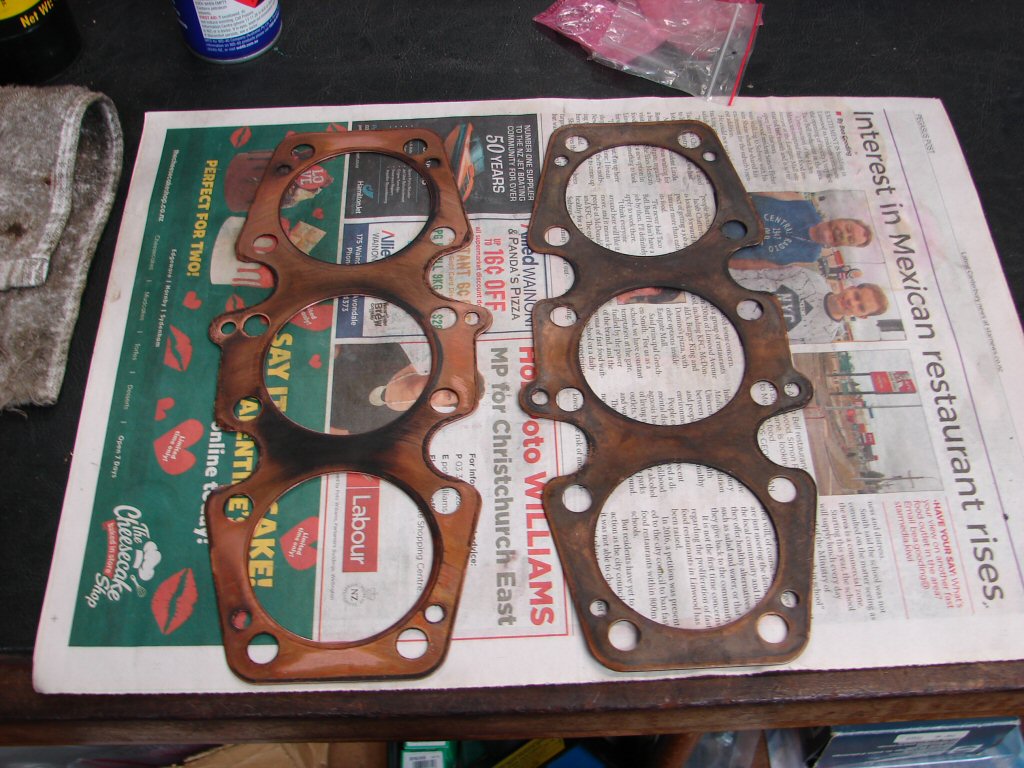
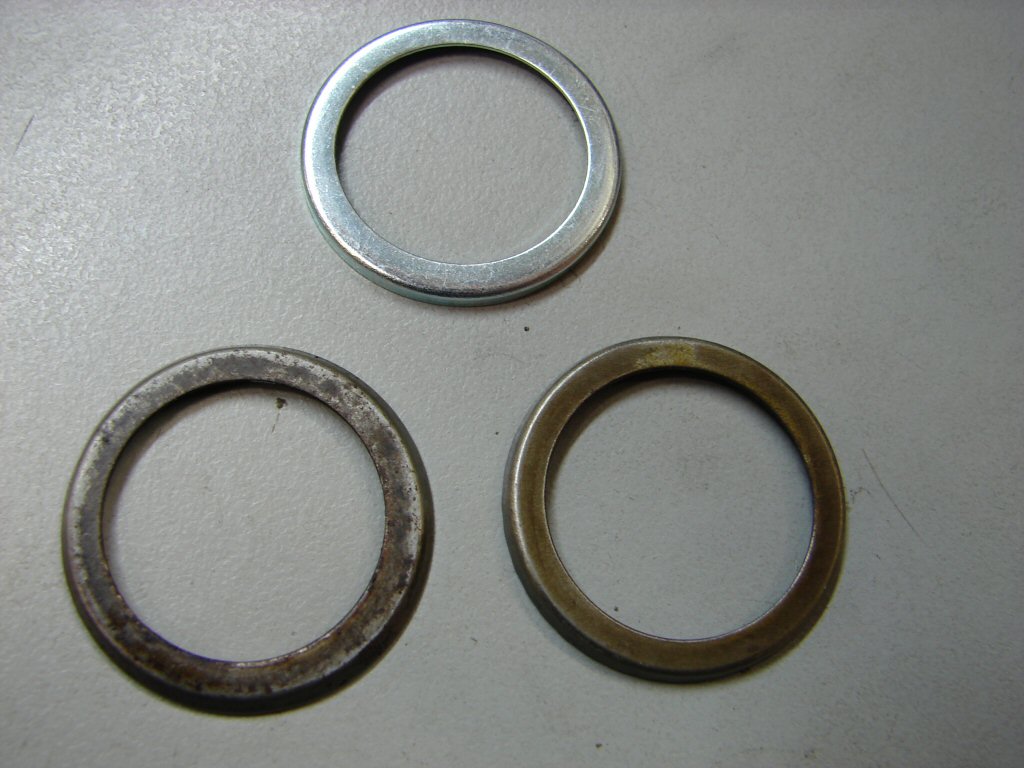
We had two head gaskets to choose from, one being a used unit that came with the bike. I preferred the look of the one that just came off - on the left - and you can see it has been leaking combustion gases between the nearest two bores.
The two centre pillar studs on the exhaust side had both pulled their threads in the old barrels, so the gasket had been leaking for a while I would say. The gasket will be annealed to soften it up, and the quenching process often cleans the copper quite well, but I will take care of that when it comes back from my handy mate with the gas bottle.
So - the next prep is getting ready for the 'big op'. Fitting the barrels is one of those jobs that needs to not be rushed, and I take some care to ensure I am not disturbed in the middle of it. I have some wire handy for supporting the barrels below the upper frame tube, but mostly it is all a hands-on job.
Base gasket in place, pistons on rods and circlips fitted, assembly lube on the cam follower faces, we are ready for lift-on.
My process is to fit the centre piston first, then the right side - which is partly obscured by the top of the timing chest, so you don't leave it til last - and the left side last, which makes the most of its easiest access for when the gap is smallest to work in. You have to rotate the engine backwards to achieve it in this order, which I do by rotating the rear wheel in top gear.
Clarkson eat yer heart out.!
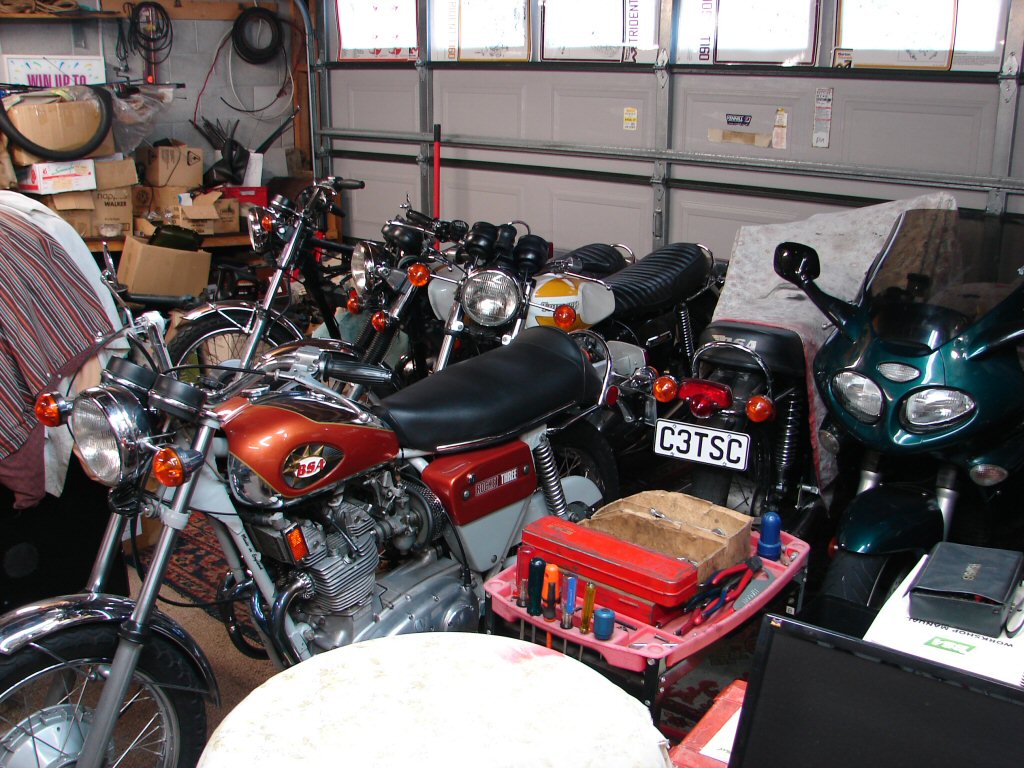
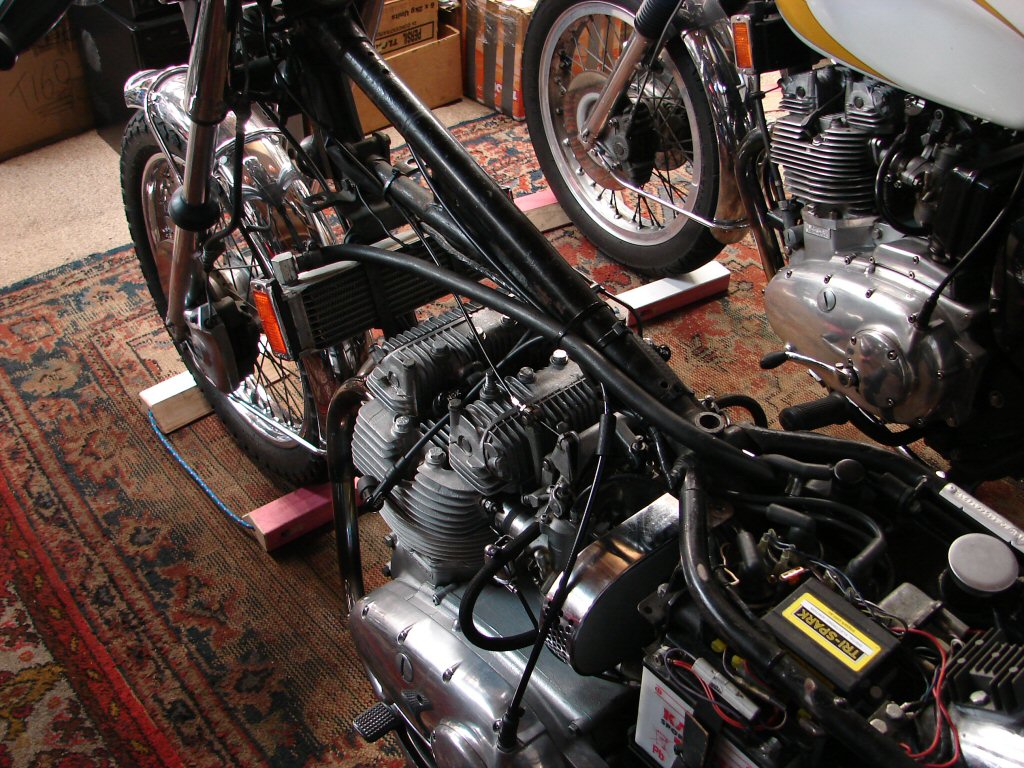
That is close of play Saturday 16th, and the shed is kinda packed, but 5 of them are triples so the T150 is in good company.
Having reserved a bit of time for the occasion, I smeared a little engine oil around the base of the 3 cylinder liners where the chamfer was recently extended. Then I smeared a little around the ring areas on the 3 pistons before beginning the job of co-ercing three sets of piston rings into their respective bores while simultaneously supporting the barrels in mid-air.
By default the radio in the shed is tuned to a classic station that plays 60's and 70's tunes which being of that era are relatively brief. It took two songs, what is that, about six minutes, and the job was done. Unbelievably brilliant, no stress, not a moment when steady progress was not being made. Smooth operation.

The barrel nuts were fitted and pulled down. In the absence of the head gasket the head was placed on the barrels as somewhere to put it while other bits got cleaned up.
The rocker boxes got cleaned and wire brushed and sat on their aluminium gaskets, and the pushrod tubes also sat in place so that once the head gasket arrives the amount of crush for the pushrod tube seals can be arranged.
When you think you have seen pretty much everything that can go wrong with a triple engine assembly you just know there will be something new. And there was. Cleaning up the cups which retain the seals at the base of the pushrod tubes revealed that both the exhaust items were badly made to the tune of 'fail'.
The worst of the two was basically just a saucer shape, and could not possibly hope to ever be made oiltight to my mind, but neither are going to pass muster here. I have already ordered a new pair, which were available and cheap.
The camera does not see it as clearly as the eye, but the edges of the original cups are splayed out allowing the seals to squeeze out the sides rather than do their job.
The annealed copper head gasket came back, and needed a bit of relieving on the stud holes to fit over the new barrels. The pillar studs look to be perhaps locally made, and were a smidgeon larger than stock items. This ended up giving a very firm fit, so then I had to ease the oil drain holes fractionally so it all went together sweetly.
With the new seal cups in place the crush tolerance was measured and the exhaust tubes needed one more fibre washer each to give what was needed, so that was ready to go.
I use a coating of copper gasket spray on both sides of the head gasket, after which you get about 5 minutes to put it in place while the spray is tacky. After that it needs to be tensioned down within two hours, so here is what I do.
Sprayed gasket goes on, head goes on that, rocker boxes go on without pushrod tubes, and the whole lot gets tightened down, albeit not to the final tension - just a good pinch. After that I back it off a tad, as I would when removing a rocker box for gasket replacement. Now the pushrods and all will be fitted, so everything gets checked. Every thread has to have proved itself, and sure as hell there will be one that does not allow the screw to pass right through..
A bit of assembly lube on the bottom of the pushrods ensures that the oil at the top does not suck the pushrod out of the cam follower while getting the rocker box all mated up. There are aluminium rocker box base gaskets and they get a light smear of silicone sealant around all the sealing edges.
Once the exhaust rocker box was all tightened down I adjusted the valve clearances to roughly 10 thou then repeated the process on the inlet rocker box. There were no other hiccups, and after everything was nipped down I torqued it down properly to 20ft.lb. The scale on my torque wrench can hardly determine the difference between 18 and 20lb, but I only go to the torque setting once.
That got me to the point where all the valve clearances could be set properly at 8 and 10 thou and the inspection covers buttoned up. Providing the engine runs happily on its first start it will get a short test ride. When it has cooled down from that the head gets loosened off and retightened. If it goes down further than I backed it off I check the valve clearances, Because the six allen screws along the outer edges of the rocker boxes have soft alloy washers fitted, they tend to crush with the heating/cooling and the screws can become slightly loose. For this reason I initially assemble them dry, then remove them completely during this first head check and put some silicone sealant down their threads as I tighten them up on the now squashed alloy washers. This makes sure no oil decides to leak down the threads in future.
Thats the theory anyway.
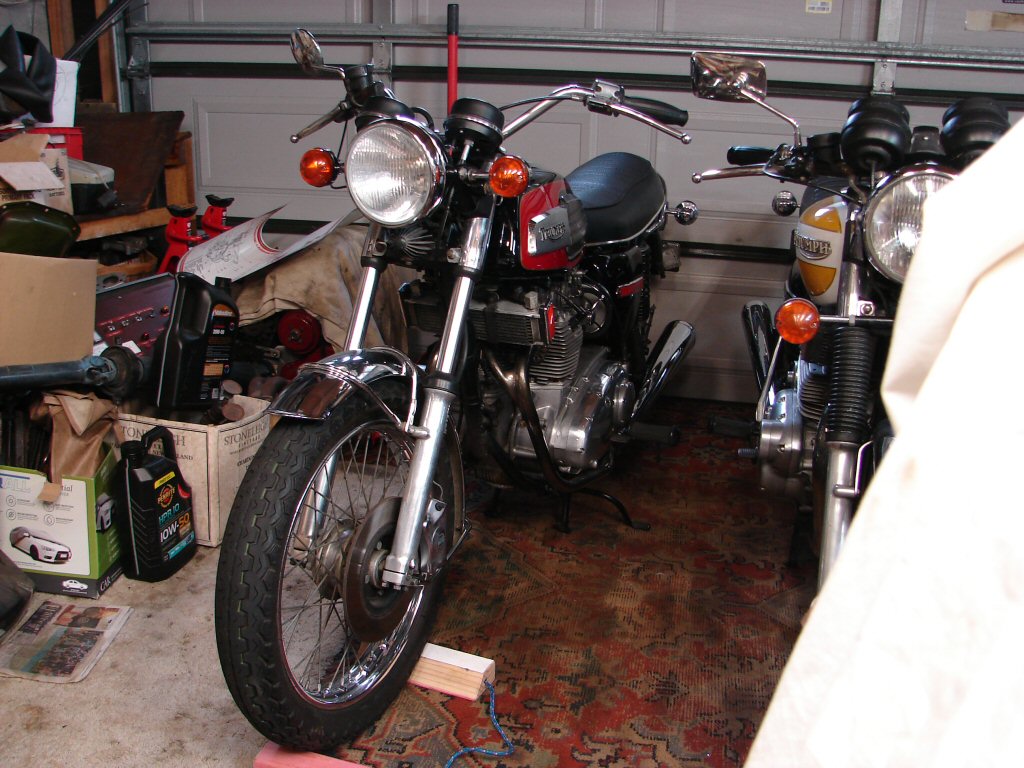
So if the next step includes possibly riding the bike, I needed to put it together. Voila.!
Since rebuilding the primary I have not refilled it with oil, so that will be taken care of before trying to find signs of life.
When kicking the engine over to set the clearances it had developed a squeak which seemed to mimic the movement of a piston in the bore. I loosened the valve adjusters which were also on the move at the same time to see if it made any difference, as I was wondering if a pushrod could be dislocated, but that made no difference. I squirted a little WD40 down the spark plug holes and that did make a difference, so I figured it had to be new rings in a new bore and it should stop after the first run. It pays to be sure of such things, as I have struck valves being too tight in their guides before, and such things need to be eliminated before doing any harm.
Today was sunny enough to make a space in the shed to attempt a first start, so after refilling the primary oil thats what happened. There were a few minor issues such as flooding the engine initially having tickled it seriously and also used full choke, so I turned the chokes off and kicked it until it was happy to go.
It progressed like this.
A fuel leak from the left side main feed made an appearance, and after shutting down I checked it to find a perish related tear in the hose just where it fitted to the banjo. Slicing 3/4" off it and forcing it back into its collar solved that one.
Sure enough the squeak had also ceased, and there was no exhaust smoke to speak of, so a test ride was in order.
Ready to roll.
Nice ride, everything worked as you would want it, and the new clutch took up and released great. I got the impression that the pilot jets were a tad rich, as I had found that the pilot air screws only wanted to be a half turn from fully in, and the engine would occasionally stumble on a trailing throttle, but clear as soon as the throttle was opened. While this is a trifling issue, it can be annoying when rolling the throttle on and off when traffic demands. As the bike has Amal Premiers the pilot jets are replaceable and a size smaller would probably solve the issue.
I will try opening the pilot air screws an additional 1/4 turn to see if that helps meantime.
No oil leaks or other annoyances, so tank off again for the final head retighten once it has completely cooled off. I only rode around local streets with one short squirt in an 80Kph zone, but the engine got quite hot, as you would expect with a new bore.
Nice little clicking noises as it cooled off.
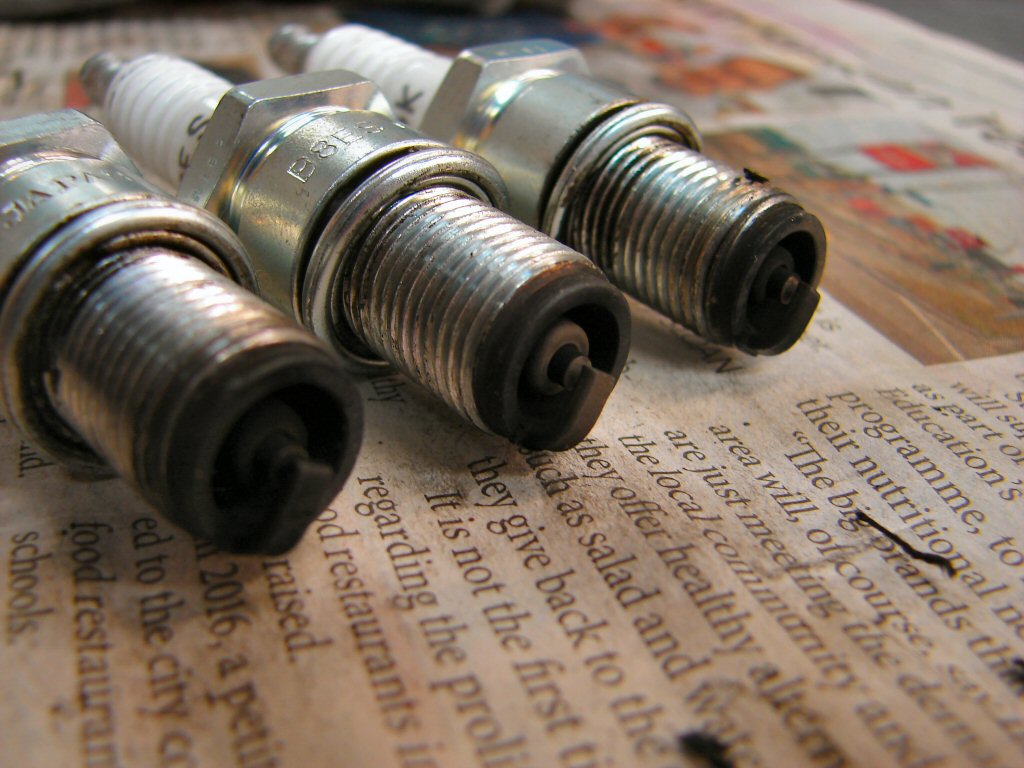
The spark plugs imitated what I thought I would find as reagrds a little too much fuel.
I have backed all the head studs off by 1/8 of a turn in the approved order, and once it is suitably cool I will retension it. Always a journey of discovery.
I figure that is going to be tomorrows first job.
Well it wasn't the first job, but it got done. The head studs went down a bit further than they were loosened, so thats a good sign. I figure it has now done all the settling it is going to.
First thing was to remove, clean and refit all the allen screws with some silicone sealant in the threads this time. The alloy washers had all spread nicely so I feel happy that nothing is going to move from here on.
Only two valves needed adjusting slightly, as I set them on the loose side to begin with and as it happened, the extra movement on the head studs closed them to near perfect.
This time I also refitted the head steady as I figure we should be finished if the next test ride is all good. I was in two minds whether to replace the rocker box inspection gaskets or not, but if they remain oiltight I shall leave them be.
I guess its time to give it another brief test ride then. I shall use my own start routine this time.
That was more like it, so I rode it a few miles and was pleased to find that the minor tweak of the pilot air screws had indeed removed the annoying power off/power on hesitation. No leaks or indications of being other than a well-behaved machine with a grunty exhaust note. Sweet.
The next and possibly final quality control assessment will be another test ride of around 10-15 miles, both to cement the running-in process and to make sure no glitches show up. The bike will be pressed into service as soon as it leaves here so I want it to deliver.
Feels like it will.!
A final test ride on Saturday proved the bike to be running very happily, no smoke other than a few breather fumes which were visible because the breather has been run down to the numberplate area and could be seen while sitting at traffic lights.
The engine idle picked up quite a few revs by the end of the run, so the total of around 15 miles has loosened up the ring-to-bore contact friction a bit already methinks. That bodes well for a fairly quick running in process.
I think we are pretty well there.
But - not so fast grasshopper. Is this oil I see.?
Bother, a small but determined leak from the end of the exhaust rocker shaft. Perhaps the presence of a bit of crankcase pressure until the rings settle in has encouraged it to come forth. A small smear of silicone sealant can sometimes cure this, but I tried and it did not, so having proved that, out it came.
The rocker shaft offered very little resistance after loosening the valve adjusters off.
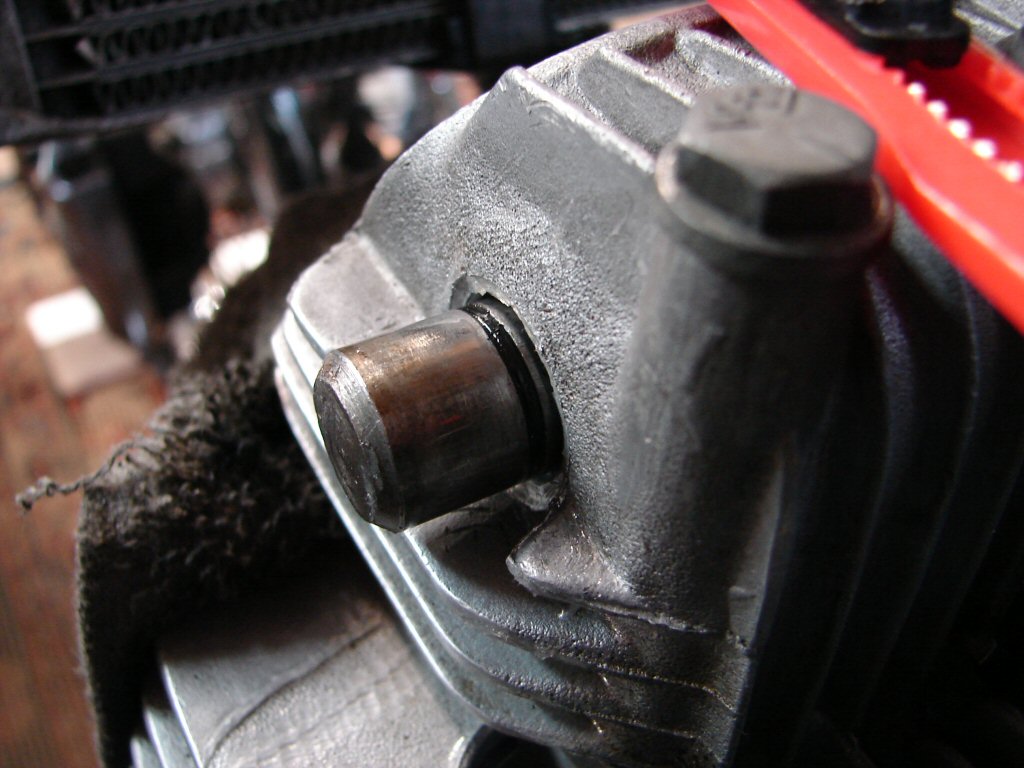
I am not sure if the O ring broke on the way out or if it had already done so, but that would explain its determination to leak. The O ring was totally brittle and likely last saw the light of day in 1974.
While the new one looks to have a greater cross section, it does have to be stretched to the circumference of the old, so it thins down when fitted.
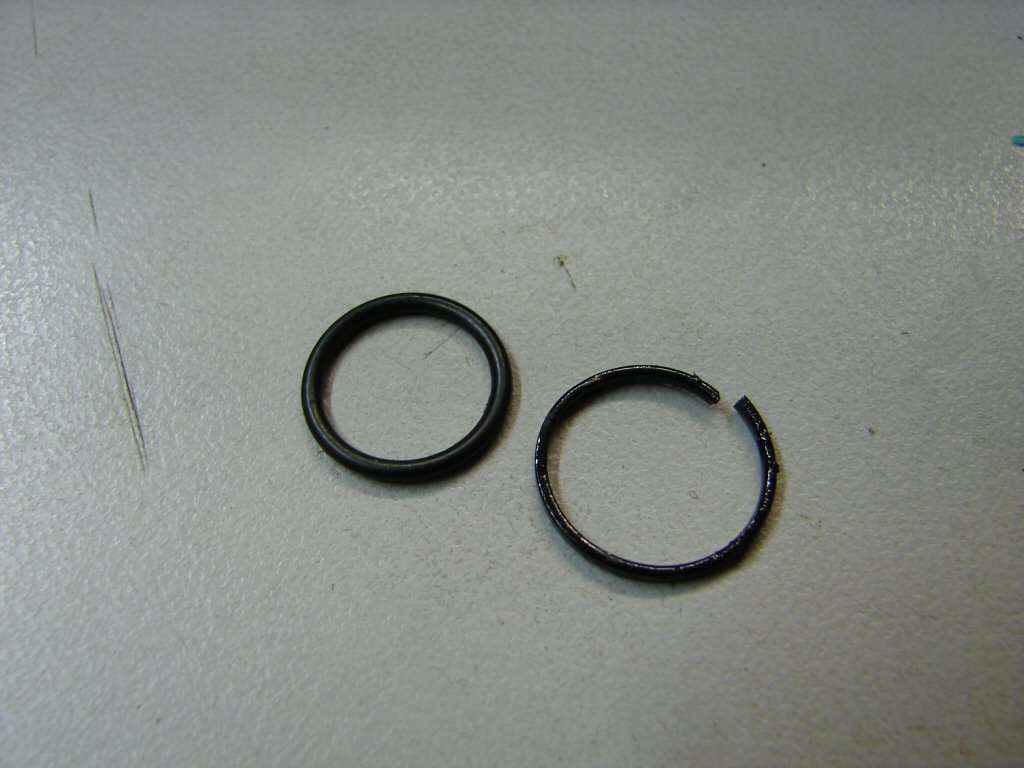
I smear the O ring in silicone sealant before fitting as it helps lubricate as well as helping to seal once it is all back together.
I have one more day before the bike is collected, so I guess it will get a squirt around the block to make sure it all worked.
Well, it didn't get a squirt around the block, but it got collected by the transporting experts and headed off home. I felt confident that the new O ring was going to do its job, so here's hoping it travels well and is soon reunited with its owner.